Table of Contents
Advertisement
Quick Links
Advertisement
Table of Contents

Related Manuals for Altman Helios Series


Summary of Contents for Altman Helios Series
- Page 1 HELIOS SERIES HELIOS_SERIES_USERS_MANUAL_REV_20201204...
-
Page 2: Table Of Contents
Helios Series Installation & Users Manual Table Of Contents Preface Important Information FCC Notice Product Warranty Product Overview Installation And Setup Operation Cleaning And Care Troubleshooting Technical Specifications Page 2... -
Page 3: Preface
Lighting no asume responsabilidad por errores o omisiones que puedan aparecer. Cualquier comentario, sug- erencia o corrección con respecto a este manual, favor de dirijirlo a la oficina de Altman Lighting más cercana. Der Inhalt dieses Handbuches ist nur für Informationszwecke gedacht, Aenderungen sind vorbehalten. Alt- man Lighting uebernimmt keine Verantwortung für Fehler oder Irrtuemer, die in diesem Handbuch auftreten. - Page 4 For this reason any current Altman Lighting product may differ in some respect from its published description, but will always equal or exceed the original design specifications unless otherwise noted.
-
Page 5: Important Information
Helios Series Installation & Users Manual Important Information Product Safety Notices When using electrical equipment, basic safety precautions should always be followed including the following: READ AND FOLLOW ALL SAFETY INSTRUCTIONS. Do not use outdoors. Do not mount near gas or electric heaters. -
Page 6: Fcc Notice
Altman Lighting, Inc., a subsidiary of Altman Stage Lighting Company, Inc., herein referred to as Altman, war- rants each new product (except for spare parts or products Altman does not manufacture) for a period of TWO (2) years from date of shipment to correct by repair or replacement any part defect due to faulty material or workmanship. - Page 7 RMA’s can also be submtted on line via https://www.altmanlighting.com/return-materials-authorization/ The return must be within THIRTY (30) days of receiving the RMA from Altman. Altman warrants for NINETY (90) days any spare part it manufactures. On spare parts or products Altman does not manufacture, such as lamps, sockets, lenses, roundels, electronics, ignitors, ballasts, etc.
-
Page 8: Product Overview
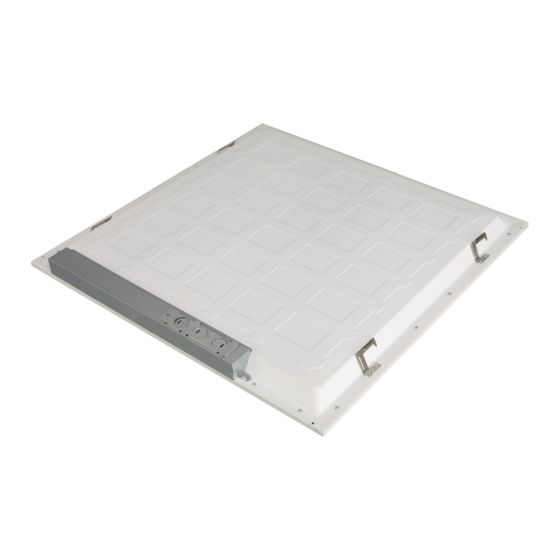
Helios Series Installation & Users Manual Product Overview Components Helios Series 1x4 Helios Series 2x2 Helios Series 2x4 Surface Mounting Kit Cable Suspension Kit Power Requirements Before performing any field wiring, refer to and read the warnings contained in “Important Information” on page 4. -
Page 9: Installation And Setup
Helios Series Installation & Users Manual Installation And Setup Recessed Grid Ceiling 1. Take the panel out of the box and 2. Lift the mounting clip on the edge of protective bag, remove protective film. the panel. 3. Turn the mounting clip head. - Page 10 Helios Series Installation & Users Manual 7. Open the knockout hole. 8. Insert the cable into the driver box. 9. Connect the AC power and the 0-10V Insert the driver box on the right side of the cover, then slide it to the left to hold the...
- Page 11 Helios Series Installation & Users Manual Surface Mount with Frame 1. Identify the two frame types as illus- 2. Attach the two ‘A’ frames together trated above (type A & B) with one ‘B’ frame. 3. Mount the frame to the ceiling.
- Page 12 Helios Series Installation & Users Manual 5. Wire luminaire per wiring instruc- 6. Affix the second frame with the tions previously described in this screws supplied. manual. Page 12...
- Page 13 Helios Series Installation & Users Manual Cable Suspension 1. Identify the two frame types as illus- Insert the wall plugs into the ceiling and secure trated above (type A & B). the suspension surface fixing to the ceiling. (20.47”) (20.47”) (16.73”)
- Page 14 Helios Series Installation & Users Manual 5. Lift the mounting clip on the edge of 6. Lock the suspension cable to the panel. clip. 7. Adjust the cable length to meet the 8. Fix the cable to the ceiling. height requirements.
- Page 15 Helios Series Installation & Users Manual 11. Insert the cables into driver box. 12. Connect the AC mains power and 0-10V dimmable cable to LED Driver. 13. Slide the power cover toward the 14. Attach the driver cover back with label to secure the power cover.
- Page 16 The pair does not need to be twisted. We particularly recommend this when low end dimming performance is of high importance as un-shielded analog control wiring runs are susceptible to interference. Fixture dimming performance is dependant on driver quality. The Helios Series is designed to dim from 100% - 10% of maximum intensity.
- Page 17 Helios Series Installation & Users Manual 3. Attach battery driver to bracket. 4. Using appropriate conduit, connect wiring as detailed below. Page 17...
-
Page 18: Operation
Helios Series Installation & Users Manual Operation Selecting Power Level Power levels are selectable via the switch located on the driver / control box. Power Switch Type 1 Power Switch Type 2 Selecting Color Temperature Color temperature is selectable via the switch located on the driver / control box. -
Page 19: Cleaning And Care
A mild soap solution. WARNING! Under no circumstances should ammonia-based cleaners, acetone, or other harsh solvents be used on or near the Helios Series. These types of cleaners or solvents can permanently damage the optics or housings of the fixture. -
Page 20: Troubleshooting
Troubleshooting The chart below provides possible causes and remedies for various error messages and/or symptoms. If this chart is unable to address your issue, please contact your authorized dealer or Altman customer service for assistance. Any service and maintenance (including troubleshooting), other than described herein should be performed by an Authorized Altman Lighting Dealer or Service Center. -
Page 21: Technical Specifications
Helios Series Installation & Users Manual Technical Specifications Materials: Materials: Corrosion-resistant materials and hardware AAL-2X2FPTFR-TW-VP Color: Color: White (RAL 9016) Control: Control: 0-10V (10%-100%) or Non Dim (On/Off) Driver Box CCT Settings: CCT Settings: 3000K, 3,500K, 4,300K 1-7/16” Beam Angle: Beam Angle: 120°...
Need help?
Do you have a question about the Helios Series and is the answer not in the manual?
Questions and answers