Table of Contents
Advertisement
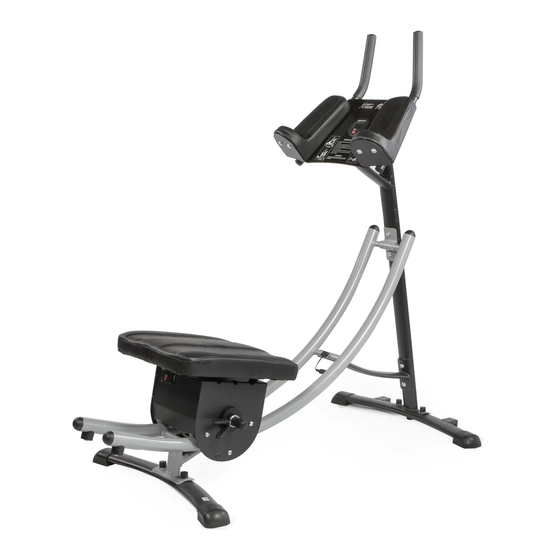
ABDOMINAL FITNESS MACHINE
ITEM: 96137
OWNER'S MANUAL AND SAFETY INSTRUCTIONS
SAVE THIS MANUAL: KEEP THIS MANUAL FOR SAFETY WARNINGS, PRECAUTIONS, ASSEMBLY,
OPERATING, INSPECTION, MAINTENANCE AND CLEANING PROCEDURES. WRITE THE PRODUCT'S
SERIAL NUMBER ON THE BACK OF THE MANUAL NEAR THE ASSEMBLY DIAGRAM (OR MONTH
AND YEAR OF PURCHASE IF PRODUCT HAS NO NUMBER).
FOR QUESTIONS PLEASE CALL OUR CUSTOMER SUPPORT: (909) 628 0880 MON-FRI 9AM TO 3PM PST
Advertisement
Table of Contents

Subscribe to Our Youtube Channel
Related Manuals for Xtreme Power 96137


Summary of Contents for Xtreme Power 96137
- Page 1 ABDOMINAL FITNESS MACHINE ITEM: 96137 OWNER’S MANUAL AND SAFETY INSTRUCTIONS SAVE THIS MANUAL: KEEP THIS MANUAL FOR SAFETY WARNINGS, PRECAUTIONS, ASSEMBLY, OPERATING, INSPECTION, MAINTENANCE AND CLEANING PROCEDURES. WRITE THE PRODUCT’S SERIAL NUMBER ON THE BACK OF THE MANUAL NEAR THE ASSEMBLY DIAGRAM (OR MONTH AND YEAR OF PURCHASE IF PRODUCT HAS NO NUMBER).
-
Page 2: Important Safety Information
IMPORTANT SAFETY INFORMATION GENERAL SAFETY WARNINGS The warnings, precautions, and instructions discussed in this instruction manual cannot cover all possible conditions and situations that may occur. It must be understood by the operator that common sense and caution are factors which cannot be built into this product, but must be supplied by the operator. Read carefully and understand all instructions before operating. -
Page 3: Product Information
PRODUCT INFORMATION ROLLER COASTER ABDOMINAL MACHINE XtremepowerUS present a new roller crunch coaster fitness machine provides new workout solution for strengthening your midsection of your body. It designs bottom up workout function that is opposite from other abs crunch machine. In this way, it also works shoulders, back, arms and legs. -
Page 4: Parts Diagram
PARTS DIAGRAM... -
Page 5: Parts List
PARTS LIST... - Page 6 ASSEMBLY The machine has been thoroughly inspected and partly assembled before shipment. Please take the time to finish assembly by following the steps below. Step 1: Attach the rear foot Step 2: Attach the front foot Step 3: Attach the front post Step 4: Attach the armrest console Step 5: Connect the wires Step 1: Attach the rear foot to the rear of the curved track.
- Page 7 ASSEMBLY Step 2: Attach the front foot (with wheels) to the front post using the 2 pre-attached bolts. Finger tighten only. Step 3: Attach the front post to the curved track. The front post is attached to the track in two locations as shown using the 2 pre-attached Allen head screws for each location.
- Page 8 ASSEMBLY Step 4: Attach the armrest console to the top of the front post using the 4 pre-attached Allen head screws. Tighten all bolts and screws using the tools provided. Cover the bolts with black plastic caps provided. Step 5: Connect the counter wires in METER: The digital repetition counter 2 locations as shown.
-
Page 9: Adjusting The Seat
ASSEMBLY ADJUSTING THE SEAT The seat on this machine can be adjusted to target different areas of your abdominal muscles. The seat adjusting pin is located at the seat below the cushion. There are 4 seat settings: Front, left, right and free-style motion. To lock the seat into the front, right and left settings, pull down the pin and move the seat to the desired setting (front, right or left). -
Page 10: Warranty
WARRANTY PLEASE READ THE FOLLOWING CAREFULLY THE MANUFACTURER AND/OR DISTRIBUTOR HAS PROVIDED THE PARTS LIST AND ASSEMBLY DIAGRAM IN THIS MANUAL AS A REFERENCE TOOL ONLY. NEITHER THE MANUFACTURER OR DISTRIBUTOR MAKES ANY REPRESENTATION OR WARRANTY OF ANY KIND TO THE BUYER THAT HE OR SHE IS QUALIFIED TO MAKE ANY REPAIRS TO THE PRODUCT, OR THAT HE OR SHE IS QUALIFIED TO REPLACE ANY PARTS OF THE PRODUCT.
Need help?
Do you have a question about the 96137 and is the answer not in the manual?
Questions and answers