Table of Contents
Advertisement
Advertisement
Table of Contents

Subscribe to Our Youtube Channel
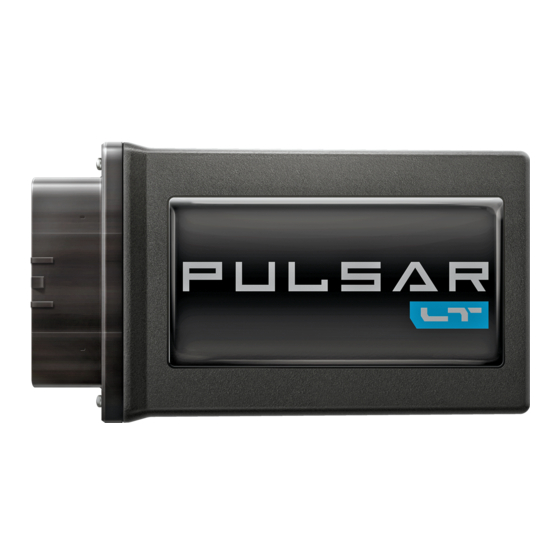
Summary of Contents for Superchips Pulsar LT
- Page 2 Table of Contents Read Me Safety Warning & Caution Safety Guidelines Update Software Downloading Update Agent Product Updates Installation L84 Pulsar LT Materials Required Tools Pulsar Installation Programmable Features Programming Menu Speed Limiter TPMS Tire Size Axle Ratio Clear DTC’s...
-
Page 3: Safety Warning & Caution
Read Me Safety Warning & Caution Throughout this User Manual you will see important messages regarding your safety or the protection of your vehicle. These messages are designated by the words WARNING, CAUTION, or NOTICE. WARNING A WARNING indicates a hazardous situation which, if not avoided, will result in death or serious injury. -
Page 4: Safety Guidelines
Safety Guidelines WARNING Before using device, read and understand the user manual, including these additional safety instructions. Failure to do so could result in DEATH or SERIOUS INJURY. • Do not exceed legal speed limits on public roadways. Violating traffic laws is dangerous and could result in injury or vehicle damage or both. -
Page 5: Update Software
STEP 1 - Go to a computer with internet access, and go to one of the following websites: superchips.com - diablosport.com - edgeproducts.com STEP 2 - Go to the website’s Updates/Downloads tab and click the link “Download Update Agent 1.0”... -
Page 6: Product Updates
NOTE: The Pulsar LT must be installed into a vehicle before updating. When updating, you CANNOT use your vehicles Wi-Fi. It will be disabled during the update process. Use an external source such as your home Wi-Fi. -
Page 7: Required Tools
Installation L84 Pulsar LT Materials Pulsar LT Module Zip Ties Velcro Strips Harness Required Tools Small Flat Head Screwdriver... - Page 8 Pulsar LT Installation STEP 1 - Before installation, remove the negative side battery terminal. STEP 2 - Release the locking tab in the back of the connector with a pick or small flathead screw driver as shown below. NOTE: The connector is located under the hood drivers side by the air intake as shown in the above image.
- Page 9 Pulsar LT Installation Cont’d STEP 6 - Install the zip tie as shown on the left. It is located behind the driver side headlight. STEP 7 - Install the harness onto the factory mounting tab and then route the harness.
-
Page 10: Programmable Features
Programmable Features Programming Menu NOTE: To access the programming menu of the device, cruise control must be turned off. The vehicle has to be running to turn off cruise control. Access the Programming Menu Seven modes can be accessed through the programming menu. The speedometer (MPH) gauge is used to display the modes and programming inputs. -
Page 11: Speed Limiter
Speed Limiter After accessing speed limiter programming mode, adjustment between 82 and 140 MPH can be input. STEP 1 - Access the Programming Menu. STEP 2 - Using +RES or -SET, select mode 10 (MPH). STEP 3 - Use +RES or -SET wheel to adjust to the desired value. STEP 4 - Press the cancel cruise control button to save the input value. -
Page 12: Axle Ratio
Tire Size Cont’d STEP 3 - Enter Stock Tire Size Example: 33.5” Tire- Whole Number = 35, Decimal = 5 a. Using +RES or -SET, adjust to the Stock Tire Whole number. b. Press cancel cruise to save the input. c. - Page 13 Axle Ratio Cont’d STEP 6 - The speedometer will sweep to 140 MPH, indicating the function is complete. Clear DTC’s STEP 1 - Access the programming menu. STEP 2 - Using +RES or -SET, select mode 50 (MPH) STEP 3 - Press cancel cruise to select. STEP 4 - The speedometer will sweep to 140 MPH, indicating the function is complete.
- Page 14 Responsiveness Level Adjustment When the vehicle is running and cruise control is turned off, the vehicle throttle responsiveness can be adjusted. The responsiveness level is indicated using the vehicle’s speedometer. STEP 1 - Using the +RES or -SET, adjust to the desired value. Level 0 = Stock Level 1 = Reduced responsiveness (up to 15% less than stock) Level 2 = Increased responsiveness (up to 15% over stock)
-
Page 15: Frequently Asked Questions
Question: Can I “stack” or use other tuners with this device? Answer: No, please do not use any other tuners when the Pulsar LT is in use or installed. Stacking tuners with the Pulsar LT may cause serious damage to the vehicle. - Page 16 Copyright© 2020 D10024100 Rev00 10/30/2020 For additional questions not found in the user guide call: Powerteq Technical Support: (801)-476-3343 6:00 am - 5:00 pm MST To expedite your support call, please have your Vehicle Information, Part Number, and Serial Number ready prior to calling Technical Support.


Need help?
Do you have a question about the Pulsar LT and is the answer not in the manual?
Questions and answers