
Related Manuals for mundoclima MUC-W9


Summary of Contents for mundoclima MUC-W9
- Page 1 Universal Fancoil DC Service manual MUC-W9 CL04630 ~ CL04635 CL04640 ~ CL04645 www.mundoclima.com www.mundoclima.com...
-
Page 2: Table Of Contents
Universal Fancoil DC MUC-W9 series Content Features ............................2 External Appearance ........................2 Standard with a variety of control functions .................2 Standard PCB compatible with more functions ................2 Products Lineup..........................3 Nomenclature ..........................3 Specifications ..........................4 Dimensions ..........................13 Sound Levels ..........................15 10. Service Spaces...........................52 11. -
Page 3: Features
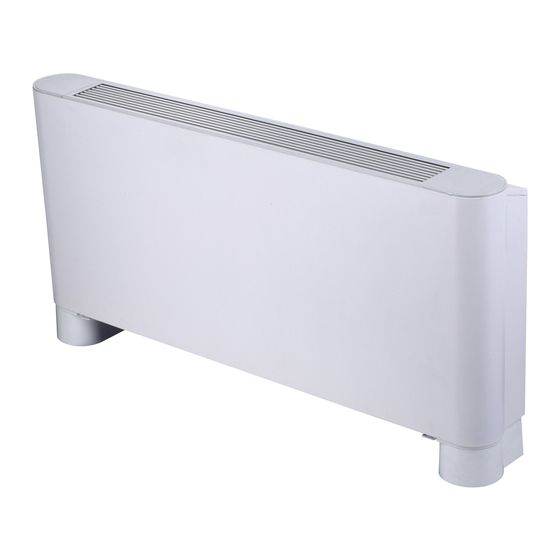
Universal Fancoil DC MUC-W9 series 1. Features Flexible for installation, designed for horizontal/vertical, concealed/cabinet application Ceiling Installation Floor Installation Concealed Installation High efficiency and low operating sound level Due to the DC fan motor, the unit operates in lower power consumption and lower operating sound level. -
Page 4: Products Lineup
Universal Fancoil DC MUC-W9 series Hysteresis temperature setting Hysteresis temperature can be set in heating and cooling mode by PCB switch, field adjustable. 0-10V wired control Voltage output of controller Fan speed 1 voltage 3 3 voltage 4 4 voltage 5... -
Page 5: Specifications
Universal Fancoil DC MUC-W9 series 7. Specifications Model MUC-05-W9/SE (none) MUC-08-W9/SE (none) Power supply V/Ph/Hz 220-240/1/50 255/170/150 255/210/150 400/315/190 425/300/190 Air flow (H/M/L) 150/100/88 150/124/88 235/185/112 250/176/112 External static pressure Sensible Capacity(H/M/L) 1.14/0.77/0.66 1.42/1.19/0.85 1.79/1.44/0.86 2.06/1.51/0.96 Capacity (H/M/L) 1.50/1.06/0.92 1.95/1.66/1.21 2.35/1.94/1.19... - Page 6 Universal Fancoil DC MUC-W9 series Model MUC-11-W9/SE (none) MUC-16-W9/SE (none) Power supply V/Ph/Hz 220-240/1/50 595/470/340 595/450/310 790/580/410 800/600/420 Air flow (H/M/L) 350/276/200 350/265/182 488/359/253 471/353/247 External static pressure Sensible Capacity(H/M/L) 2.65/2.14/1.57 2.90/2.35/1.72 3.25/2.56/1.91 3.63/2.85/2.08 Capacity (H/M/L) 3.50/2.89/2.22 3.90/3.20/2.43 4.30/3.48/2.71 4.85/3.92/2.93...
- Page 7 Universal Fancoil DC MUC-W9 series Model MUC-19-W9/SE (none) MUC-24-W9/SE (none) Power supply V/Ph/Hz 220-240/1/50 1190/855/505 1190/875/530 1360/1015/685 1300/980/680 Air flow (H/M/L) 700/503/297 700/515/312 800/597/403 765/576/400 External static pressure Sensible Capacity(H/M/L) 4.62/3.60/2.43 4.98/3.98/2.68 5.87/4.74/3.45 6.12/4.82/3.42 Capacity (H/M/L) 5.60/4.47/3.14 6.35/5.19/3.62 7.35/6.12/4.57 8.25/6.65/4.84...
- Page 8 Universal Fancoil DC MUC-W9 series Model MUC-05-W9/CE (none) MUC-08-W9/CE (none) Power supply V/Ph/Hz 220-240/1/50 255/170/150 255/210/150 400/315/190 425/300/190 Air flow (H/M/L) 150/100/88 150/124/88 235/185/112 250/176/112 External static pressure Sensible Capacity(H/M/L) 1.14/0.77/0.66 1.42/1.19/0.85 1.79/1.44/0.86 2.06/1.51/0.96 Capacity (H/M/L) 1.50/1.06/0.92 1.95/1.66/1.21 2.35/1.94/1.19 2.85/2.13/1.41...
- Page 9 Universal Fancoil DC MUC-W9 series Model MUC-11-W9/CE (none) MUC-16-W9/CE (none) Power supply V/Ph/Hz 220-240/1/50 595/470/340 595/450/310 790/580/410 800/600/420 Air flow (H/M/L) 350/276/200 350/265/182 488/359/253 471/353/247 External static pressure Sensible Capacity(H/M/L) 2.65/2.14/1.57 2.90/2.35/1.72 3.25/2.56/1.91 3.63/2.85/2.08 Capacity (H/M/L) 3.50/2.89/2.22 3.90/3.20/2.43 4.30/3.48/2.71 4.85/3.92/2.93...
- Page 10 Universal Fancoil DC MUC-W9 series Model MUC-19-W9/CE (none) MUC-24-W9/CE (none) Power supply V/Ph/Hz 220-240/1/50 1190/855/505 1190/875/530 1360/1015/685 1300/980/680 Air flow (H/M/L) 700/503/297 700/515/312 800/597/403 765/576/400 External static pressure Sensible Capacity(H/M/L) 4.62/3.60/2.43 4.98/3.98/2.68 5.87/4.74/3.45 6.12/4.82/3.42 Capacity (H/M/L) 5.60/4.47/3.14 6.35/5.19/3.62 7.35/6.12/4.57 8.25/6.65/4.84...
- Page 11 Universal Fancoil DC MUC-W9 series (none) (none) (none) (none) Model Power supply V/Ph/Hz 220-240/1/50 245/160/135 245/180/130 380/245/140 380/240/110 Air flow (H/M/L) 144/94/79 144/106/76 224/144/82 224/141/65 External static pressure Sensible Capacity(H/M/L) 1.09/0.74/0.63 1.36/1.14/0.81 1.70/1.36/0.81 1.84/1.35/0.85 Capacity (H/M/L) 1.44/1.01/0.88 1.87/1.59/1.16 2.23/1.84/1.13 2.55/1.90/1.26...
- Page 12 Universal Fancoil DC MUC-W9 series Model (none) (none) (none) (none) Power supply V/Ph/Hz 220-240/1/50 580/435/310 580/430/300 780/550/380 780/560/390 Air flow (H/M/L) 341/256/182 341/253/176 459/324/224 459/329/229 External static pressure Sensible Capacity(H/M/L) 2.58/2.08/1.53 2.83/2.29/1.67 3.21/2.52/1.88 3.54/2.77/2.02 Capacity (H/M/L) 3.41/2.81/2.16 3.80/3.11/2.36 4.25/3.43/2.67 4.73/3.82/2.85...
- Page 13 Universal Fancoil DC MUC-W9 series Model (none) (none) (none) (none) Power supply V/Ph/Hz 220-240/1/50 1050/750/450 1050/770/460 1150/850/570 1150/860/600 Air flow (H/M/L) 618/441/265 618/453/271 676/500/335 676/506/353 External static pressure Sensible Capacity(H/M/L) 4.08/3.17/2.14 4.39/3.51/2.36 4.75/4.00/2.91 5.41/4.26/3.02 Capacity (H/M/L) 4.94/3.94/2.77 5.60/4.58/3.19 6.21/5.17/3.86 7.30/5.88/4.28...
-
Page 14: Dimensions
Universal Fancoil DC MUC-W9 series 8. Dimensions Cased type (CE) 45 F Dimensions (unit: mm) MODEL MUC-05-W9 MUC-08-W9 MUC-11-W9 MUC-16-W9 MUC-19-W9 MUC-24-W9 1020 1240 1240 1360 1360 1104 1104 1078 1078 1198 1198... - Page 15 Universal Fancoil DC MUC-W9 series Uncased type (SE) Dimensions (unit: mm) MODEL MUC-05-W9 MUC-08-W9 MUC-11-W9 MUC-16-W9 MUC-19-W9 MUC-24-W9 1020 1240 1240 1360 1360 1104 1104 1078 1078 1198 1198...
-
Page 16: Sound Levels
Universal Fancoil DC MUC-W9 series 9. Sound Levels Sound Power Level: MUC-05 MUC-08 MUC-11 MUC-16 MUC-19 MUC-24 Model 47/36/34 43/37/29 52/44/36 59/51/36 64/56/45 63/58/49 W9/CE (H/M/L) W9/SE (H/M/L) 47/36/34 43/37/29 52/44/36 59/51/36 64/56/45 63/58/49... - Page 17 Universal Fancoil DC MUC-W9 series Sound Pressure Level: Model MUC-05 MUC-08 MUC-11 MUC-16 MUC-19 MUC-24 34/24/21 29/24/18 38/32/23 46/38/30 50/42/31 51/44/33 W9/CE (H/M/L) W9/SE (H/M/L) 34/24/21 29/24/18 38/32/23 46/38/30 50/42/31 51/44/33...
- Page 18 Universal Fancoil DC MUC-W9 series NC Noise Curve: (none) (none)
- Page 19 Universal Fancoil DC MUC-W9 series (none) (none)
- Page 20 Universal Fancoil DC MUC-W9 series (none) (none)
- Page 21 Universal Fancoil DC MUC-W9 series MUC-05-W9 MUC-08-W9...
- Page 22 Universal Fancoil DC MUC-W9 series MUC-11-W9 MUC-16-W9...
- Page 23 Universal Fancoil DC MUC-W9 series MUC-19-W9 MUC-24-W9...
- Page 24 Universal Fancoil DC MUC-W9 series (none) (none)
- Page 25 Universal Fancoil DC MUC-W9 series (none) (none)
- Page 26 Universal Fancoil DC MUC-W9 series (none) (none)
- Page 27 Universal Fancoil DC MUC-W9 series (none) (none)
- Page 28 Universal Fancoil DC MUC-W9 series (none) (none)
- Page 29 Universal Fancoil DC MUC-W9 series (none) (none)
-
Page 30: Service Spaces
Universal Fancoil DC MUC-W9 series 10. Service Spaces Cased type Footing a (mm) b (mm) c (mm) Uncased type a (mm) b (mm) -
Page 31: Wiring Diagrams
Universal Fancoil DC MUC-W9 series 11. Wiring Diagrams For all the model Main control board port description: Description Remarks VALVE-N: Cooling/Heating 2-way valve/3-way valve null line Standard VALVE-C: Cooling 2-way/3-way valve live line VALVE-N: Cooling/Heating 2-way valve/3-way valve null line... - Page 32 Universal Fancoil DC MUC-W9 series WATER: Water level switch port Customized DISPLAY: Display board port Reserved DC_FAN: DC fan Standard DEBUG: Main control program burn port Standard Grounding screw position Standard N: Null line output port for AC fan H: High fan speed output port for AC fan...
- Page 33 Universal Fancoil DC MUC-W9 series For all the model Wire controller DC FAN CN24 CN20 Wire controller KJR-75A/BK-E (LC04630) CN21 FOR SETTING NET ADDRESS The terminales that are between dashed lines is optionals its use Figure 5-20 Wiring diagram MUC-05-W9...
-
Page 34: Installation
Universal Fancoil DC MUC-W9 series 12. Installation 12.1 Transport and handling Caution: Do not open or tamper with the packaging before installation. The units should only be moved and lifted by specialized personnel trained in these operations. Check on arrival that the unit has not been damaged during transport and that it is complete with all its parts. - Page 35 Universal Fancoil DC MUC-W9 series 12.2 Storage conditions Units in packaging may be stacked not more than four-layer, and must be kept under cover. 12.3 Units installation Caution: Installation must only be carried out by qualified technicians, trained to work with air-conditioning and refrigeration systems.
- Page 36 Universal Fancoil DC MUC-W9 series Figure 12.4.2 The footings shown in Figure 12.4.3 are optional. You can purchase them separately and install them as follows: 1. Put the footings beside the unit to be installed. ① 2. Place the mounting holes on the unit base into the corresponding footing locating pin and install screws ②...
- Page 37 Universal Fancoil DC MUC-W9 series Original concrete slab structure Wooden structure Secure the square rod on the beam to set the lifting bolts. Use embedded bolts, and pull bolts. Square bar material Beam Ceiling Lifting bolt Newly set concrete slab structure...
- Page 38 Universal Fancoil DC MUC-W9 series Drainage Water outlet Water inlet Figure 12.4.6 All water system coils are equipped with discharge and drain valves. Use a screwdriver or wrench to open and close the valve. When installation is complete, ① Remove air inside pipes.
- Page 39 Universal Fancoil DC MUC-W9 series Set water storage elbow The condensate drain system must be fitted with a suitable elbow to prevent odour penetration. Follow the steps below to set the elbow. Note: Place a drain stopper at the bottom of the elbow.
- Page 40 Universal Fancoil DC MUC-W9 series ΠProvide dedicated and suitable leakage protection device for the unit, with a minimum distance of 3 mm among the wiring contacts. The unit must be grounded reliably. ΠMake sure that the power cord has a large-enough cross section to withstand the maximum current required.
- Page 41 Universal Fancoil DC MUC-W9 series 1.5mm2, type H05RN-F. ΠPass the power supply cable through the slot beside the air filter. Use the cable clamp provided on the inner side of the panel to secure the power supply cable and the connecting cables, and strip only the length of cable needed to go into the connector block.
- Page 42 Universal Fancoil DC MUC-W9 series Wash and brush gently with water; Dry with a jet of compressed air; Check that there are no obstacles in the condensation drain tube which could prevent the normal flow of water. Release the air in the water system.
- Page 43 Universal Fancoil DC MUC-W9 series Filter Upper propeller housing Motor Figure 12.5.2 Removal of filter, upper volute and motor screws Heat exchanger to replace, follow the steps below: a) Unplug the unit. b) Shut off the water supply. c) As shown in Figure 12.5.3, remove screws *2 and *2 and then the casing.
- Page 44 Universal Fancoil DC MUC-W9 series Electric control Figure 12.5.4 Removing the electric control box Heat exchanger Temperature Drain pan sensor plug Figure 12.5.5 Removal of drain pan and heat exchanger If the unit or its parts need(s) to be removed, make sure that: Only a professional person can disassemble the unit.
- Page 45 Universal Fancoil DC MUC-W9 series Error Measures Check whether there is a power failure. Wait for the power supply If the system does not run at all. to be restored. If a power failure occurs when the unit is still running, the system will restart automatically once the power is restored.
- Page 46 Universal Fancoil DC MUC-W9 series Model protection not set (model DIP switch not Flashes 2 times Buzzes 2 times every Protection Blinking listed in the model every 3 seconds 3 seconds table) Water temperature Flashes 3 times Buzzes 2 times every...
- Page 47 Universal Fancoil DC MUC-W9 series 13. Capacity Table 13.1 Cooling capacity table (none) Indoor temperature (D.B.) Indoor ΔT temp(W.B.) TC SC WPD TC SC WPD TC SC WPD TC SC WPD TC SC [°C] [°C] [°C] [kW] [kW] [m^3/h] [kPa] [kW] [kW] [m^3/h] [kPa] [kW] [kW] [m^3/h] [kPa] [kW] [kW] [m^3/h] [kPa] [kW] [kW] [m^3/h] [kPa] 1.3 1.03 0.37 20.15 1.29 1.19 0.37 19.98 1.34 1.34 0.39 21.31 1.5 1.5...
- Page 48 Universal Fancoil DC MUC-W9 series 1.14 0.76 0.16 4.88 1.14 0.91 0.16 4.83 1.13 1.07 0.16 4.78 1.23 1.23 0.18 5.54 1.39 1.39 6.83 1.65 0.93 0.24 9.12 1.65 1.09 0.24 9.05 1.64 1.25 0.23 8.98 1.63 1.4 0.23 8.91 1.92 0.94 0.27 11.73 1.91 1.09 0.27 11.67 1.9 1.25 0.27 11.59 1.9 1.41 0.27 11.51...
- Page 49 Universal Fancoil DC MUC-W9 series 0.37 0.37 1.92 0.54 0.54 0.15 4.18 0.69 0.69 6.46 0.85 0.85 0.24 9.12 1.01 1.01 0.29 12.15 0.37 0.37 0.11 1.93 0.54 0.54 0.15 0.7 0.7 6.48 0.85 0.85 0.24 9.15 1.01 1.01 0.29 12.2...
- Page 50 Universal Fancoil DC MUC-W9 series 2.15 1.34 0.62 23.45 2.14 1.58 0.61 23.25 2.13 1.82 0.61 23.05 2.12 2.06 0.61 22.89 2.31 2.31 0.66 26.4 2.91 1.59 0.84 40.05 2.9 1.84 0.84 39.83 2.89 2.08 0.84 39.57 2.88 2.32 0.83 39.28 3.31 1.6...
- Page 51 Universal Fancoil DC MUC-W9 series 0.56 0.56 0.16 2.07 0.83 0.83 0.24 4.42 1.07 1.07 0.31 6.83 1.31 1.31 0.38 9.64 1.55 1.55 0.44 12.66 1.01 0.83 0.29 6.17 1.06 1.03 6.72 1.32 1.32 0.38 9.68 1.56 1.56 0.44 12.71 1.41 0.84...
- Page 52 Universal Fancoil DC MUC-W9 series 3.29 2.03 0.95 65.24 3.27 2.4 0.94 64.69 3.25 2.75 0.94 63.53 3.25 3.12 0.94 63.56 3.48 3.48 1.01 72.55 4.43 2.41 1.29 110.79 4.41 2.78 1.28 110.13 4.39 3.14 1.28 109.32 4.36 3.5 1.26 106.6...
- Page 53 Universal Fancoil DC MUC-W9 series 0.9 0.9 0.26 6.78 1.27 1.27 0.36 12.04 1.63 1.63 0.47 18.5 1.99 1.99 0.57 26.07 2.35 2.35 0.67 34.24 1.59 1.27 0.46 17.64 1.66 1.65 0.48 19.1 0.57 26.17 2.36 2.36 0.67 34.38 2.17 1.28 0.62 29.96 2.16 1.64 0.62 29.67 2.17 0.62 29.95 2.36 2.35 0.67 34.47...
- Page 54 Universal Fancoil DC MUC-W9 series 4.23 2.6 1.24 103.06 4.21 3.08 1.22 100.86 4.2 3.54 1.22 100.54 4.2 4.01 1.22 100.6 4.47 4.47 1.29 111.29 5.68 3.1 1.66 172.08 5.67 3.56 1.65 171.04 5.65 4.03 1.65 170.1 5.62 4.49 1.64 168.86 6.46 3.1...
- Page 55 Universal Fancoil DC MUC-W9 series 1.17 1.17 0.34 10.52 1.64 1.64 0.47 18.69 2.1 2.1 28.29 2.57 2.57 0.74 40.22 3.03 3.03 0.87 53.21 2.05 1.64 0.58 26.95 2.17 2.12 0.62 29.99 2.58 2.57 0.74 40.38 3.04 3.04 0.87 53.41 2.82 1.65 0.81 47.56 2.8 2.12 0.81 47.08 2.82 2.58 0.81 47.66 3.05 3.05 0.87 53.86...
- Page 56 Universal Fancoil DC MUC-W9 series 5.45 3.36 1.57 80.99 5.42 3.97 1.57 80.34 5.39 4.58 1.56 79.51 5.39 5.18 1.56 79.48 5.78 5.78 1.67 89.32 7.32 3.99 2.12 135.97 7.29 4.6 2.11 135.18 7.27 5.2 134.36 7.24 5.81 134.04 8.33 2.43 172.66 8.3 4.61 2.42 171.71 8.28 5.22 2.41 170.79 8.25 5.82 2.41 169.88...
- Page 57 Universal Fancoil DC MUC-W9 series 1.51 1.51 0.43 8.39 2.12 2.12 0.61 2.72 2.72 0.78 23.08 3.32 3.32 0.95 32.38 3.92 3.92 1.13 43.24 2.63 2.12 0.75 21.71 2.78 2.74 23.93 3.33 3.33 0.95 32.49 3.93 3.93 1.13 43.72 3.6 2.12 1.03 37.05 3.58 2.73 1.02 36.57 3.6 3.33 1.03 36.96 3.94 3.94 1.13 43.86 1.16 1.16 0.25...
- Page 58 Universal Fancoil DC MUC-W9 series 6.3 3.9 1.81 51.21 6.28 4.61 1.81 51.08 6.24 5.31 1.79 50.07 6.25 6.01 1.81 50.84 6.72 6.72 1.94 57.78 8.5 4.64 2.47 87.29 8.48 5.35 2.46 86.95 8.45 6.05 2.45 86.41 8.41 6.75 2.44 85.75...
- Page 59 Universal Fancoil DC MUC-W9 series 1.73 1.73 5.34 2.44 2.44 9.56 3.14 3.14 0.89 14.5 3.84 3.84 20.79 4.53 4.53 1.29 27.3 2.99 2.44 0.85 13.39 3.17 3.16 0.91 14.93 3.85 3.85 1.11 20.87 4.54 4.54 27.41 4.16 2.46 23.85 4.14 3.16 1.19 23.6 4.15 3.86 1.19 23.71 4.55 4.53...
- Page 60 Universal Fancoil DC MUC-W9 series 1.45 0.9 0.41 23.64 1.44 1.06 0.41 23.45 1.43 1.22 0.41 23.25 1.43 1.39 0.41 23.11 1.55 1.55 0.44 26.61 1.96 1.07 0.57 40.37 1.95 1.23 0.56 40.14 1.94 1.4 0.56 39.89 1.93 1.56 0.56 39.6...
- Page 61 Universal Fancoil DC MUC-W9 series 0.38 0.38 0.11 2.14 0.56 0.56 0.16 4.46 0.72 0.72 0.21 6.88 0.88 0.88 0.25 9.72 1.04 1.04 12.76 0.68 0.56 0.19 6.23 0.71 0.69 6.77 0.88 0.88 0.25 9.76 1.05 1.05 12.81 0.95 0.56 0.27 10.95 0.94 0.73 0.27 10.84 0.94 0.89 0.27 10.81 1.05 1.05 12.84...
- Page 62 Universal Fancoil DC MUC-W9 series 2.25 1.4 0.65 25.34 2.24 1.65 0.64 25.13 2.23 1.91 0.64 24.91 2.22 2.16 0.64 24.78 2.41 2.41 28.96 3.04 1.66 0.87 42.61 3.03 1.92 0.87 42.34 3.02 2.17 0.87 42.07 2.42 0.86 41.69 3.47 1.67 53.91 3.45 1.93 0.99 53.46 3.44 2.18 0.99 53.11 3.43 2.43 0.99 52.75...
- Page 63 Universal Fancoil DC MUC-W9 series 0.6 0.6 0.17 2.38 0.87 0.87 0.25 4.77 1.12 1.12 0.32 7.38 1.37 1.37 0.39 10.42 1.62 1.62 0.46 13.69 1.06 0.87 6.68 1.11 1.08 0.32 7.26 1.38 1.38 10.46 1.63 1.63 0.46 13.74 1.47 0.88 0.42...
- Page 64 Universal Fancoil DC MUC-W9 series 3.36 2.08 0.97 67.83 3.35 2.45 0.97 67.26 3.33 2.82 0.96 66.7 3.33 3.19 0.96 66.71 3.56 3.56 1.02 74.3 4.52 2.46 113.33 4.5 2.84 112.62 4.48 3.21 111.91 4.46 3.58 1.29 111.04 5.14 2.47 1.49 142.6 5.12 2.85 1.48 141.83 5.11 3.22 1.48 141.07 5.11 3.59 1.51...
- Page 65 Universal Fancoil DC MUC-W9 series 0.93 0.93 0.27 7.05 1.3 1.3 0.37 12.3 1.67 1.67 0.48 19.23 2.04 2.04 0.58 26.68 2.4 2.4 0.69 35.61 1.63 1.3 0.47 18.36 1.71 1.7 0.49 19.93 2.04 2.04 0.58 26.79 2.41 2.41 0.69 35.76 2.22 1.31 0.64 31.27 2.21 1.68 0.63 30.99 2.22 2.05 0.64 31.27 2.41 2.41 0.69 35.87...
- Page 66 Universal Fancoil DC MUC-W9 series 4.29 2.64 1.24 103.94 4.25 3.1 1.23 101.83 4.23 3.58 1.23 101.65 4.24 4.05 1.23 101.7 4.52 4.51 113.31 5.74 3.13 1.67 175.17 5.72 3.6 1.67 174.03 5.7 4.07 1.66 173.12 5.68 4.54 1.65 171.78 6.52 3.14...
- Page 67 Universal Fancoil DC MUC-W9 series 1.19 1.18 0.34 10.71 1.66 1.66 0.48 19.01 2.13 2.13 0.61 28.83 2.6 2.6 0.74 40.96 3.06 3.06 0.88 54.19 2.07 1.66 0.59 27.46 2.2 2.14 0.63 30.62 2.6 2.6 0.75 41.11 3.07 3.07 0.88 54.4...
- Page 68 Universal Fancoil DC MUC-W9 series 6.01 3.71 1.75 97.03 5.99 4.38 1.74 96.36 5.94 5.04 1.71 93.68 5.96 5.71 1.73 95.43 6.37 6.37 1.84 106.08 8.07 4.4 2.35 163.37 8.05 5.07 2.34 162.5 8.02 5.74 2.34 161.65 7.99 6.4 2.33 160.61 9.18 4.41 2.67 204.59 9.15 5.08 2.67 203.47 9.12 5.75 2.66 202.36 9.09 6.41 2.65 201.23...
- Page 69 Universal Fancoil DC MUC-W9 series 1.67 1.67 0.48 9.97 2.34 2.34 0.67 17.79 0.86 26.95 3.66 3.66 1.05 38.16 4.33 4.33 1.24 50.92 2.91 2.34 0.84 25.84 3.08 3.02 0.88 28.21 3.67 3.67 1.05 38.29 4.33 4.33 1.24 51.11 4.01 2.35 1.15 45.12 3.98 3.02 1.14 44.5...
- Page 70 Universal Fancoil DC MUC-W9 series 7.26 4.49 65.79 7.23 5.3 2.09 65.24 7.19 6.1 2.07 64.62 7.17 6.9 2.06 63.98 7.71 7.71 2.23 73.33 9.76 5.33 2.83 110.86 9.74 6.14 2.83 110.93 9.71 6.95 2.82 110.64 9.67 7.75 2.81 109.76 11.09 5.33...
- Page 71 Universal Fancoil DC MUC-W9 series 0.57 6.82 2.81 2.81 0.81 12.18 3.62 3.62 1.04 18.78 4.42 4.42 1.27 26.34 5.22 5.22 1.49 34.87 3.49 2.82 17.58 3.62 3.6 1.05 19.2 4.43 4.43 1.27 26.41 5.23 5.23 1.49 4.8 2.83 1.37 30.26 4.76 3.63 1.36 29.85 4.79 4.44 1.37 30.12 5.23 5.22 35.04...
- Page 72 Universal Fancoil DC MUC-W9 series 1.56 0.96 0.45 36.14 1.55 1.13 0.45 35.98 1.55 1.3 0.45 35.79 1.54 1.47 0.45 35.6 1.64 1.64 0.47 39.67 2.09 1.14 59.71 2.07 1.31 59.41 2.07 1.48 59.14 2.07 1.65 59.05 2.37 1.15 0.68 74.11 2.36 1.32 0.68 73.76 2.36 1.5 0.68 73.51 2.35 1.66 0.68 73.46...
- Page 73 Universal Fancoil DC MUC-W9 series 0.42 0.42 0.12 3.69 0.59 0.59 0.17 6.6 0.76 0.76 0.22 10.08 0.93 0.93 0.27 13.97 1.1 1.1 0.32 18.83 0.75 0.6 0.22 9.77 0.76 0.71 0.22 10.11 0.93 0.93 0.27 14.04 1.1 1.1 0.32 18.92 1.03 0.6...
- Page 74 Universal Fancoil DC MUC-W9 series 2.26 1.4 0.65 34.58 2.26 1.65 0.65 34.47 2.24 1.9 0.65 33.78 2.24 2.15 0.65 33.77 2.4 2.4 0.69 38.32 3.05 1.67 0.88 57.94 3.04 1.92 0.88 57.54 3.03 2.17 0.88 57.16 3.01 2.42 0.87 56.77 3.47 1.67 1.01 72.56 3.46 1.93...
- Page 75 Universal Fancoil DC MUC-W9 series 0.61 0.61 0.18 3.36 0.87 0.87 0.25 6.39 1.12 1.12 0.32 9.79 1.37 1.37 0.39 13.58 1.62 1.62 0.46 18.34 1.08 0.87 0.31 9.24 1.12 1.09 0.32 9.76 1.37 1.37 0.39 13.64 1.62 1.62 0.47 18.42 1.49 0.88 0.43 15.92 1.48 1.13 0.43 15.81 1.48 1.38 0.43 15.81 1.62 1.61 0.47 18.43...
- Page 76 Universal Fancoil DC MUC-W9 series 3.46 2.15 0.99 42.93 3.45 2.53 0.99 42.62 3.44 2.91 0.99 42.35 3.43 3.29 0.99 42.27 3.68 3.68 1.06 47.65 4.67 2.56 1.35 73.21 4.65 2.94 1.35 72.73 4.64 3.32 1.34 72.29 4.62 3.71 1.34 71.82...
- Page 77 Universal Fancoil DC MUC-W9 series 0.95 0.95 0.27 4.53 1.33 1.33 0.38 8.04 1.71 1.71 0.49 12.13 2.1 2.1 17.36 2.48 2.48 0.71 23.08 1.67 1.34 0.48 11.72 1.72 1.69 0.49 12.19 2.11 2.11 17.43 2.48 2.48 0.71 23.18 2.29 1.35 0.66 20.1 2.28 1.73 0.65 19.97 2.28 2.11 0.66 20.02 2.49 2.47 0.71 23.22...
- Page 78 Universal Fancoil DC MUC-W9 series 4.45 2.75 1.29 4.43 3.25 1.28 66.45 4.41 3.74 1.27 65.93 4.41 4.23 1.27 65.88 4.72 4.72 1.36 73.52 5.98 3.27 1.73 111.98 5.96 3.76 1.72 111.33 5.94 4.25 1.72 110.87 5.92 4.75 1.72 110.92 6.8 3.28 1.97 140.94 6.79 3.77 1.97...
- Page 79 Universal Fancoil DC MUC-W9 series 1.22 1.22 0.35 6.95 1.7 1.7 0.49 12.17 2.21 2.21 0.64 2.7 2.7 0.77 26.43 3.18 3.18 0.91 35.18 2.15 1.73 0.62 18.08 2.25 2.24 0.65 19.52 2.7 2.7 0.77 26.5 3.19 3.19 0.91 35.33 2.94 1.73 0.84 30.78 2.92 2.22 0.84 30.53 2.94 2.71 0.84 30.76 3.2 3.18 0.91...
- Page 80 Universal Fancoil DC MUC-W9 series 5.75 3.56 1.66 39.09 5.72 4.21 1.65 38.76 5.69 4.86 1.64 38.38 5.67 5.5 1.64 38.22 6.14 6.14 1.76 43.3 7.74 4.24 2.23 65.37 7.72 4.88 2.23 7.69 5.53 2.22 64.61 7.65 6.17 63.56 8.81 4.25 2.54 81.52 8.78 4.9...
- Page 81 Universal Fancoil DC MUC-W9 series 1.56 1.56 0.45 2.22 2.22 0.64 7.23 2.86 2.86 0.82 11.17 3.51 3.51 1.01 15.81 4.15 4.15 1.19 21.08 2.71 2.23 0.78 10.13 2.85 2.8 0.82 11.08 3.52 3.52 1.01 15.87 4.16 4.16 21.16 3.77 2.24 1.08 17.83 3.74 2.88 1.07 17.62 3.74 3.52 1.07 17.64 4.16 4.15 21.2...
- Page 82 Universal Fancoil DC MUC-W9 series 6.83 4.22 1.97 79.01 6.8 4.98 1.97 78.39 6.77 5.72 1.95 77.38 6.78 6.48 1.96 7.22 7.22 2.09 87.2 9.19 5.02 2.68 134.04 9.16 5.77 2.67 133.75 9.12 6.52 2.66 132.43 9.08 7.27 2.64 131.26 10.45 5.04 3.05...
- Page 83 Universal Fancoil DC MUC-W9 series 1.88 1.88 0.54 8.2 2.63 2.63 0.75 14.27 3.38 3.38 0.97 22.24 4.13 4.13 1.18 31.13 4.87 4.87 41.49 3.32 2.65 0.95 21.52 3.47 3.44 23.21 4.14 4.14 1.19 31.25 4.88 4.88 41.67 4.51 2.65 1.29 36.01 4.49 3.4 1.28 35.82 4.52 4.15 1.29 36.18 4.9 4.88...
- Page 84 Universal Fancoil DC MUC-W9 series 1.62 0.47 38.57 1.61 1.18 0.47 38.37 1.61 1.35 0.46 38.15 1.6 1.53 0.46 38.02 1.7 1.7 0.49 41.76 2.16 1.19 0.62 63.28 2.16 1.36 0.62 62.96 2.15 1.54 0.62 62.66 2.14 1.71 0.62 62.37 2.46 1.19 0.71...
- Page 85 Universal Fancoil DC MUC-W9 series 0.44 0.44 0.13 3.99 0.62 0.62 0.18 7.04 0.79 0.79 0.23 10.76 0.97 0.97 0.28 15.16 1.14 1.14 0.33 20.11 0.78 0.62 0.22 10.4 0.8 0.75 0.23 10.82 0.97 0.97 0.28 15.24 1.15 1.15 0.33 20.21 1.07 0.63 0.31 17.81 1.06 0.8...
- Page 86 Universal Fancoil DC MUC-W9 series 2.55 1.58 0.73 41.86 2.54 1.86 0.73 41.55 2.53 2.14 0.73 41.29 2.52 2.42 0.72 41.21 2.71 2.71 0.78 46.46 3.44 1.88 71.42 3.42 2.16 0.99 70.95 3.41 2.45 0.99 70.51 3.4 2.73 0.99 70.07 3.9 1.88 1.13...
- Page 87 Universal Fancoil DC MUC-W9 series 0.7 0.7 4.42 0.98 0.98 0.28 7.85 1.26 1.26 0.36 12.02 1.55 1.55 0.44 16.93 1.82 1.82 0.52 22.5 1.23 0.99 0.35 11.43 1.27 1.25 0.36 12.11 1.55 1.55 0.44 17.01 1.83 1.83 0.53 22.6 1.68 0.99 0.48 19.62 1.68 1.27 0.48...
- Page 88 Universal Fancoil DC MUC-W9 series 3.55 2.2 1.02 44.76 3.53 2.59 1.01 44.44 3.52 2.98 1.01 44.16 3.52 3.38 1.01 44.08 3.77 3.77 1.08 49.66 4.78 2.61 1.37 75.09 4.76 3.01 1.37 74.61 4.74 3.4 1.36 74.11 4.72 3.79 1.36 73.64...
- Page 89 Universal Fancoil DC MUC-W9 series 0.97 0.97 0.28 4.72 1.37 1.37 0.39 8.38 1.75 1.75 12.64 2.15 2.15 0.62 18.09 2.54 2.54 0.73 24.06 1.71 1.37 0.49 12.18 1.76 1.74 12.73 2.16 2.16 0.62 18.17 2.55 2.55 0.73 24.16 2.34 1.38 0.67 20.95 2.33 1.77 0.67 20.82 2.34 2.16 0.67 20.88 2.55 2.53 0.73 24.2...
- Page 90 Universal Fancoil DC MUC-W9 series 4.56 2.82 1.32 70.28 4.54 3.32 1.31 69.62 4.52 3.82 1.31 69.08 4.51 4.32 68.44 4.82 4.82 1.39 76.39 6.13 3.34 1.78 118.38 6.11 3.85 1.78 117.67 6.07 4.35 1.75 114.85 6.04 4.85 1.75 114.07 6.97 3.35 2.03 148.58 6.95 3.86 2.03 147.83 6.92 4.37 2.02...
- Page 91 Universal Fancoil DC MUC-W9 series 1.25 1.25 0.36 7.23 1.75 1.75 12.62 2.26 2.26 0.65 19.74 2.76 2.76 0.79 27.41 3.26 3.26 0.93 36.57 2.2 1.77 0.63 18.78 2.3 2.29 0.66 20.32 2.76 2.76 0.79 27.52 3.26 3.26 0.93 36.72 3.01 1.77 0.86 32.02 2.99 2.27 0.86 31.76 3.01 2.77 0.86 32.02 3.27 3.26 0.93...
- Page 92 Universal Fancoil DC MUC-W9 series 6.36 3.95 1.83 46.11 6.33 4.67 1.82 45.73 6.3 5.39 1.81 45.29 6.29 6.1 45.15 6.82 6.82 1.96 8.58 4.69 2.47 77.74 8.57 5.4 2.47 77.97 8.53 6.13 2.45 76.88 8.49 6.85 2.44 76.34 9.8 4.72 2.84 99.56 9.77 5.44 2.84...
- Page 93 Universal Fancoil DC MUC-W9 series 1.74 1.74 4.81 2.47 2.47 0.71 8.67 3.18 3.18 0.91 13.19 3.9 3.9 1.12 18.96 4.61 4.61 1.33 25.3 3.02 2.48 0.87 12.18 3.18 3.14 0.91 13.17 3.91 3.91 1.12 19.03 4.62 4.62 1.33 25.4 4.19 2.49...
- Page 94 Universal Fancoil DC MUC-W9 series 7.66 4.72 2.22 97.16 7.62 5.56 2.21 96.32 7.59 6.4 95.71 7.58 7.23 2.19 94.29 8.07 8.06 2.33 105.16 10.27 5.6 2.99 163.08 10.23 6.44 2.98 162.11 10.19 7.28 2.97 161 10.15 8.12 2.96 159.95 11.67 5.62...
- Page 95 Universal Fancoil DC MUC-W9 series 2.09 2.09 0.61 9.94 2.95 2.95 0.85 17.6 3.78 3.78 1.08 26.55 4.61 4.61 1.32 37.53 5.44 5.44 1.56 49.99 3.72 2.96 1.07 26.17 3.89 3.83 1.11 27.99 4.62 4.62 1.32 37.69 5.46 5.46 1.56 50.2...
- Page 96 Universal Fancoil DC MUC-W9 series 1.77 0.15 3.46 1.62 0.14 2.99 1.48 0.13 2.55 1.33 0.12 2.13 1.63 0.12 2.22 1.48 0.11 1.89 1.33 1.58 1.18 0.09 1.48 0.09 1.47 1.33 0.08 1.23 1.18 0.07 0.97 1.01 0.06 0.68 1.32 0.07...
- Page 97 Universal Fancoil DC MUC-W9 series 2.61 0.19 2.38 0.17 2.13 2.13 0.15 1.79 0.14 1.47 2.38 0.15 1.67 2.15 0.13 0.12 1.14 1.65 0.84 2.15 0.12 1.11 1.89 0.84 1.63 0.09 1.37 0.07 0.42 3.58 0.39 8.29 3.36 0.37 7.41 3.13...
- Page 98 Universal Fancoil DC MUC-W9 series 4.01 0.29 6.85 3.65 0.26 5.84 3.28 0.24 2.93 0.21 4.03 3.67 0.23 4.58 3.31 3.84 2.94 0.18 3.16 2.58 0.16 2.53 3.32 0.18 3.13 2.96 0.16 2.57 2.59 0.14 2.06 2.22 0.12 1.58 5.48 22.9...
- Page 99 Universal Fancoil DC MUC-W9 series 5.11 0.37 10.38 4.66 0.34 8.85 4.21 7.43 3.75 0.27 6.11 4.69 0.29 6.93 4.23 0.26 5.81 3.77 0.23 4.78 3.31 3.83 4.25 0.23 4.72 3.79 0.21 3.89 3.33 0.18 3.12 2.86 0.15 2.42 6.99 0.76...
- Page 100 Universal Fancoil DC MUC-W9 series 0.45 7.68 5.73 0.41 6.54 5.18 0.37 5.49 4.61 0.33 4.51 5.76 0.36 5.11 0.32 4.28 4.63 0.29 3.51 4.05 0.25 2.81 5.22 0.28 3.47 4.64 0.25 2.84 4.06 0.22 2.27 3.47 0.19 1.74 8.65 0.94...
- Page 101 Universal Fancoil DC MUC-W9 series 7.44 0.54 5.11 6.77 0.49 4.35 6.11 0.44 3.65 5.44 0.39 6.79 0.42 6.13 0.38 2.85 5.45 0.34 2.34 4.76 0.29 1.87 6.13 0.33 2.31 5.46 1.89 4.77 0.26 1.51 4.02 0.22 1.08 10.22 1.11 17.28...
- Page 102 Universal Fancoil DC MUC-W9 series 1.69 0.12 2.36 1.54 0.11 2.01 1.38 1.68 1.23 0.09 1.38 1.54 1.56 1.38 0.09 1.31 1.22 0.08 1.05 1.05 0.06 0.75 1.37 0.07 1.01 0.06 0.74 1.02 0.06 0.52 0.86 0.05 0.38 2.33 0.25 7.88...
- Page 103 Universal Fancoil DC MUC-W9 series 2.76 2.75 2.51 0.18 2.34 2.26 0.16 1.96 2.01 0.15 1.61 2.52 0.16 1.83 2.27 0.14 1.54 2.02 0.12 1.26 1.76 0.11 0.97 2.28 0.12 1.25 2.01 0.11 0.97 1.74 0.09 0.69 1.47 0.08 0.48 3.79...
- Page 104 Universal Fancoil DC MUC-W9 series 4.11 7.15 3.74 0.27 6.09 3.37 0.24 5.11 3.01 0.22 3.76 0.23 4.77 3.39 0.21 3.01 0.19 3.29 2.65 0.16 2.64 3.41 0.18 3.26 3.03 0.16 2.68 2.65 0.14 2.15 2.28 0.12 1.66 5.62 0.61 23.91...
- Page 105 Universal Fancoil DC MUC-W9 series 5.16 0.37 10.58 4.71 0.34 9.02 4.25 0.31 7.57 3.79 0.27 6.22 4.74 0.29 7.06 4.28 0.26 5.93 3.82 0.24 4.87 3.35 0.21 3.91 0.23 4.81 3.84 0.21 3.97 3.37 0.18 3.18 2.89 0.16 2.46 7.07...
- Page 106 Universal Fancoil DC MUC-W9 series 6.96 9.13 6.35 0.46 7.78 5.73 0.41 6.53 5.11 0.37 5.36 6.38 0.39 6.07 5.76 0.36 5.09 5.13 0.32 4.19 0.28 3.35 5.78 0.31 4.11 5.15 0.28 3.39 4.51 0.24 2.71 3.88 0.21 2.09 9.56 1.04...
- Page 107 Universal Fancoil DC MUC-W9 series 8.83 0.64 6.85 8.04 0.58 5.84 7.26 0.52 6.47 0.47 4.03 8.09 4.57 7.29 0.45 3.83 6.49 3.15 5.69 0.35 2.52 7.31 3.11 6.51 0.35 2.56 5.71 0.31 2.04 4.87 0.26 1.58 12.1 1.31 23.09 11.34...
- Page 108 C/ NÁPOLES 249 P1 08013 BARCELONA ESPAÑA / SPAIN (+34) 93 446 27 80 SAT: (+34) 93 652 53 57 www.mundoclima.com...
Need help?
Do you have a question about the MUC-W9 and is the answer not in the manual?
Questions and answers