
Related Manuals for Kymeta u8


Summary of Contents for Kymeta u8
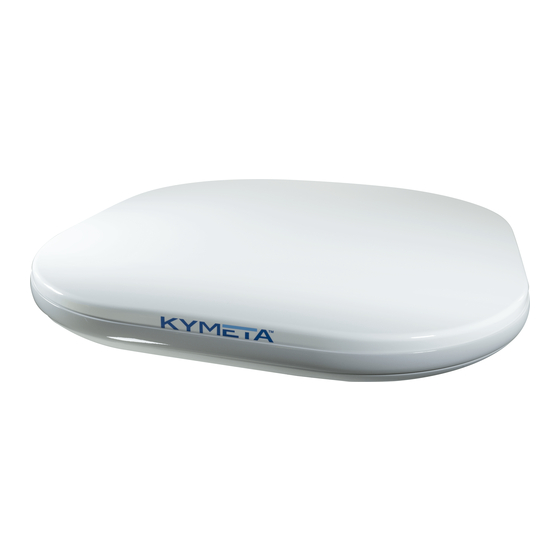
- Page 1 Kymeta™ u8 Products Installation and User Guide Covers u8 terminal and u8 ODU configurations Document number: 700-00121-000 revD 08 December 2020...
-
Page 2: Table Of Contents
5.2.2 Stationary platform instructions Power on the u8 terminal and access the antenna Provision and commission the u8 terminal with Kymeta™ Broadband services 5.4.1 Provision and commission the u8 terminal without Kymeta™ Broadband services Set up the u8 terminal secondary SIM... - Page 3 Appendix A. Kymeta u8 terminal cabling diagram Appendix B. Kymeta u8 ODU cabling diagram Appendix C. LED status indicators Appendix D: u8 accessories available for purchase Appendix E: u8 ODU and u8 terminal parts available for purchase Appendix F: Device login information...
-
Page 4: Introduction And General Considerations
Never grab or lift the u8 by the shroud, diplexer or any other part of the RF chain. Never use the diplexer or any part of the RF chain to mount the ODU as they are not a structural part of the u8 and may be damaged if handled improperly. -
Page 5: Reduce The Risk Of Rf Exposure
Reduce the risk of RF exposure Install the u8 ODU or u8 terminal in an area above accessible range of personnel within the operational range of the antenna to reduce the risk of RF exposure. Mount the terminal in an area that has limited access by people and does not allow for people to pass through the path of the antenna beam in any direction the antenna beam may point. - Page 6 700-00121-000 revD Kymeta u8 products installation and user guide ✎ If you need support in assessing your mounting configuration, contact Kymeta customer support at support@kymetacorp.com for additional information. The following images show example installation sites. Figure 2. Land-mobile installation Figure 3. Stationary installation ©...
-
Page 7: Mounting Considerations
✎ When mounting the u8, keep at least a 12 in. (305 mm) open distance behind the fans and a minimum single exhaust zone vertically (up or down), horizontally (right or left), or some combination to minimize backpressure. -
Page 8: Qr Code
700-00121-000 revD Kymeta u8 products installation and user guide QR code The u8 includes a QR code on the antenna communications module next to the LED status panel to show the as-built configuration of the system. The following is an example of the information included in the QR code: PRODUCT NAME: (E.G KYMETA U8 GEO TERMINAL, 20W) -
Page 9: U7-To-U8 Upgrade Kit Installation Considerations
Physical and mounting considerations The footprint of the u8 terminal is 89.5 cm × 89.5 cm × 14 cm (35.2 in. × 35.2 in. × 5.5 in.), which is slightly larger than the u7 footprint. Before you begin installation of the u8, ensure you have enough mounting space for the increased footprint size. -
Page 10: Cabling Considerations
40 VDC power source. The u8 is configured by default to use a DC power source and requires a 12 VDC to 36 VDC power source. To use an AC power source for the u8, purchase the AC-to-DC power kit (U8ACC-00002-0). -
Page 11: Unbox The U8 Terminal
3. With two people (one person on each side), lift the u8 out of the case, keeping the antenna parallel to the floor, and lay the antenna face down on the clean flat surface. Place a piece of foam, fabric, or non-abrasive material on the clean flat surface to prevent marks or damage to the face of the antenna. -
Page 12: Open The U8 Shroud
4. Access the connections or cables inside including the RX, TX, and Ethernet cable jumper or the power cable connector to install an AC-to-DC power kit. If you have a u8 ODU, refer to 6.1 Connect the cables to the u8 ODU to connect all cables before replacing the shroud. -
Page 13: Install The U8 Terminal
AC power source instructions The u8 terminal accepts DC voltage, so you need an AC-to-DC power supply to power the antenna with a standard wall outlet. Kymeta sells an IP-67-rated AC-to-DC power kit (U8ACC-00002-0) as an accessory to the u8. -
Page 14: Power On The U8 Terminal And Access The Antenna
Ethernet connection is not recommended. Refer to 7.1 Open the shroud access panel. In the u8 terminal configuration, you have the option to install a second SIM for terrestrial communications. Refer to 5.5 Set up the u8 terminal secondary SIM for details. -
Page 15: Provision And Commission The U8 Terminal With Kymeta™ Broadband Services
Provide your terminal serial number, contact name and number, and requested commissioning window 07:00-18:00 PT (UTC-8). Kymeta support will provision your terminal and provide you options files before the call, which you will load with Kymeta support during your commissioning window. -
Page 16: Set Up The U8 Terminal Secondary Sim
700-00121-000 revD Kymeta u8 products installation and user guide Set up the u8 terminal secondary SIM In the u8 terminal configuration, you have the option to install a second SIM for terrestrial communications. To install a second SIM card, do the following: 1. -
Page 17: Install The U8 Odu
Kymeta recommends that installers, integrators, and handlers of the u8 do not lift or hold the u8 by using any of the RF chain as a handle or grip, or by any mounted components or cables. Always lift the u8 by the corner handles. -
Page 18: Mount The U8 Odu
The Ethernet cable is connected to administrative port of modem or a network switch. c. The power cable is connected to power source. 3. Power on the u8 ODU and external modem. You may hear the shroud fans power up, and then reduce speed. ⚠... -
Page 19: Obtain U8 Antenna Status Information
Administrative web-based UI access according the directions in the section above relevant to your configuration. Refer to 700-00139-000 Kymeta™ u8 antenna software user guide for details on interacting with the features of the Kymeta antenna. The software user guide provides you with details on all available features and modes of operation. -
Page 20: Set Up U8 Antenna Orientation
Set up u8 antenna orientation When in motion, the antenna’s yaw (heading), relative to north, is provided by the GPS heading. The Kymeta u8 antenna out-of-the-box configuration assumes that the X axis of the antenna is aligned with the heading vector of the vehicle. If this is not the case, you can set the vehicle-to-ant-yaw value to inform the antenna of the offset. - Page 21 You can adjust the vehicle-to-antenna-yaw offset value using the antenna’s API. Navigate to Help > API Documentation > /setup/vehicle-to-ant. Then, set the necessary value. Refer to 700-00159-000 Kymeta™ u8 antenna public RESTful application programmers' interface reference for further information on using the RESTful API.
-
Page 22: Network Interfaces
Failure to utilize the Data VLAN settings as shipped will result in connectivity issues with the antenna on all forms of u8 terminal connectivity except the wired Admin Ethernet Port as well as elimination of OTA Metric transmission. © 2020 Kymeta Corporation. All rights reserved. - Page 23 700-00121-000 revD Kymeta u8 products installation and user guide The u8 antenna and u8 ODU will ship to you with the following network interfaces: Network Interface Network Setting ODU value (as shipped) Local network IP Mode static Local network IP Address 192.168.0.10...
- Page 24 700-00121-000 revD Kymeta u8 products installation and user guide If you utilize the antenna reset button, and depress the button for 5 seconds or longer, the u8 reverts to baseline network configuration: Network Interface Network Setting Baseline configuration (after reset)
-
Page 25: Manage U8 Antenna Automatic Reboot
The u8 antenna automatically reboots every 21 days since the previous automatic or manual reboot. To see the countdown until the next reboot or disable the automatic reboot in the u8 web-based user interface, go to the Settings page > System tab, and then view the Auto Reboot field. -
Page 26: Troubleshoot The U8
Customer support. Replace components Kymeta offers a variety of field replaceable units (FRUs). Refer to Appendix E: u8 ODU and u8 terminal parts available for purchase for details. For replacement instructions, refer to the documentation shipped with the FRUs. -
Page 27: Clean The U8
14.3 Hydrophobic coating reapplication The u8 comes with a hydrophobic coating applied to the radome. For best performance Kymeta recommends reapplying the coating every 6-12 months. Kymeta sells the hydrophobic coating reapplication kit (U8ACC-00028-0) as an accessory. For additional information on this coating or for purchasing this material, see the following site: https://chemonaworld.com/product/chemona-multi-coat/. -
Page 28: Package The Kymeta U8 Terminal
Dry off cables and coil them into the box, binding with cable ties. c. Do not leave adapters on cables. 3. Remove the u8 from the mounting structure and place face-down on a non-abrasive surface for safe and easy access. -
Page 29: Customer Support
©2020 Kymeta Corporation. All Rights Reserved. KYMETA, KYMETA CONNECT, MAKING MOBILE GLOBAL, and CONNECTED BY KYMETA are trademarks of Kymeta Corporation, with registrations or pending applications in the U.S. and/or other countries. All other trademarks are the property of their respective owners. -
Page 30: Appendix A. Kymeta U8 Terminal Cabling Diagram
700-00121-000 revD Kymeta u8 products installation and user guide Appendix A. Kymeta u8 terminal cabling diagram Six field-replaceable external cables reside under the u8 terminal shroud. The power jumper cable and Ethernet jumper cable move connection interfaces outside the shroud to improve installation experience. - Page 31 700-00121-000 revD Kymeta u8 products installation and user guide Cable name and product code Cable description Fan power and control jumper This shielded Ethernet cable provides power and control to the fan panel. cable (W47A) Since this cable supplies power, you cannot replace it with a standard non- (U8ACC-00020-0) POE Ethernet cable.
-
Page 32: Appendix B. Kymeta U8 Odu Cabling Diagram
700-00121-000 revD Kymeta u8 products installation and user guide Appendix B. Kymeta u8 ODU cabling diagram Seven field replaceable external cables reside under the u8 ODU shroud. The power, Ethernet, RX, and TX jumper cables move connection interfaces outside the shroud to improve installation experience. - Page 33 RX jumper cable (W58) This short LMR cable with the right-angle connector provides connection from the RX port on the communication module to a connector outside of the u8 (U8ACC-00022-0) ODU shroud. Connect this short cable to a longer coaxial cable connected to the RX port of your modem.
-
Page 34: Appendix C. Led Status Indicators
700-00121-000 revD Kymeta u8 products installation and user guide Appendix C. LED status indicators Antenna status LED indicator LED state Indication Antenna not powered Solid amber Antenna powered but not successfully booted Solid green Antenna powered and successfully booted Blink green, then solid green Antenna reset successful Satellite modem status LED indicator... - Page 35 700-00121-000 revD Kymeta u8 products installation and user guide Multi-WAN status LED indicator LED state Web-based UI indicator Indication Multi-WAN not powered Solid amber BOOTING Multi-WAN powered but not successfully booted Solid green NO SERVICE Multi-WAN successfully booted but no WAN...
-
Page 36: Appendix D: U8 Accessories Available For Purchase
700-00121-000 revD Kymeta u8 products installation and user guide Appendix D: u8 accessories available for purchase Before replacing any terminal components, take inventory to ensure you have all required hardware. Kymeta provides all hardware for any accessory component for the terminal in accessory kits: Product name Description Vehicle power kit includes wiring to cleanly and efficiently tie u8 vehicle power kit, 25’... -
Page 37: Appendix E: U8 Odu And U8 Terminal Parts Available For Purchase
Appendix E: u8 ODU and u8 terminal parts available for purchase Kymeta offers a variety of u8 ODU and u8 terminal parts listed in the table below. For cable parts available for purchase, refer to Appendix A. Kymeta u8 terminal cabling diagram and Appendix B. Kymeta u8 ODU cabling diagram. -
Page 38: Appendix F: Device Login Information
700-00121-000 revD Kymeta u8 products installation and user guide Appendix F: Device login information The table below is a collection of devices, usernames, and passwords. Configuration Device IP address or SSID Username Password Usage information u8_Admin_#### Gen2 for the Terminal...
Need help?
Do you have a question about the u8 and is the answer not in the manual?
Questions and answers