Table of Contents
Advertisement
Advertisement
Chapters
Table of Contents

Subscribe to Our Youtube Channel
Related Manuals for MFZ Ovitor Control CS 310


Summary of Contents for MFZ Ovitor Control CS 310
- Page 1 Operating Instructions Control CS 310 Control CS 310 / Rev.I 1.55 – 1...
-
Page 2: Table Of Contents
RESETTING the control without an LCD monitor ......22 2 – Control CS 310 / Rev.I 1.55... -
Page 3: Information In This Document
− Local protective regulations must be complied with. − Consult the manufacturer before carrying out modifications or replacing the mains connection cable. Control CS 310 / Rev.I 1.55 – 3 Control CS 310 / Rev.I 1.55 – 3... -
Page 4: Product Overview
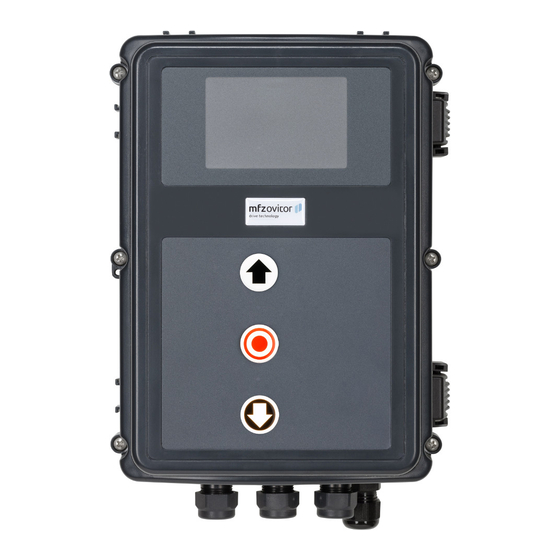
The operating instructions describe the connection and pro- gramming options and variants of the controller CS 310 with connected LCD monitor and from software version V1.55j. 4 – Control CS 310 / Rev.I 1.55 4 – Control CS 310 / Rev.I 1.55... -
Page 5: Motherboard Cs
No power line entry for the control unit itself. “5.3 Power supply for external devices“ ➔ The position of the jumper must take into account the power supply voltage and the motor voltage. Control CS 310 / Rev.I 1.55 – 5... -
Page 6: Installation
− The control housing with the CS 310 control is installed. REFERENCE The relevant manufacturers’ instructions must be adhered to for the installation of the door, the MFZ motor, and the command and safety devices. 6 – Control CS 310 / Rev.I 1.55... -
Page 7: Power Supply For External Devices
The connection X19 is protected by the fuse element F1 (max. circuit 1 A / T). X15: Terminal block for mechanical limit switches (Safety circuit at X2 / B1-B2) X19: Power supply connection for external devices Control CS 310 / Rev.I 1.55 – 7... -
Page 8: Allocation Of Connections For Absolute Value Encoder (Sockets X11)
If a change is made at a later date, the relevant end position system must be selected via a parameter setting in INPUT mode. 8 – Control CS 310 / Rev.I 1.55... -
Page 9: Connection Of Command Devices
Emergency stop command device a change is made at a later date, the relevant end position system must be selected via a parameter setting in INPUT mode. ➔ “10.2 Input operating mode“ Control CS 310 / Rev.I 1.55 – 9... - Page 10 Button / DOWN input 5.6 / 3 Button / pulse input Button / UP input (UP inside, with active two-way control) STOP button Pulse button Not active in manual mode (Dead-man) 5.6 / 4 10 – Control CS 310 / Rev.I 1.55...
-
Page 11: Connection Of Closing Edge Safety Device 1
Optoelectronic closing edge protective device (OSE) Parameter SKS = MOD1 Pneumatic closing edge protection (DW) 5.7 / 1 Parameter SKS = MOD3 / testing automatically active 5.7 / 3 Legend: White Green Brown Control CS 310 / Rev.I 1.55 – 11... -
Page 12: Photocell Connection 1
Parameter LIGHT BARR. 1 = MOD 1 5.8 / 2 Legend: Receiver Transmitter NOTICE: All photocells are active for the OPENING or CLOSING direction, depending on the setting. ➔ “10.2 Input operating mode“ (Parameter LB FUNC. 1) 12 – Control CS 310 / Rev.I 1.55... -
Page 13: Light Curtain Connection
Diagrams from other manufacturers on inquiry. Brown REFERENCE The connection cable (A) is pluggable. For a precise description of the function and connection, refer to the separate documentation for the light grid. Control CS 310 / Rev.I 1.55 – 13... -
Page 14: Connection Of Programmable Inputs
As soon as a slip door switch has been detected, the input is active and must await a safety element on 8.2 kΩ basis. ➔ “10.2 Input operating mode“ (Parameter INPUT 2) Input 1 Input 2 either/or The type of wiring depends on the parameter settings for both inputs in INPUT mode. 14 – Control CS 310 / Rev.I 1.55... -
Page 15: Connection Of Relay Outputs
When the LED lights up for approximately 4 seconds, all of When the LED lights up for approximately 4 seconds, all of the memory spaces have been deleted. the memory spaces have been deleted. The deletion procedure can be cancelled by briefly pressing the programming button. Control CS 310 / Rev.I 1.55 – 15... -
Page 16: Connection Of Lcd Monitor
Sockets X16 and X17 can be used only once. Taking the beyond repair. power consumption into account, however, it is possible to connect several BUS modules by using special jumper cables. 5.13 / 2 16 – Control CS 310 / Rev.I 1.55... -
Page 17: Initialisation
The desired language can be selected using the [+] and [–] buttons and saved by pressing the [P] button. After this, all texts or messages displayed are shown in the language that you have selected. Control CS 310 / Rev.I 1.55 – 17... -
Page 18: Setting The End Positions
− After programming the limit switches, the teach-in of by pressing button (P). the system running time is carried out automatically. The functions of the control are the same as in automatic mode. 18 – Control CS 310 / Rev.I 1.55... -
Page 19: Setting The Electronic End Position System Using The Lcd Monitor
− After programming the limit switches, the teach-in of the system running time is carried out automatically. The display shows TEACH IN RUN. The functions of the control are the same as in automatic mode. Control CS 310 / Rev.I 1.55 – 19... -
Page 20: Programming
“PLEASE WAIT ...” will appear in the display. The control system is not ready for use. After Display: switching on for the first time, the initialisation phase takes − The current end position value is shown approximately 60 seconds. 20 – Control CS 310 / Rev.I 1.55... -
Page 21: Expert Menu
EXPERT MENU is set to ON again. − The same applies for switching the power off. In this case, too, the parameter EXPERT MODE is set to OFF again. Control CS 310 / Rev.I 1.55 – 21... -
Page 22: Reset
While initialisation is being carried out, it is not possible to programme or operate the system. Once initialisation has been successfully completed, the end positions have then been deleted and all parameters have been reset to their factory default settings. 22 – Control CS 310 / Rev.I 1.55... - Page 23 Control CS 310 / Rev.I 1.55 – 23...
-
Page 24: Navigator (Lcd Monitor Only)
9. Navigator (LCD monitor only) 24 – Control CS 310 / Rev.I 1.55... - Page 25 Control CS 310 / Rev.I 1.55 – 25...
-
Page 26: Overview Of Functions
If the “PRESS/REL“ parameter is set to MOD2, 3, 4, 5 or MOD6 in the input menu, the display changes from AUTOMATIC to MANUAL. Display Description MANUAL The door is in the opening phase. MAIN UP MANUAL The door is in the closing phase. MAIN DOWN MANUAL The door is at an intermediate position. STANDBY 26 – Control CS 310 / Rev.I 1.55... -
Page 27: Input Operating Mode
After 3 attempts, the automatic closing process will be aborted automatically. START WARN. The start warning is carried out before each run. OFF, 1 – 10 seconds Control CS 310 / Rev.I 1.55 – 27... - Page 28 Capacitor switching for 230 V/1~ sectional-door operators MOD25: Yard light function, light stays on for 2 minutes after OPEN impulse/ command MOD26: Activation of radio 2 transmission system MOD27: Impulse signal when OPEN end position is reached 28 – Control CS 310 / Rev.I 1.55...
- Page 29 Setting is done in increments (only AWG), starting from the lower travel cut-out point. In systems with mechanical limit switches, the additional CLOSE limit switch serves as the PS-POINT. SKS FUNC MOD1: Stop + reverse MOD1 – MOD2 MOD1 MOD2 Stop + 2-second reversing movement Control CS 310 / Rev.I 1.55 – 29...
- Page 30 Please note: When adjusting, this point will be automatically recognised during the first closing run, provided that Photocell 1 is installed in the door frame and the photocell remains interrupted during the closing operation from this point through to the CLOSED end position. 30 – Control CS 310 / Rev.I 1.55...
- Page 31 (only during initial commissioning or after a reset) and the parameter is automatically set to MOD4. If nothing is detected during initial commissioning or after a reset, the parameter is automatically set to OFF. Control CS 310 / Rev.I 1.55 – 31...
- Page 32 The larger the difference compared to the lowest value displayed, the less sensitively the power monitoring reacts. The power monitoring facility is only activated if a value has been set. 32 – Control CS 310 / Rev.I 1.55...
-
Page 33: Input
– INC.P.OP – OPEN TIME – FOREWARNING – FAST CL. – REVERS- POINT. – INPUT 1 – SELF LOCK – EXPERT MENU ON: Access to all parameters as listed in Chapter 10.2. Control CS 310 / Rev.I 1.55 – 33... -
Page 34: Explanation Of The Relay Modes
MOD19 Intermediate OPEN position to OPEN end The relay closes the contact when the door is in the area between the OPEN end position and position the intermediate OPEN position (Part OPEN). 34 – Control CS 310 / Rev.I 1.55... - Page 35 Monitoring SKS1 (X4/5-8) , SKS2 (X4/11-12) and SKS3/SKS4 (transmission system) Relay ON: All closing edge protective devices are OK Relay OFF: At least one closing edge protective device is actuated or defective Control CS 310 / Rev.I 1.55 – 35...
- Page 36 Testing presence and movement sensors (NC) The relay generates a test signal each time before closing travel and awaits an interruption of the closing edge input as a response to the test signal. 36 – Control CS 310 / Rev.I 1.55...
- Page 37 The relay is active after reaching the programmed service interval. Only after the service interval is reset or redefined does the relay drop out again. ➔ “10.2 Input operating mode“ on page 27 /Parameter SERVICE MOD46 ADJUSTMENT operating mode The relay is active if the control is in the ADJUSTMENT operating mode. Control CS 310 / Rev.I 1.55 – 37...
-
Page 38: Key To Inputs
(emergency opening) NO Open: Normal operation Closed: Emergency opening of door BUTTON: No function LIGHT BARR / SKS: No function STOP: Emergency closing interrupted as long as this is activated. N o automatic closing after deactivation of fire alarm signal. 38 – Control CS 310 / Rev.I 1.55... -
Page 39: Mod11: Automatic Closing Button
It is no longer possible to use the (+) and (-) buttons on the LCD monitor and the motherboard to issue operation commands in AUTOMATIC mode. MOD30 OPEN button inside When the button is pressed, the door opens as far as the OPEN end position. The traffic light inside changes to green. Control CS 310 / Rev.I 1.55 – 39... -
Page 40: Mod31 Open Button Outside
Acts in same way as light curtain 1 (SKS MOD 4 – 6) – Light curtain active in the CLOSE direction. – Stop and reverse when the light curtain is triggered. The type of reversing (reverse / short reversal) is also adopted. 40 – Control CS 310 / Rev.I 1.55... -
Page 41: Diagnosis / Error Memory Operating Mode
SKS 4 with MOD 2-3 SAFE. 4 with MOD 4 IMPULS Command button / IMPULSE input Button activated / input is active (X3 / 7+8) OFF: Button not activated / input not active Control CS 310 / Rev.I 1.55 – 41... - Page 42 ➔ “11.1 Error messages shown on LCD display“ Deleting the error log: Press buttons [+] and [–] at the same time for approximately 2 seconds. Every error message must be indivi- dually deleted. 42 – Control CS 310 / Rev.I 1.55...
- Page 43 Overvoltage and undervoltage are detected and counted. in the supply voltage. RESTART Restart counter Display of the restarts executed. Caused by detection of undervoltage, change of the limit position system or after a RESET of the controller. Control CS 310 / Rev.I 1.55 – 43...
-
Page 44: Error Messages And Rectification
– Check the closing edge safety device and the OPEN direction –> (X4 / 11+12) input 2 spiral cable. ERROR STOP 2 – Safety circuit 2 is interrupted. – Check wicket door switch. Wicket door switch 8.2 kΩ –> (X4 / 11+12) input 2 44 – Control CS 310 / Rev.I 1.55... - Page 45 OPEN command being given. ERROR MSBUS – Communication between the control and the MS BUS – Check the cable and socket connections and module attached is interrupted. replace, if necessary. Control CS 310 / Rev.I 1.55 – 45...
-
Page 46: Error Message Via Led Indicator
– Check the door for any mechanical impairment or damage. ERROR RUNTIME Flashes 6x The programmed running time has been exceeded. – Check the path of the door and the running time. – Re-programme the running time, if necessary. 46 – Control CS 310 / Rev.I 1.55... - Page 47 Check the RADIO transmission system. ERROR LIGHT BAR Continuous light The installed photocell indicates a permanent fault. Travel in CLOSING direction only possible in – Check photocell (function and alignment). deadman mode – Check cabling. Control CS 310 / Rev.I 1.55 – 47...
-
Page 48: Technical Data
MFZ two-wire photocells have a self-test facility, so this requirement does not apply in this case. Display (LCD): Only an original MFZ LCD monitor may be used. 48 – Control CS 310 / Rev.I 1.55... -
Page 49: Functional Safety Category And Performance Level According To En Iso 13849-1
If activated in the CLOSING direction, the door stops or reverses. Average diagnostic coverage MTTF Mean time to dangerous failure Control CS 310 / Rev.I 1.55 – 49 Control CS 310 / Rev.I 1.55 – 49... -
Page 50: Maintenance
Check all electrical cables and the housing for damage. A Check all electrical cables and the housing for damage. A defective cable must be replaced immediately. defective cable must be replaced immediately. 50 – Control CS 310 / Rev.I 1.55... -
Page 51: Manufacturer's Declaration
EN ISO 13849-1 Safety of machinery - Safety-related parts of control systems - Part 1: General principles for design EN 60335-1 Household and similar electrical appliances - Safety - Part 1: General requirements Control CS 310 / Rev.I 1.55 – 51... -
Page 52: Appendix
Terminal block X15 (mechanical limit switches) - Limit switch OPEN - Limit switch CLOSE - Pre-limit switch OPEN - Pre-limit switch CLOSE Terminal block X19 (Power supply connection for external units) 400V/50Hz/3/N/PE 52 – Control CS 310 / Rev.I 1.55... - Page 53 - OPEN button for external switching devices - OPEN button - GROUND (connection to terminals 1 and 2) - 24 V DC - STOP button white green brown Control CS 310 / Rev.I 1.55 – 53...
-
Page 54: Measuring Points, Safety Circuit
The measurement range must be set for 24 V-DC. Emergency Stop Stop Measure at all measuring points on the diagram in order to Measure at all measuring points on the diagram in order to locate the interruption. locate the interruption. 54 – Control CS 310 / Rev.I 1.55... - Page 55 Control CS 310 / Rev.I 1.55 – 55...
- Page 56 #1700015706 #105722...
Need help?
Do you have a question about the Control CS 310 and is the answer not in the manual?
Questions and answers