Advertisement
Quick Links
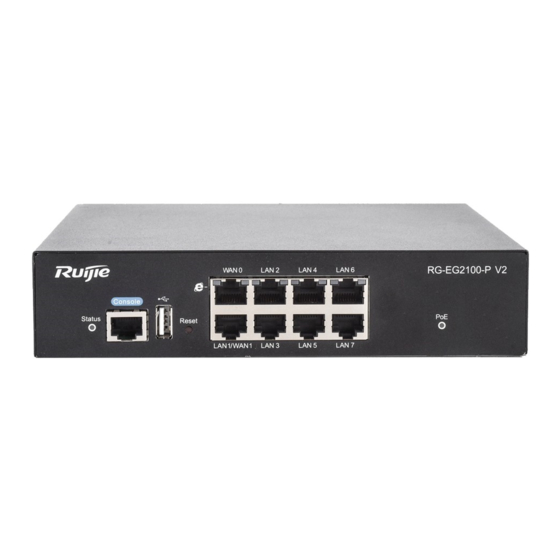
Ruijie RG-EG2100-P Series Gateways Quick Start Guide
1. WAN Uplink Quick Setup
1.1 Setup via EG local Web
1) Modify the IP address of PC.
IP address: 192.168.1.x (except 192.168.1.1)
Subnet mask: 255.255.255.0
Default gateway: 192.168.1.1 (default LAN IP)
2) Connect the PC to any port (except WAN0) on the device.
3) Visit http://192.168.1.1 by Chrome browser.
4) Enter the username and password on the login page and click "Log In".
Default Username: admin
Default Password: admin
5) Change the password at the first login.
Advertisement

Subscribe to Our Youtube Channel
Related Manuals for Ruijie RG-EG2100-P Series


Summary of Contents for Ruijie RG-EG2100-P Series
- Page 1 Ruijie RG-EG2100-P Series Gateways Quick Start Guide 1. WAN Uplink Quick Setup 1.1 Setup via EG local Web 1) Modify the IP address of PC. IP address: 192.168.1.x (except 192.168.1.1) Subnet mask: 255.255.255.0 Default gateway: 192.168.1.1 (default LAN IP) 2) Connect the PC to any port (except WAN0) on the device.
- Page 2 Select a scenario. Configure the WAN port (DHCP, Static IP or PPPoE). It is not recommended to change the IP of LAN port; otherwise, you may need to log in and configure again. After wizard completes, you can configure LAN port on the interface configuration page.
- Page 3 6) Click Dashboard to open the homepage, or click Interface to enter the interface configuration page. If the WAN port is connected to the Internet, you can access the Internet now and add the EG to the Cloud.
- Page 4 1) Connect AP710 to any of LAN1-LAN7 ports on EG2100-P. After AP is powered on, it will broadcast the default SSID: RJ-xxxxxx (xxxxxx is the last six digits of EG2100-P SN). 2) Launch Ruijie Cloud App, tap Tool menu, and tap Gateway Setup to start the Gateway Quick Setup, as shown below:...
- Page 5 4) Reset the Web management password, and tap Next (Note: This password is required when you add EGs by scanning the QR-code).
- Page 6 5) Select a Scenario. If you select the S&M Enterprise, Flow Control Configuration will be added to the wizard. Here you can just tap Next to enter the Interface settings. 6) Configure the WAN port (PPPoE, Static IP or DHCP), tap Next and wait for about 5 seconds until a success message is displayed.
- Page 7 7) The initial configuration complete. Now you can create the network and add devices on App. 1.2.2 Add Network and Device 1) Open the Ruijie Cloud App, tap Create Network, and enter the network name and SSID.
- Page 8 2) After the network is created, enter the network and tap Add Device to add AP and EG2100-P by scanning the QR code (AP SN/MAC) on the back of the device. (Note: When adding an EG, you need to enter its Web management password.)
- Page 9 3) Wait for about 3 to 5 minutes, and you can see the online status of AP and EG devices. The SN/MAC QR-Code demo on the back of AP:...
- Page 10 1.2.3 Advanced Configuration 1) After an EG comes online on the Ruijie Cloud, you can visit its eWeb page for advanced configuration. Select the EG in the Gateway List, and click eWeb. 2) After the tunnel is created, the Web management page will open automatically, as shown below: 3) If the following information is displayed, click Proceed to enter the eWeb system.
-
Page 11: Common Functions
2. Common Functions Click Common on the menu for commonly-used functions. -
Page 12: Cache Configuration
3. Cache Configuration EG supports static resource (such as image, video and file) cache and App cache (both on iOS and Android). Cache is disabled by default. You can enable it in the Service menu (device will restart). 3.1 Resource File Cache Static resources, including files, images and videos, can be cached on EG. - Page 13 Example When cache is disabled, the traffic mainly comes from WAN: When cache is enabled:...
- Page 14 As the file is downloaded from cache, the WAN traffic throughput is lower and the Internet bandwidth is saved. Even when the Internet bandwidth is limited to 0.5 Mbps, the download speed can reach 15.5MB/s (124Mbps). 3.2 iOS App Cache Step1: Enable APP Cache and select iOS-based App.
- Page 15 Step3: After STA begins to download the App from App Store, you can check the EG cache status. EG caches the App when the STA downloads the App for the first time. Note: URL in iTunes varies with iPhone model.
- Page 16 3.3 Android App Cache EG supports Android APK download link (Note: Google Play is not supported). Step1: Enable APP Cache and select Android-based App. Step2: Enter the App server address and enable all HTTP, as shown below:...
- Page 17 Step3: STA begins to download from the above link. EG caches the App when the STA downloads the App for the first time. When other STAs download the App again in the same network, they will get App from EG Cache.
Need help?
Do you have a question about the RG-EG2100-P Series and is the answer not in the manual?
Questions and answers