
Related Manuals for CNC Design D-500


Summary of Contents for CNC Design D-500
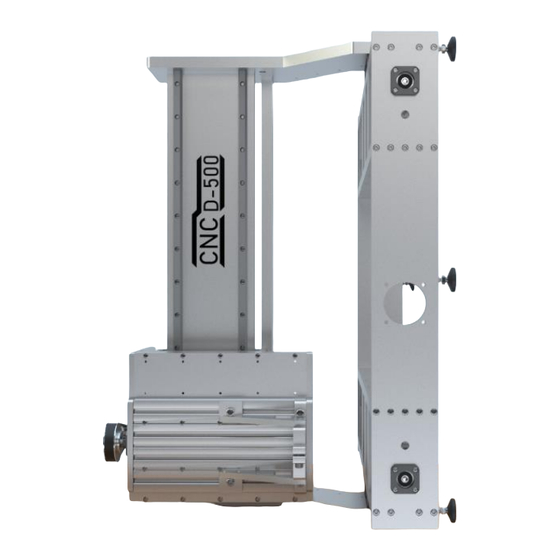
- Page 1 CNC D-500 Wiring Machine Instructions V1.1 http://www.ukcnc.net Please make sure you have checked the Checklist and that all the parts have been received. Before proceeding with these build instructions.
- Page 2 Wire the 2 Y-Axis motors with the signal cables (labeled 2) and DC motor cable (labeled 8) as shown above. Note: Make sure the jumpers S1-S6 are set to the same value as above.
- Page 3 Make sure you have the following: 4 * M5 x 8mm 4 * M5 Washer 10 * M4 x 8mm 10 * M4 Washer 2 * 1/4” P-Clip 6 * 1/8” P-Clip 5 * 1/2” P-Clip Rotate the machine 90 degrees so it’s resting on the left upright arm.
- Page 4 Attach the Y1 Signal (labeled 2) and Y DC motor (labeled 8) cables below the middle foot using a 1/4” P-clip secured with an M4 x 8mm bolt and M4 washer. Y DC motor Y1 Signal...
- Page 5 Now attach the Y2 Signal (labeled 2) and Y DC motor (labeled 8) cables above the middle foot using a 1/4” P-clip secured with an M4 x 8mm bolt and M4 washer. Y DC motor Y2 Signal...
- Page 6 No. 3) Secure the frame earth cable into the threaded hole above the Y2 signal and Y DC motor cable with an M4 x 8mm bolt and M4 washer. Frame earth cable...
- Page 7 Thread the following cables through 2 x 1/2” P-clips with 2 * M5 x 8mm bolts and M5 washers: Spindle cable, Z-axis signal (labeled 3),Z DC motor (labeled 9), Z Limit switch cable (labeled 6) and the Emergency stop cable. Spindle Cable Z-Axis Signal Z DC motor...
- Page 8 Thread the emergency stop cable along the top bar through the 1/8” P-clips securing them onto the frame with M4 x 8mm bolts and M4 Washers. Emergency stop...
- Page 9 No. 4) Thread the following cables through 3 x 1/2” P-clips with 2 * M5 x 8mm bolts, M5 washers and 1 * M4 x 8mm bolt, M4 washer: Y-Axis Earth cable, X-axis signal (labeled 1),X DC motor (labeled 7), X Limit switch cable (labeled 4) and the Y Limit switch cable (labeled 5).
- Page 10 Thread the Y limit switch cable (Labeled 5) along the bottom bar through the 1/8” P-clips securing them onto the frame with M4 x 8mm bolts and M4 Washers. Y Limit switch...
- Page 11 Make sure you have the following: 4 * M5 x 8mm bolts 2 * M5 Washer 2 * M4 x 12mm bolts 2 * M4 Nylon locking nut 2 * 1/8” P-clip 1 * DC-Plate 36 1 * Limit Switch 1 * Emergency Stop...
- Page 12 Attach the Limit switch to the frame. Plug it into the cable. Secure the cable using a 1/8” P-clip, M5 x 8mm bolt and M5 washer.
- Page 13 Secure the emergency stop to DC-Plate 36 with 2 * M4 x 16mm bolts and M4 Nylon locking nuts as shown. Screw the forks into the normally open terminal in the emergency stop(labeled ‘NO’ 3 + 4).
- Page 14 Bolt the emergnecy stop plate onto the frame using 2 * M5 x 8mm bolts then secure the cable using a 1/8” P-clip and an M5 x 8mm bolt, M5 washer.
- Page 15 Make sure you have the following: 4 * M4 x 8mm bolts 8 * M4 x 10mm countersunk bolts 2 * DC-Plate 35 2 * 520mm long - 20 x 10 Drag chain Note: The drag chain has a static bracket and a rotatable bracket on either end.
- Page 16 Remove the 6 support plates (DC-Plate 15). Pull the Y-axis to the front of the machine.
- Page 17 Adjust the Y Limit switch.
- Page 18 Start with the right hand side of the machine. Bolt the static bracket onto the DC-Plate 15 closest to the back of the machine and thread the cables through the drag chain.
- Page 19 Secure the rotatable bracket onto DC-Plate 35 using 2 * M4 x 10mm countersunk bolts. Bolt DC-Plate 35 onto DC-Plate 16 using 2 * M4 x 8mm bolts.
- Page 20 Repeat the same process for the left hand side of the machine. Ensure that the static bracket is bolted to DC-Plate 15 closest to the back of the machine and the rotatable bracket is secured to DC-Plate...
- Page 21 Thread the cables as shown over DC-Plate 16 Using 2 * 8” cable ties for each side. Leave these cable ties loose.
- Page 22 Make sure you have the following: 16 * M4 x 8mm bolts 16 * M4 washers 7 * 1/2” P-clips 6 * 1/4” P-clips 2 * 1/8” P-clips...
- Page 23 Starting with the right side thread all the cables through the 1/2” P- clips and secure them to the upright arm using 7 * M4 x 8mm bolts, M4 washers.
- Page 24 With the left hand upright arm first thread the X-axis signal cable (labeled 1) and X DC motor cable (labeled 7) through the top slot. Connect the cables to the X axis motor as shown above. Note: Make sure the jumpers S1-S6 are set to the same value as above.
- Page 25 With the left hand upright arm bolt the earth cable to the bottom threaded hole as shown with an M4 x 8mm bolt and M4 washer. Thread the remaining cables up the armusing 1/4" P-clips and 6 * M4 x 8mm bolts, M4 washers.
- Page 26 Fasten the X limit switch into the upright arm and secure the cable using a 1/8” P-clip and M4 x 8mm bolt, M4 washer.
- Page 27 Make sure you have the following: 6 * M4 x 10mm countersunk bolt 1 * 880mm long – 15 x 10 Drag chain...
- Page 28 No.1) Secure the static drag chain bracket to DC-Plate 34 using 2 * M4 x 10mm countersunk bolts. No.2) There will be 2 slotted chain links in the drag chain, using 2 * M4 x 10mm countersunk bolts to securely fasten those links to DC- Plate 34.
- Page 29 Connect the cables to the Z axis motor as shown above. Note: Make sure the jumpers S1-S6 are set to the same value as above.
- Page 30 Make sure you have the following: 1 * 1/4” P-clip 3 * 1/8” P-clip 1 * M4 x 8mm bolt 1 * M4 washer 3 * M5 x 8mm bolt 3 * M5 washer...
- Page 31 No.1) Secure the Spindle cable using a 1/4" P-clip and an M5 x 8mm bolt, M5 washer. No.2) Thread the Z Limit switch cable (labeled 6) through the slot. Attach the Z Limit switch cable to DC-Plate 8 using 2 * 1/8” P-clips and 2 * M4 x 8mm bolts, M4 washers.
- Page 32 Take off DC-Plate 7 by removing the 9 bolts indicated with arrows.
- Page 33 Attach the Z-Axis Limit switch as shown.
- Page 34 Secure the Z Limit switch cable into the second from the top threaded hole using a 1/8” P-clip and M4 x 8mm bolt, M4 washer.
- Page 35 Join the switch together and ensure you have full travel along the Z- axis.
- Page 36 Fasten DC-Plate 7 back onto the machine.
- Page 37 Take up any slack on the Z-axis and thread back through the drag chain. Once all the cabling is secured tighten the 4 cable ties as shown above. Attach all the support DC-Plate 15’s back onto the machine.
- Page 38 Insert the cabling from the back of the machine into the 1.2 Meter conduit. Attach 2 cable tie mounts as shown above.
- Page 39 Make sure you have the following: 5 * 1/4" P-clip 5 * M4 x 8mm bolts 5 * M4 washers...
- Page 40 Secure the leftover cables using the 1/4” P-clips and M4 x 8mm bolts, M4 washers. Ensure that the loose cable is within the machine frame. Tie the bundles of cable together and secure onto the cable tie mounts.
- Page 41 Make sure you have the following: 1 * AMB Spindle 1 * Spindle lead 1 * 3 pin plug 1 * Earth cable 1 * M5 x 8mm bolt 1 * M5 washer 1 * M4 x 8mm bolt 1 * M4 washer 1 * 1/4"...
- Page 42 Unscrew the 3 pin plug. Secure the spindle into the spindle holder using an M8 allen key.
- Page 43 Strip back the spindle cable and twist together the ground lines. Wire into the plug as shown. Ensure the right cover is on.
- Page 44 Screw the plug back together. Cut down and trip back the spindle lead and wire it into the plug as shown above then screw the cover on.
- Page 45 Secure the spindle lead onto DC-Plate 8 with a 1/4" P-clip and M5 x 8mm bolt, M5 washer. Mount the earth cable to DC-Plate 8 using an M4 x 8mm bolt and M4 washer.
Need help?
Do you have a question about the D-500 and is the answer not in the manual?
Questions and answers