Advertisement
Assembly Instructions
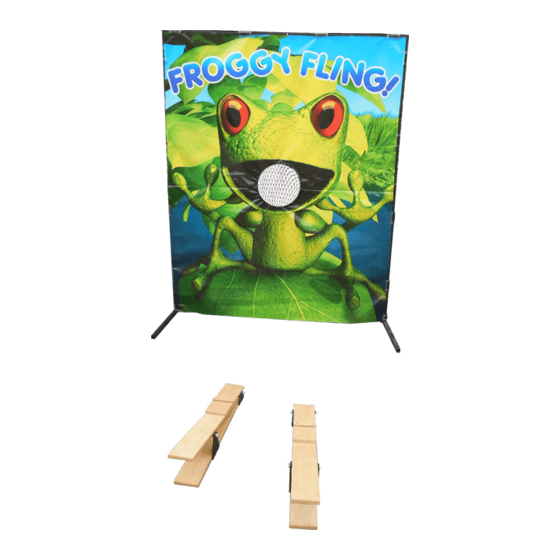
Froggy Fling Game
IMPORTANT
AS OWNER/OPERATOR IT IS YOUR RESPONSIBILITY TO WRITE AND CARRY OUT
YOUR OWN RISK ASSESSMENT BEFORE ATTEMPTING TO USE THIS PRODUCT
Included with your Froggy Fling Game:
The unit in its bag
Foot Fling
Rubber Frogs
2X
6X
Set up:
The unit is formed of: a metal frame, that will need to be assembled, and a printed sheet.
Version 1.1
14/12/16
Page 1 of 7
Advertisement
Table of Contents

Subscribe to Our Youtube Channel
Related Manuals for airquee Froggy Fling Game


Summary of Contents for airquee Froggy Fling Game
- Page 1 Froggy Fling Game IMPORTANT AS OWNER/OPERATOR IT IS YOUR RESPONSIBILITY TO WRITE AND CARRY OUT YOUR OWN RISK ASSESSMENT BEFORE ATTEMPTING TO USE THIS PRODUCT Included with your Froggy Fling Game: The unit in its bag Foot Fling Rubber Frogs Set up: The unit is formed of: a metal frame, that will need to be assembled, and a printed sheet.
- Page 2 This unit can be set up and packed away by one person, who has had proper manual handling training and uses the correct equipment to move the inflatable. Installing the metal frame: The first step is to unpack the pieces of the metal frame. You should start to piece them together from the bottom.
- Page 3 First you will need to join the two pieces together, as seen in fig.5, and then secure them with a bolt. (fig.6) Fig. 6 Fig. 5 If you followed these steps, you have half of your metal frame ready. – see fig.7: Fig.
- Page 4 The top part of the frame is thinner than the bottom one. It consists of two similar parts (fig. 9) that need to be joined together and fixed with a screw as seen on fig. 9 and fig. 10. Fig. 9 Fig.
- Page 5 1) The lower part of it ends in a small flat metal piece, that can be used to anchor or screw the unit to the ground. (fig.13). Fig. 13 2) The top part of it must be joined to the frame (fig. 14), and use the screws to fix them together (fig.
- Page 6 4) At the end your metal frame should look like this - fig.17. Fig. 17 Installing the banner: 1) The banner should be attached from the top toward the bottom, with the help of the Velcro flaps, as in fig. 18. You can either start from the two top ends and go toward the middle, or go from one end toward the other.
- Page 7 Fig.19c Disassembling the unit: The first step is to take off the sheet, fold it in half (fig.20a), and roll it up so it fits in its bag. (fig.20b) Fig. 20a Fig. 20b Start disassembling the metal frame from top to bottom. First by taking the bolts out, and taking off the metal pieces one by one, exactly in an opposite order of the assembling process.
Need help?
Do you have a question about the Froggy Fling Game and is the answer not in the manual?
Questions and answers