
Related Manuals for LiteGait Walkable


Summary of Contents for LiteGait Walkable
- Page 1 Operator & Service Manual LiteGait® / LiteGait® Jr. / LiteGait® LiteGait® is a Registered Trademark of Mobility Research, Inc.
- Page 3 Serial Number of Your Device: Note: Please keep your serial number in a safe and secure location. The serial number must be provided when seeking service for your LiteGait® device. The serial number provides us access to technical information regarding your device.
- Page 5 IMPORTANT SAFETY INSTRUCTIONS ***WARNING*** READ ALL INSTRUCTIONS BEFORE USING LiteGait® Maximum Height Maximum Patient Weight LiteGait® WalkAble™ 75 5’0” 75 lbs LiteGait® WalkAble™ 100 5’6” 100 lbs LiteGait® 100MX 5’6” 100 lbs LiteGait® 100MX w/I FreeDome 5’6” 100 lbs LiteGait®...
- Page 6 1-800-332-9255...
- Page 7 LiteGait® LiteGait® WalkAble 75 LiteGait® WalkAble 100 LiteGait® 100MX LiteGait® 100MX LiteGait® 100MX with Integrated FreeDome LiteGait® 200 MX LiteGait® 200MX www.LiteGait.com 1-800-332-9255...
- Page 9 If you have questions about the possible uses of LiteGait® with particular patients, or are in need of some ideas for ways to use LiteGait® more effectively, please do not hesitate to contact us for information relating to your individual situation. Our website also offers valuable information.
-
Page 11: Table Of Contents
Table of Contents Unpacking and Assembly ................... 12 Unit Diagram ...................... 17 About Your Unit ....................17 USING Your LiteGait® ..................18 I. Yoke Adjustment ................... 18 II. FlexAble ....................... 18 III. Raising and Lowering MX Yoke - MX Only ........... 18 IV. -
Page 12: Unpacking And Assembly
6.) Remove cardboard harness and accessories box. NOTE: Two people are required for safe assembly. NOTE: Your LiteGait® may look different than the following images, but assembly Steps are the same. NOTE: If you have any questions during installation, please contact Mobility Research Service &... - Page 13 16.) Using two people lift the post onto Feel free to call 1-800-332-9255 Extension 7104 for Mobility base. Research Service & Parts during assembly. NOTE: Your LiteGait® may look different than images above www.LiteGait.com 1-800-332-9255...
- Page 14 6.) Remove the base from the box and place on a level floor. NOTE: Two people are required for safe assembly. NOTE: Your LiteGait® may look different than the following images, but assembly Steps are the same. NOTE: If you have any questions during installation, please contact Mobility Research Service &...
- Page 15 Section intentionally left blank. 14.) Tighten knobs to secure yoke in position. Feel free to call 1-800-332-9255 Extension 7104 for Mobility Research Support during this assembly. Section intentionally left blank. NOTE: Your LiteGait® may look different than images above www.LiteGait.com 1-800-332-9255...
- Page 16 This page intentionally left blank. www.LiteGait.com 1-800-332-9255...
-
Page 17: Unit Diagram
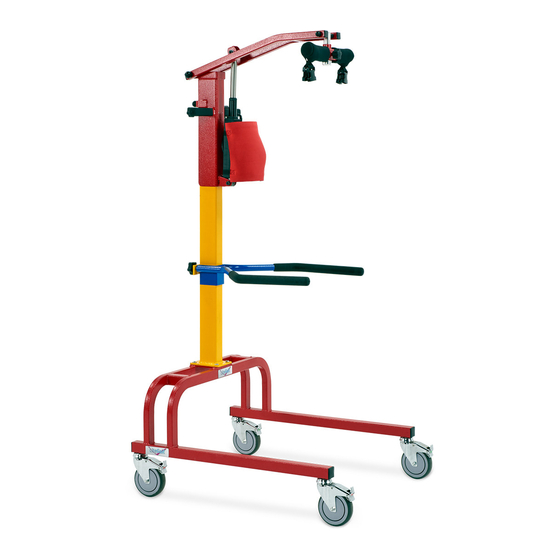
6. Directional Locking Casters 7. Post Assembly 8. Handle Bar Assembly 9. Actuator NOTE: Your LiteGait® may look different than image above CONTROL UNIT: Junction box mounted on the actuator About Your LiteGait® for the battery power, handheld switch and contains electrical safety protection circuitry. -
Page 18: Using Your Litegait
Tighten the knobs to secure the yoke once NOTE: Your LiteGait® may look different than images above in place. For the WalkAble 75, the yoke is secured by NOTE: THE LiteGait YOKE & HARNESS PROVIDE FULL tightening the lever knob on the front of the yoke. -
Page 19: Charging Mx Yoke - Mx Only
1. If the battery looks like this image, remove battery 4. Align tabs on the bottom of the battery pack with the pack from side of LiteGait® by lifting the locking tab and side mount to reattach battery. pulling off the battery. If your battery does not look like this, skip to the next page. - Page 20 Using Your LiteGait® LiteGait is equipped with a 24 volt battery pack that needs to Note: Leaving a charger connected to the LiteGait while dis- be charged at least once per week overnight. Follow instruc- connected to the wall outlet device decreases the battery life tions below if you battery looks like this image.
-
Page 21: Adjusting Handle Bars
WARNING: LiteGait® Handle Bars are designed to be used as press the tab and align the caster with the frame. Once a balance aid while using the LiteGait. Excess loading of the Aligned this locks the swivel of the casters and is handle bars may damage handle bars. - Page 22 Using Your LiteGait® This page intentionally left blank NOTE: Your LiteGait® may look different than images above www.LiteGait.com 1-800-332-9255...
- Page 23 Integrated FreeDome yoke , the BiSym also allows for measuring in the side stepping position. Side stepping measurement s are displayed as total weight only. DISPLAY UNITS Display the values of suppor t provided by the LiteGait ® in the Weight selected weight unit s or a percentage of the patients body weight.
- Page 24 Using Your LiteGait® SET USER WEIGHT Set user’s weight. Slide scale up or down to adjust scale . Weight default s at 150lbs / 69kg. SET GOAL (WEIGHT / PERCENTAGE) Enter goal value or If goal is to: percent ...
- Page 25 Using Your LiteGait® BiSym TABLET HOLDER Insert tablet Slide Holder 1 . I f a p p l i c a b l e , s e e 2.Inser t edge of tablet into 3.Inser t edge of tablet into...
-
Page 26: Harness Application
There are four buckles on the top and bottom of the harness wrap. The four top buckles extend beyond the harness from the top seam and attach to the LiteGait® overhead straps. The bottom four buckles attach to the groin piece and do not extend past the bottom seam of the harness. - Page 27 Using Your LiteGait® Harness Application - While Standing 1. Wrap harness around patient with lowest side straps even with GREATER TROCHANTER. 2. Connect buckles top to bottom. 3. Adjust side straps* to the patient from bottom to top, alternate sides and tighten evenly.
-
Page 28: Training With Litegait
Using Your LiteGait® Harness Application – In Supine 1. Roll patient away from you. 2. Attach groin piece and place harness on patient with half of the harness rolled and under patient. (Figure 1) Figure 1 3. Hold harness in place with lowest strap at greater trochanter 4. - Page 29 Leave a few inches of slack in the front straps. 3. Once the patient is connected, unlock casters. With one hand on LiteGait, press up button on hand switch to lift patient into a standing position. Roll LiteGait® forward slightly while lifting so patient ends up directly under the yoke buckles.
- Page 30 Stepping up onto Treadmill (Continued) 7. To exit the unit, reverse the process. Keep directional casters locked until the LiteGait® is at the end of the treadmill. It is helpful to ensure that the locking casters are nudged into an outward rolling position so they do not get caught on the treadmill as they roll.
-
Page 31: Unit Care And Maintenance
Unit Care and Maintenance LiteGait® Maintenance Your LiteGait® has been specially designed to be durable and relatively maintenance free. The frame is constructed from high strength steel, and has been painted with a special powder coat to resist rust and scratches. - Page 32 To maintain the highest quality of function and safety, it is extremely important that you conduct regular maintenance checks of your LiteGait® unit and all of its parts. Please refer to the following checklist for an inspection guideline. If you should have any questions concerning the functional status of any of the LiteGait® parts, please contact the Service &...
- Page 33 Unit Care and Maintenance www.LiteGait.com 1-800-332-9255...
-
Page 34: Troubleshooting
The Directional Locking Casters are labeled with a green STEER sticker and engage aligned when the caster is aligned with the leg of the base. If the LiteGait® does not move forward and backward when the directional locking casters are locked they are not aligned properly. - Page 35 On the left side of the scale there should be three cables, two that look like phone jack connectors and one that connects to the top of the LiteGait®. Confirm that the cables are securely attached to the BiSym display.
-
Page 36: Parts List
Parts List – Power System (LG100MX) POWER SYSTEM The electrical system that controls the positioning of the actuator. PS10X Actuator Cord Lifting Mechanism on LiteGait MX PS10X-A Battery 24V battery pack. PSMX4H13-B Control Box The electric junction box. - Page 37 Rectangular metal plate that covers battery PS10X-G Parts List – Power System (LG200MX) POWER SYSTEM The electrical system that controls the positioning of the actuator. PS20X Actuator Lifting Mechanism on LiteGait MX PS20X-A Battery 24V battery pack. PSMX4H23-B Control Box The electric junction box.
- Page 38 A digital read out scale that displays the amount of load reduction Digital BiSym Scale PBSD on the lower extremities. Digital BiSym Battery 12V Battery for Digital BiSym PBSD-B 12V DC adapter cord that plugs into a wall outlet and connects to Digital BiSym Charger PBSDB-C Digital BiSym Battery. www.LiteGait.com 1-800-332-9255...
-
Page 39: Resource Directory
Service & Parts Department ClinicalSupport@LiteGait.com Clinical Support Education@LiteGait.com Education Department Sales@LiteGait.com Sales Department Mobility Research P.O. Box 3141 Tempe, AZ 85280 United States LiteGait® is a Registered Trademark of Mobility Research, Inc. PO Box 3141, Tempe AZ, USA 85280. (2016) www.LiteGait.com 1-800-332-9255...
Need help?
Do you have a question about the Walkable and is the answer not in the manual?
Questions and answers