Advertisement
Advertisement
Table of Contents

Related Manuals for Feelworld F5 Pro V2


Summary of Contents for Feelworld F5 Pro V2
- Page 1 7″ Touchscreen Monitor F970 Install and Power Kit User Manual...
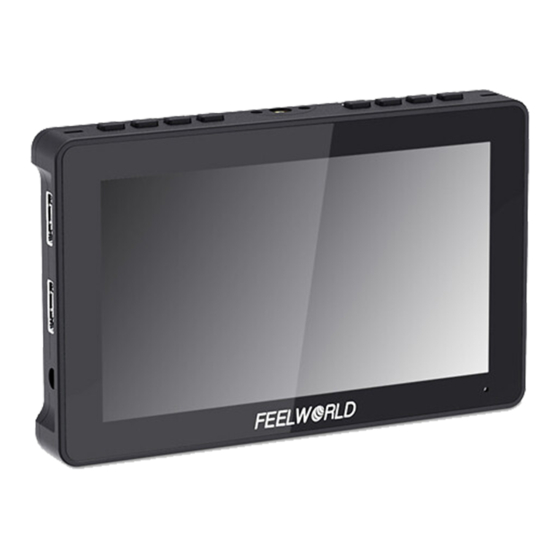
- Page 2 Product Overview Thank you for purchasing our Full HD color LCD monitor, This monitor has HDMI input and output, auxiliary power output, touch screen menu operation, support user 3D LUT upload, etc. It has small size, simple operation, portable convenience and wide application range.
- Page 3 ● Keep the product away from the heat source, and avoid the prolonged exposures to the sun as the LCD screen will be damaged. ● To avoid damaging the product, please do not take apart or repair the unit by yourself without the adjustable components in the unit.
-
Page 4: Table Of Contents
● Stereo Earphone output ● DC 8V power out to power your DSLR camera or mirrorless camera ● External sunshade, sunlight readable CONTENTS 1. Product Description ----------------------------------------- 4 1.1 Button Instruction --------------------------------------------- 5 1.2 Port Instruction (bottom) ------------------------------------ 5 1.3 Port Instruction (left) ----------------------------------------- 6 1.4 Power Supply Way ------------------------------------------- 7 1.5 Sony F970 Install and Power Kit ------------------------- 7 1.6 Mount Points--------------------------------------------------- 9... -
Page 5: Product Description
1. Product Description Front Panel Back Panel ... -
Page 6: Button Instruction
1.1 Button Instruction : Long press to turn on and off the power; short press to turn on and off the screen touch function. MENU: Long press to open the main menu and short press to open the shortcut menu. Rotate the wheel to select a menu item, press it again to open the corresponding menu function. -
Page 7: Port Instruction (Left)
1.3 Port Instruction (Left) HDMI IN: 4K HDMI signal input HDMI OUT: 4K HDMI signal output DC IN 12V: DC power input, polarity as the input power DC OUT 8V: DC power output interface, polarity as the output power Barrel output for powering your camera with a separately available DC coupler via adaptor (NP-FW50 Sony &... -
Page 8: Power Supply Way
1.4 Power Supply Way (1) The rear cover of the monitor is equipped with F970 battery plate, which is applicable to F970 series of batteries ● Sony F970 battery plate for battery of Sony DV: Sony F970 F960 F950 F930 F770 F750 F730 F570 F550 F530 series. - Page 9 Note: Before disassembling the kit, make sure that the monitor is turned off, and then remove the battery or power adapter. (1) Just move the kit: Loosen 2 screws, and then adjust up / down / left / right. (2) Steps to remove the kit: ①.
-
Page 10: Mount Points
④. Then gently lift the kit upwards and carefully disassemble the 2P power cord. ⑤. Then remove the 2 screws. (4) Install back to the kit: first screw the 2 screws back to the screw hole used to install the kit on the back of the monitor, install the 2P power cable to the cutout, then align the round hole of the kit with the screw, and then push the kit to the screw at the center of the kit cross, then tighten the screws. -
Page 11: Sunshade
1.7 Sunshade ① Sunshade ② Sunshade Frame ③ Fixed Frame ④ Sunshade Application... -
Page 12: Menu Operation Instruction
First lock the Sunshade Frame ②with the monitor tight ③. Open the sunshade ①, and match the sticker on the sunshade inside to the marked part of the sunshade frame ②, smooth and press 3 sides on the sunshade, and then complete the sunshade installation ④. - Page 13 corresponding function. Double-click the shortcut menu function and select the function setting with the "<" or ">" key. ③.On the left side of the screen (1/2 split screen), you can directly adjust the brightness of the screen backlight; on the right side of the screen (1/2 split screen), you can directly adjust the volume.
-
Page 14: Menu Function Instruction
shortcut menu will automatically exit after about 5 seconds without operation. 3. Menu Function Instruction OFF, ON All Waves OFF, RGB, YUV, Y Parade OFF, ON Vector OFF, ON Histogram OFF, ON Focus Assist The focus level and focus color items are displayed after the focus assist is turned on. - Page 15 Nine Grid OFF, ON OFF, 70%, 80%, 90%, 16:9, 16:10, 4:3, 5:4, 1:1, Safety Marker 1.91:1.1, 4:5, 9:16, 1.85:1, 2.35:1 Center Marker OFF, ON OFF, 16:9, 16:10, 4:3, 1.85:1, 2.35:1, 2.41:1, 1.9:1, 5:4, 1:1.9 Marker Mat The Marker Mat Alpha item is displayed after the Marker Mat is turned on.
- Page 16 Freeze OFF, ON Pixel to Pixel OFF, ON Return Back to the previous OSD menu OFF, HLG 2020, HLG 709, HLG P3 OFF, ON Lut Switch The Lut item is displayed after the Lut Switch is turned on. SLOG2, SLOG3, LOGC, VLOG After copying the 3D LUT file to the SD card and inserting it into the SD card slot, you can click the Lut Import (SD)
- Page 17 Backlight, Volume After selecting the wheel option, you can click the “<” or “>” button in the wheel option, or rotate the Wheel wheel to select one of the shortcut keys to set it to the rotary wheel adjustment (when the menu is not displayed).
-
Page 18: Technical Parameters
4. Technical Parameters 5.5” touch screen Panel Size 1920 × 1080 pixels Resolution 0.07875 (H) x 0.07875 (W) (mm) Dot Pitch 16:10 Aspect Ratio 500cd/m Brightness 1200:1 Contrast 80°/80°(L/R) 80°/80°(U/D) Viewing Angle Backlight Adjustable Backlight Input HDMI Output HDMI, 3.5mm stereo headphone jack DC IN 12V, Barrel (5.5mm outer, 2.1mm inner), Power In DC IN 5V (Type-C) -
Page 19: Trouble Shooting
5. Trouble Shooting Only black and white or monochrome picture ① please check saturation, brightness & contrast adjustment. ② Please check "Monochrome" is in black, white or monochrome image or other condition. NO Image after put on the power ① Check if signal cable connecting is in good condition. ②...
Need help?
Do you have a question about the F5 Pro V2 and is the answer not in the manual?
Questions and answers