Advertisement
Advertisement
Table of Contents

Subscribe to Our Youtube Channel
Related Manuals for Feelworld FW279S


Summary of Contents for Feelworld FW279S
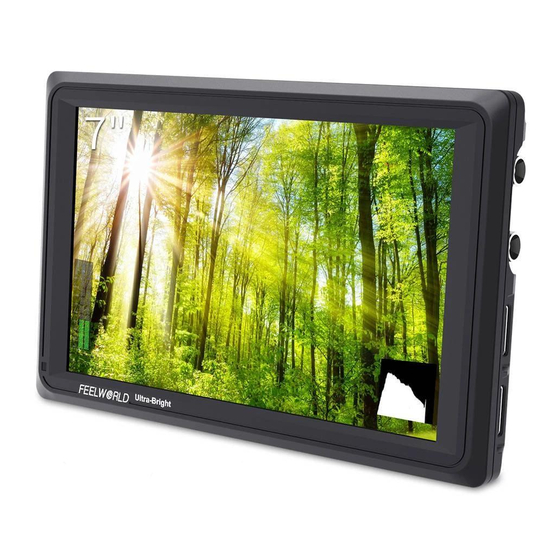
- Page 1 7″ 3D LUT Touchscreen Monitor 2200nits Daylight Viewable User Manual...
- Page 2 Product Overview Thank you for using our 7 inch ultra bright touch screen monitor. This monitor has SDI (optional), HDMI input and output, auxiliary power output, touch screen menu operation, HDR monitoring and support user 3D LUT upload and other features. Advanced features include Parade, Vector, Histogram, Audio Meter, Focus Assist, False Color, Zebra Exposure, Pixel to Pixel, Center Marker, Safety Marker, Marker Mat, Monochrome, Image Freeze, Zoom,...
- Page 3 5. No adjustable components are in the monitor. Please do not take apart or repair the unit by yourself, to avoid the damage of the product. Features ● Touch screen menu operation ● Support HDR monitoring ● Support 3D LUT Log to REC.709 and user 3D LUT upload ●...
-
Page 4: Table Of Contents
CONTENTS 1. Product Description ----------------------------------------- 4 1.1 Button Instruction --------------------------------------------- 4 1.2 Port Instruction ------------------------------------------------ 5 1.3 Power Supply Way ------------------------------------------- 6 1.4 Mount Points --------------------------------------------------- 7 2. Menu Operation Instruction ------------------------------- 8 3. Menu Function Instruction -------------------------------- 10 4. Support Formats --------------------------------------------- 14 5. -
Page 5: Product Description
1. Product Description 1.1 Button Instruction ①. Indicator Light: After connecting the power, the indicator light is on (red). Long Press button to turn on the monitor, it turns yellow. After the signal is connected, it turns green. ②. MENU: See details: 3.1 MENU Wheel Menu Operation in 3. Menu Operation Instruction ③. -
Page 6: Port Instruction
④. F1 ~ F3: Custom function buttons 1.2 Port Instruction ①. Dual F970 Battery Plates ⑥. DC 12V Power Input ②. Power / Touch Function Button ⑦. DC OUT 8.4V Power Output Long press to turn on / off; short press to Connect the optional dummy battery turn on / off the screen touch function. -
Page 7: Power Supply Way
1.3 Power Supply Way (1) The rear cover of the monitor is equipped with dual F970 battery plate, which is applicable to F970 series of batteries. Sony F970 battery plate for battery of Sony DV: Sony F970 F960 F950 F930 F770 F750 F730 F570 F550 F530 series Remark: It is recommended to use standard original F970 batteries. -
Page 8: Mount Points
1.4 Mount Points There are (3) ¼-20 thread points (bottom, right & left) can be easily connected to the hot shoe mount, tripod fixed installation. Tilt Arm Mounting The monitor secures to your camera using the included Tilt Arm via shoe mount or 1/4"-20 thread. -
Page 9: Menu Operation Instruction
2. Menu Operation Instruction After the monitor is properly connected to the power supply, the indicator light is on (red). Long press button to turn on the monitor, the indicator light turns yellow. After the signal is connected, the indicator light turns green. After startup, short press to select to turn the screen touch function on or off. - Page 10 Figure: 2.2 MENU Wheel Menu Operation ①.When the menu is not displayed, directly rotate the wheel to backlight or brightness adjustment. The wheel option can be set to backlight or brightness in the menu ②. Long press the MENU wheel to open the main menu (on the left side of the screen).
-
Page 11: Menu Function Instruction
3. Menu Function Instruction OFF, ON After the Focus Assist is turned on, the Focus Level (1~10) Focus Assist and Focus Color (yellow, red, green, blue, white) can be adjusted. OFF, ON Zebra After the Zebra is turned on, the Zebra Value (1%~100%) can be adjusted. - Page 12 Scan Mode Under Scan, Over Scan auto, 16:9, 16:10, 4:3, 5:4, 1.85:1, 2.35:1, stretch, user Video Aspect Under the “user”, you can customize the Video Width (100% ~ 200%), Video Height (100% ~ 200%) Anamorphic Mode OFF, 1.25x, 1.33x, 1.5x, 2.0x, 2.0x mag OFF, ON Auto Mirror After turning on, the image will automatically adjust upside...
- Page 13 OFF, ON Lut Switch After the LUT Switch is turned on, you can use the Lut (SLOG2, SLOG3, LOGC, VLOG). OFF, ON (With SDI interface version) Lut Out Under the SDI signal, you can choose whether to loop out the LUT after the LUT function is turned on, and the default is off.
- Page 14 Backlight, Volume, Zoom Times After selecting the wheel option, you can click the “<” or “>” Wheel button in the wheel option, or rotate the wheel to select one of the shortcut keys to set it to the rotary wheel adjustment (when the menu is not displayed).
-
Page 15: Support Formats
Exit the menu 4. Support Formats 720p (60/59.94/50/30/29.97/25/24/23.98) 1080i (60/59.94/50) SDI Input 1080p (60/59.94/50/30/29.97/25/24/23.98) Support Format 2048x1080i (60/59.94/50) (SDI version) 2048x1080p (60/59.94/50/30/29.97/25/24/23.98) 720p (60/59.94/50/30/29.97/25/24/23.98) SDI Output 1080i (60/59.94/50) Support Format 1080p (60/59.94/50/30/29.97/25/24/23.98) (SDI version) 480i/480p/576i/576p 720p (60/59.94/50/30/29.97/25/24/23.98) HDMI Input/ 1080i (60/59.94/50) Output Support 1080p (60/59.94/50/30/29.97/25/24/23.98) Format... -
Page 16: Trouble Shooting
Backlight Input SDI (Optional), HDMI Output SDI (Optional), HDMI, DC OUT 8.4V 3.5mm Stereo Headphone Audio Power Input Voltage 7~24V Power Consumption ≦18W Unit Size 190Lx126Hx27D (mm) Unit Weight 460g (3) ¼-20 thread points (left, right, bottom) Mount Points Working Temperature -20℃~50℃ Storage Temperature -30℃~60℃... - Page 17 ■ If there are still other problems, please contact with our related technologists. ★ As we are improving product features and product performance, so if there is any change on the specification without prior notice.
Need help?
Do you have a question about the FW279S and is the answer not in the manual?
Questions and answers