SR Research EyeLink Portable Duo User Manual
Hide thumbs
Also See for EyeLink Portable Duo:
- Quick start manual (2 pages) ,
- Quick start manual (2 pages) ,
- Quick start manual (2 pages)

Related Manuals for SR Research EyeLink Portable Duo


Summary of Contents for SR Research EyeLink Portable Duo
- Page 1 EyeLink Portable Duo User Manual ® Version 1.0.2 Copyright ©2016-2017, SR Research Ltd. EyeLink is a registered trademark of SR Research Ltd., Mississauga, Ontario, Canada...
- Page 2 Intertek, an independent testing agency. SAFETY WARNINGS WARNING: Do not open or modify the EyeLink Portable Duo eye tracker in any way. This may render the unit unsafe, resulting in shock or burn hazards, and will void the warranty and safety certifications.
- Page 3 Host PC or disconnect both plugs of the USB cable of the eye tracker (see Chapters 5 and 6). • Do not cover or place any items on top of the EyeLink Portable Duo while the Host PC is powered on, unless the eye tracker cable is disconnected from both USB ports.
- Page 4 CONTACT ADDRESS SR Research Ltd 35 Beaufort Drive Ottawa, Ontario, K2L 2B9 Canada Fax: (613) 482-4866 Phone: (613) 271-8686 Toll Free: 1-866-821-0731 (North America only) Email: support@sr-research.com Sales: http://www.sr-research.com Support: http://www.sr-support.com © 2016-2017 SR Research Ltd.
-
Page 5: Table Of Contents
Validation Screen ..................30 2.4.4 Drift Check/Drift Correct Screen ..............32 2.4.5 Record Screen ....................34 An EyeLink Portable Duo Tutorial: Running an Experiment ....... 39 The Setup Screen ................40 Participant Setup ................41 3.2.1 Participant Setup in Head-Stabilized Mode ..........41 3.2.2... - Page 6 Recording EDF Files ................72 4.2.1 Recording from the EyeLink Portable Duo Host PC ........72 4.2.2 Recording from the EyeLink API or SR Research Experiment Builder ..72 The EyeLink On-Line Parser ..............72 4.3.1 Parser Operation ................... 72 4.3.2...
- Page 7 Suitable Electromagnetic Environments ............. 108 6.4.2 Sources of Interference and Degraded Performance ......... 109 6.4.3 Preserving Electromagnetic Compatibility ........... 109 6.4.4 Other Electromagnetic Compatibility Statements ........110 Limited Hardware Warranty .............. 110 Limited Software Warranty ..............111 © 2016-2017 SR Research Ltd.
- Page 8 Copyrights / Trademarks ..............112 viii © 2016-2017 SR Research Ltd.
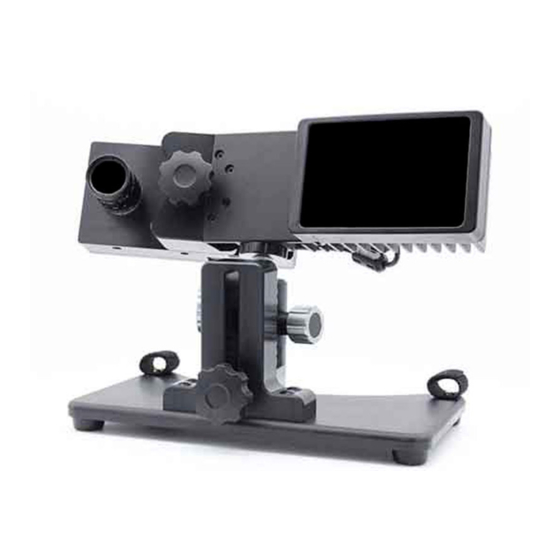
- Page 9 List of Figures Figure 1-1: EyeLink Portable Duo Eye Tracker, Showing Internal Camera Lens and Illuminator ..................2 Figure 1-2. Example Use Scenarios (Left: Eye Tracker Mounted on Top of a Tripod; Right: Eye Tracker Installed on a Laptop Mount) ......3 Figure 2-1: File Manager Screen ..............
- Page 10 List of Tables Table 1: EyeLink Portable Duo Configuration Files ......... 17 Table 2: Cleaning and Disinfecting Rules ............102 Table 3: Approved Cleaning and Disinfecting Methods, Ordered by Risk ..103 © 2016-2017 SR Research Ltd.
-
Page 11: Introduction
(especially the sensor) cool while radiating sufficient heat to keep its temperature within safety requirements. The compact design of the eye tracking unit makes the EyeLink Portable Duo easier to transport and simpler to set up compared to other models of EyeLink eye trackers. -
Page 12: Eyelink Portable Duo System Configuration
A typical EyeLink Portable Duo setup consists of two computers – one, which is called the Host PC, connects to the eye tracker and is dedicated to data collection. The second computer is referred to as the Display PC, and is generally used for the presentation of stimuli to a participant. -
Page 13: Host Pc
Since the EyeLink Portable Duo’s eye tracking unit is near the stimulus display, no electronics need to be near the participant’s head. The eye tracker can operate in either a head-stabilized mode (any head support can be used) or in a head free-to-move Remote mode. -
Page 14: Display Pc
[COM] interface) have freely-available wrappers for this API, which allow you to interface with the EyeLink system from these programming environments. For full details and links to downloadable resources, visit and join the SR Research support forums at http://www.sr-support.com. Introduction... -
Page 15: Supporting Documents
EyeLink Portable Duo Installation Guide – Describes a standard EyeLink • Portable Duo system layout as well as the steps required to install the EyeLink Portable Duo hardware and software on both the Host and Display PCs. EyeLink Programmer’s Guide – Provides suggestions on how to program •... - Page 16 NOTE: Please be sure to check http://www.sr-support.com for the latest product and documentation updates. Introduction © 2016-2017 SR Research Ltd.
-
Page 17: System Specifications
Time from physical event until first registered sample is available via Ethernet or Analog output. Optional data filter algorithm adds one sample delay for each filtering level. Measured with an artificial eye. Measured with real subject fixations. Introduction © 2016-2017 SR Research Ltd. -
Page 18: Physical Specifications
IEC 60601-1 ed. 3., AAMI ES60601-1, CSA C22.2#60601-1 ed. 3.1, IEC 62366 ed. 1, ISO 15004-1, ed. 1, ISO 15004-2, IEC 62471 ed. 1, ISO 14971. ed. 2, IEC 60601-1-6 ed. 3.0, IEC 60601-1-2, ed. 4 Introduction © 2016-2017 SR Research Ltd. -
Page 19: Eyelink Portable Duo Host Software
The Web UI consists of a File Manager and a Configuration Tool. 2.1.1 File Manager The EyeLink Portable Duo Host Application runs on QNX, a Unix-like real-time operating system, allowing the eye tracker to minimize delays in data acquisition and transmission and to provide very low data access variability. -
Page 20: Figure 2-1: File Manager Screen
From left to right, the buttons on the toolbar are: Tracker Clicking on this icon will start the EyeLink Portable Duo Host application if the camera is attached to the USB 3.0 ports on the Host PC. - Page 21 Clicking on this button performs an orderly system shutdown of the Host PC by closing all processes running and powering off the computer. Help This brings up the help document. EyeLink Portable Duo Host Software © 2016-2017 SR Research Ltd.
- Page 22 Folder view – this shows a list of folders and files contained in the currently selected folder in the Tree View panel. The full path of the current EyeLink Portable Duo Host Software © 2016-2017 SR Research Ltd.
- Page 23 Preview panel at the bottom of the File Manager. The “Preview/Edit Panel” button on the toolbar toggles on/off the visibility of this panel. The Preview/Edit panel can be expanded to full screen by clicking EyeLink Portable Duo Host Software © 2016-2017 SR Research Ltd.
-
Page 24: Configuration Tool
Tracker Clicking on this icon will start the Host application if the EyeLink Portable Duo camera connected to the USB 3.0 ports on the Host PC. File Manager Switches to the File Manager interface for accessing files on the Host PC. -
Page 25: Tracker Initialization Files
(*.INI files) or by sending commands from the Display PC via the Ethernet link. The configuration files are loaded by the EyeLink Portable Duo eye tracker from the directory that contains the tracker program (\ELCL\EXE). - Page 26 If you plan to make changes to the screen settings, please follow the instructions provided in the above “Configuration” tool (or section 5.4 “Customizing Screen Settings” of the EyeLink Portable Duo Installation Guide). If you plan to change the default settings for other non-screen related settings, please copy and paste the target commands from the relevant .INI file to the...
-
Page 27: Running The Web Ui On The Display Pc
Host PC. Now turn on the Host PC. The EyeLink Host application will start automatically. You will first see an EyeLink Portable Duo splash screen, followed by the Setup view of the Host Application. Please make sure you are using the latest version of the Host Application. -
Page 28: Modes Of Operation
Ethernet link. The degree of Display PC control is dependent only on the display application itself. With appropriate programming, it is possible to have full control of the tracker via the Display PC. SR Research Experiment Builder software and various other programming interfaces have been designed to facilitate interacting with the Host PC. -
Page 29: Eyelink Portable Duo Host Application Navigation
Host PC mouse, keyboard shortcuts, or from the Display PC application via link commands. Figure 2-2: EyeLink Portable Duo Host PC Application Overview Each of the modes shown in Figure 2-2 has a special purpose. Where possible, each screen has a distinctive appearance. -
Page 30: Setup Screen
(CR) detection thresholds. The eye to be tracked, tracking mode, calibration settings, illumination level, and some other advanced tracker settings can be configured from the Setup screen. EyeLink Portable Duo Host Software © 2016-2017 SR Research Ltd. - Page 31 If set to “Automatic”, the calibration and validation procedure automatically samples a target fixation once the eye settles and moves on to the next target. EyeLink Portable Duo Host Software © 2016-2017 SR Research Ltd.
- Page 32 If only one eye is being tracked, the thumbnail image box of the other eye will be grayed out. EyeLink Portable Duo Host Software © 2016-2017 SR Research Ltd.
- Page 33 Select to present the camera image on the Display PC monitor. This button will only be available when a display program is running on Display PC to control the eye tracker. Keyboard Shortcut: ENTER = toggle sending images over link EyeLink Portable Duo Host Software © 2016-2017 SR Research Ltd.
- Page 34 Correction” is toggled on, a true drift correction will be performed; otherwise, the tracker just reports the error without correcting for it. The EyeLink Portable Duo eye tracker is generally drift-free so we recommend users keep the default setting (with the option turned off).
- Page 35 Click to open a data file for data recording and closes any open file. Close File Close the currently open EDF file Add Message Add a message to the EDF file EyeLink Portable Duo Host Software © 2016-2017 SR Research Ltd.
- Page 36 Toggle crosshair display. Toggle threshold coloring display. Change illuminator power. CTRL + E Toggle Auto Exposure on or off. Adjust bias value of Auto Exposure. CTRL and ⇑, or ⇓ EyeLink Portable Duo Host Software © 2016-2017 SR Research Ltd.
-
Page 37: Calibration Screen
The panels on the left show the view of the target sticker (in the Remote mode only), and the map view of the eyes and target sticker in the global camera image. Camera adjustment is EyeLink Portable Duo Host Software © 2016-2017 SR Research Ltd. - Page 38 Click to automate the calibration sequencing. Keyboard Shortcut: A = Auto Trigger Click to repeat the last calibration target or last few targets. Keyboard Shortcut: Backspace = Undo last few targets EyeLink Portable Duo Host Software © 2016-2017 SR Research Ltd.
- Page 39 (Auto trigger ON). EyeLink accepts current fixation if it is stable Backspace Repeat previous calibration targets After Calibration ENTER Accept calibration values Validate calibration values Discard calibration values Backspace Repeat last calibration target EyeLink Portable Duo Host Software © 2016-2017 SR Research Ltd.
-
Page 40: Validation Screen
If you continue to press backspace you will go further back in the calibration routine to repeat even older points. If you are not satisfied with the calibration results you may choose EyeLink Portable Duo Host Software © 2016-2017 SR Research Ltd. - Page 41 ALT + F7 Take a screenshot. Increase pupil threshold. Page Up and ⇑ Decrease pupil threshold. Page Down and ⇓ + and - Set corneal reflection threshold. EyeLink Portable Duo Host Software © 2016-2017 SR Research Ltd.
-
Page 42: Drift Check/Drift Correct Screen
Backspace Repeat previous validation target(s) After Validation ENTER Accept validation values Discard the current validation and switch to setup screen DELETE Restart validation 2.4.4 Drift Check/Drift Correct Screen EyeLink Portable Duo Host Software © 2016-2017 SR Research Ltd. -
Page 43: Figure 2-6: Example Drift Check/Drift Correct Screen
Therefore the procedure is better viewed as a “Drift Checking” procedure in the EyeLink Portable Duo, though a true drift correction can be easily enabled (by toggling on the “Apply Correction”... -
Page 44: Record Screen
View is only useful when the EyeLink system’s built-in calibration routines have been used for gaze position calculation. The Plot View displays the x and y data traces as a function of time. EyeLink Portable Duo Host Software © 2016-2017 SR Research Ltd. -
Page 45: Figure 2-7: Example Record Screen (Gaze Cursor View)
Figure 2-7: Example Record Screen (Gaze Cursor View) EyeLink Portable Duo Host Software © 2016-2017 SR Research Ltd. -
Page 46: Figure 2-8: Example Record Screen (Plot View)
The user can change the scale of the plotting by clicking on the “Zoom In” or “Zoom Out” button so that fine details or global EyeLink Portable Duo Host Software © 2016-2017 SR Research Ltd. - Page 47 ALT + F7 Take a screenshot. Increase pupil threshold. Page Up and ⇑ Decrease pupil threshold. Page Down and ⇓ EyeLink Portable Duo Host Software © 2016-2017 SR Research Ltd.
- Page 48 Change to default view and speed Add a rewinding marker Rewind to marker or start HOME Clear all data Zoom out/in SHIFT ⇐ and ⇒ Scroll up/down SHIFT ⇑ or ⇓ EyeLink Portable Duo Host Software © 2016-2017 SR Research Ltd.
-
Page 49: An Eyelink Portable Duo Tutorial: Running An Experiment
3 An EyeLink Portable Duo Tutorial: Running an Experiment The following tutorial will allow you to test the EyeLink Portable Duo system, assuming that you have already arranged a proper layout of the eye tracker equipment and configured Screen Settings for your setup (see Section 1.1 “Suggested Equipment Layout”... -
Page 50: The Setup Screen
Display PC-based control are 1) that it allows the experimenter to work near the participant and 2) that it allows you to perform self-setup. We will perform most of the EyeLink Portable Duo setup by using the Host PC keyboard. 3.1 The Setup Screen The first step in an eye-tracking session is to set up the participant and eye tracker. -
Page 51: Participant Setup
3.2.2 “Participant Setup in Remote Head-Free-to-Move Mode” 3.2.1 Participant Setup in Head-Stabilized Mode The EyeLink Portable Duo eye tracker can be configured to track eye movements at 250, 500, 10000, or 2000 Hz monocularly or binocularly. The eye tracker can be mounted either on a tripod or a Laptop Mount. Instructions vary slightly depending on which mount you are using. - Page 52 If you have the eye tracker mounted on a tripod (see section “3.1 Mounting the Eye Tracker on the Tripod” of the EyeLink Portable Duo Installation Guide for mounting instructions), please take the following steps to set up the eye tracker.
- Page 53 Please measure the screen dimensions and viewing distance and update screen settings for the tracker (see section 5.4 of the EyeLink Portable Duo Installation Guide). 3) The eye tracker should be placed at a distance of about 45 cm if measuring from the front of the unit to the participant's eyes.
-
Page 54: Figure 3-2: Camera Setup With Participants Wearing Glasses
Use the index finger to push the wheel left or right slightly, until the best focus is achieved. Do not over-adjust An EyeLink Portable Duo Tutorial: Running an Experiment © 2016-2017 SR Research Ltd. -
Page 55: Participant Setup In Remote Head-Free-To-Move Mode
Now proceed to section 3.3 “Setting Pupil Thresholds”. 3.2.2 Participant Setup in Remote Head-Free-to-Move Mode The Remote Mode of the EyeLink Portable Duo eye tracker is designed for applications where a chin rest or head mount is not desirable or perhaps not even possible (e.g., patient work, gerontology, studies on young children, etc.). -
Page 56: Figure 3-4: Setup Screen In The Remote Mode
(the maximum viewing angle of the display should be within 32° horizontally and 25° vertically). In such cases, measure the shortest distance (in millimeters) from the back of the An EyeLink Portable Duo Tutorial: Running an Experiment © 2016-2017 SR Research Ltd. - Page 57 Display monitor and update all sections of the “Screen Settings” configuration tool (“Camera-to-Screen Distance” section in particular; see section 5.4 of the EyeLink Portable Duo Installation Guide). This step is very important for the head movement compensation when recording the eye position data in the Remote Mode.
- Page 58 (for the “Camera-to-Screen Distance” setting), and update all sections of the “Screen Settings” configuration tool (see section 5.4 of the EyeLink Portable Duo Installation Guide). Start the Host PC application, click the “Operating Mode” panel and choose “Remote Mode”...
-
Page 59: Figure 3-5: Eyelink Remote Target Placement
Look closely at the eye image on the zoomed view while adjusting the focusing wheel until the eye An EyeLink Portable Duo Tutorial: Running an Experiment © 2016-2017 SR Research Ltd. -
Page 60: Figure 3-6: Pupil And Cr Thresholds And Bias Values
UP and DOWN keys. Raising the bias increases pupil coverage (i.e., increasing the blue area) while lowering the bias decreases the pupil coverage (i.e., decreasing the blue area). Pressing the AUTO button resets the pupil threshold bias. An EyeLink Portable Duo Tutorial: Running an Experiment © 2016-2017 SR Research Ltd. - Page 61 “CR MISSING” on the Host PC. The EyeLink Portable Duo Host software also implements exposure control, which is used to adjust the brightness of the camera image when the eye-to- camera distance changes and to improve the dynamic range of the camera.
-
Page 62: Setting Pupil Thresholds
The pupil threshold should be checked by closely examining the blue area in the zoomed camera image. Figure 3-7 shows the symptoms to look for. If the An EyeLink Portable Duo Tutorial: Running an Experiment © 2016-2017 SR Research Ltd. -
Page 63: Figure 3-7: Symptoms Of Poor Pupil Threshold
Figure 3-8), the crosshair will disappear and the pupil will be lost. On the Host PC, a “Pupil Missing” error will appear in the zoomed eye image. An EyeLink Portable Duo Tutorial: Running an Experiment © 2016-2017 SR Research Ltd. -
Page 64: Setting The Corneal Reflection (Cr) Threshold
3.4 Setting the Corneal Reflection (CR) Threshold EyeLink Portable Duo uses the pupil-CR tracking mode, regardless whether you plan to use head support or not. The corneal reflection, if present, is identified by a circular shape in turquoise. -
Page 65: Search Limits
3.5 Search Limits The EyeLink Portable Duo eye tracker provides a “Use Search Limits” option. If enabled, it draws a red ellipse in the global view of the camera image to reduce the area of the camera image that is searched to locate the pupil position. If the “Use Search Limits”... -
Page 66: Calibration
3.7 Calibration The preceding steps set up the EyeLink Portable Duo eye tracker to track the position of the selected eye(s). Almost all eye-movement research requires information on the participant's point of gaze on a display of visual information, such as a screen of text. - Page 67 However, it is important to remind the participant to look at each calibration target until the next target appears. An EyeLink Portable Duo Tutorial: Running an Experiment © 2016-2017 SR Research Ltd.
-
Page 68: Figure 3-10: Calibration Grid
This is especially helpful for those participants whose calibration data is hard to get. An EyeLink Portable Duo Tutorial: Running an Experiment © 2016-2017 SR Research Ltd. - Page 69 It could also be that there is a problem with camera setup. Please adjust as needed. Indicator Status of Corneal Reflection MISSING Corneal Reflection is missing BOUNDS Corneal Reflection is missing or the gaze data is not valid An EyeLink Portable Duo Tutorial: Running an Experiment © 2016-2017 SR Research Ltd.
-
Page 70: Validation
1° or greater. Poor eye/camera setup can cause a highly distorted calibration pattern thus magnifying small errors. Some participants may show substantial drifts in gaze position during fixations or may not fixate carefully, adding to the errors. An EyeLink Portable Duo Tutorial: Running an Experiment © 2016-2017 SR Research Ltd. -
Page 71: Improving Calibration Quality
• Always ask the participant to look at the four corners of the display after performing the camera setup. Be sure to instruct the participant to fixate An EyeLink Portable Duo Tutorial: Running an Experiment © 2016-2017 SR Research Ltd. - Page 72 An EyeLink Portable Duo Tutorial: Running an Experiment © 2016-2017 SR Research Ltd.
-
Page 73: Recording Gaze Position
Therefore, the default drift correction behavior of the EyeLink Portable Duo system is to only report the calculated fixation error from the drift correction procedure and to not actually adjust the calibration map in any way. -
Page 74: Enabling Drift Correction
FINAL.INI or sent across the link. The default setting in the behavioral laboratory setting is to turn ON the disabling of the drift correction when the CR is being used on the EyeLink Portable Duo. We are turning this disabling OFF so that the drift correction adjustment will take place. - Page 75 The drift correction can also be executed when an assigned key is pressed. To do this the following command defines the F9 key to be used to trigger the drift correction action. key_function F9 “online_dcorr_trigger” An EyeLink Portable Duo Tutorial: Running an Experiment © 2016-2017 SR Research Ltd.
-
Page 76: Exiting The Host Application
3.13 EyeLink Portable Duo Setup Summary It is suggested that you try the procedures in this section until you feel comfortable with the EyeLink Portable Duo setup, and can reliably get good calibrations. This is a summary of the steps detailed in the practice session. It assumes no setup problems are encountered. -
Page 77: Experiment Practice
EyeLink eye tracker system can be used and programmed. On Windows, each sample experiment can be launched from the “Start -> All Programs -> SR Research -> EyeLink Examples -> C Examples -> GDI Graphics (or SDL Graphics)” menu item. - Page 78 This illustrates how real-time data analysis might be performed, by reproducing the display (based on the TRIALID messages) and displaying a gaze An EyeLink Portable Duo Tutorial: Running an Experiment © 2016-2017 SR Research Ltd.
- Page 79 7, or "Documents\ExperimentBuilder Examples" on Mac OS X). Each of these experiment templates illustrates a typical experimental paradigm. The following table provides a brief description of the experiments. See the SR Research Experiment Builder User Manual for a detailed description of each template's operations.
- Page 80 Video Illustrates creating an experiment displaying video clips using XVD codec. An EyeLink Portable Duo Tutorial: Running an Experiment © 2016-2017 SR Research Ltd.
-
Page 81: Data Files
It adapts to monocular and binocular recording, with compatibility support for future enhancements. The EyeLink Portable Duo EDF file format is backwards- compatible with the earlier EyeLink I, II, 1000, and 1000 Plus EDF file format. -
Page 82: Recording Edf Files
4.2 Recording EDF Files EDF files are created by the EyeLink Portable Duo tracker, recording eye- position data, events from the on-line parser, and button and input events. -
Page 83: Parser Limitations
This section explains the function of, and suggests values for, the most useful parser parameters. Data Files © 2016-2017 SR Research Ltd. -
Page 84: Parser Data Type
EyeLink eye tracker system may be larger than those reported for analog eye trackers. These systems use multi-pole filters for noise reduction that add delay and smooth the data, significantly reducing the measured acceleration. Data Files © 2016-2017 SR Research Ltd. -
Page 85: Pursuit Thresholds
Data is aggregated over a preset period, which lowers data noise. The interval between updates and the data accumulation period can both be set. Data Files © 2016-2017 SR Research Ltd. -
Page 86: Other Parameters
0.6°. The psychophysical configuration is useful for neurological and smooth-pursuit research, and reports very small saccades. It also better estimates saccade durations and average velocities. Cognitive Configuration: recording_parse_type = GAZE Data Files © 2016-2017 SR Research Ltd. -
Page 87: File Data Types
Time of the sample (timestamp) in milliseconds • Eye position data in gaze, HREF, or RAW data, monocular or binocular • Pupil size, monocular or binocular • Button or input port state bits • Data Files © 2016-2017 SR Research Ltd. -
Page 88: Position Data
However, they may be more accurate for neuro-psychophysical research, as they reflect real eye movement velocities and amplitudes. The (x, y) coordinate pairs in HREF data reflect the line of sight in the geometric model below: Data Files © 2016-2017 SR Research Ltd. - Page 89 (see below). A typical resolution is about 36 pixels per degree for an EyeLink setup in which the distance between the participant's eyes and Data Files © 2016-2017 SR Research Ltd.
-
Page 90: Pupil Size Data
It is also possible to counterbalance stimulus position during the experiment. As well, since pupil size is largely affected by luminance, cognitive load, and emotional responses, Data Files © 2016-2017 SR Research Ltd. -
Page 91: Button Data
EyeLink tracker, which timestamps the data and writes it to the EDF file. The application does not need precise time keeping, since link delays are usually very low (on the order of 1 or 2 milliseconds). Data Files © 2016-2017 SR Research Ltd. -
Page 92: Buttons
The time differences between eyes are very important for neurological analysis, for example. The main classes of data events are summarized below. Data Files © 2016-2017 SR Research Ltd. - Page 93 For fixations, these data include: The time of the first and last sample in the fixation • The eye that generated the event • Data Files © 2016-2017 SR Research Ltd.
- Page 94 Because of variations in acceleration profiles, the onset and offset point of saccades can vary by one or two samples from "ideal" segmentation done by hand. Nonetheless, the saccadic data compiled by the Data Files © 2016-2017 SR Research Ltd.
- Page 95 4.5.3.5 Blinks The STARTBLINK and ENDBLINK events bracket parts of the eye-position data where the pupil size is very small, or the pupil in the camera image is missing Data Files © 2016-2017 SR Research Ltd.
-
Page 96: Setting File Contents
HREF head-referenced eye position data HTARGET target distance and X/Y position (EyeLink Remote only) PUPIL raw pupil coordinates AREA pupil size data (diameter or area) Data Files © 2016-2017 SR Research Ltd. -
Page 97: Event Data
The "file_event_data" command may be edited in the DATA.INI file of the EyeLink tracker, or may be sent over the link. Some example settings are given below: Data Files © 2016-2017 SR Research Ltd. -
Page 98: Event Types
EyeLink Developers Kit for Windows (https://www.sr-support.com/showthread.php?6). On Mac OS X, there is a GUI version of the converter called EDFConverter, which can be found at https://www.sr-support.com/forums/showthread.php?t=17. A command line Data Files © 2016-2017 SR Research Ltd. -
Page 99: Using Asc Files
-s or -ne outputs sample data only -e or -ns outputs event data only -nse blocks output of start events -nmsg blocks message event output -neye outputs only non-eye events (for sample-only files) Data Files © 2016-2017 SR Research Ltd. -
Page 100: The Asc File Format
All eye-movement samples and events occur between the START event and • the matching END event. Data Files © 2016-2017 SR Research Ltd. -
Page 101: Sample Line Format
• <time> <xp> <yp> <ps> <xv> <yv> <xr> <yr> Binocular • <time> <xpl> <ypl> <psl> <xpr> <ypr> <psr> Binocular, with velocity • <time> <xpl> <ypl> <psl> <xpr> <ypr> <psr> <xvl> <yvl> <xvr> <yvr> Data Files © 2016-2017 SR Research Ltd. - Page 102 "I" if sample was interpolated second character is "C" if LEFT CR missing third character is "R" if LEFT CR recovery in progress fourth character is "C" if RIGHT CR missing Data Files © 2016-2017 SR Research Ltd.
-
Page 103: Event Line Formats
Each type of event has its own line format. These use some of the data items listed below. Each line begins with a keyword (always in uppercase) and items are separated by one or more tabs or spaces. Data Files © 2016-2017 SR Research Ltd. - Page 104 BUTTONS.INI or FINAL.INI. 4.9.3.3 Block Start & End START <time> <eye> <types> • END <time> <types> RES <xres> <yres> • Data Files © 2016-2017 SR Research Ltd.
- Page 105 4.9.3.5 Saccades SSACC <eye> <stime> • ESACC <eye> <stime> <etime> <dur> <sxp> <syp> <exp> <eyp> <ampl> <pv> • ESACC <eye> <stime> <etime> <dur> <sxp> <syp> <exp> <eyp> <ampl> <pv> • <xr> <yr> Data Files © 2016-2017 SR Research Ltd.
-
Page 106: Data-Specification Lines
EDF file to report the recording information of the trial such as mount type, sampling rate, filtering level, pupil threshold, and pupil tracking algorithm. RECCFG <tracking mode> <sampling rate> <file sample filter> <link sample • filter> <eye(s) recorded> Data Files © 2016-2017 SR Research Ltd. - Page 107 If velocity data is present, it must be divided by this value. For EDF2ASC, the prescaler is always 1. Programs that write integer data may use a larger prescaler (usually 10) to add precision to the data. Data Files © 2016-2017 SR Research Ltd.
-
Page 108: Processing Asc Files
For lines where the first token begins with a letter, processing depends on what the first token is. The tokens after the first are read and desired data from the line are extracted from Data Files © 2016-2017 SR Research Ltd. - Page 109 For all of these, the organization and contents of the ASC files have been designed to simplify the programmer's task. Data Files © 2016-2017 SR Research Ltd.
-
Page 110: System Care
Host PC or disconnect both plugs of the USB cable of the EyeLink Portable Duo (see sections 5.2 and 6.1). • Do not cover or place any items on top of the EyeLink Portable Duo while the Host PC is powered on, unless the eye tracker cable is disconnected from both USB ports. -
Page 111: Cleaning And Disinfection
5.2 Cleaning and Disinfection WARNING: Cleaning with a wet cloth, sprays applied directly to unit, or pouring fluids onto the EyeLink Portable Duo could cause a shock hazard to participants, by forcing liquids into the unit. Units returned with signs of such misuse will not be covered under warranty. - Page 112 This may leave particles on the optical window, which should be removed by dusting with anti-dust cloth or canned air. Let dry thoroughly before allowing participants near • the unit. System Care © 2016-2017 SR Research Ltd.
- Page 113 DO NOT LET BLEACH SOLUTION DRY ON UNIT. • Wipe several times with cloth dampened with water. Let dry thoroughly before allowing participant in • area. Table 3: Approved Cleaning and Disinfecting Methods, Ordered by Risk System Care © 2016-2017 SR Research Ltd.
-
Page 114: Important Information
WARNING: Cleaning with a wet cloth, sprays applied directly to unit, or pouring fluids onto the EyeLink Portable Duo eye tracker could cause a shock hazard to participants, by forcing water into the unit. Units returned with signs of such misuse will not be covered under warranty. -
Page 115: Disconnection
USB cable could damage the Host PC or the USB cable. The EyeLink Portable Duo is intended to be powered by two USB 3.0 ports on the Host PC. Desktop and laptop computers are typically certified to IEC 60950 or equivalent, which provides electrical protection for the operator. -
Page 116: Exposure To Fluids And Spills
Note that since the EyeLink Portable Duo is powered by the USB ports of the Host PC, there is no danger to the operator if the computer and its power source were not involved in the spill. -
Page 117: Eye Illumination Safety
6.2 Eye Illumination Safety 6.2.1 Eye Safety and Comfort The EyeLink Portable Duo complies with the IEC-62471 lamp safety standards, and meets requirements as an “exempt” device, which is safe under any conditions, including using optical viewing devices and lenses. The internal illuminator emits near-infrared (NIR) radiation. -
Page 118: Electromagnetic Compliance And Immunity
WARNING: Portable RF communications equipment (including peripherals such as antenna cables and external antennas) should be used no closer than 30 cm (12 inches) to any part of the EyeLink Portable Duo, including cables specified by the manufacturer. Otherwise, degradation of the performance of this equipment could result. -
Page 119: Sources Of Interference And Degraded Performance
6.4.3 Preserving Electromagnetic Compatibility The EyeLink Portable Duo eye tracker was designed to meet all electromagnetic compatibility requirements, both immunity to interference and to avoid producing interference to other devices. To maintain this, ensure the following rules are met: Do not remove any ferrites on cables. -
Page 120: Other Electromagnetic Compatibility Statements
6.5 Limited Hardware Warranty SR Research Ltd. 35 Beaufort Drive Ottawa, Ontario, K2L 2B9, Canada EyeLink Portable Duo Product Hardware – Limited Warranty Important Information © 2016-2017 SR Research Ltd. -
Page 121: Limited Software Warranty
EyeLink Portable Duo Camera and Illuminator Module – Two (2) year parts and labor. EyeLink Portable Duo Head Support System (excluding gel pads) – Two (2) year parts and labor. Host PC – Two (2) year parts and labor. - Page 122 Some jurisdictions do not allow limitations on the duration of an implied warranty, so this limitation may not apply to you. In no event shall SR Research Ltd. or its suppliers be liable for any damages whatsoever (including, without limitation, damages for loss of business profits,...
Need help?
Do you have a question about the EyeLink Portable Duo and is the answer not in the manual?
Questions and answers