Table of Contents
Advertisement
Quick Links
The uScope – Getting started
Introduction
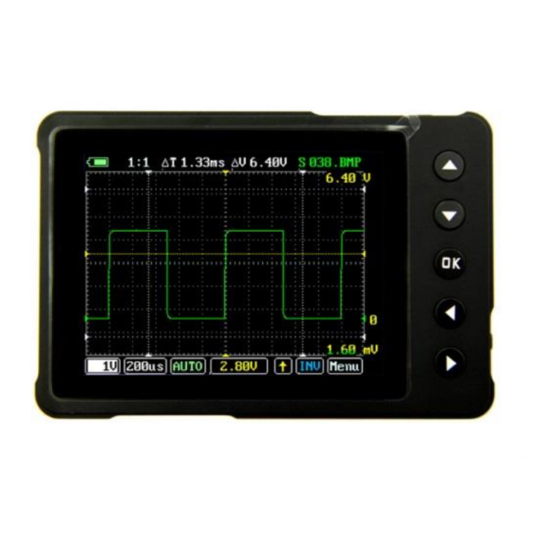
The uScope! A single channel, pocket-sized, digital
storage oscilloscope that ¡s small, quick, and
powerful. Automotive presets get you going
quickly. Ideal for the Flat Rater that wants the
ultimate run and gun lab scope for pin point
testing. Ideal for the student that is ready to start
scope'n.
The uScope is powered by an easy to use interface
enhanced with automotive presets and reference
waveforms.
Put the power of the uScope in your hand (and shirt
Secondary ignition, injectors, mass air flow, crank,
cam, TPS, 02, CTS you name it it'll scope it. The
uScope is also perfect for your low amp probe,
secondary ignition pickup and pressure transducers.
www.AESwave.com
AES uScope Manual
(fw 6.01)
pocket).
Copyright 2015 by Automotive Electronics Services, Inc.
When you just need to run a quick
test to verify the "signal" is working
as the engineer intended, why spend
time pulling out and setting up your
"big boy Scope" when you can do it
faster with the uScope?
Page 1
Advertisement
Table of Contents

Summary of Contents for AES uScope
- Page 1 When you just need to run a quick Put the power of the uScope in your hand (and shirt test to verify the "signal" is working pocket). as the engineer intended, why spend...
- Page 2 AES uScope Manual First Time Use: Protective Film: When you first receive your uScope, the front face of the unit will have a plastic film that protects the uScope during shipping. Please feel free to remove the plastic film. Charge the battery: Charge your new uScope for at least 5 hours before first use.
- Page 3 AES uScope Manual Key Specs Display Full Color 2.8" TFT LCD 65K 320×240 Analog bandwidth 0 - 200KHz Max sample rate 1Msps 12Bits Sample memory depth 4096 Point Horizontal sensitivity 1uS/Div~10S/Div Horizontal position adjustable with indicator 10mV/Div~10V/Div (with ×1 probe) Vertical sensitivity 0.5V/Div~100V/Div (with ×10 probe)
- Page 4 When properly installed the card will be just below flush. The uScope can be connected to your PC via the USB cable. Once connected to the PC, the memory card will show up as a removable storage card. To view the contents of the card, open the removable drive.
- Page 5 Splash Menu Startup Screen Once the uScope is turned on, a pre-set menu screen will appear. This menu will adjust your uScope settings according to the selected preset. If the preset items on the menu do not apply to your test, select “Labscope”...
- Page 6 AES uScope Manual Main Buttons [On/Off] Turn uScope on or off Slide switch located on bottom right side of uScope [Arrows] Navigation (located on right side of the front Panel) Toolbar menu: The default menu. When navigating the “Toolbar” menu -LEFT/RIGHT arrows: Navigate between different toolbar menu items.
- Page 7 Press and hold “B”, while in grid value mode to save a BMP image or a “User Defined File”. By default, the uScope will save a “User Defined File”. You can change the default of the “B” button by navigating to: Menu >...
- Page 8 18. Note: To select Auto Setup, highlight Auto Setup, and press & hold “OK” to activate it. Waveform Capture not using a PreSet: 1. Turn on the uScope by sliding the switch located on the bottom right of unit to the right. 2. Use the LEFT | RIGHT arrow keys and highlight the “AUTO” menu.
- Page 9 AES uScope Manual a. Some signals can not be stablized. For example, a square wave that has a unique ID such as a crank sensor. Other signals are easy to stabalize. In either case follow these procedures: b. Use the LEFT | RIGHT arrow keys and highlight the Trigger Level Icon.
- Page 10 Highlight Probe Cal At the top left of the screen, the uScope will specify what attenuation setting you are currently on (Note: 10x does not change anything within the scope other than the voltage settings will be 10x larger – 1volt per division will read 10 volt per division.
- Page 11 Left moves the trigger level down and right moves it up. Note: horizontal yellow trigger level indicator trace. Note: Value is located on the bottom center of the uScope screen. Yellow Numerical Values. Press “OK” to exit menu Tr.
- Page 12 “File/SD” Save Waveforms, Setups, Configuration and Images on SD Card Highlight the “File/SD” menu and press “OK” to activate the menu. Note: SD card must be present in uScope. Save as image (BMP) Highlight the “save as image” menu item.
- Page 13 Message will appear on the upper right confirming the save “Save ok” Press “OK” to exit menu Reset Factory Default To reset your uScope to factory default settings. Use UP/DOWN to select “Reset Factory Default” Press and hold “OK”...
- Page 14 Plug the uScope into an available USB port on a computer Note: The waveforms and presets are saved onto the uScope memory card. Never remove the memory card; doing so will interrupt some of the uScopes functions. ...
- Page 15 AES uScope Manual TRIGGER MODES Display Mode Trigger Synchronization Example Applications Waveform AUTO Always General use Only watch periodic NORM Triggered signals SING Triggered Auto-hold Capture 1 event Page 15 www.AESwave.com Copyright 2015 by Automotive Electronics Services, Inc.
- Page 16 AES uScope Manual ADDITIONAL RESOURCES Video: Using the COP Paddle Probe with the uScope: QR Code (Scan Me) https://goo.gl/XDoHPw Video: uScope Navigation (older software version 5.12) QR Code (Scan Me) https://goo.gl/xYB46H Page 16 www.AESwave.com Copyright 2015 by Automotive Electronics Services, Inc.


Need help?
Do you have a question about the uScope and is the answer not in the manual?
Questions and answers