Power works XB 20V Operator's Manual
Hide thumbs
Also See for XB 20V:
- Operator's manual (28 pages) ,
- Operator's manual (23 pages) ,
- Operator's manual (24 pages)

Subscribe to Our Youtube Channel
Related Manuals for Power works XB 20V


Summary of Contents for Power works XB 20V
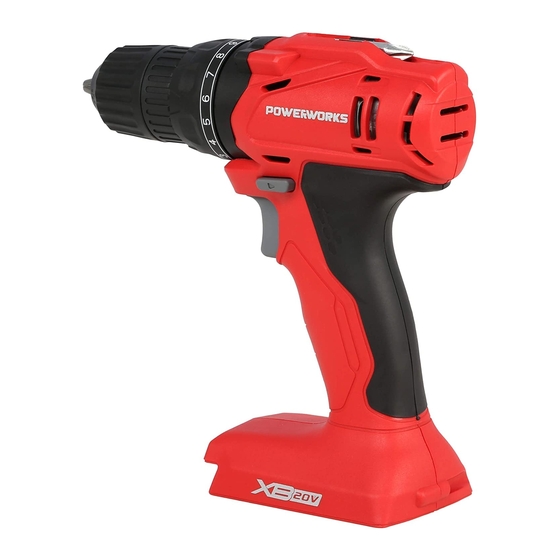
- Page 1 DRILL DRIVER OPERATOR MANUAL PERCEUSE-VISSEUSE MANUEL D’OPÉRATEUR TALADRO ATORNILLADOR MANUAL DEL OPERADOR DDG304...
-
Page 2: Table Of Contents
English Description........4 Install the battery pack....... 6 Remove the battery pack......7 Purpose............4 Install the bit..........7 Overview............ 4 Remove the bit........... 7 General power tool safety Operation........7 warnings........4 Start the machine........7 Work area safety........4 Stop the machine........ -
Page 3: Description
English DESCRIPTION Unmodified plugs and matching outlets will reduce risk of electric shock. PURPOSE • Avoid body contact with earthed or grounded surfaces, such as pipes, radiators, ranges and The machine is intended for driving in and loosening There is an increased risk of electric refrigerators. -
Page 4: Power Tool Use And Care
English POWER TOOL USE AND CARE SERVICE • Do not force the power tool. Use the correct power • Have your power tool serviced by a qualified repair The correct power tool will This tool for your application. person using only identical replacement parts. do the job better and safer at the rate for which it will ensure that the safety of the power tool is was designed. -
Page 5: Risk Levels
English WARNING Symbol Explanation • If the parts have damage, do not use the machine. High speed • If you do not have all the parts, do not operate the machine. • If the parts are damaged or missing, speak to the service center. -
Page 6: Remove The Battery Pack
English REMOVE THE BATTERY PACK REMOVE THE BIT 1. Push and hold the battery release button. 2. Remove the battery pack from the machine. INSTALL THE BIT 1. Push reversing button in the center position to lock the switch trigger. 2. -
Page 7: Stop The Machine
English STOP THE MACHINE WARNING Use LO (1) speed for high power and torque applications and HI (2) speed for fast drilling or driving applications. ADJUST THE REVERSING BUTTON 1. Release the switch trigge to turn the machine OFF The machine has the reversing button (forward/reverse lock) above the switch trigger to chang the direction of (O). -
Page 8: Drill Materials
English MAINTENANCE NOTE The machine does not operate until the direction CAUTION button is pushed fully to the left or right. Do not let brake fluids, gasoline, petroleum-based materials touch the plastic parts. Chemicals can cause DRILL MATERIALS damage to the plastic, and make the plastic unserviceable. -
Page 9: Technical Data
English TECHNICAL DATA TRANSPORTATION CHARGES: Transportation charges for the movement of any power Voltage 20 V equipment unit or attachment are the responsibility of the purchaser. It is the purchaser’s responsibility to pay No Load Speed 0-400 / 0-1600 RPM transportation charges for any part submitted for Chuck Keyless 1/2"... - Page 10 Français Description........12 Installez le bloc-batterie......15 Retirez le bloc-batterie......15 But............12 Installez la mèche........15 Aperçu............12 Retirez la mèche........15 Avertissements généraux de Utilisation........16 sécurité des outils électriques..12 Démarrez la machine....... 16 Sécurité de la zone de travail....12 Arrêtez la machine........
-
Page 11: Description
Français DESCRIPTION étincelles qui peuvent enflammer la poussière ou les vapeurs. • Tenez les enfants et les curieux à l'écart lorsque Les distractions vous utilisez un outil électrique. Cet appareil est conçu pour visser et dévisser des vis et peuvent vous faire perdre le contrôle. des boulons ainsi que pour serrer et desserrer des écrous dans leur gamme de dimension respective. -
Page 12: Utilisation Et Entretien Des Outils Électriques
Français brancher à la source d’alimentation et/ou le bloc- • Garder les outils de coupe propres et tranchants. Les outils de coupe bien entretenus avec des bords batterie et quand vous soulevez ou transportez Transporter un outil électrique avec un tranchants sont moins susceptibles de se coincer et l'appareil. -
Page 13: Symbols On The Product
Français NIVEAUX DE RISQUES non-intentionnelle du bouton marche/arrêt peut provoquer des blessures. Les termes de mise en garde suivants et leur • La batterie fournie est partiellement chargée. Pour signification ont pour but d'expliquer les niveaux de vous assurer de la pleine capacité de la batterie, risques associés à... -
Page 14: Installez Le Bloc-Batterie
Français INSTALLEZ LE BLOC-BATTERIE INSTALLEZ LA MÈCHE AVERTISSEMENT • Si le bloc-batterie ou le chargeur est endommagé, 1. Poussez le bouton marche arrière vers la position remplacez-le, au besoin. centrale pour verrouiller le bouton marche/arrêt. • Arrêtez la machine et attendez que le moteur 2. -
Page 15: Utilisation
Français RÉGLEZ LA VITESSE VARIABLE AVERTISSEMENT Préparez-vous à la butée lors de la perforation. Lorsque cela se produit, la perceuse a tendance à accrocher et cogner dans le sens inverse de la rotation ce qui peut provoquer une perte de contrôle lors de la perforation d'un matériau. -
Page 16: Matériaux De Perçage
Français souhaitez faire le trou. Cela permet d'éviter que la perceuse-visseuse ne glisse du centre alors que le trou est déjà à moitié percé. • Lorsque vous percez du métal, mettez une huile légère sur la mèche de la perceuse pour éviter que celle-ci chauffe. -
Page 17: Remove The Chuck
Français ATTENTION Clé de serrage 50 Nm N'utilisez pas de solvants ou de détergents puissants Poids sans batterie 3.3 lbs sur le boîtier ou les composants en plastique. Batterie (modèle) BAP series Chargeur (modèle) CAP series AVERTISSEMENT Retirez le bloc-batterie de la machine avant l’entretien. GARANTIE LIMITÉE REMOVE THE CHUCK The chuck may be removed and replaced by a new one. - Page 18 Español Descripción........20 Desembalaje de la máquina.....22 Instalación de la batería......23 Finalidad...........20 Retirada de la batería.......23 Perspectiva general........20 Instalación de la broca......23 Advertencias generales de Retirada de la broca......... 23 seguridad para herramientas Funcionamiento......24 eléctricas........20 Puesta en marcha de la máquina.....24 Seguridad de la zona de trabajo....
-
Page 19: Descripción
Español DESCRIPCIÓN • Mantenga alejados a los niños y los transeúntes mientras utilice una herramienta eléctrica. distracciones pueden hacer que pierda el control. FINALIDAD SEGURIDAD ELÉCTRICA La máquina se ha diseñado para atornillar y aflojar tornillos y pernos, así como para apretar y aflojar •... -
Page 20: Utilización Y Cuidado De Herramientas Eléctricas
Español interruptor o la conexión de herramientas eléctricas probabilidades de atascarse y son más fáciles de que tienen el interruptor activado fomenta los controlar. accidentes. • Utilice la herramienta eléctrica, los accesorios, las • Retire cualquier llave de ajuste antes de encender brocas, etc. -
Page 21: Símbolos En El Producto
Español interruptor de encendido/apagado puede provocar NIVELES DE RIESGO lesiones. • La batería se suministra parcialmente cargada. Para Las siguientes indicaciones y significados tienen como garantizar la máxima capacidad de la batería, fin explicar los niveles de riesgo asociados a este cargue totalmente la batería en el cargador de producto. -
Page 22: Instalación De La Batería
Español INSTALACIÓN DE LA BATERÍA INSTALACIÓN DE LA BROCA AVISO • Si la batería o el cargador ha sufrido daños, 1. Empuje el botón de inversión hacia la posición sustituya la batería o el cargador. central para bloquear el gatillo interruptor. •... -
Page 23: Funcionamiento
Español AJUSTE DE LA VELOCIDAD 2. Abra las mordazas del portabrocas. VARIABLE 3. Retire la broca. AVISO Esté preparado para posibles atascos a medida que avanza la broca. Cuando se producen estas situaciones, el taladro tiene una tendencia a atascarse y retroceder en dirección contraria a la dirección de rotación y podría provocar la pérdida de control al romper el material. -
Page 24: Perforación De Materiales
Español taladrar el orificio. Esto puede evitar que la broca se salga del centro cuando se inicia el orificio. • Al taladrar metales, utilice un aceite ligero en la broca para evitar que se sobrecaliente. El aceite puede prolongar la vida útil de la broca y aumentar la acción de perforación. -
Page 25: Retirada Del Portabrocas
Español PRECAUCIÓN Portabrocas 1/2’’ Sin llave No utilice disolventes o detergentes fuertes en la Embrague 24 posiciones + taladro carcasa o los componentes de plástico. 50 N.m. Peso sin batería 3.3 lbs AVISO Modelo de batería BAP series Retire la batería de la máquina antes de realizar tareas de mantenimiento. - Page 26 Español comprador pagar los costes de transporte de cualquier pieza enviada para su sustitución bajo esta garantía, a menos que dicha devolución sea solicitada por escrito por Powerworks.
Need help?
Do you have a question about the XB 20V and is the answer not in the manual?
Questions and answers