Table of Contents
Advertisement
Advertisement
Table of Contents

Related Manuals for EunSung CoolShaping


Summary of Contents for EunSung CoolShaping
- Page 1 Operator Manual...
- Page 2 Copyright© 2015 Eunsung Global Corp. All rights reserved. Eunsung Global reserves the right to make changes to its products or specifications to improve performance, reliability, or manufacturability. Information furnished by Eunsung Global is believed to be accurate and reliable. However, Eunsung Global assumes no responsibility for its use.
-
Page 3: Table Of Contents
2.5. Cleaning Induced Hazard 2.6. Operation Safety 2.7. Installation Hazard 2.8. Contraindication 3. Component 3.1. Structure 3.2. Applicators 4. Site Preparation 4.1. About Site Preparation 4.2. Spatial Requirements 4.3. Electrical Requirements 4.4. Environmental Requirements 4.5. Storage & Transportations Requirements CoolShaping... - Page 4 6.1. About Operating Instruction 6.2. System Operation 6.3. Auto Mode Screen 6.4. Manual Mode Screen 6.5. L+R Dual Applicator Mode 6.6. L Applicator Mode 6.7. R Applicator Mode 6.8. Applicator Operating Buttons 7. Maintenance 7.1. About Maintenance 7.2. Cleaning 7.3. Error Messages CoolShaping...
- Page 5 Contents 8. Treatment Guideline 9. About Warranty 10. Tech Specification 11. Customer Support CoolShaping...
-
Page 6: Introduction
This manual has been prepared to aid staff and technical personnel to understand and operate the system. Do not operate the system before reading this manual and gaining a clear understanding of system operation. If any part of this manual is not clear, please contact your local Eunsung representative for clarification. -
Page 7: Equipment Safety
Never leave the system turned on, open or unattended during system maintenance. When treating with CoolShaping always use a sheet of CoolPad at every treating area not only to improve the efficacy but also in order to effectively protect the given area. -
Page 8: Electrical Hazard
Use a soft cloth for both cleaning and disinfecting. Keep the device and applicator clean at all times to get the best possible performance. If 70% isopropyl alcohol is used to clean and disinfect any part of the CoolShaping system, allow it to dry thoroughly before operating the system. -
Page 9: Installation Hazard
Do not give an impact to this device. The slightest external stimulation can be caused serious problem. 2.8. Contraindications CoolShaping is a safe device yet treatment operated by CoolShaping is contraindicated for those patients who have following symptoms and/or diseases. Please have your patients consult to doctor prior to the treatment. -
Page 10: Component
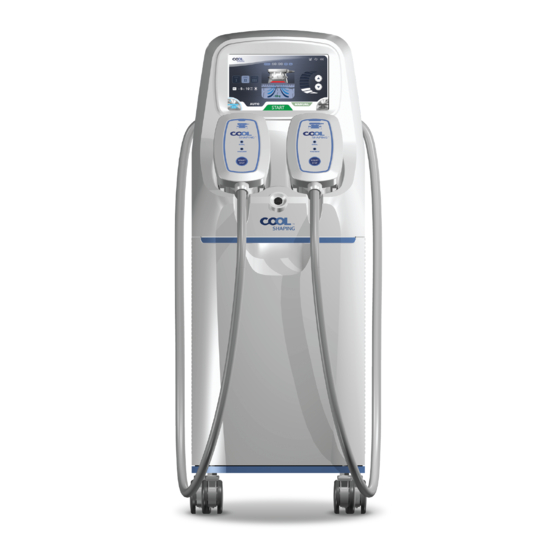
3. Component 3.1. Structure LCD Monitor Handpiece Key switch Handpiece cable Handle - CoolShaping System - CoolShaping... -
Page 11: Applicators
[ Large size ] [ Small size ] Dimension Dimension Dimension 108mm(W) x 188mm(D) x 118mm(W) x 220mm(D) x 142mm(H) 108mm(W) x 172mm(D) x 138mm(H) 120mm(H) NOTE Call your local dealer if you want to purchase additional components of CoolShaping. CoolShaping... -
Page 12: Site Preparation
4.3. Electrical Requirements CoolShaping incorporates a universal power supply module that allows it to be connected to standard electrical outlets anywhere. Please consider the following electrical requirements before installing the system: The AC line power requirements for the system are: ... -
Page 13: Storage & Transportations Requirements
Store the system where the air is free of corrosive substances, such as salts or acids. Store the system where there is a minimum of dust particles. Minimize shock and vibration. Do not drop. Lift only with suitable and appropriate equipment. CoolShaping... -
Page 14: Installation
5. Installation 5.1. About the Installation CoolShaping is designed for installation in an office or a clinic and requires minimal site preparation. System installation is carried out by clinic personnel, who will do the following: Unpack the system and position it in its pre-selected location. - Page 15 Otherwise an accident caused by leakage may occur. Before connecting, do make sure that the condition of water connector holder is ‘Normal’. If it is ‘Not-Normal’ condition, press top and bottom of the water connector holder simultaneously as shown above. CoolShaping...
-
Page 16: Fill Up The Water
5. Installation 5.3. Fill up the water Pulling the latch to open the back plate [ Open backside cover ] CoolShaping... - Page 17 1) Open the Fill port by turning in a counterclockwise direction. 2) Connect the funnel hose to Fill port then slowly fill the water up to the device. Never fill the water reservoir with regular tap water. Use only either distilled or deionized water. CoolShaping...
- Page 18 1) Unwind Drain port for water drainage.(If the device is not in use for a long period of time, please drain the water and store the device.) Never fill the water reservoir with regular tap water. Use only either distilled or deionized water. CoolShaping...
-
Page 19: Connect The Power Cable
5.6. Turn on the Power Power on by press the power button at the lower back side of device and then turn the safety key switch clockwise to the power on. - Main Power Switch- - Key switch - CoolShaping... -
Page 20: Operating Instruction
2) Connect both applicators at respective socket and locate in their cradles. 3) Turn on the system by pressing the power button & turn the safety key in the right direction. 6.2.2. Turn on the CoolShaping Once the system powers up, booting & loading screens appear one after another as shown below. - Page 21 6. Operating Instructions 6.2. System Operation 6.2.2. Turn on the CoolShaping Lightly touch the screen to move to the selected treatment mode among three menu as shown below. - HOME screen - 1) Dual mode(L+R) L+R: Both Left and Right applicators operate with synchronized same value.
-
Page 22: Auto Mode Screen
⑧ Vacuum level display Display vacuum level ⑨ Level decrease/increase button Select vacuum level ⑩ Current treatment display Display applicator operating ⑪ Start/Stop button Select start and stop ⑫ Water level display Display water level warning ⑬ Sound button Sound On/Off button CoolShaping... - Page 23 Auto mode allows a process of going through STEP I STEP II STEP III in a sequential manner. Set details of Step Setting menu on pop up window by pressing Step Button. Reset data Save setting data Exit from setting window. CoolShaping...
- Page 24 Select treatment time Adjustment range : 01min.~ 60min. ⑧ Vacuum level display Preset : 5 Display vacuum level ⑨ Level decrease/increase button Select vacuum level Level can be changed during operating by press this button. CoolShaping...
- Page 25 ⑩ Current treatment display Display applicator operating, one of L+R, Left and Right Operating Stop ⑪ Start/Stop button Device in operation Operation Stopped: Timer will be at pause. ⑫ Water level display Water level warning Normal 1st Warning 2nd Warning CoolShaping...
- Page 26 6. Operating Instructions 6.3. Auto Mode Screen ⑬ Sound button CoolShaping...
-
Page 27: Manual Mode Screen
⑧ Vacuum level display Display vacuum level ⑨ level decrease/increase button Select vacuum level ⑩ Current treatment display Display applicator operating ⑪ Start/Stop button Select start and stop ⑫ Water level display Display water level warning ⑬ Sound button Sound On/Off button CoolShaping... - Page 28 Select either Auto mode or Manual mode Manual mode Auto mode ③ Treatment pulse button Select Vacuum pulse 4 kinds of pulse ④ Cooling temperature Set cooling temperature Adjustment range : -10 ~ 5℃ CoolShaping...
- Page 29 Display vacuum level ⑨ Level decrease/increase button Select vacuum level Level can be changed during operating by press this button. ⑩ Current treatment display Display operated applicator(L+R, Left, Right), current temperature, operational status . Operating Stop CoolShaping...
- Page 30 6. Operating Instructions 6.4. Manual Mode Screen ⑪ Start/Stop button Device in operation Operation Stopped: Timer will be at pause. ⑫ Water error display Water level warning Normal 1st Warning 2nd Warning ⑬ Sound button CoolShaping...
- Page 31 Manual mode : Pulse, Temperature and Vacuum level are selectable as per operator’s decision. Dual mode(L+R Mode) - Auto - - Manual - Single Mode (Left Mode) - Manual - - Auto - Single Mode (Right Mode) - Auto - - Manual - CoolShaping...
-
Page 32: L+R Dual Applicator Mode
2) Auto mode is automatically selected, if there will not be any mode-changing action. 3) After locating the CoolPad, attach 2 applicators at target place and press Start to initiate the CoolShaping treatment. 4) Default value is shown as above. If operators care to adjust more specifically in customized way, can adjust each value such as treatment steps and vacuum level. - Page 33 2) Auto mode is automatically selected, if there will not be any mode-changing action. 3) Press MANUAL soft key which is placed at the bottom right. 4) Select desired choice of Vacuum pulse. 5) Adjust Vacuum level. 6) Attach 2 applicators at each target area then press Start to initiate CoolShaping treatment. CoolShaping...
-
Page 34: L Applicator Mode
2) Auto mode is automatically selected, if there will not be any mode-changing action. 3) Attach an applicator at target area then press Start to initiate CoolShaping treatment. 4) Default value is shown as above. If operators care to adjust more specifically in customized way, can adjust each value such as treatment steps and vacuum level. - Page 35 3) Press MANUAL soft key which is placed at the bottom right. 4) Select desired choice of Vacuum pulse. 5) Adjust Vacuum level. 6) Attach both applicators at their target treatment area then press Start to initiate CoolShaping treatment. CoolShaping...
-
Page 36: R Applicator Mode
2) Auto Mode is automatically selected, if there will not be any mode-changing action. 3) Attach an applicator at target area then press Start to initiate CoolShaping treatment. 4) Default value is shown as above. If operators care to adjust more specifically in customized way, can adjust each value such as treatment steps and vacuum level. - Page 37 3) Press MANUAL soft key which is placed at the bottom right. 4) Select desired choice of Vacuum pulse. 5) Adjust Vacuum level. 6) Attach both applicators at their target treatment area then press Start to initiate CoolShaping treatment. CoolShaping...
-
Page 38: Applicator Operating Buttons
① Lamp Cooling : Turn _ON Turn _OFF Vacuum : Turn _ON Turn _OFF ② START/STOP button Applicator On/Off Dual mode( L + R): 2ea applicators are activated at the same time by Start/Stop button of each applicators CoolShaping... -
Page 39: Maintenance
※ Check filters once per month. Main Device Clean the outer surface of CoolShaping on a regular manner. Turn the system off and wipe all surfaces with a soft, damp, non-abrasive cloth. Be careful not to spill any liquids on or into the system. -
Page 40: Error Messages
The following does not attempt to list all possible system failures. Any error not listed should be referred to your local Eunsung service representative. Connection Error Applicator and/or its connecting cable is(are) not correctly attached to the device. - Page 41 If, after the first warning (see above), no water is supplied, this symbol appears after 24 hours of operation. However, the device is operating normally. Low water level. Fill the water reservoir with distilled or deionized water. CoolShaping...
- Page 42 It is necessary to place coolpad prior to locate the applicator on the treatment area. Coolpad is indispensable, please do not reuse. In case you need to relocate the applicator ad interim, coolpad also is needed to be changed to new. CoolShaping...
- Page 43 8. Treatment Guideline 8.1. L+R applicator 1) Abdomen Medium or Small Size Medium or Small Size ① ② 2) back ① ② CoolShaping...
- Page 44 8. Treatment Guideline 8.1. L+R applicator 3) Hip 4) Thigh Medium Size Medium Size Back Saddlebag CoolShaping...
- Page 45 8. Treatment Guideline 8.2. L or R applicator 1) Abdomen Medium or Small Size Medium or Small Size ① ② ③ ④ 2) back ① ② ③ ④ CoolShaping...
- Page 46 8. Treatment Guideline 8.2. L or R applicator 3) Hip Medium or Medium or Large Size Large Size ① ② 4) Thigh Inner Thigh Saddlebag CoolShaping...
- Page 47 1) You may claim the warranty if the device gets malfunctioned within an year from the date of the purchase. 2) Eunsung Global has the sole responsibility to determine the cause of merchandise defect. 3) One Year Limited Warranty only includes main device. (accessories and/or consumables such as applicators and CoolPads are not included) 9.3.
- Page 48 110V / 240V,50 / 60Hz (Max. 600W) Panel 10.2inch LCD & Touch screen Dimension (WxDxH mm) 380×505×1,071 Weight (net) 60Kg 11. Customer Support Sales Representatives Manufacturer Eunsung Global Corp.. #1102~1105, 53, Gasan digital 2-ro, Geumcheon-gu, Seoul, 153-706, Korea Tel: +82-2-514-9713(Rep) Fax: +82-2-514-9716 E-mail: es@esglobal.co.kr/www.esglobal.co.kr CoolShaping...
- Page 49 CoolShaping...
Need help?
Do you have a question about the CoolShaping and is the answer not in the manual?
Questions and answers