Table of Contents
Advertisement
Quick Links
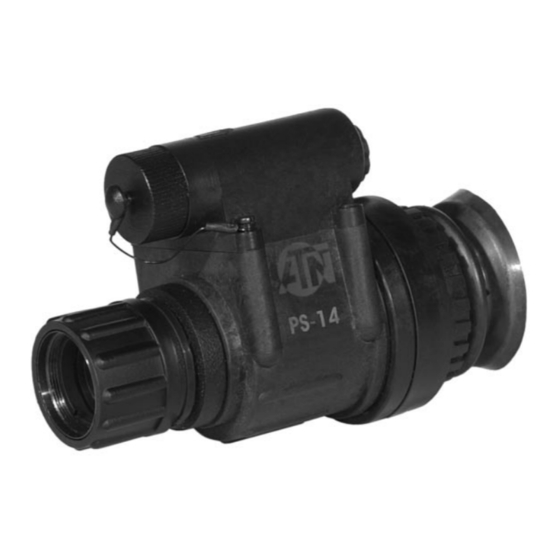
ATN PS14
Multi-use Night VisioN MoNocular
u s e r ` s
g u i d e
Important Export Restrictions! Commodities, products,
technologies and services contained in this manual are
subject to one or more of the export control laws and
regulations of the U.S. Government and they fall
under the control jurisdiction of either the US Depart-
ment of State or the US BIS-Department of Commerce. It
is unlawful and strictly prohibited to export, or attempt to
export or otherwise transfer or sell any hardware or
AmericAn
technical data or furnish any service to any foreign person,
Technologies
whether abroad or in the United States, for which a license
or written approval of the U.S. Government is required,
neTwork
without first obtaining the required license or written
corp.
approval from the Department of the U.S. Government hav-
ing jurisdiction. Diversion contrary to U.S. law is prohibited.
Advertisement
Table of Contents

Related Manuals for ATN PS14-3


Summary of Contents for ATN PS14-3
- Page 1 ATN PS14 Multi-use Night VisioN MoNocular u s e r ` s g u i d e Important Export Restrictions! Commodities, products, technologies and services contained in this manual are subject to one or more of the export control laws and regulations of the U.S.
- Page 2 The information in this manual furnished for information use only, is subject to change without notice, is not to be construed as a commitment by ATN Corp. ATN Corp. assumes no responsibility or liability for any errors or inaccuracies that may appear in this book. ©2008 ATN Corp. All right reserved.
-
Page 3: Specifications
Dimensions ... 151x80x55 mm (6.7” x 2.5” x 4”) Weight ... 0.32kg (0.7 lb) * ATN reserves the right to change the above specifications at any time without notice ApplicATion The PS-14 Multi-Use Night Vision monocular is one of the most versatile night vision devices available. -
Page 4: Operation
operATion Operation • You may now enter a dark environment or simply shut the lights off in order to darken the room. • Next, remove the lens cap/daylight filter. Adjust the front lens focusing. You should not have to readjust the diopter. Remember that focusing range starts from 0.24m. •... - Page 5 450 mw infrA-red illminATor The 450 mW IR Illuminator is powered by a separate from the main unit battery. To install the battery unscrew the cap and insert a bat- tery the way shown at the diagram on the IR. To install the 450mW IR Illuminator onto the monocular screw the adapter into the thread on the monocular.
-
Page 6: Interchangeable Lenses
To install 5X lens unscrew the objective lens of PS-14 and screw F112 Lens instead of it. BioclAr kiT With the biocular eyepiece and 3X or 5X lens the ATN PS-14 can be made into a 4x or 6.5x bioculars. -
Page 7: Camera Adapter
aDJuStInG 1) Lo o s e n t h e t i g hte n i n g k no b [ 2 ] to sli d e the unit along the rail to adjust the eye relief. Tighten the knob. 2) Loosen the top horizon- tal fixation knob [3]. -
Page 8: Storage And Care
adapter comes with 37mm and 52mm threads. If you need other sizes your local camera store should be able to help. • Remove the rubber eyecup from the PS-14 • Screw the camera adapter onto the front of the lens on your Video camera’s lens or your 35mm camera’s lens. -
Page 9: Accessory Packages
StanDaRD aCCESSoRIES: • MONOCULAR • NECK CORD • SOFT CARRY CASE GoGGLE KIt 1: • ATN HEADSET ASSEMBLY • ATN HELMET MOUNT (OPTIONAL) GoGGLE KIt 2: • PVS-7 STYLE HEADSET • HELMET MOUNT ADAPTER • PVS-7 STYLE HELMET MOUNT (OPTIONAL) 4X BIoCuLaR KIt: •... - Page 10 Tube MAiTeNANce/rePlAceMeNT 1. unscrew the eyepiece (F) from the case of device (a). 2. unscrew the lock ring (E) from the case of device. 3. Extract the ring (D) from the case of device. 3. Extract the light guide (C) from the case of device. 4.
-
Page 11: Limitation Of Liability
ATN, at its option, will either repair or replace the product, and such action on the part of ATN shall be the full extent of ATN’s liability, and the Customer’s sole and exclusive remedy. This warranty does not cover a product (a) used in other than its normal and customary manner;... - Page 12 1341 San Mateo Avenue, South San Francisco, CA 94080 phone: 800-910-2862, 650-989-5100; fax: 650-875-0129 European office phone: 44(0)870-0111286, fax: 44(0) 845-3349142 The following countries can use our toll free number 00 800 9102-8620 Austria, France, Germany, Holland, Italy, Spain, Sweden, Switzerland www.atncorp.com ©2008 ATN Corporation...
Need help?
Do you have a question about the PS14-3 and is the answer not in the manual?
Questions and answers