Table of Contents
Advertisement
Advertisement
Table of Contents

Related Manuals for Essilor Instruments AKR 300


Summary of Contents for Essilor Instruments AKR 300
- Page 1 SER MANUAL...
-
Page 2: Table Of Contents
> C SER MANUAL ONTENTS ONTENTS I. I NTRODUCTION 1. Important notice 2. Safety information 3. Intended use a. Symbols marked on the instrument b. Symbols marked on the instrument's packaging c. Disposal d. General safety information e. Meaning of caution sign II. - Page 3 > C SER MANUAL ONTENTS 6. When moving the instrument 7. Service information a. Repair b. Disposal of the instrument IX. C LASSIFICATIONS AND SPECIFICATIONS 1. Classifications 2. Specifications a. Refractometry b. Keratometry c. Environmental requirements X. C OMPONENTS 1. Components 2.
-
Page 4: Introduction
I. I NTRODUCTION... -
Page 5: Important Notice
Do not make any changes or modifications to the equipment unless otherwise specified in the manual. If such changes or modifications should be made, you could be required to stop operation of the equipment. ESSILOR INSTRUMENTS is not liable for any consequences linked to this product modification. This product is compliant with marking. -
Page 6: Symbols Marked On The Instrument's Packaging
For more detailed information about disposal of your old appliance, please contact your local Essilor Instruments distributor b. Symbols marked on the instrument's packaging Symbol Description Indicates a medical device that needs to be protected... -
Page 7: General Safety Information
Caution Please ask a professional waste disposal company to handle disposal, or contact ESSILOR INSTRUMENTS representative or distributor before disposing of the instrument. d. General safety information If you see any warnings or cautions printed on the warning labels, follow the safety instructions in this manual. - Page 8 > I SER MANUAL NTRODUCTION Change the chinrest paper each time the examinee changes in Caution order to keep the chinrest clean. Do not place your hand or fingers between the stage and base. Caution Also ensure that the examinee does not place his/her hand or fingers there either.
-
Page 9: Features
II. F EATURES... - Page 10 > F SER MANUAL EATURES 1. Various measurements supported Not only the usual refractometry and keratometry, but also corneal diameter and base curve of contact lens can be measured with this one instrument. Thus, measurements of eye and prescriptions for glasses and contact lenses can be made more efficiently.
-
Page 11: Notes For Using The Instrument
III. N OTES FOR USING THE INSTRUMENT... - Page 12 > N SER MANUAL OTES FOR USING THE INSTRUMENT 1. Do not hit or drop the instrument. The instrument may be damaged if it receives a strong impact. The impact can damage the function of this instrument. Handle with care. 2.
-
Page 13: Description
IV. D ESCRIPTION... -
Page 14: Main Unit
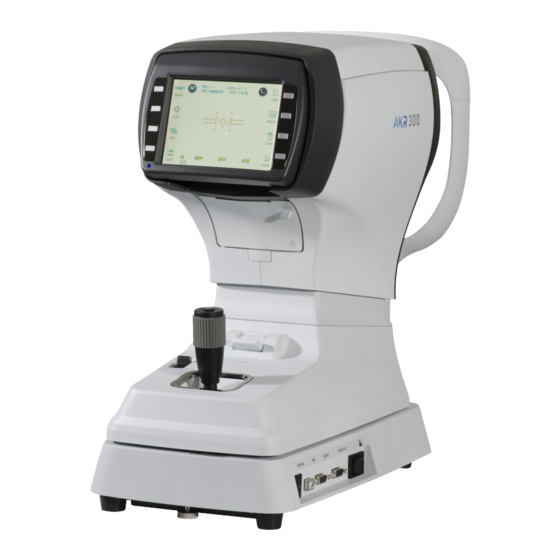
> D SER MANUAL ESCRIPTION 1. Main unit Name Function Measurement head Unit that performs measurement. Align the height of the examinee's eye with this mark by Height adjustment mark adjusting the height of chinrest. Monitor that displays measurement and [SET] modes Monitor displays. -
Page 15: Operation Panel
If you want to connect the input / output signal ports and other devices that must meet IEC standards (IEC62368-1 IT equipment, IEC60601 medical equipment). If in doubt should contact ESSILOR INSTRUMENTS or your authorized distributor. The materials composed of the parts that contact the patient during measurement are as follows. Do as much as possible to avoid contact. - Page 16 > D SER MANUAL ESCRIPTION [Touch] button (button by monitor & touch screen) [K/R] mode Press this button in order to change measurement mode. [Manual] Press this button in order to start manual or automatic measurement. [LiveREF] Press this button when the examinee's eye is difficult to measure due to cataract or examinee with intraocular lens.
-
Page 17: Practicing Through Model Eye
V. P RACTICING THROUGH MODEL EYE... - Page 18 > P SER MANUAL RACTICING THROUGH MODEL EYE Practice measurement by using the accessory test model eye before doing the actual measurement. 1 - Turn ON the power Turn ON the power switch of the instrument. 2 - Attach the model eye Remove the chinrest paper and align the holes on the base of the model eye with the holes on the chinrest.
- Page 19 > P SER MANUAL RACTICING THROUGH MODEL EYE (c) Check whether diopter value is measured or not. Diopter value is recorded in the bottom area of the model eye. If you are not satisfied with the measured value, measure in the same way and check again. 8 - Automatic measurement Press the [Auto] button on the operation panel.
-
Page 20: Measurement
VI. M EASUREMENT... -
Page 21: Continuous Keratometry And Refractometry - [K/R] Mode
> M SER MANUAL EASUREMENT Should any of the following occur, immediately turn OFF the power switch, unplug the power cable from the AC outlet, and contact the dealer or the agent who/where you purchase this instrument. Warning 1. When there is smoke, strange odor or abnormal sound. 2. - Page 22 > M SER MANUAL EASUREMENT Enter [K/R] mode. Press [Mode] button until [K/R] is displayed on the right side of the display. [K/R] mode Adjust height of examinee's eye. Ensure that the examinee has not placed his/her hand or fingers under the Caution chinrest.
- Page 23 > M SER MANUAL EASUREMENT 1. Slide stage to the forward/backward and right/left if you are unsatisfied with the operation lever control. 2. If the alignment marks and the pupil are not concentric, instruct the examinee to look at the red roof at the center of the picture.
- Page 24 > M SER MANUAL EASUREMENT Right eye selected 1. There can be error if the outer alignment mark and the pupil are eccentric. 2. There may be some aberration to the measurement value due to the eccentricity or inclination of lens, or deformation of cornea after surgery. 3.
- Page 25 > M SER MANUAL EASUREMENT Measure the other eye. Slide the stage to the right side and measure the left eye. Left eye selected After both eyes are measured, pupil distance (PD) will be displayed on the monitor. If stage is slid to the right eye again without pressing the [Print] button, the last measurement will be displayed.
-
Page 26: Refractometry - [Ref] Mode
> M SER MANUAL EASUREMENT Results will be erased after printing/transfer is performed. It is recommended that a hard copy of the printouts be made if you wish to store it for a long time, because printouts on the thermal paper are apt to deteriorate. Example of printout: *: Confidence of result Level... - Page 27 > M SER MANUAL EASUREMENT [REF] mode There can be error if the outer alignment mark and the pupil are eccentric. There may be some aberration to the measurement value due to the eccentricity or inclination of lens, or deformation of cornea after surgery. If error occurs or the measurement value is instable during the REF measurement, follow as the below instructions: Click the [LiveREF] button then [REF] image is shown on the monitor.
-
Page 28: Keratometry - [Ker] Mode
> M SER MANUAL EASUREMENT Follow the same procedure (5)~(7) of the continuous keratometry and refractometry [K/R] mode. Example of printout: *: Confidence of result Level Quality (Hight) (Low) 3. Keratometry - [KER] mode Only the radius of curvature of the cornea can be measured in [KER] mode. Don't measure the base curve of contact lens in this mode. - Page 29 > M SER MANUAL EASUREMENT [REF] mode Follow the same procedure (5)~(7) of the continuous keratometry and refractometry [K/R] mode. Example of printout: *: Confidence of result Level Quality (Hight) (Low) AKR300 - Auto Kerato Refractometer > V3 - 04-2020...
-
Page 30: Contact Lens Base Curve Measuremement - [Clbc] Mode
> M SER MANUAL EASUREMENT 4. Contact lens base curve measuremement - [CLBC] mode Base curve (posterior curve) of hard contact lens can be measured in the [CLBC] mode. Enter [CLBC] mode. Press [Mode] button until “[CLBC] is displayed on the right side of the display. Attach contact lens. - Page 31 > M SER MANUAL EASUREMENT There are two modes for lighting the peripheral eye fixation lamps: 1. [AUTO] mode: After measuring the center of cornea, four peripheral eye fixation lamps light automatically in turn according to the corneal astigmatism axis. 2.
- Page 32 > M SER MANUAL EASUREMENT Once you have entered [Manu] mode, you must end the measurement, press [Print] button, and start a new measurement in order to return to [Auto] mode. Eccentricity ([E] and [EQ]) will not be calculated unless the center of cornea is measured. Repeat the measurement as required.
-
Page 33: Other Modes
VII. O THER MODES... -
Page 34: Measuring Cornea Diameter - [Size] Mode
> O SER MANUAL THER MODES 1. Measuring cornea diameter - [SIZE] mode Diameter of cornea can be measured in [Size] mode for prescribing contact lens. The size of pupil can also be measured to see how much it is dilated, and the size of contact lens can be measured without having the examinee remove it. - Page 35 > O SER MANUAL THER MODES [CORNEAL SIZE] measurement. Press the measuring button to pause the window. If the frozen image is not clear, you can unfreeze the image by pressing the [CAM] button. To move the vertical bar by pressing the [>] button or [<] button. [CAM] Unfreeze the image.
-
Page 36: Observe Image Obtained By Retroillumination - [Illum] Mode
> O SER MANUAL THER MODES Pupil size [PD] Measurement. Press the [Mode] button to select [PD] mode. After proper alignment of the right eye and left eye, press the measuring button each time. When the measurement is complete, the PD is displayed on the screen. Print and exit. - Page 37 > O SER MANUAL THER MODES Enter [ILLUM] mode. Press [ILLUM] button in the [Measurement] mode. Press [Exit] button in order to go out [ILLUM] mode. Pupil [FRZ] mode Change the mode ([Freeze ⇔ Frz/Ref]) [Up] Change the amount of light [Down] Monitor amount of light [Ref]...
- Page 38 > O SER MANUAL THER MODES [Freeze/Ref Mode] display: Vertex distance [VD] Press [VD] button to change the vertex distance Ready for observation. Ask the examinee to look at the red roof of the eye fixation target. See procedure 3. of the continuous keratometry and refractometry [K/R] mode. Observation.
- Page 39 > O SER MANUAL THER MODES Pupil [Save] Press [Save] button to store the image into memory [Cancel] Press [Cancel] button not to store the image Result of refractometry Maximum of ten images can be stored for each eye. Each image will have a sub number (01~10). Displaying of stored image.
-
Page 40: Display] Mode
> O SER MANUAL THER MODES [Standard Size Display / Double Size Display]: [Exit] End of the select image mode [Zoom] Display in standard size or double size [Prev], [Next] Change images of eye Image of double size can be moved by touching four directions (“↑”, “↓”, “→”,“←”). 3. -
Page 41: Setup] Mode
> O SER MANUAL THER MODES Print button Clear button Exit button <Display for KER>: <Display for CLBC>: <Display for K(P)>: 4. [Setup] mode Change all the settings about measurements, printouts etc. Press [Setup] button in measurement mode. PAGE 1 of [Setup] mode will be displayed. Press [End] button in order to return to measurement mode. - Page 42 > O SER MANUAL THER MODES Change the item Change the contents [End] button Change the page [Print] button [How to change the page] Press one of nine tab buttons on the upper side of display. When you press measuring button, change the page 1,2,3,4,5,6 7,8,9.
-
Page 43: Keratometry
> O SER MANUAL THER MODES b. Keratometry [mm/D]: Form of displaying result of keratometry [mm R1]: Radius of curvature on minimum meridian [R2]: Radius of curvature on maximum meridian [AX]: Axis on maximum meridian [D K1]: Refractive power on minimum meridian [K2]: Refractive power on maximum meridian [AX]: Axis on minimum meridian [AVE AR]: Average radius of curvature... -
Page 44: Patient Number, Time And Date
> O SER MANUAL THER MODES c. Patient number, time and date [Items] [COUNT]: To select whether using the patient number or not [NO.]: Setting off the serial number Pressing [DEC] or [INC] button renders the serial number to be decreased or increased by “1” Pressing [Input] button enables you input number from dialog box. -
Page 45: Print Format
> O SER MANUAL THER MODES d. Print format [Items] [R-PRT]: Result of refractometry to be printed out [ALL]: Maximum of the 10 newest measurements and an average value for each eye [AVE]: Average values only [OFF]: Not printed [K-PRT]: Result of Keratometry to be printed out [ALL]: Maximum of the 10 newest measurements and an average value for each eye [AVE]: Average values only [OFF]: Not printed... -
Page 46: Customize Measuring Modes, Autostart, Etc
> O SER MANUAL THER MODES [ TYPE: A ] [ TYPE: E ] e. Customize measuring modes, AutoStart, etc. [Items] [MODE]: Assigns order of measurement modes [REF, KER, K/R, CLBC, K(P)] and delete unnecessary modes 1: First mode that is displayed when power is turned ON. It cannot be set to OFF 2~5: Second modes and after Assign first measurement mode and after If you want to delete unnecessary modes, delete from last (5... -
Page 47: Communication
> O SER MANUAL THER MODES [LANGUAGE]: English / Chinese [INIT AUTO START] [ON]: Automatic start after power ON [OFF]: Manual start after power ON [AUTO START COUNT] 3: Continuous measurement starts automatically and will be performed 3 times 5: Continuous measurement starts automatically and will be performed 5 times [BEEP] [ALL]: Enable beep sound when touch screen, press keypad or measurement button, error occurs, [REF] motor moves... -
Page 48: Messages For Internal Printer
> O SER MANUAL THER MODES g. Messages for internal printer Enter a message to be printed out with the results of measurement using the internal printer in this window. You can enter a messages in 24 characters x 2 lines. [Cursor position] The cursor blinking in the upper area represents the input position Press [Line] button to change the row of the blinking cursor... -
Page 49: Adjust Brightness
> O SER MANUAL THER MODES h. Adjust brightness Adjust the brightness of monitor Press [BRIGHT-] or [BRIGHT+] button to adjust the brightness of monitor (0~17) i. Load default system variable If you press the [LOAD DEFAULT SYSVAR] button, the system variable will be initialized. AKR300 - Auto Kerato Refractometer >... -
Page 50: Self Inspection And Maintenance
VIII. S ELF INSPECTION AND MAINTENANCE... -
Page 51: Before Calling A Service Person
> S SER MANUAL ELF INSPECTION AND MAINTENANCE 1. Before calling a service person Warning messages will be displayed on the monitor if some problems occur. It might be operation errors or problems of the machine. In this case, refer the following instructions. If the function is still not salvaged or recovered, disconnect the power supply and consult the dealer. -
Page 52: Message On Printing
> S SER MANUAL ELF INSPECTION AND MAINTENANCE Sum of SPH and CYL of examinee's eye is over –25D - OUT Impossible to measure Radius of curvature is under 5.0 mm Objective glass in the measurement Clean the glass window is dirty Astigmatism is over 10D Impossible to measure Corneal stigmatism is over 15D... -
Page 53: Service Information
This instrument incorporates a lithium battery, which may pollute the environment if the instrument is abandoned. Caution Please ask a professional waste disposal company to handle disposal, or contact ESSILOR INSTRUMENTS representative or distributor before disposing of the instrument. AKR300 - Auto Kerato Refractometer > V3 - 04-2020... -
Page 54: Classifications And Specifications
IX. C LASSIFICATIONS AND SPECIFICATIONS... -
Page 55: Classifications
> C SER MANUAL LASSIFICATIONS AND SPECIFICATIONS 1. Classifications Classification of equipment: Class I Applied part of equipment: TYPE B Applied Part (Chinrest & Headrest) Protection against electric shock: Class I Protection against harmful ingress of water: Ordinary (IPX0) Method of sterilization: Not applicable Stability of use in an oxygen rich environment: Not suitable Mode of operation: Continuous operation 2. - Page 56 > C SER MANUAL LASSIFICATIONS AND SPECIFICATIONS Power supply AC100-240V, 50/60Hz Power consumption 40 ~ 60 VA Size Approximately 260 (W) x 500 (D) x 450 (H) mm Weight Approximately 20kg AKR300 - Auto Kerato Refractometer > V3 - 04-2020...
-
Page 57: Components
X. C OMPONENTS... -
Page 58: Components
> C SER MANUAL OMPONENTS 1. Components AKR300 main unit: 1 Operation manual: 1 Power supply cable: 1 Test model eye: 1 Chinrest paper: about 100 sheets Printing paper: 2 rolls Dust cover: 1 2. Optional accessories Chinrest paper : 500 sheets Printing paper : 10 rolls AKR300 - Auto Kerato Refractometer >... -
Page 59: Qr Code
XI. QR C... - Page 60 > QR C SER MANUAL AKR300 - Auto Kerato Refractometer > V3 - 04-2020...
- Page 61 > QR C SER MANUAL AKR300 - Auto Kerato Refractometer > V3 - 04-2020...
- Page 62 > QR C SER MANUAL AKR300 - Auto Kerato Refractometer > V3 - 04-2020...
- Page 63 Essilor Instruments USA 8600 W. Catalpa Avenue, Suite 703 Chicago, IL 60656 Phone: 855.393.4647 Email: info@essilorinstrumentsusa.com www.essilorinstrumentsusa.com...
Need help?
Do you have a question about the AKR 300 and is the answer not in the manual?
Questions and answers