Table of Contents
Advertisement
Quick Links
Advertisement
Table of Contents

Subscribe to Our Youtube Channel
Related Manuals for Essilor Instruments ALM 800


Summary of Contents for Essilor Instruments ALM 800
- Page 1 SER MANUAL...
-
Page 2: Table Of Contents
> C SER MANUAL ONTENTS ONTENTS I. I NTRODUCTION 1. About this manual II. S AFETY CONSIDERATION 1. Symbols in this manual 2. General cautions III. A CCESSORIES IV. D EVICE 1. General description of product 2. Parts identification V. I NSTRUCTIONS FOR USE 1. - Page 3 > C SER MANUAL ONTENTS 9. Measurement of contact lens a. Preparation b. Procedure IX. M ARKING 1. Lens without astigmatism 2. Lens with astigmatism 3. Prism lens X. O THER FUNCTIONS 1. Auto memory 2. Power saving XI. E RROR DISPLAY 1.
-
Page 4: Introduction
I. I NTRODUCTION... -
Page 5: About This Manual
> I SER MANUAL NTRODUCTION The complete user manual is available on a web space. To access other available languages, please scan the QR code at the end of this user manual > Chapter QR code (p.72). This devise is possible to measure the spherical power / cylindrical power / cylindrical axis / prism / PD / UV cut percentage / blue light cut (transmittance) percentage of glass lens and contact lens. -
Page 6: Safety Consideration
II. S AFETY CONSIDERATION... -
Page 7: Symbols In This Manual
> S SER MANUAL AFETY CONSIDERATION 1. Symbols in this manual This symbol indicates that mishandling as a result of Warning failure to comply with the indications can result in “personal death” or “serious injury”. Denotes general ban or prohibition General mandatory action Additional information which is important to the text or useful/ convenient to know... -
Page 8: Accessories
III. A CCESSORIES... - Page 9 > A SER MANUAL CCESSORIES Power cord: 1 (2.5m) Printer paper: 1 (Width: 58mm) Contact lens: 1 Dust cover: 1 Operation manual: 1 Use only the accessories specified by us. Avoid direct sunlight, high-temperature and humidity when storing the printer paper because it is a thermal paper.
-
Page 10: Device
IV. D EVICE... -
Page 11: General Description Of Product
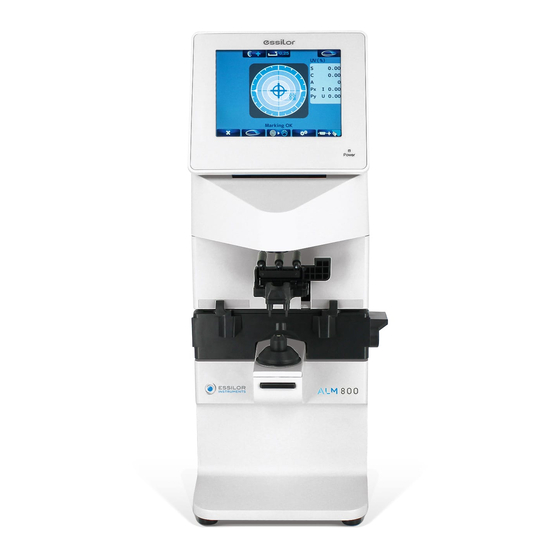
> D SER MANUAL EVICE 1. General description of product This device aims to take the measurements of SPH, CYL, AXIS, prism refractive power and optical axis coordinate of unprocessed lens, processed eyeglass lens and contact lens, and to put dots on them to find its axis. - Page 12 > D SER MANUAL EVICE Nose pad Lens stand Take a measurement by placing the eyeglass lens on the lens stand. Lens plate The plate to be reference of the cylindrical axis and specified direction of the prism. For the eyeglass lens, take a measurement so as that the lens frame contacts with the lens plate. Lens plate lever Moves the lens plate back and forth.
-
Page 13: Instructions For Use
V. I NSTRUCTIONS FOR USE... -
Page 14: Installation
> I SER MANUAL NSTRUCTIONS FOR USE 1. Installation 1. Do not expose the device to sunlight or bright light from lighting equipments. Take extra caution to avoid strong light because it may cause the failure of measurement. 2. Do not install the device in places where either dust or rubbish may accumulate. Also, the environments with extremes in heat and humidity should be avoided. -
Page 15: Disposal
> I SER MANUAL NSTRUCTIONS FOR USE Avoid using organic solvent such as thinner which may damage the water based paint finish or device. 4. If the device is not used for any length of time, unplug the power cord. 5. -
Page 16: Operating Instructions Of Device
VI. O PERATING INSTRUCTIONS OF DEVICE... -
Page 17: Lens Holder
> O SER MANUAL PERATING INSTRUCTIONS OF DEVICE 1. Lens holder Raise the lever to the operational direction until it is unlocked. Lower the lens holder slowly and fix the lens. Do not give strong impact to a lens when lowering the lens holder. When rising the lens holder, make sure to move to the top. -
Page 18: Printer
> O SER MANUAL PERATING INSTRUCTIONS OF DEVICE Place the tips of the marking pens on the lens surface softly. Do not mark several times at the same point. The marking pen may be worn out quickly. Release the finger after marking. The marking lever returns to the initial position. - Page 19 > O SER MANUAL PERATING INSTRUCTIONS OF DEVICE Name Distributor's name, comment etc. (printed out only when ID is set) Number of characters input: 44 characters (22 characters X 2 lines) <R> Measurement value of right lens The unit of the prism value is different according to the setting. [Add] Add measurement values are displayed only at the time of measurements of multifocal lens and progressive lens.
- Page 20 > O SER MANUAL PERATING INSTRUCTIONS OF DEVICE (Same as that for a right lens) PD of right eye and left eye Printout sample when unprocessed lens is measured Printout sample in case of measurement error [Measurement error]. Other error can be displayed: SPH Over CYL Over Prism Over...
-
Page 21: Before Measurement
VII. B EFORE MEASUREMENT... -
Page 22: Check Up Before Measurement
> B SER MANUAL EFORE MEASUREMENT 1. Check up before measurement Verify that: The lens holder is set properly. The lens under the lens stand is clean. > In case that the lens is dirty, clean it with a soft cloth. Plug the power cord to the outlet. -
Page 23: Description Of Measurement Screen
> B SER MANUAL EFORE MEASUREMENT Measurement value display area 2. Description of measurement screen The display of the measurement screen reflects the setting and condition of the device. The touch panel is adopted. They are corresponding to the icons on the monitor. Type of lens Left Right... -
Page 24: Preparation For Measurement
> B SER MANUAL EFORE MEASUREMENT mentioned [Measurement of ultraviolet (UV) and blue light cut percentage /transmittance]. The details of Hard/Soft contact lens measurement mode are mentioned [Measurement of contact lens]. Explanation about switches - Bottom of monitor: AME OF ICON ESCRIPTION OF FUNCTION Deletes measurement values stored Clear... -
Page 25: Setup] Screen
> B SER MANUAL EFORE MEASUREMENT b. [Setup] screen [Setup] screen - Page 1/4 [Cyl] Selects sign for Cyl: ± [Step] Selects step to display measurement value: 0.25 0.12 0.01 [Auto Prog.] Sets auto detection of progressive lens: [Off] [On] [Lens] Selects lens to be measured: [Normal]: Eyeglass lens... - Page 26 > B SER MANUAL EFORE MEASUREMENT [Setup] screen - Page 2/4 [UV / Blue] Selects [UV] cut percentage or [BV] cut percentage and [CB] transmittance measurement [Off]: No measurement [UV]: Only [UV] cut measurement [UV+BL]: [UV] and [BV] cut percentage, [CB] transmittance measurement. [UV Graph] Selects if displaying [UV] transmission graph or not (displayed only on the progressive lens measurement screen):...
- Page 27 > B SER MANUAL EFORE MEASUREMENT [Setup] screen - Page 3/4 [Ray] Selects measurement wavelength: e-line d-line [Stanby] Selects time to activate standby mode: 3 min 5 min 10 min [Language] Selects language displayed on screen: English French Spanish Italian Portuguese German Chinese...
-
Page 28: Id] Screen
> B SER MANUAL EFORE MEASUREMENT [Setup] screen - Page 4/4 [Date/Time] Switches to [Date/Time] screen [Lens mode] Selects the lens measurement mode: [Lab]: Switching the lens which is selected single lens→ eyeglass right lens→ eyeglass left lens [ECP]: Switching the lens which is selected eyeglass right lens → eyeglass left lens Refer to [Lab/ECP mode]. -
Page 29: Data Output] Screen
> B SER MANUAL EFORE MEASUREMENT Select the characters with and enter them with > Any changes made will overwrite the original characters. > The cursor in moves by pressing the arrows. > The maximum number of characters is 44 (22 characters X 2 lines). case changing characters,... - Page 30 > B SER MANUAL EFORE MEASUREMENT [Output Device] [Print]: Device printer [RS232C]: RS232C terminal [Both]: Both [Auto Comm] [Off]: Output by touching the measurement screen output icon [On]: Measurement values are output continuously [Baud Rate] Communication speed, select from: 115200 38400 9600 In case of output from RS232C, the data is output only in english regardless of language...
-
Page 31: Date/Time] Screen
> B SER MANUAL EFORE MEASUREMENT Use a shield wire for a connecting cable to protect the output data from noise. e. [Date/Time] screen The screen to set the date and time for printout and communication output. Select the item to be changed with and set the detail with [YMD]: Year, Month, Day [DMY]: Day, Month, Year... -
Page 32: Prism Center] Screen
> B SER MANUAL EFORE MEASUREMENT Move the cursor to the item to be changed with While the Memory/Add switch is held, the screen above is displayed. Make changes with f. [Prism center] screen This function performs the prism center measurement setting. If set the [On], the prism center measurement is performed. - Page 33 > B SER MANUAL EFORE MEASUREMENT Next, enter the prism value to ten-key which is displayed and touch the enter key After entering the value, touch to return to measurement screen. > The cross cursor is displayed at the entered prism prescription value. >...
-
Page 34: Default Setting] Screen
> B SER MANUAL EFORE MEASUREMENT Next, enter the prism value to ten-key which is displayed and touch the enter key After entering the value, touch to return to measurement screen. > The cross cursor is displayed at the entered prism prescription value. g. - Page 35 > B SER MANUAL EFORE MEASUREMENT Press: if you want to change the setting back to the default. if you do not want to change the setting back to the default. It goes back to the measurement screen by selecting it. ALM800 - Auto lensmeter >...
- Page 36 VIII. M EASUREMENT...
-
Page 37: Measurement
> M SER MANUAL EASUREMENT 1. Measurement of single lens Make sure that the [Lens Mode] setting on the [Setup] screen is set to [Lab]. Place the lens on the lens stand. Lower the lens holder softly on the lens. >... - Page 38 > M SER MANUAL EASUREMENT Move the lens until the alignment mark and cross cursor overlap. When they overlap, the message [Marking OK] appears to indicate that the marking is ready to be carried out. S, C, A and prism value are stored by pressing the Memory/Add switch. >...
-
Page 39: Measurement Of Eyeglass Lens
> M SER MANUAL EASUREMENT 2. Measurement of eyeglass lens Place the eyeglass lens on the lens stand and lower the lens holder softly on the lens. Move the lens plate to the near side with the lens plate lever so that the bottom of the lens touches the lens plate. - Page 40 > M SER MANUAL EASUREMENT Save the measurement values in memory by pressing the Memory/Add switch after measurement. > The color of the measurement value area is changed, and the measurement values are fixed. In case of setting [Auto Memory] on the [Setup] screen as [On], the measurement values are automatically stored in memory after the message [Marking OK] appears.
-
Page 41: Pupillary Distance [Pd] Measurement
> M SER MANUAL EASUREMENT 3. Pupillary distance [PD] measurement a. Device setting On the [Setup] screen, confirm that [PD Measure] is set as [On], and the lens measurement is set for both of right and left lens. In case that [PD Measure] is [Off], the PD measurement value and measurement area are not displayed. b. -
Page 42: Measurement Of Multifocal Lens
> M SER MANUAL EASUREMENT 1. Left PD measurement value 2. Right and left PD measurement values 3. Right PD measurement value 4. Measurement of multifocal lens Place the lens on the lens stand and hold it with the lens holder softly. Take a measurement of far point, and press the Memory/ Add switch. -
Page 43: Measurement Of Progressive Lens
> M SER MANUAL EASUREMENT Store the ADD value of the near point (near-sight segment) in memory by pressing the Memory/Add switch. The color of the Add value is reversed after storing it. In case of trifocal lens, display “Ad2” by pressing the Memory/Add switch one more time. After that, repeat (3) and (4) after bringing the second near point (near-sight segment) to the center of the lens stand. - Page 44 > M SER MANUAL EASUREMENT Switching to progressive lens measurement screen. > The icon is changed to , and the progressive lens measurement screen is displayed by pressing (single/ progressive lens selection switch). In case that [Auto Prog] is set as [On], the lens is automatically judged whether the lens is a progressive lens or not.
- Page 45 > M SER MANUAL EASUREMENT When (ADD Measure] on the [Setup] screen is set as [F/N.AT], it is detected automatically and the measurement values are stored in memory. Measurement of near point. Take a measurement of near point. As shown on the right, move the lens slowly to move the cross cursor (red) according to If it goes out of the progressive zone, the cross cursor moves right or left.
-
Page 46: Measurement Of Ultraviolet [Uv] Transmission And Blue Light Cut Percentage /Transmittance
> M SER MANUAL EASUREMENT Perform the alignment carefully when it comes closer to the near point and starts blinking. Once the near point is detected, it blips. The cross cursor is fixed at the near point and its color changes to blue. -
Page 47: Device Setting
> M SER MANUAL EASUREMENT a. Device setting Before [UV] cut percentage measurement, please make sure what [UV / BLUE] is set to [UV] in the [Setup] screen. If [UV / BLUE] is set to [Off], [UV] cut percentage and [UV] cut percentage display area are not displayed. If you want to display the [UV] cut percentage graph, set [UV Graph] to [On]. - Page 48 > M SER MANUAL EASUREMENT [UV / BLUE] icon [UV / BLUE] icon (before storing measured values (after storing measured values) button will be changed to button after measurement. Then it is possible to touch. By touching , [UV/BLUE] screen is displayed and it is possible to check the [UV] and [BV] cut percentage and [CB] transmittance.
-
Page 49: Lab / Ecp] Mode
> M SER MANUAL EASUREMENT [UV] transmittance measurement Ultra Violet Measure the cut percentage of UV which harmful to the eyes. The measurement result are displayed [UV] and by the size and color of the arrow (*) nothing 1% ≦ R ≦ 9% 10% ≦... -
Page 50: Measurement Of Contact Lens
> M SER MANUAL EASUREMENT [Prism Center] 9. Measurement of contact lens a. Preparation Select: [H CL]: in case of taking a measurement of hard contact lens [S CL]: in case of taking a measurement of soft contact lens Change the lens stand to the accompanying contact lens stand. b. - Page 51 > M SER MANUAL EASUREMENT Replace the standard lens stand with the contact lens stand. Lower the lens holder, and hold the contact lens stand which the contact lens is already placed. ALM800 - Auto lensmeter > V1 - 05-2020...
-
Page 52: Marking
IX. M ARKING... -
Page 53: Lens Without Astigmatism
> M SER MANUAL ARKING 1. Lens without astigmatism Overlap the cross cursor with the alignment mark on the screen by moving the lens. > You are ready for marking when the message [Marking OK] is displayed. Lower the marking lever to mark on the lens. 2. -
Page 54: Prism Lens
> M SER MANUAL ARKING Marking on the cylindrical axis Move the lens so as that the axis mark aligned with 0° approximately. To be more precise, align it so as that the axis value indicated becomes 0°. 3. Prism lens In case that prescription is expressed in [X-Y] Select [X-Y] from [Prism] on the [Setup] screen. - Page 55 > M SER MANUAL ARKING In case that prescription is expressed in [P-B] Select [P-B] from [Prism] on the [Setup] screen. Move the lens so that the prism values displayed on the screen match with the ones in the prescription. Prism value Base direction In case that prescription is expressed in [mm]...
-
Page 56: Other Functions
X. O THER FUNCTIONS... -
Page 57: Auto Memory
> O SER MANUAL THER FUNCTIONS 1. Auto memory This device has the function to store the measurement values in memory automatically when the alignment is achieved, and the message [Marking OK] is displayed at the time of the measurements of single focal lens, multifocal lens and contact lens. - Page 58 > O SER MANUAL THER FUNCTIONS Measurement mode power indicator (PW) light on (No operation for a set time) Power saving Power indicator (PW) blinking (Press any switch) Return to measurement mode power indicator (PW) light on ALM800 - Auto lensmeter > V1 - 05-2020...
-
Page 59: Error Display
XI. E RROR DISPLAY... -
Page 60: Type Of Errors
> E SER MANUAL RROR DISPLAY 1. Type of errors An error message appears when the measurement condition or measurement result is judged as unreasonable. Also, an error message appears when the performance of the device is abnormal. ESSAGE AUSE ORRECTIVE ACTION Any of the measurement values is more than ±0.25 Lens is set on the lens stand... - Page 61 > E SER MANUAL RROR DISPLAY This message appears in case of measuring the lens which exceeds the upper limit of the measurement range of the device. SPH/CYL/Prism/ADD over Take a measurement of the lens within the measurement range > Refer to specification This message appears when the direct sunlight or strong glare is on the device, or the lens under the lens stand is extremely dirty or has scratches.
-
Page 62: Storage And Maintenance
XII. S TORAGE AND MAINTENANCE... -
Page 63: Storage
> S SER MANUAL TORAGE AND MAINTENANCE 1. Storage 1. Points to check for long-term storage Turn the power switch OFF Remove the power cord from the outlet Put the dust proof cover on the main unit 2. Notes on storage environment Avoid storage under the following conditions: Dusty place Where water may get on the device... -
Page 64: Reloading Printer Paper
> S SER MANUAL TORAGE AND MAINTENANCE Ensure to use the marking pen specified for ALM800. Do not touch the pen tip at the time of replacement. b. Reloading printer paper Open the printer cover by pressing the printer cover button. Insert the printer paper with attention to the winding direction. - Page 65 > S SER MANUAL TORAGE AND MAINTENANCE When the fuse is brown out, replace it after removing the fuse holder of the power inlet. The fuse holder is removed from the main unit by pulling it out. Always use the specified fuse (T2A L 250V). 1.
- Page 66 XIII. S PECIFICATIONS...
-
Page 67: Specifications
> S SER MANUAL PECIFICATIONS Sphere (S) -25D to +25D Step: 0.01/0.12/0.25D Cylinder (C) 0 to ±10D Step: 0.01/0.12/0.25D Measurement range Axis angle (A) 0 to 180° Step: 1° Addition (Add) 0 to +10D Step: 0.01/0.12/0.25D Prism 0 to 10Δ Step: 0.01/0.12/0.25D Unprocessed lens (diameter: 100mm) -
Page 68: Guidance And Manufacturer ' S Declaration
XIV. G UIDANCE AND MANUFACTURER S DECLARATION... -
Page 69: Electromagnetic Emission
> G SER MANUAL UIDANCE AND MANUFACTURER S DECLARATION 1. Electromagnetic emission Guidance and manufacturer's declaration – electromagnetic emission This device is intended for use in the electromagnetic environment specified below. The customer or the end user of the device should assure that it is used in such an environment. Emission test Compliance Electromagnetic environment - guidance... - Page 70 > G SER MANUAL UIDANCE AND MANUFACTURER S DECLARATION Guidance and manufacturer's declaration – electromagnetic immunity The device is intended for use in the electromagnetic environment specified below. The customer or the user of the device should assure that it is used in such an environment. IEC 60601 Compliance Immunity test...
- Page 71 > G SER MANUAL UIDANCE AND MANUFACTURER S DECLARATION For transmitters rated at a maximum output power not listed above, the recommended separation distance (d) in meters (m) can be estimated using the equation applicable to the frequency of the transmitter, where (P) is the maximum output power rating of the transmitter in watts (W) according to the transmitter manufacturer.
-
Page 72: Qr Code
XV. QR C... - Page 73 > QR C SER MANUAL ALM800 - Auto lensmeter > V1 - 05-2020...
- Page 74 > QR C SER MANUAL ALM800 - Auto lensmeter > V1 - 05-2020...
- Page 75 > QR C SER MANUAL ALM800 - Auto lensmeter > V1 - 05-2020...
- Page 76 Essilor Instruments USA 8600 W. Catalpa Avenue, Suite 703 Chicago, IL 60656 Phone: 855.393.4647 Email: info@essilorinstrumentsusa.com www.essilorinstrumentsusa.com...
Need help?
Do you have a question about the ALM 800 and is the answer not in the manual?
Questions and answers