Advertisement
Quick Links
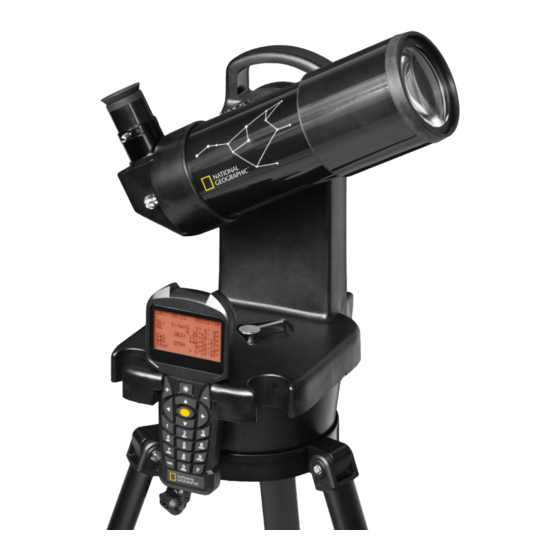
70/350MM GOTO
Automatic Tracking Telescope
Instruction Manual
Optical design
Magnification
Front lens (clear aperture)
Focal length, focal ratio
Standard eyepieces
Accepts eyepiece barrel
Mounting
Total weight (without packaging)
6
X
NOT INCLUDED
Do not mix old and new batteries.
Do not mix alkaline, standard (carbon-zinc),
or rechargeable (ni-cad, ni-mh, etc.) batteries.
Visit us at: nationalgeographic.com
WARNING:
SUN HAZARD — Never look directly at the sun
with this device.
1
Achromatic refractor
18x-88x
60 mm
700 mm
Kellner 20 mm and 10 mm
31.7 mm (1.25")
Slow motion alt-azimuth
2.45 kg / 5.39 lbs
WARNING:
CHOKING HAZARD — Small parts.
Not for children under 3 years.
AGES
10 +
80-10171
Advertisement

Related Manuals for National Geographic 70/350MM GOTO


Summary of Contents for National Geographic 70/350MM GOTO
- Page 1 AGES 10 + Visit us at: nationalgeographic.com 80-10171 70/350MM GOTO Automatic Tracking Telescope Instruction Manual Optical design Achromatic refractor Magnification 18x-88x Front lens (clear aperture) 60 mm Focal length, focal ratio 700 mm Standard eyepieces Kellner 20 mm and 10 mm Accepts eyepiece barrel 31.7 mm (1.25”)
- Page 2 National Geographic’s net proceeds support vital exploration, conservation, research, and education programs. SUN WARNING WARNING: NEVER ATTEMPT TO OBSERVE THE SUN WITH THIS DEVICE! OBSERVING THE SUN – EVEN FOR A MOMENT – WILL CAUSE INSTANT AND IRREVERSIBLE DAMAGE TO YOUR EYE OR EVEN BLINDNESS. Eye damage is often painless, so there is no warning to the observer that the damage has occurred until it is too late.
-
Page 3: Parts Overview
Visit us at: nationalgeographic.com Note: We recommend assembling your telescope for the first time in the daylight or in a lit room so that you can familiarize yourself with assembly steps and all components. Parts Overview 1. Telescope tube 2. Tube opening 3. -
Page 4: Controller Overview
National Geographic’s net proceeds support vital exploration, conservation, research, and education programs. Controller Overview 18. Red light source 19. Handbox display 20. Plus/minus key 21. Illumination 22. Center key 23. Arrow keys 24. Number pad 25. Mini-USB port 26. RJ-45 port... - Page 5 Loosen the screw (12) in the dovetail mount so that it is completely retract-ed (No. 4). Place the telescope with the dovetail in the mount and tighten the screw. Make sure that the National Geographic logo is upright. 3. Altitude knob Loosen the vertical knob by rotating it anticlockwise, align the optical telescope tube (1) horizontally and re-tighten the knob (No.
- Page 6 National Geographic’s net proceeds support vital exploration, conservation, research, and education programs. Part II: Handbox 1. Batteries Remove the cover of the battery compartment (10), located on the top side of the mount’s base, and insert the batteries in the battery holder (No. 2). Use 6 AA batteries and make sure the polarities are aligned correctly. Place the holder into the compartment and cover it.
- Page 7 Visit us at: nationalgeographic.com One-Star Alignment: Step 2: After you select this option, you will be prompted to select a target star. The software will select a star that is very visible in the night sky. If you happen to know of a star you can see with the naked eye, you can choose it by pressing the up and down arrow keys and then selecting it with the center key (22).
- Page 8 National Geographic’s net proceeds support vital exploration, conservation, research, and education programs. 2. Navigation Solar system Object catalog of the solar system Constellation Catalog with the stellar constellations Famous Star Famous star catalog Messier Catal. Catalog with bright deep-sky objects NGC Catalog.
- Page 9 Visit us at: nationalgeographic.com When you select an object catalog, the first object of the catalog will be displayed. You can change the currently displayed object by pressing the up and down arrow keys. Select the object you want to view with the telescope by pressing the center key (22). The telescope will then slew to that position.
- Page 10 National Geographic’s net proceeds support vital exploration, conservation, research, and education programs. Terrestrial Images Possible Objects for Observation: f=20 mm f=10 mm Terrestrial objects Take note of the examples below, including Mount Rushmore and the golf course. Start with the 20 mm eyepiece and focus until the image is clear. After mastering the 20 mm eyepiece, switch to the 10 mm eyepiece and practice scanning and focusing until the image is clear.
- Page 11 Visit us at: nationalgeographic.com Cleaning: Before cleaning the device, disconnect it from the power supply by removing the plug or batteries. Clean the eyepieces and lenses only with a soft, lint-free cloth, like a micro-fibre cloth. Do not apply excess pressure to the cloth to avoid scratching the lenses.
- Page 12 National Geographic’s net proceeds Visit us at: nationalgeographic.com support vital exploration, conservation, research, and education programs. © 2017 National Geographic Partners LLC. All rights reserved. NATIONAL GEOGRAPHIC and Yellow Border Design are trademarks of the National Geographic Society, used under license.
Need help?
Do you have a question about the 70/350MM GOTO and is the answer not in the manual?
Questions and answers