Advertisement
Available languages
Available languages
Quick Links
FABER BT
FABER L BT
KIT
AUTOMAZIONI A PISTONE PER CANCELLI A BATTENTE
PISTON AUTOMATIONS FOR SWING GATES
AUTOMATIONS A PISTON POUR PORTAILS BATTANTS
ELEKTROMECHANISCHER DREHTORANTRIEB
Attenzione! Leggere attentamente le "Avvertenze" all'interno! Caution! Read "Warnings" inside carefully!
Attention! Veuillez lire attentivement les Avertissements qui se trouvent à l'intérieur! Achtung! Bitte lesen Sie aufmerksam die „Hinweise" im Inneren!
Advertisement

Related Manuals for BFT FABER BT


Summary of Contents for BFT FABER BT
- Page 1 FABER BT FABER L BT AUTOMAZIONI A PISTONE PER CANCELLI A BATTENTE PISTON AUTOMATIONS FOR SWING GATES AUTOMATIONS A PISTON POUR PORTAILS BATTANTS ELEKTROMECHANISCHER DREHTORANTRIEB Attenzione! Leggere attentamente le “Avvertenze” all’interno! Caution! Read “Warnings” inside carefully! Attention! Veuillez lire attentivement les Avertissements qui se trouvent à l’intérieur! Achtung! Bitte lesen Sie aufmerksam die „Hinweise“ im Inneren!
- Page 2 MOVIMENTI CANCELLO ������������������������������������������������������������������������������������������������������������������������������������������������������������ 27 VERIFICHE FINALI E MANUTENZIONE ������������������������������������������������������������������������������������������������������������������������������������� 27 MANUALE D'USO: MANOVRA MANUALE �������������������������������������������������������������������������������������������������������������������������������� 28 SOSTITUZIONE BATTERIA �������������������������������������������������������������������������������������������������������������������������������������������������������� 28 SOSTITUZIONE FUSIBILE ���������������������������������������������������������������������������������������������������������������������������������������������������������� 28 AVVERTENZE PER L'UTILIZZATORE ������������������������������������������������������������������������������������������������������������������������������������������ 29 REGISTRO DI MANUTENZIONE ������������������������������������������������������������������������������������������������������������������������������������������������ 30 - FABER BT - FABER L BT KIT...
- Page 3 Conservare le istruzioni per allegarle al fascicolo tecnico e per consultazioni future� Le dichiarazioni di conformità sono consultabili nel sito web http://www�bft-automation�com/CE� Le istruzioni di montaggio e d'uso sono consultabili nella sezione download� Questo prodotto è stato progettato e costruito esclusivamente per l’utilizzo indicato in questa documentazione�...
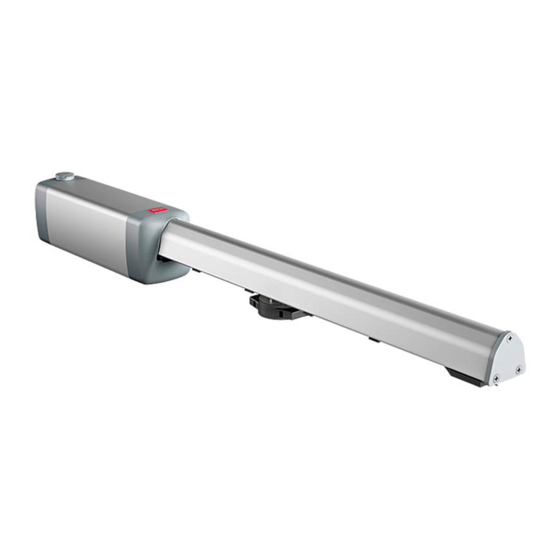
- Page 4 DESCRIZIONE DEL PRODOTTO FABER BT FABER L BT - FABER BT - FABER L BT KIT...
- Page 5 STAFFA DI FISSAGGIO POSTERIORE ARB ZN VITE TE M8X35 8�8 UNI5737 ZN DADO DE AUTOBLOC�M8 ALTO DIN982 ZN ROND�GROWER D�8 ROND�D�8 VITE TCEI M8X25 8�8 UNI5931 ZN TASSELLO TIPO FISCHER SC 6X30 NYLON VITE AUTOF�TC+48X32 UNI6954/DIN7981 ZN FABER BT - FABER L BT KIT...
- Page 6 30 m (ridotta in caso di nebbia-pioggia) Massimo peso anta 2500 N (~250 kg) Grado di protezione IP X4 50N (~5kg) FABER BT Peso attuatore 77N (~7,7kg) FABER L BT Dimensioni Vedere Fig� L Lubrificazione grasso permanente - FABER BT - FABER L BT KIT...
- Page 7 ATTREZZI NECESSARI FABER BT - FABER L BT KIT...
- Page 8 - una volta collegato l’apparecchio alla rete, toccare soltanto i pulsanti e mezzi di regolazione necessari per la programmazione della centrale� - non sono autorizzati interventi e riparazioni che non siano specificati dalle presenti istruzioni� - FABER BT - FABER L BT KIT...
- Page 9 99 103 104 107 108 111 112 112 109 99 102 103 107 106 109 110 110 98 101 102 105 106 108 110 98 100 102 105 105 108 98 100 102 106 105 97 100 104 110 FABER BT - FABER L BT KIT...
- Page 10 73.8 82.5 99.8 73.8 150.9 133.6 142.3 91.1 108.4 82.5 99.8 133.6 150.9 INSTALLAZIONE DESTRA 116.3 142.3 73.8 91.1 108.4 142.3 82.5 73.8 133.6 150.9 99.8 91.1 108.4 82.5 99.8 133.6 150.9 - FABER BT - FABER L BT KIT...
- Page 11 FISSAGGIO STAFFA SU MURO D1 M8 D2 M12 20 Nm SU FERRO D1 M8 D2 M12 20 Nm FABER BT - FABER L BT KIT...
- Page 12 FISSAGGIO OPERATORE + 60 mm - 60 mm CORRETTA INSTALLAZIONE FABER BT FABER L BT CHIUDI CHIUDI 100 mm 135 mm APRI APRI - FABER BT - FABER L BT KIT...
- Page 13 ANCORAGGIO DEGLI ATTACCHI ALL'ANTA Sbloccare l'operatore come da figura e APRIRE l'anta fino ad apertura desiderata (α°) α° Chiudere l'anta e ribloccare l'operatore come da figura Fissare la staffa seguendo la procedura sotto: FABER BT - FABER L BT KIT...
- Page 14 7� Inserire i fisher e fissare le viti come indicato in figura� Ø5 5� Cavopovolgere la scatola 6� Forare con trapano i quattro fori indicati� quadro comandi - FABER BT - FABER L BT KIT...
- Page 15 IN CASO DI PASSAGGIO CAVO DA PARETE rompere il IN CASO DI PASSAGGIO CAVO SU CANALETTA ESTERNA foro posteriore PG11 max 24 mm In entrambi i casi , piegare ora i gommini per chiudere i fori: FABER BT - FABER L BT KIT...
- Page 16 ATTENZIONE: LA VITE VA FISSATA NELLA PARTE DI PARETE PIÙ PLANARE� Procedere come indicato in sequenza: Rompere i pre fori Inserire le apposite viti e avvitare Segnare con una matita nei fori Forare con trapano - FABER BT - FABER L BT KIT...
- Page 17 Ø 4 dal basso *Non in dotazione *Non in dotazione Procedere come indicato in sequenza: Rompere i pre fori Inserire le apposite viti e avvitare Segnare con una matita nei fori Forare con trapano FABER BT - FABER L BT KIT...
- Page 18 - I conduttori devono essere vincolati da un fissaggio supplementare in prossimità dei morsetti (per esempio mediante fascette) al fine di tenere nettamente separate le parti in tensione dalle parti in bassissima tensione di sicurezza� - FABER BT - FABER L BT KIT...
- Page 19 1 2 3 4 5 6 7 8 9 10 1 2 3 1 2 3 3� Procedere ai collegamenti come indicato facendo attenzione a 4� Chiudere il coperchietto e avvitare le viti posizionare l'OR nell'apposito incavo* 5 mm FABER BT - FABER L BT KIT...
- Page 20 7 8 9 13 14 15 16 17 18 19 20 21 22 23 24 25 26 27 28 COLLEGAMENTI DI RETE Collegare i cavi di FASE (L) e NEUTRO (N) - FABER BT - FABER L BT KIT...
- Page 21 Svitare la vite della camma Spostare la camma a 5 mm A tenendo teso il filo B � Chiudere il cancello� dal bordo della staffa Come ultima operazione: bloccare il cancello� Ripetere tutte le operazioni sull'altra anta! FABER BT - FABER L BT KIT...
- Page 22 RADIO RADIO RADIO premere per 1 volta MEMORIZZAZIONE TELECOMANDO COME PEDONALE (APERTURA PARZIALE) RADIO RADIO RADIO premere per 1 volta CANCELLAZIONE TELECOMANDI RADIO RADIO ..premere per 5 sec� - FABER BT - FABER L BT KIT...
- Page 23 LA CHIUSURA E' LA CHIUSURA E' QUELLA QUELLA QUELLA QUELLA DESIDERATA: DESIDERATA: DESIDERATA: DESIDERATA: Spostare il finecorsa FC1 fino ad Spostare il finecorsa FC2 fino ad ottenere l'apertura desiderata� ottenere la chiusura desiderata� FABER BT - FABER L BT KIT...
- Page 24 5 6 7 8 9 10 5 6 7 8 9 10 min 1 sec max 25 sec * è il tempo che trascorre tra la chiusura della prima anta e la seconda� - FABER BT - FABER L BT KIT...
- Page 25 20 21 22 23 24 25 26 27 28 10 11 14 15 20 21 28 29 42 43 44 45 50 51 52 60 61 62 70 71 72 73 74 75 220-230V ~ FABER BT - FABER L BT KIT...
- Page 26 7 8 9 13 14 15 16 17 18 19 20 21 22 23 24 25 26 27 28 1 2 3 4 5 6 7 8 9 10 B: STOP A: START - FABER BT - FABER L BT KIT...
- Page 27 - La manutenzione come sopra descritta deve essere ripetuta con frequenza almeno annuale o ad intervalli di tempo minori qualora le caratteristiche del sito o dell’installazione lo richiedessero� FABER BT - FABER L BT KIT...
- Page 28 60 61 62 70 71 72 73 74 75 essere cortocircuitati o toccati con le mani� 23A 12V Rimuovere e smaltire le batterie se- paratamente secondo quanto pre- scritto dalle norme vigenti� - FABER BT - FABER L BT KIT...
- Page 29 - La rottura o l’usura di organi meccanici della porta (parte guidata), quali ad esempio cavi, molle, sup- FABER BT - FABER L BT KIT...
- Page 30 REGISTRO DI MANUTENZIONE Ubicazione: Motore/azionamento: Proprietario: Fotocellule: Dimensioni e peso: Radiocomando: Materiale (PVC, alluminio): Lampeggiante: Data di installazione: Altro: Data Descrizione dell’intervento Nome e firma ...
- Page 31 Q�BO KEY CONNECTION OPTIONAL ���������������������������������������������������������������������������������������������������������������������������������������� 55 GATE MOVEMENTS ������������������������������������������������������������������������������������������������������������������������������������������������������������������ 56 FINAL CHECKS AND MAINTENANCE��������������������������������������������������������������������������������������������������������������������������������������� 56 USER GUIDE: MANUAL OPERATION���������������������������������������������������������������������������������������������������������������������������������������� 57 BATTERY REPLACEMENT ��������������������������������������������������������������������������������������������������������������������������������������������������������� 57 FUSE REPLACEMENT ���������������������������������������������������������������������������������������������������������������������������������������������������������������� 57 USER WARNINGS ���������������������������������������������������������������������������������������������������������������������������������������������������������������������� 58 MAINTENANCE REGISTER ������������������������������������������������������������������������������������������������������������������������������������������������������� 59 FABER BT - FABER L BT KIT...
- Page 32 Keep hold of instructions so that you can attach them to the technical file and keep them handy for future reference� Declarations of conformity can be found at http://www�bft-automation�com/CE� Instructions for use and assembly can be found in the download section�...
- Page 33 PRODUCT DESCRIPTION FABER BT FABER L BT FABER BT - FABER L BT KIT...
- Page 34 HEX HEAD SCREW M8X35 8�8 UNI5737 GALV� DE SELF-LOCKING NUT M8 ALTO DIN982 GALV� GROWER WASHER D�8 WASHER D�8 SOCKET HEAD CAP SCREW M8X25 8�8 UNI5931 GALV� FISCHER TYPE DOWEL SC 6X30 NYLON SELF-TAP� SCREW+48X32 UNI6954/DIN7981 GALV� - FABER BT - FABER L BT KIT...
- Page 35 DIMENSIONS 825 FABER BT KIT 943 FABER L BT KIT Cu MAX 305 mm FABER BT KIT Cu MAX 470 mm FABER L BT KIT 72,5 mm FABER BT KIT 108 mm FABER L BT KIT INSTALLATION DIAGRAM STOPS STOPS Not provided�...
- Page 36 NECESSARY TOOLS - FABER BT - FABER L BT KIT...
- Page 37 - do not connect to the mains until assembly is completed� - once the equipment is connected to the mains, only touch buttons and adjustment devices necessary to program the unit� - work and repairs not specified in these instructions are not authorised� FABER BT - FABER L BT KIT...
- Page 38 99 103 104 107 108 111 112 112 109 99 102 103 107 106 109 110 110 98 101 102 105 106 108 110 98 100 102 105 105 108 98 100 102 106 105 97 100 104 110 - FABER BT - FABER L BT KIT...
- Page 39 142.3 73.8 82.5 99.8 73.8 150.9 133.6 142.3 91.1 108.4 82.5 99.8 133.6 150.9 RIGHT INSTALLATION 116.3 142.3 73.8 91.1 108.4 142.3 82.5 73.8 133.6 150.9 99.8 91.1 108.4 82.5 99.8 133.6 150.9 FABER BT - FABER L BT KIT...
- Page 40 ATTACHING THE BRACKET TO WALL D1 M8 D2 M12 20 Nm ONTO IRON D1 M8 D2 M12 20 Nm - FABER BT - FABER L BT KIT...
- Page 41 ATTACHING THE OPERATOR + 60 mm - 60 mm CORRECT INSTALLATION FABER BT FABER L BT CLOSE CLOSE 100 mm 135 mm OPEN OPEN FABER BT - FABER L BT KIT...
- Page 42 FASTENING OF FITTINGS TO LEAF Unlock the operator as shown and OPEN the leaf ad far as required (α°) α° Close the leaf and relock the operator as shown Fix the bracket following the procedure below: - FABER BT - FABER L BT KIT...
- Page 43 7� Insert the Fisher dowels and fix with the screws as shown in the figure� Ø5 5� Turn the control panel 6� Drill the four holes shown� upside down FABER BT - FABER L BT KIT...
- Page 44 TO PASS WIRES FROM THE WALL break the back hole TO PASS WIRE THROUGH THE EXTERNAL RACEWAY PG11 max 24 mm In both cases, now fold the plugs to close the holes: - FABER BT - FABER L BT KIT...
- Page 45 WARNING: THE SCREW SHOULD BE SECURED TO THE MOST EVEN PART OF THE WALL Proceed as shown in the sequence: Break the provisionary holes Insert the appropriate screws and screw in Make a mark with a pencil Drill the holes through the holes FABER BT - FABER L BT KIT...
- Page 46 *Not provided *Not provided Proceed as shown in the sequence: Break the provisionary holes Insert the appropriate screws and screw in Make a mark with a pencil Drill the holes through the holes - FABER BT - FABER L BT KIT...
- Page 47 0�5 mm � - Wires must be secured with additional fastening near the terminals (for example, using cable clamps) in order to keep live parts well separated from safety extra low voltage parts� FABER BT - FABER L BT KIT...
- Page 48 1 2 3 3� Proceed with the connections as shown, paying attention to place 4� Close the lid and screw the screws back in the O-ring in the appropriate slot* 5 mm - FABER BT - FABER L BT KIT...
- Page 49 7 8 9 13 14 15 16 17 18 19 20 21 22 23 24 25 26 27 28 MAINS CONNECTIONS Connect the PHASE (L) and NEUTRAL (N) wires FABER BT - FABER L BT KIT...
- Page 50 Move the cam to 5 mm from screw A keeping wire B taut� the edge of the bracket Close the gate� As the last operation: block the gate� Repeat the same operations for the other leaf! - FABER BT - FABER L BT KIT...
- Page 51 RADIO RADIO press once SAVING THE REMOTE CONTROL AS PEDESTRIAN (PARTIAL OPEN) RADIO RADIO RADIO press once DELETING REMOTE CONTROLS RADIO RADIO ..press and hold down for 5 sec� FABER BT - FABER L BT KIT...
- Page 52 OPENING IS OPENING IS CLOSING IS CLOSING IS DESIRED: DESIRED: DESIRED: DESIRED: Move the limit switch (FC1) to get Move the limit switch (FC2) to get the desired opening� the desired closing� - FABER BT - FABER L BT KIT...
- Page 53 1 2 3 4 5 6 7 8 9 10 5 6 7 8 9 10 min 1 sec max 25 sec * it is the time between the first and second leaf closing FABER BT - FABER L BT KIT...
- Page 54 23 24 25 26 27 28 10 11 14 15 20 21 28 29 42 43 44 45 50 51 52 60 61 62 70 71 72 73 74 75 220-230V ~ - FABER BT - FABER L BT KIT...
- Page 55 7 8 9 13 14 15 16 17 18 19 20 21 22 23 24 25 26 27 28 1 2 3 4 5 6 7 8 9 10 B: STOP A: START FABER BT - FABER L BT KIT...
- Page 56 - The maintenance described above must be repeated at least once yearly or at shorter intervals where site or installation conditions make this necessary� - FABER BT - FABER L BT KIT...
- Page 57 10 11 14 15 20 21 28 29 42 43 44 45 50 51 52 60 61 62 70 71 72 73 74 75 Remove the batteries and dispose 23A 12V of them separately according to lo- cal regulations� FABER BT - FABER L BT KIT...
- Page 58 Have the system checked by qualified, expert per- sonnel (professional installer) at regular intervals according to the instructions issued by the installer or manufacturer of the door� - When cleaning the outside, always disconnect the mains power� - FABER BT - FABER L BT KIT...
- Page 59 MAINTENANCE REGISTER Position: Motor/operating: Owner: Photocells: Weight and size: Transmitter: Material (PVC, aluminium): Flashing light: Installation date: Other: Date Description of the intervention Name and signature...
- Page 60 MOUVEMENTS DU PORTAIL ����������������������������������������������������������������������������������������������������������������������������������������������������� 85 VÉRIFICATIONS FINALES ET ENTRETIEN ��������������������������������������������������������������������������������������������������������������������������������� 85 MANUEL D’UTILISATION : MANŒUVRE MANUELLE �������������������������������������������������������������������������������������������������������������� 86 REMPLACEMENT BATTERIE ������������������������������������������������������������������������������������������������������������������������������������������������������ 86 REMPLACEMENT FUSIBLE �������������������������������������������������������������������������������������������������������������������������������������������������������� 86 AVERTISSEMENTS POUR L’UTILISATEUR ��������������������������������������������������������������������������������������������������������������������������������� 87 REGISTRE D'ENTRETIEN ������������������������������������������������������������������������������������������������������������������������������������������������������������ 88 - FABER BT - FABER L BT KIT...
- Page 61 Conservez les instructions pour les joindre au dossier technique et pour d'ultérieures consultations� Les déclarations de conformité peuvent être consultées sur le site http://www�bft-automation�com/CE� Les instructions de montage et d'utilisation peuvent être consultées dans la section download�...
- Page 62 DESCRIPTION DU PRODUIT FABER BT FABER L BT - FABER BT - FABER L BT KIT...
- Page 63 ETRIER DE FIXATION ARRIERE ARB ZN VIS TE M8X35 8�8 UNI5737 ZN ECROU DE AUTOVERR M8 HAUUT DIN982 ZN ROND�GROWER D�8 ROND�D�8 VIS TCEI M8X25 8�8 UNI5931 ZN CHEVILLE TYPE FISCHER SC 6X30 NYLON VIS AUTOT�TC+48X32 UNI6954/DIN7981 ZN FABER BT - FABER L BT KIT...
- Page 64 Poids maximum du vantail 2500 N (~250 kg) Portée Utile de pluie) Degré de protection IP X4 50N (~5kg) FABER BT Poids de l’actionneur 77N (~7,7kg) FABER L BT Dimensions Cf� Fig� L Lubrification graisse permanente - FABER BT - FABER L BT KIT...
- Page 65 OUTILS NÉCESSAIRES FABER BT - FABER L BT KIT...
- Page 66 - après avoir relié l'appareil au réseau, ne touchez que les boutons et les moyens de réglage nécessaires à la programmation de la centrale� - toute intervention ou réparation qui n'est pas spécifiée dans les présentes instructions n'est pas autorisée� - FABER BT - FABER L BT KIT...
- Page 67 99 103 104 107 108 111 112 112 109 99 102 103 107 106 109 110 110 98 101 102 105 106 108 110 98 100 102 105 105 108 98 100 102 106 105 97 100 104 110 FABER BT - FABER L BT KIT...
- Page 68 73.8 82.5 99.8 73.8 150.9 133.6 142.3 91.1 108.4 82.5 99.8 133.6 150.9 INSTALLATION DROITE 116.3 142.3 73.8 91.1 108.4 142.3 82.5 73.8 133.6 150.9 99.8 91.1 108.4 82.5 99.8 133.6 150.9 - FABER BT - FABER L BT KIT...
- Page 69 FIXATION DE L'ETRIER SUR LE MUR D1 M8 D2 M12 20 Nm SUR FER D1 M8 D2 M12 20 Nm FABER BT - FABER L BT KIT...
- Page 70 FIXATION DE L’ACTIONNEUR + 60 mm - 60 mm INSTALLATION CORRECTE FABER BT FABER L BT FERMER FERMER 100 mm 135 mm OUVRIR OUVRIR - FABER BT - FABER L BT KIT...
- Page 71 Déverrouiller l'actionneur comme le montre la figure et OUVRIR le vantail jusqu'à l'ouverture voulue(α°) α° Fermer le vantail et reverrouiller l'actionneur comme le montre la figure Fixer l'étrier en suivant la procédure ci-dessous: FABER BT - FABER L BT KIT...
- Page 72 7� Enfiler les fishers et fixer les vis comme le montre la figure� Ø5 5� Basculer le boîtier du 6� Percer les quatre trous indiqués tableau de commande avec une perceuse - FABER BT - FABER L BT KIT...
- Page 73 EN CAS DE PASSAGE DU CÂBLE DU MUR, rompre l'orifice arrière EN CAS DE PASSAGE DU CÂBLE SUR UNE GOULOTTE EXTERNE PG11 max 24 mm Dans les deux cas, plier à présent les plots en caoutchouc pour fermer les orifices : FABER BT - FABER L BT KIT...
- Page 74 ATTENTION : LA VIS DOIT ÊTRE FIXÉE DANS LA PARTIE LA PLUS PLATE DU MUR� Procéder de la façon indiquée dans la séquence: Briser les pré-trous Enfiler les vis et visser Marquer les trous au crayon Percer avec une perceuse - FABER BT - FABER L BT KIT...
- Page 75 * Pas fournis * Pas fournis Procéder de la façon indiquée dans la séquence: Briser les pré-trous Enfiler les vis et visser Marquer les trous au crayon Percer avec une perceuse FABER BT - FABER L BT KIT...
- Page 76 - Immobiliser les conducteurs à l’aide d’une fixation supplémentaire à proximité des bornes (par exemple, à l’aide d’un collier) afin de séparer nettement les parties sous tension des parties sous très faible tension de sécurité� - FABER BT - FABER L BT KIT...
- Page 77 1 2 3 3� Procéder aux connexions de la façon indiquée en faisant attention 4� Fermer le couvercle et visser les vis placer l'OR dans la gorge prévue à cet effet* 5 mm FABER BT - FABER L BT KIT...
- Page 78 7 8 9 13 14 15 16 17 18 19 20 21 22 23 24 25 26 27 28 BRANCHEMENTS DE RÉSEAU Brancher les câbles de PHASE (L) et NEUTRE (N) - FABER BT - FABER L BT KIT...
- Page 79 Déplacer la came à 5 mm du A en tenant le fil B tendu Fermer le portail� bord de l'étrier Comme dernière opération: verrouiller le portail� Répéter toutes les opérations sur l'autre vantail! FABER BT - FABER L BT KIT...
- Page 80 RADIO RADIO appuyer 1 fois MÉMORISATION DE LA TÉLÉCOMMANDE COMME PIÉTONNE (OUVERTURE PARTIELLE) RADIO RADIO RADIO appuyer 1 fois EFFACEMENT DES TÉLÉCOMMANDES RADIO RADIO ..appuyer pendant 5 s - FABER BT - FABER L BT KIT...
- Page 81 LA FERMETURE EST CELLE CELLE CELLE CELLE VOULUE: VOULUE: VOULUE: VOULUE: NON: NON: Déplacer le fin de course (FC1) Déplacer le fin de course (FC2) jusqu'à obtenir l'ouverture voulue jusqu'à obtenir la fermeture voulue FABER BT - FABER L BT KIT...
- Page 82 5 6 7 8 9 10 5 6 7 8 9 10 min 1 sec max 25 sec * c'est le temps écoulé entre le fermeture du premier vantail et celle du deuxième - FABER BT - FABER L BT KIT...
- Page 83 20 21 22 23 24 25 26 27 28 10 11 14 15 20 21 28 29 42 43 44 45 50 51 52 60 61 62 70 71 72 73 74 75 220-230V ~ FABER BT - FABER L BT KIT...
- Page 84 7 8 9 13 14 15 16 17 18 19 20 21 22 23 24 25 26 27 28 1 2 3 4 5 6 7 8 9 10 B: STOP A: START - FABER BT - FABER L BT KIT...
- Page 85 à pouvoir accomplir l'ouverture et la fermeture manuelles du portail� - L’entretien décrit plus haut doit être répété au moins une fois par an ou plus fréquemment si les caractéristiques du site ou de l’installation le demandent� FABER BT - FABER L BT KIT...
- Page 86 70 71 72 73 74 75 ne doivent pas être court-circuitées ou touchées avec les mains� 23A 12V Retirer et éliminer les batteries sépa- rément conformément aux prescrip- tions des normes en vigueur� - FABER BT - FABER L BT KIT...
- Page 87 - Avec les ouvre-stores : surveiller le store en mou- vement et veiller à ce que les personnes restent à l’écart tant qu’il n’est pas complètement fermé� Actionner le déverrouillage avec prudence car si un store reste ouvert il peut tomber brutalement FABER BT - FABER L BT KIT...
- Page 88 REGISTRE D’ENTRETIEN Emplacement : Moteur / actionnement : Propriétaire : Photocellules : Dimensions et poids : Radiocommande : Matériel (PVC, aluminium): Clignotant : Date d’installation : Autre : Date Description de l’intervention Nom et signature...
- Page 89 ANSCHLUSS ELEKTROSCHLOSS OPTIONAL ��������������������������������������������������������������������������������������������������������������������������113 ANSCHLUSS Q�BO KEY OPTIONAL �����������������������������������������������������������������������������������������������������������������������������������������113 BEWEGUNG TOR ���������������������������������������������������������������������������������������������������������������������������������������������������������������������114 ABSCHLIESSENDE ÜBERPRÜFUNGEN UND WARTUNG ��������������������������������������������������������������������������������������������������������114 BEDIENUNGSHANDBUCH: MANUELLES MANÖVER �������������������������������������������������������������������������������������������������������������115 AUSWECHSELN DER BATTERIE ����������������������������������������������������������������������������������������������������������������������������������������������115 AUSWECHSELN DER SICHERUNG ������������������������������������������������������������������������������������������������������������������������������������������115 HINWEISE FÜR DEN BENUTZER ���������������������������������������������������������������������������������������������������������������������������������������������116 WARTUNGSREGISTER �������������������������������������������������������������������������������������������������������������������������������������������������������������117 FABER BT - FABER L BT KIT...
- Page 90 Schäden, die auf die Nichtbeachtung der Hinweise im vorliegenden Handbuch zurückzuführen sind� Unter Beibehaltung der wesentlichen Eigenschaften des Produktes kann die Firma jederzeit und ohne Verpflichtung zur Aktualisierung des vorliegenden Handbuches Änderungen zur technischen, konstruktiven oder handelstechnischen Verbesserung vornehmen� - FABER BT - FABER L BT KIT...
- Page 91 BESCHREIBUNG DES PRODUKTS FABER BT FABER L BT FABER BT - FABER L BT KIT...
- Page 92 HINTERER BEFESTIGUNGSBÜGEL ARB ZN INNENSECHSKANTSCHRAUBE M8X35 8�8 UNI5737 ZN SELBSTBLOCKIERENDE MUTTER M8 OBEN DIN982 ZN GROWER-SCHEIBE D�8 SCHEIBE D�8 INNENSECHSKANTSCHRAUBE M8X25 8�8 UNI5931 ZN FISCHER-DÜBEL SC 6X30 NYLON SELBSTSCHNEIDENE SECHSKANTKOPFSCHRAUBE +48X32 UNI6954/ DIN7981 ZN - FABER BT - FABER L BT KIT...
- Page 93 ABMESSUNGEN 825 FABER BT KIT 943 FABER L BT KIT Cu MAX 305 mm FABER BT KIT Cu MAX 470 mm FABER L BT KIT 72,5 mm FABER BT KIT 108 mm FABER L BT KIT INSTALLATIONSPLAN ANSCHLÄGE ANSCHLÄGE Nicht mitgeliefert ** Elektroschloss: für eine Länge von mehr als 3 Metern (nicht mitgeliefert)�...
- Page 94 ERFORDERLICHES WERKZEUG - FABER BT - FABER L BT KIT...
- Page 95 - nach dem Anschließen an das Stromnetz nur die Tasten und Einstellvorrichtungen berühren, die für die Programmierung des Steuergeräts erforderlich sind;� - Reparaturarbeiten, die in den vorliegenden Anweisungen nicht beschrieben werden, dürfen nicht ausgeführt werden� FABER BT - FABER L BT KIT...
- Page 96 99 103 104 107 108 111 112 112 109 99 102 103 107 106 109 110 110 98 101 102 105 106 108 110 98 100 102 105 105 108 98 100 102 106 105 97 100 104 110 - FABER BT - FABER L BT KIT...
- Page 97 142.3 73.8 82.5 99.8 73.8 150.9 133.6 142.3 91.1 108.4 82.5 99.8 133.6 150.9 RECHTE INSTALLATION 116.3 142.3 73.8 91.1 108.4 142.3 82.5 73.8 133.6 150.9 99.8 91.1 108.4 82.5 99.8 133.6 150.9 FABER BT - FABER L BT KIT...
- Page 98 BEFESTIGUNG DES BÜGELS AN MAUERWERK D1 M8 D2 M12 20 Nm AUF EISEN D1 M8 D2 M12 20 Nm - FABER BT - FABER L BT KIT...
- Page 99 BEFESTIGUNG DES TRIEBS + 60 mm - 60 mm RICHTIGE INSTALLATION FABER BT FABER L BT SCHLIESSEN SCHLIESSEN 100 mm 135 mm ÖFFNEN ÖFFNEN FABER BT - FABER L BT KIT...
- Page 100 ÖFFNEN Sie den Torflügel bis zur gewünschten Öffnung (α°) α° Schließen Sie den Torflügel und blockieren Sie erneut den Trieb, wie auf der Abbildung gezeigt� Befestigen Sie den Bügel unter Befolgung des folgenden Verfahrens: - FABER BT - FABER L BT KIT...
- Page 101 Karte zu vermeiden! 7� Setzen Sie die Fischer-Dübel wie auf der Abbildung gezeigt ein� Ø5 5� Drehen Sie das Gehäuse 6� Bohren Sie die 4 angezeigten der Bedientafel um� Bohrungen mit einer Bohrmaschine� FABER BT - FABER L BT KIT...
- Page 102 FALLS DAS KABEL DURCH EINEN EXTERNEN KANAL EINGEFÜHRT WIRD� KABEL VON DER WAND DURCHGEFÜHRT WIRD PG11 max 24 mm Verwenden Sie in beiden Fällen jetzt die Gummistopfen, um die Bohrungen zu verschließen: - FABER BT - FABER L BT KIT...
- Page 103 ACHTUNG: DIE SCHRAUBE MUSS IM EBENEREN TEIL DER WAND BEFESTIGT WERDEN� Befolgen Sie die Sequenz: Brechen Sie die Öffnungen aus Setzen Sie die entsprechenden Schrauben ein und ziehen Sie sie an Zeichnen Sie mit einem Stift in Bohren mit einer den Bohrungen an Bohrmaschine FABER BT - FABER L BT KIT...
- Page 104 Befolgen Sie die Sequenz: Brechen Sie die Öffnungen aus Setzen Sie die entsprechenden Schrauben ein und ziehen Sie sie an Zeichnen Sie mit einem Stift in Bohren mit einer Bohrmaschine den Bohrungen an - FABER BT - FABER L BT KIT...
- Page 105 Verwenden Sie für den Anschluss der Zusatzanlage Leiter mit einem Mindestquerschnitt von 0,5 mm � - Die Leiter müssen in der Nähe der Klemmen zusätzlich befestigt werden (zum Beispiel mit Kabelbindern), um die spannungführenden Bauteile von den Bauteilen mit niedriger Sicherheitsspannung zu trennen� FABER BT - FABER L BT KIT...
- Page 106 3� Nehmen Sie die Anschlüsse wie angegeben vor und achten Sie auf 4� Schließen Sie die Abdeckung und ziehen Sie die Schrauben an das Einsetzen der O-Rings in den entsprechenden Sitz* 5 mm - FABER BT - FABER L BT KIT...
- Page 107 Jumper� 7 8 9 13 14 15 16 17 18 19 20 21 22 23 24 25 26 27 28 ANSCHLUSS AN DAS STROMNETZ Die Leiter PHASE (L) und NULLLITER (N) anschließen� FABER BT - FABER L BT KIT...
- Page 108 5 mm vom Rand des Lösen Sie die Schrauben des Bügels� Endschalters zu vermeiden� Schließen Sie das Tor� Nocken FC2� Zum Abschluss: blockieren Sie das Tor� Wiederholen Sie alle Arbeitsschritte am anderen Torflügel! - FABER BT - FABER L BT KIT...
- Page 109 ABSPEICHERUNG FERNBEDIENUNG ALS START (VOLLSTÄNDIGE ÖFFNUNG) Stromversorgung einschalten RADIO RADIO RADIO einmal drücken ABSPEICHERUNG FERNBEDIENUNG ALS FUSSGÄNGER (PARTIELLE ÖFFNUNG) RADIO RADIO RADIO einmal drücken LÖSCHUNG VON FERNBEDIENUNGEN RADIO RADIO ..für 5 Sekunden drücken FABER BT - FABER L BT KIT...
- Page 110 Verschieben Sie den Endschalter V e r s c h i e b e n S i e d e n (FC1), bis die gewünschte Öffnung Endschalter(FC2), bis die gewünschte erzielt wird� Schließung erzielt wird� - FABER BT - FABER L BT KIT...
- Page 111 1 2 3 4 5 6 7 8 9 10 5 6 7 8 9 10 min 1 sec max 25 sec * ist die Zeit zwischen der Schließung des ersten und des zweiten Torflügels� FABER BT - FABER L BT KIT...
- Page 112 23 24 25 26 27 28 10 11 14 15 20 21 28 29 42 43 44 45 50 51 52 60 61 62 70 71 72 73 74 75 220-230V ~ - FABER BT - FABER L BT KIT...
- Page 113 7 8 9 13 14 15 16 17 18 19 20 21 22 23 24 25 26 27 28 1 2 3 4 5 6 7 8 9 10 B: STOP A: START FABER BT - FABER L BT KIT...
- Page 114 Leerlauf zu setzen und so das Öffnen und Schließen von Hand zu ermöglichen� - Die oben beschriebene Wartung muss zumindest einmal pro Jahr oder mit kürzeren Abständen vorgenommen werden, falls die Eigenschaften des Standorts oder der Installation dies erforderlich machen� - FABER BT - FABER L BT KIT...
- Page 115 60 61 62 70 71 72 73 74 75 nicht kurzgeschlossen oder mit den Händen berührt werden� 23A 12V Bauen Sie die Batterien aus und entsorgen Sie sie separat gemäß den geltenden Bestimmungen� FABER BT - FABER L BT KIT...
- Page 116 - Die Aktivierung der manuellen Entsperrung könnte Verbesserung vornehmen� bei mechanischen Defekten oder Ungleichgewi- chtssituationen zu unkontrollierten Bewegungen der Tür führen� - Bei Rollladenöffner: Überwachen Sie den Rollladen - FABER BT - FABER L BT KIT...
- Page 117 WARTUNGSREGISTER Position: Motor/Antrieb: Eigentümer: Fotozellen: Abmessungen und Gewicht: Fernbedienung Material (PVC, Aluminium): Blinkleuchte: Datum der Installation: Sonstiges: Datum Beschreibung des Eingriffes Name und Unterschrift...
- Page 118 - FABER BT - FABER L BT KIT...
- Page 119 FABER BT - FABER L BT KIT...
- Page 120 BFT USA www.bftbenelux.be CZECH REPUBLIC 69800 Saint Priest BFT CZ S.R.O. Boca Raton POLAND www.bft-france.com Praha www.bft-usa.com BFT POLSKA SP. Z O.O. www.bft.it GERMANY 05-091 ZąBKI CHINA BFT TORANTRIEBSSYSTEME Gmb H BFT CHINA www.bft.pl TURKEY 90522 Oberasbach BFT OTOMATIK KAPI SISTEMELERI...
Need help?
Do you have a question about the FABER BT and is the answer not in the manual?
Questions and answers