Table of Contents
Advertisement
Advertisement
Table of Contents

Subscribe to Our Youtube Channel
Related Manuals for Sonicware LIVEN 8bit warps


Summary of Contents for Sonicware LIVEN 8bit warps
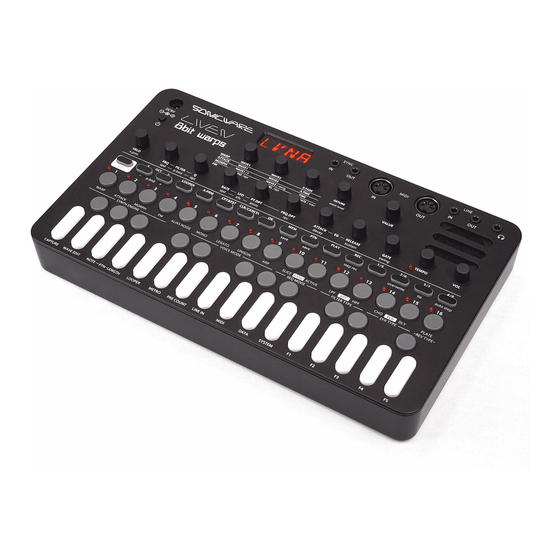
- Page 1 User's Manual User's Manual LVN-010-UM-01-EN...
- Page 2 Moreover, information in this document could be changed without notice. SONICWARE retains the right to change product specifications and programs at any time. SONICWARE will bear no responsibility for any errors depicted in this document. SONICWARE will bear no responsibility for any losses resulting from the use of this information, functions or performance, regardless of contracts, lack of caution or other conduct.
- Page 3 Be sure to insert the batteries with +/ - ends oriented correctly. Do not use new and old batteries together. Do not use batteries of different types together. Remove the batteries when they will not be used for a long time. If a leak occurs, thoroughly wipe the battery compartment and battery terminals to remove the leaked fluid.
-
Page 4: Table Of Contents
Contents Synchronizing the tempo with an external device connected to Preparing to play ………………………………………………………………… 5 Names of parts ………………………………………………………………… 5 the SYNC IN …………………………………………………………………… 16 Connecting ……………………………………………………………………… 5 Synchronizing tempo with an ELZ_1 or Pocket Operator (PO) … 17 Preparing for startup ………………………………………………………… 6 Step sequencer and rhythm settings …………………………………... -
Page 5: Preparing To Play
Preparing to play Names of parts DC9V Main knobs Display SYNC SYNC MIDI MIDI LINE LINE Headphone jack 1–4 jack Speaker POWER switch VALUE Knobs Knobs TEMPO LEDs Buttons Page buttons Step LEDs Step buttons Keyboard Connecting Note : U se connection cables that are 3 m or shorter. -
Page 6: Preparing For Startup
EIAJ3, inner diameter 1.7mm, outer diameter tern. 4.75mm, center +) to the LIVEN 8bit warps DC9V jack. • If the sound has been edited, save the patch memo- ry (See p.8 “ Saving patch memories”). -
Page 7: Basic Operations
Basic operations This section explains basic operations. Patch memories 81–96 : lit orange Patch memories 97–112 : lit orange Patch memories 113–128 : lit orange Adjusting the overall volume ① Turn the VOL knob. ③ Press a step button to select a patch memory. ーーーーーーーーーーーーーーーーーーーーーーーーーーーーーー... -
Page 8: Adjusting The Sound
Adjusting the sound This section explains how to adjust the sound, including selected patch memory. the synth engine, filter, LFO, envelope generator (EG) and effects. ーーーーーーーーーーーーーーーーーーーーーーーーーーーーーー • When a patch memory is reloaded, the sound is restored to its last saved state. Initializing patch memories ①... -
Page 9: Turning The Filter On/Off
Adjusting the sound Adjusting the LFO speed ーーーーーーーーーーーーーーーーーーーーーーーーーーーーーー ① Turn the RATE/speed knob. • ON or OFF will appear on the display. ーーーーーーーーーーーーーーーーーーーーーーーーーーーーーー • The parameter is shown on the display. Turning the filter on/off • The LFO produces a sine wave. ①... -
Page 10: Changing The Effect Type
Adjusting the sound Changing the effect type ーーーーーーーーーーーーーーーーーーーーーーーーーーーーーー ① While pressing , press to select the effect. • The parameter is shown on the display. button lights when the effect is not off. • The adjustment range is 0–127. ーーーーーーーーーーーーーーーーーーーーーーーーーーーーーー •... -
Page 11: Changing The Voice Mode
Adjusting the sound Changing the voice mode Plays notes from lowest to highest, then plays from highest to lowest repeatedly ① While pressing , press to select the 6. DOWN&UP (D.A.U on display) : voice mode. The LED will light for the selected voice mode. Plays notes from highest to lowest, then plays from lowest to highest repeatedly (For ARP, both... -
Page 12: Creating And Editing Waveforms
Creating and editing waveforms Step button 12 : 64 This section explains how to create and edit waveforms. Step button 13 : 90 Step button 14 : 96 Editing waveforms (easy mode) Step button 15 : 112 ① While pressing , press WAVE EDIT. -
Page 13: Clearing Waveforms
Creating and editing waveforms • The preset waveform name or user waveform num- ーーーーーーーーーーーーーーーーーーーーーーーーーーーーーー ber (U-number) appears on the display. • Use the (1–16) and (17–32) buttons to se- • The selection range is preset waveforms 1–63 and lect pages. U-01–U-64. -
Page 14: Step Sequencer Playback And Recording
Step sequencer playback and recording This section explains step sequence playback and re- Pattern 81–96 : lit orange cording. Pattern 97–112 : lit orange Pattern 113–128 : lit orange Pattern playback ③ Press a STEP 1–16 button to select a pattern (and ①... -
Page 15: Step Recording
Step sequencer playback and recording Step recording • When in overwrite mode, playing keyboard keys will overwrite notes on steps. (See p.18 “Overwriting ① Press (lights red). steps while recording (overwrite mode)”.) The LED for the current step will blink. The LEDs for steps that already have notes will light. -
Page 16: Saving Patterns
• No parameters are recorded during STUTTER mode. Synchronizing the tempo with an exter- nal device connected to the SYNC IN ① Connect the LIVEN 8bit warps SYNC IN to the exter- nal device SYNC OUT. Recording parameter operations in real time ②... -
Page 17: Synchronizing Tempo With An Elz_1 Or Pocket Operator (Po)
Synchronizing tempo with an ELZ_1 or Example 2 : External device as master synchronizes Pocket Operator (PO) with LIVEN 8bit warps ① Connect the LIVEN 8bit warps headphone out to the Master Synchronized ELZ_1 AUX IN or PO input. SYNC... -
Page 18: Step Sequencer And Rhythm Settings
Step sequencer and rhythm settings This section explains settings related to the sequencer • This can be set in a range of 10–90%. and rhythm. • This setting applies even when the sequencer mode is STUTTER. Changing the sequencer mode Changing the sequencer swing ①... -
Page 19: Changing The Note Of A Single Step
Step sequencer and rhythm settings Changing the note of a single step ① While pressing , press NOTE. ② Turn the VALUE knob to change the note. ーーーーーーーーーーーーーーーーーーーーーーーーーーーーーー • The note is shown on the display. • Notes can be set to 1/1, 1/2, 1/4., 1/4, 1/8., 1/2T, 1/8, 1/16., 1/4T, 1/16, or 1/32. -
Page 20: Looper Playback And Recording
Looper playback and recording Continuous recording to looper tracks This section explains the 4-track looper that can be used in improvisational performances. ① During recording, pressing a page button that does not have recording data will put the corresponding looper track into recording standby. ②... -
Page 21: Playing And Stopping Loopers And Patterns At Once
Looper playback and recording Playing and stopping loopers and patterns at once ① During pattern and looper tracks are stopped, press the page button to put looper tracks in standby for playback and then press to start pattern and loop- er playback at once. -
Page 22: Adjusting The Looper
Adjusting the looper This section explains adjustments related to the looper. Main knob 1 : Looper track 1 Explanations assume that looper mode has already been Main knob 2 : Looper track 2 enabled Main knob 3 : Looper track 3 Main knob 4 : Looper track 4 •... -
Page 23: External Input Settings
External input settings This section explains adjustments related to external input. Changing the gain ① While pressing (lights green), press LINE IN, and select GAIN. ② Turn the VALUE knob to change the gain. ーーーーーーーーーーーーーーーーーーーーーーーーーーーーーー • The gain is shown on the display. •... -
Page 24: Midi Settings
MIDI settings This section explains settings related to MIDI. ーーーーーーーーーーーーーーーーーーーーーーーーーーーーーー • ON/OFF will appear on the display. Setting the receiving channel ① While pressing , press MIDI, and select RX.CH. Setting MIDI OUT ② Turn the VALUE knob to change the receiving ①... -
Page 25: Saving And Loading User Data
User data can be saved and loaded via MIDI. Connect a device that can transmit and receive data by MIDI to the LIVEN 8bit warps. Importing patch memory and pattern data ① Put the unit into regular mode, and start transmit- ting data from the transmitting device. -
Page 26: Backing Up User Data
Saving and loading user data Backing up user data ① While pressing , press the POWER switch to turn on the LIVEN 8bit warps. ② Turn the VALUE knob, and select EXPT. ③ Press to start transfer. ーーーーーーーーーーーーーーーーーーーーーーーーーーーーーー • The steps show the progress of data transmission. -
Page 27: System Settings
System settings Setting the master tuning This section explains settings related to the system. Explanations assume that the function setting state has ① Press SYSTEM, and select TUNE. been enabled. ② Turn the VALUE knob to set the master tuning. ーーーーーーーーーーーーーーーーーーーーーーーーーーーーーー... -
Page 28: Setting Knob Movement Function
System settings Setting knob movement function ーーーーーーーーーーーーーーーーーーーーーーーーーーーーーー ① Press UI, and select the type of knob movement. • The LIVEN 8bit warps will start up, and VER. will appear on the display. ーーーーーーーーーーーーーーーーーーーーーーーーーーーーーー ② Press to select the system version. -
Page 29: Appendix
Appendix Figure 1. Sound architecture Table 1. Synthesizer engine parameter list shift Synth engine Main knob 1 Main knob 2 Main knob 3 button Waveform 1 Waveform 2 Crossfade MEM, preset waveforms MEM, preset waveforms WARP 1–63, U-01–U-64 (user 1–63, U-01–U-64 (user <63 –...
Need help?
Do you have a question about the LIVEN 8bit warps and is the answer not in the manual?
Questions and answers