
Related Manuals for SMARTfit Mini On-Wall Adjustable


Summary of Contents for SMARTfit Mini On-Wall Adjustable
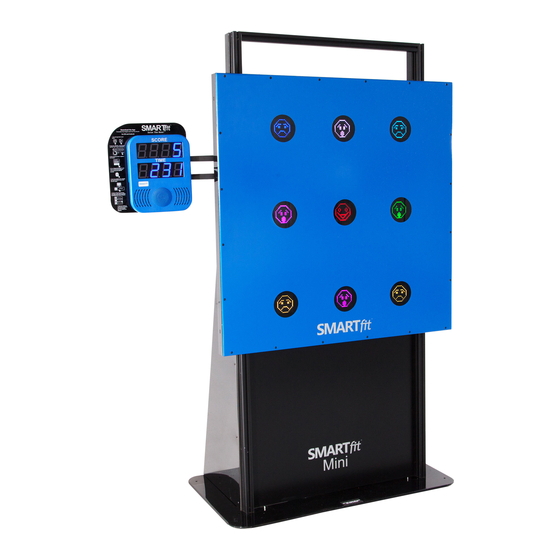
- Page 1 SMARTfit Mini User Manual Version 5.6 Mini On-Wall Adjustable - 1-30111 Mini On-Frame - 1-30100 Mini On-Frame Portable - 1-30101 1-800-900-8542 www.smartfitinc.com...
-
Page 2: Table Of Contents
Strike Target Options ..........................9 Controller Settings ..........................10 Downloading the SMARTfit App and Creating a New Account on the SMARTfit Cloud ......12 Register Your Controller ........................20 Four Icons on the Sign on Page ..............Error! Bookmark not defined. -
Page 3: Important Safety Instructions
Children should be supervised to ensure that they do not play with the appliance. • PLEASE SAVE THESE INSTRUCTIONS • ©SMARTfit Inc. All Rights Reserved... -
Page 4: Maintenance
• Check wiring for wear and fraying. • Battery Operations Power Banks are found in certain configurations of SMARTfit systems. This section only applies to such systems. Only a power bank from SMARTfit Inc. may be used. • Power banks must be removed from the system prior to charging the pack. -
Page 5: Getting Started
What’s in this Document? This manual will familiarize you with your SMARTfit Mini and guide you to set it up quickly. Setup instructions include system components, On-Wall and On-Frame assembly and integration with SMARTfit Strike Targets. The remainder of the manual guides you through the setup of the SMARTfit app for iOS and Android including setup of open and closed platforms, playing and creating activities and programming and both searching and exporting data. -
Page 6: What's In The Box
1. One Interactive 46’’x 46’’ Station 2. 9 Multi-Functional Targets 3. AC CPU controller 4. 4 22lb. Rubber Coated Weights 5. Frame w/Adjustable Height System (range from floor to 7’) 6. Pneumatic Lift Kit for portability. ©SMARTfit Inc. All Rights Reserved... -
Page 7: Assembly Instructions
Mini On-Frame Assembly Instructions: https://smartfitinc.com/wp-content/uploads/2018/02/Min-On-Frame-Installation.pdf On-Frame Portable Assembly Instructions: https://www.youtube.com/watch?v=DskOyKvhqzY SMARTfit Mini 9 Operating Instructions ADJUSTING THE PANEL HEIGHT (On-Frame and On-Frame Portable Systems) The brake system is located on the left post behind the panel (see photo below). To adjust the panel height, pull the brake knob and move the panel to the desired height. -
Page 8: Powering On Your Smartfit Mini System
Powering On Your SMARTfit Mini System Locate the Power and Target Ports on the CPU. Plug in the Target Wire as shown in the photo. Use the top target wire port on the CPU. Plug in the Power Cord as shown in the picture. -
Page 9: Wheel Kit Operation
When the system is in the desired location, plug the power cord into an outlet. Flip the Wheels toggle switch to the down position so that the wheels will retract. Caution! Ensure Nothing is underneath the base plate when lowering the system. Failure to do so could cause serious injury. ©SMARTfit Inc. All Rights Reserved... -
Page 10: Strike Target Options
Add SMARTfit Strike Pods to your Mini System to create a 360-degree playing environment. The SMARTfit Controller can run up to 15 wireless targets at a time. We recommend adding 3 to 5 Strike Pods to a Mini System. Optional Strike Pod Stands recommended. -
Page 11: Controller Settings
Auto Restart: With Auto Restart on, the game will display scores and then ready itself for the next game to start. With Auto Restart off, the system will remain idle displaying the score of the last game and only start a new game when the menu button is pressed. ©SMARTfit Inc. All Rights Reserved... - Page 12 Music: Select the music played while attract mode is active and the system is not in use (only used in entertainment zones). Message: The message displayed here is the message that is displayed on the targets during the Attract mode. ©SMARTfit Inc. All Rights Reserved...
-
Page 13: Downloading The Smartfit App And Creating A New Account On The Smartfit Cloud
Downloading the SMARTfit App and Creating a New Account on the SMARTfit Cloud • With a cloud account you can be assured that your data is secure and available from anywhere through identity access management powered by Microsoft. • You also have access to features such as remote training, global statistics, software upgrades, controller management, and additional features planned for the future. - Page 14 4. Open the SMARTfit App. 5. Select the button to take you to the SMARTfit portal. 6. Select the “Sign In” option shown in the image at right. ©SMARTfit Inc. All Rights Reserved...
- Page 15 14. Fill out the gender role, then select the “Create” button. 15. Now you can enter your credentials and select the button. ©SMARTfit Inc. All Rights Reserved...
- Page 16 21. Select Fitness if your interest is fitness or sports performance applications. 22. Select Home if the SMARTfit system is located at your home. ©SMARTfit Inc. All Rights Reserved...
- Page 17 23. Now that you are officially logged in, select the “Settings” menu item. 24. Change the configuration, so that your system matches the photograph. ©SMARTfit Inc. All Rights Reserved...
- Page 18 25. Select the blue “Done” button when you are finished. 26. Select the “Manage Connections” menu item. ©SMARTfit Inc. All Rights Reserved...
- Page 19 27. Select the Bluetooth symbol at the top right of the screen. 28. Select the 8-digit ID number displayed on your CPU. ©SMARTfit Inc. All Rights Reserved...
- Page 20 Bluetooth device. Please be sure to disconnect from Apple watches, wireless speakers, headphones, etc. 31. You can now begin using SMARTfit. 32. If you are unable to connect, please call our customer service line at 800- 900-8542 x 112.
-
Page 21: Register Your Controller
Register Your Controller • All new SMARTfit owners will be required to register their controller the first time it is turned on. The term owner will refer to the designated administrator of the system. • This will ensure the owner can perform administrative duties which include updating software, registering a software license, and setting a controller password. - Page 22 8. First, connect to the Controller by selecting the Manage Connections menu item. 9. Select the 8 Digit ID Code. 10. You will be prompted to register your controller. Select “Yes” to register the controller. ©SMARTfit Inc. All Rights Reserved...
- Page 23 11. Select “OK” so that the SMARTfitOS app can access your device camera to scan the QR code. 12. Hold your device over your SMARTfit License key for automatic QR scanning. 13. Choose if you would like to password protect this controller. If “Yes” is...
-
Page 24: Four Icons On The Sign On Page
This is a device-specific feature, set for a specific phone or tablet only. Your SMARTfit system can run a featured activity of the day. The tablet provides written instructions set by the trainer so that anyone interested in using SMARTfit can quickly and efficiently learn how to play. - Page 25 Internet connection is required to use the cloud. The Cloud is recommended when using the SMARTfit app because it allows you to take advantage of all that the application has to offer such as sharing programs between multiple sites, proving remote...
-
Page 26: Choosing Between A Local And Cloud Account
• The Cloud sign-in is recommended when using the SMARTfit app because it allows you to take advantage of all that the SMARTfit app has to offer. - Page 27 8. With local sign-in you will still receive updates and have access to Predesigned Activities and Predesigned Programs. 9. To use a controller under local sign-in the controller must have been previously registered with a cloud account. ©SMARTfit Inc. All Rights Reserved...
-
Page 28: Modes And License Keys
Predesigned Activities and Programs. 4. You will not see any of the Fitness, Sports, or children’s activities and programs. Of significance is the new TEST tab which includes unique content for research and medical practitioners. ©SMARTfit Inc. All Rights Reserved... - Page 29 8. You can see all three modes offered by SMARTfit. 9. To change modes, select the mode you would like in the dropdown options. The Commercial Fitness/Sports mode will host only sports and fitness content within the Predesigned Activities and Programs. ©SMARTfit Inc. All Rights Reserved...
-
Page 30: Trainer Requests & Client Accepts
• You may find that trainers would like to share the same client. • Clients can have as many trainers as desired in their trainer list. • This process starts from the trainer’s account. 1. Select the Active Client tab. ©SMARTfit Inc. All Rights Reserved... - Page 31 2. Select the add user symbol at the top of the screen. 3. Select request via email. 4. Type in the email address associated with the client’s account. 5. Select OK. ©SMARTfit Inc. All Rights Reserved...
- Page 32 “Accept.” For Android devices, hold down on the request and select “Accept”. 8. The client can now select the active trainer. 9. Similarly, the trainer can activate this client from their active client list ©SMARTfit Inc. All Rights Reserved...
-
Page 33: Start A Game
Start a Game Select the Play tab at the bottom of the screen. Select a game category from the list provided under “Categories.” Customize the game settings, then scroll down to select the “Start Game” button. ©SMARTfit Inc. All Rights Reserved... -
Page 34: Standard Settings
Standard Settings 1. The standard settings are found within every Category. 2. The time indicates the game duration in seconds. The remaining time is shown on the CPU, which can be found below the score. ©SMARTfit Inc. All Rights Reserved... - Page 35 For example, low sensitivity is used for a heavy strike from a medicine ball or boxing gloves. High sensitivity is used for a light strike from a hand or noodle. ©SMARTfit Inc. All Rights Reserved...
- Page 36 6. Level determines the difficulty of the game. Each category gives level a different meaning. Level will control the speed the targets change color (track categories) or how long a target stays lit (memory categories). ©SMARTfit Inc. All Rights Reserved...
- Page 37 1 – 5 are default patterns that are provided and are known by the user when played within a game. 10. To create your own sequence, visit the Build tab within the app and select the “Sequence” button. ©SMARTfit Inc. All Rights Reserved...
- Page 38 11. The specialty Settings differ for each category. To understand the meaning of each, select the question mark next to the setting. ©SMARTfit Inc. All Rights Reserved...
-
Page 39: Pre-Designed Activities
8. Once opened, you will notice that each activity shows three levels of difficulty. 9. Level 1 is an easier physical and cognitive intensity, while levels 2 and 3 are progressively more challenging. ©SMARTfit Inc. All Rights Reserved... - Page 40 13. For example, the trainer might know the client needs to improve their memory. Therefore, they would select the Memory folder, which provides activities utilizing the memory games located in the categories section. ©SMARTfit Inc. All Rights Reserved...
- Page 41 21. The settings for each activity are pre-set and are not changeable. 22. However, you can select the orange button labeled “copy and edit” which allows you to adjust the settings, then create a new activity from the results. ©SMARTfit Inc. All Rights Reserved...
-
Page 42: Pre-Designed Programs
Trainers can preplan each client’s workout before they arrive. All the Activities in the Predesigned Programs include how-o videos showing how the exercise is performed and including all the pre-selected settings which do not require adjustment. ©SMARTfit Inc. All Rights Reserved... - Page 43 Once inside the folder, you will notice that each program shows three levels of difficulty. Level 1 is an easier physical and cognitive intensity, while levels 2 and 3 are progressively more challenging. ©SMARTfit Inc. All Rights Reserved...
-
Page 44: Create An Activity
Activities are a list of game categories, created by a Tier One User, with chosen settings and equipment to meet a focus area. Select the Play tab at the bottom of the screen. Select a category from the list. ©SMARTfit Inc. All Rights Reserved... - Page 45 Select the “Create Activity” button. Name the activity and provide a brief description of the rules and set up of the activity. Select the blue “Done” button when you are finished. ©SMARTfit Inc. All Rights Reserved...
- Page 46 One User) Activities tab when both the trainer and client are signed in. If “No” is selected, the new Activity will appear under the Trainer (Tier One User) Activities tab when the trainer is signed in. ©SMARTfit Inc. All Rights Reserved...
- Page 47 The new activity will show up under the Marked Activities tab. If “No” is selected, the new Activity will show up under the Trainer Activities Tab. Select the Trainer Activities folder and select the new Activity. ©SMARTfit Inc. All Rights Reserved...
- Page 48 Scroll down the game options to select the blue “Start Game” button. The game will begin when the player strikes the first target. ©SMARTfit Inc. All Rights Reserved...
-
Page 49: Create A Program
Select the first Activity you wish to build into your Program. You can either select one of the Predesigned Activities or an Activity that you created. ©SMARTfit Inc. All Rights Reserved... - Page 50 Scroll down the page, then select the orange “Add to Activity List” button. This question is asking you to enter the number of repetitions desired for this activity before the next activity appears in the program. ©SMARTfit Inc. All Rights Reserved...
- Page 51 The App will update you on the current activity list which your program will import. Repeat the above steps until you are ready to build the Program. Select the “Build” tab at the bottom of the screen. Select the “Programs” button. ©SMARTfit Inc. All Rights Reserved...
- Page 52 The number of program repetitions is the number of repetitions the program will play after it has finished once. Press the Blue “Next” button to continue. Select “Import” if you wish to import your activity list. ©SMARTfit Inc. All Rights Reserved...
- Page 53 Choose “Clear” to clear the activities in the list or “Keep” if you would like to import them later. On this page, the user can make a change to the number of repetitions an Activity will play. ©SMARTfit Inc. All Rights Reserved...
- Page 54 You can scroll through the entire activity library and select the one you desire. Once you have selected the desired activities, select the blue Build button to continue. ©SMARTfit Inc. All Rights Reserved...
- Page 55 If “Yes” is selected during this second option, the user can choose to save this program for a specific client. If “No” is selected, the app will keep the new program private for the creating user only. ©SMARTfit Inc. All Rights Reserved...
- Page 56 Programs tab. This program will appear under the name of the creating user. Select the new program. Scroll down and confirm that the games list is known, then select the blue Play tab. ©SMARTfit Inc. All Rights Reserved...
- Page 57 The first activity will begin after the player strikes the first target. Once all activities are finished, the app will send a notification of completion. ©SMARTfit Inc. All Rights Reserved...
-
Page 58: Search And Export Data
Search and Export Data First activate the client, patient, or student that you produced data on for this activity. Next select the Data tab at the bottom of the screen. ©SMARTfit Inc. All Rights Reserved... - Page 59 Select the second tab that appears, then select “is”. Select the third tab that appears, then select the name of the activity you wish to view. In this example, the activity is called “Track the Color- Sit to Stand.” ©SMARTfit Inc. All Rights Reserved...
- Page 60 24 hours, while 1W indicates all attempts completed within 1 week. 1M indicates 1 month, 3M indicates 3 months and 1Y equals 1 year. You can now see 7 data points played within 1 year. ©SMARTfit Inc. All Rights Reserved...
- Page 61 Here are all 7 attempts with the average statistics on each attempt. You can also see the time stamp and order of which they were played. Select the bottom data set to produce an Excel report for all 7 attempts. ©SMARTfit Inc. All Rights Reserved...
- Page 62 Now select the Excel symbol at the top right of the screen. You can zoom in on your tablet to take a closer look at each attempt. ©SMARTfit Inc. All Rights Reserved...
- Page 63 ID. Scrolling down the page will reveal the data on the remaining 6 attempts. ©SMARTfit Inc. All Rights Reserved...
- Page 64 To export the Excel file, select the export symbol at the top right of the screen. ©SMARTfit Inc. All Rights Reserved...
-
Page 65: Eu Declaration Of Conformity (Doc)
Identification of Radio Equipment: Model Number: 3-56323 CPU 12V Object of the declaration: Product Name: SMARTfit Mini and SMARTfit Panel The object of the declaration described above is conformity with relevant Union harmonization legislation: RED Directive 2014/53/EU EN 60950-1:2006+A11:2009+A1:2010+A12:2011+A2:2013 EN 301489-3v2.1.1 andEN 301489-17 3.2.0... - Page 66 CE mark and issued the EU-type examination certificate; Controller: 99819-10-EURED This declaration of conformity is issued under sole responsibility of the manufacturer. Signed for and on behalf of: SMARTfit, Printed Name: Jim Manley Date: 5/14/18 Title/Function: Place:...
Need help?
Do you have a question about the Mini On-Wall Adjustable and is the answer not in the manual?
Questions and answers