Table of Contents
Advertisement
Quick Links
SMARTfit Strike Pod User Manual
Version 11.7
Please follow the set-up instructions below for the Secure Case and/or Duffel Case.
If you need assistance, feel free to give our Customer Service a call at
1-800-900-8542 x 116, between the hours of 9:00 a.m. and 4:30 p.m. PST,
Monday thru Friday or watch our easy to follow instruction video on our website at
https://smartfitinc.com/customer-resources/strike-pod-system/
www.smartfitinc.com
Advertisement
Table of Contents

Related Manuals for SMARTfit Strike Pod


Summary of Contents for SMARTfit Strike Pod
- Page 1 SMARTfit Strike Pod User Manual Version 11.7 Please follow the set-up instructions below for the Secure Case and/or Duffel Case. If you need assistance, feel free to give our Customer Service a call at 1-800-900-8542 x 116, between the hours of 9:00 a.m. and 4:30 p.m. PST, Monday thru Friday or watch our easy to follow instruction video on our website at https://smartfitinc.com/customer-resources/strike-pod-system/...
-
Page 2: Table Of Contents
Rack Straps ........................14 Concrete Wall Installation ....................17 Stud Wall Installation ...................... 19 Pod Stand Assembly ...................... 21 Using the SMARTfit App ....................25 Downloading the SMARTfit App ..................25 Start a Game ........................32 Standard Settings ......................33 Open and Closed Platforms ................... -
Page 3: Important Safety Instructions
IMPORTANT SAFETY INSTRUCTIONS (READ ALL INSTRUCTIONS) CAUTIONS, WARNINGS and DANGERS This is not a toy and is intended for use by or under the supervision of adults. • To reduce the risk of fire, replace only with a fuse of the same type and electrical rating. •... -
Page 4: Maintenance
Maintenance • Clean all surfaces with a water-based disinfectant, like Windex Disinfectant. Check all bolts, should be snug. • Check all mechanical parts for wear. • Check wiring for wear and fraying. •... -
Page 5: Power Bank Operations
Power Bank Operations Battery packs are found in certain configurations of SMARTfit systems. This section only applies to such systems. Only a power bank from SMARTfit shall be used. • Power bank shall be removed from the system prior to charging. -
Page 6: Getting Started With Your Strike Target System
2. Carefully lay the closed Duffle Case or Secure Case on the floor. 3. Unzip the large pocket on the Duffel Case or open the clasps of the Secure Case. Pod Battery Installation 1. Remove the SMARTfit power banks and Charging Station from the Package. - Page 7 3. Insert the SMARTfit power banks in between each plastic divider. 4. Connect the SMARTfit power banks to the Charging Station using the USB wires provided. 5. Connect the Power Cord to the Power Station. Allow to charge overnight 6. (A minimum of 7 hours, but not longer than 24 hours).
- Page 8 11. Locate the ON/OFF button on the SMARTfit power bank. Turn it on by pressing the ON/OFF button twice. A bright white light will indicate that the power bank is on.
- Page 9 12. Insert the SMARTfit power bank with one hand, while holding the USB target wire with the other hand. 13. Make sure that the 2.1A USB port, closest to the light, is closest to the USB wire inside of the power bank compartment.
- Page 10 CPU, the display will turn off after 5 minutes. 18. Show-mode is a feature that permanently keeps the Strike Pod display turned on. To activate Show-mode, hold the on/off button until the target displays “OFF” in capital letters. The...
-
Page 11: Cpu Battery Installation
3. Locate the ON/OFF button on the SMARTfit power bank. Turn it on by pressing the ON/OFF button twice. A bright white light will indicate that the power bank is on. - Page 12 6. The CPU’s lights will turn on and display your 8-digit User ID.
-
Page 13: Pod Layout
Pod Layout Set up your pods in one of the following layouts (floor, rack, wall): 1. Pods can be laid out in any configuration on the floor. No more than 100’ from the CPU. 2. Pods can be fastened to a rack in a gym using any of the vertical rack columns. - Page 14 Wide placement for Cardio and lateral movement. c. Two stacked on either side of the controller. 4. Using SMARTfit 36” pod stands 5. Using SMARTfit 68” pod stands...
-
Page 15: Rack Straps
2. One of the racks is labeled as CPU. This rack is designed for the CPU and can be attached to the fully extended handle of the SMARTfit duffle or Pelican case. 3. The remaining Rack Straps can be attached to the cone stands or any similar sized material. - Page 16 11. Now we’re ready to attach the Strike Pods 12. The back of each strike pod has 3 insertions points. 13. The rack has 3 screws that will be used to secure the Strike Pod.
- Page 17 14. To take off the strike pod, unlock the lever first, then slide the Strike Pod upward against the rack. 15. Attach all remaining Strike Pod and do the same for the CPU.
-
Page 18: Concrete Wall Installation
Concrete Wall Installation 1. Locate the Pod template in the case. 2. Place it against the wall, while making sure it’s level. 3. Mark all 3 holes labeled “SP.” 4. Mark all 3 “SP” holes in four more locations. 5. Mark a set of 3 holes labeled “CPU.” 6. - Page 19 8. Remove the blue anchors, place them in each of the drill holes. 9. Using a rubber mallet hammer the anchors into the wall. 10. Using a Phillips screwdriver, loosen the anchor screw about ½”. 11. Screw in the blue screws to each of the 18 anchors.
-
Page 20: Stud Wall Installation
Stud Wall Installation 1. Locate the Pod template in the case. 2. Place it against the wall, while making sure it’s level. 3. Mark all 3 holes labeled “SP.” 4. Mark all 3 “SP” holes in four more locations. 5. Mark a set of 3 holes labeled “CPU.” 6. - Page 21 8. Remove the Stud Wall anchors, place them in each of the drill holes. 9. Using a rubber mallet hammer the anchors into the wall. 10. Using a Phillips Screwdriver, loosen the anchor screw about 1/2’’ 11. Attach all 5 Pod and CPU to their desired location.
-
Page 22: Pod Stand Assembly
6 to 12-inch difference between the front and back post. 3. Stack and align two SMARTfit weights on top of each other. 4. Place the bottom of the post through one end of the weights. - Page 23 6. Gather the base and align the holes against the pole extension. 7. Fit the screw through the countersink side of the base and lock it into place, then tighten the screws using the T-handle Hex Wrench. 8. Place the stand into the upright position.
- Page 24 16. Loosen/Tighten the knob on the back of the pole extension to adjust the height. 17. The back of each strike pod has 3 insertion points. The rack has three screws that will be used to secure the Strike Pod.
- Page 25 18. Insert the Strike Pod onto the screws and lock it in place by pushing the Strike Pod downward so that it locks into a tighter position. 19. The end of the rack has a lever that can be used to lock the Strike Pod permanently.
-
Page 26: Using The Smartfit App
*Please see the end of this document or our website for an explanation of Closed and Open Platforms (Pg. 25). The next steps will take you through downloading our SMARTfit app and choosing the right activities and programs for you. - Page 27 Select the app store on your iOS or Android device and search “SMARTfit – seize the now.” Download it to your device, then open the SMARTfit app. (The iOS view is shown. The Android view differs slightly.) Select “Create New Account”...
- Page 28 Create login credentials by entering a name, username, password, age, and gender. The role option allows you to select a tier 1 or 2 user. If this is your system, then we recommend that you create a tier 1 user. Select the blue “Done”...
- Page 29 10. Select the “Settings” menu item. 11. Change the configuration, so that your system matches the photograph.
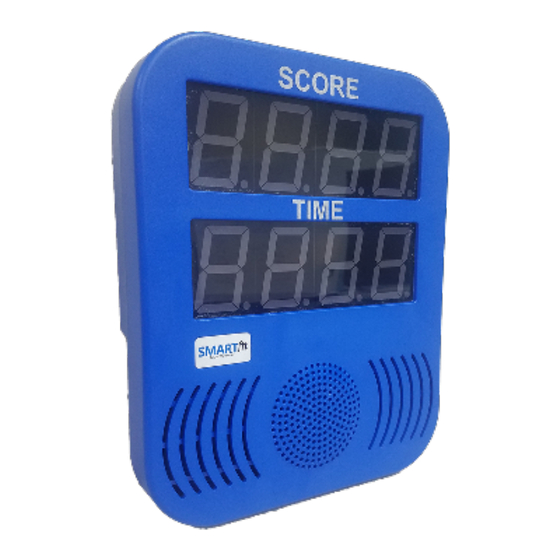
- Page 30 12. Turn on one of your Strike Pods. Looks at the target display, so that you can confirm the RF Channel. The RF Channel is indicated as C 3 in the photo to the right. This stands for Channel 13. Confirm that all your Strike Pods are set to the same RF Channel.
- Page 31 15. Turn on the setting labeled, “Response Time.” This setting will enable target data collection including response time accuracy. 16. Select the blue “Done” button when you are finished. 17. Select the “Manage Connections” menu item.
- Page 32 19. Wait 5 seconds, while Bluetooth connects the CPU and SMARTfit App. 20. You will not be able to connect to the SMARTfit system if you are connected to any other Bluetooth device. For example, you must disconnect from Apple watches, wireless speakers, headphones, etc.
-
Page 33: Start A Game
Start a Game Select the “Play” tab at the bottom of the screen. Select a game category from the list provided under “Categories.” Customize the game settings, then scroll down to select the “Start Game” button... -
Page 34: Standard Settings
Standard Settings The standard settings are found within every Category. The time indicates the duration, in seconds, the game will be played for. The remaining time is shown on the CPU, which can be found below the score. The volume bar controls how loud the sound of each target strike will be. - Page 35 The sensitivity determines how hard the target must be struck. For example, low sensitivity is used for a heavy strike from a medicine ball or boxing gloves. High sensitivity is used for a light strike from a hand or noodle. Hit Delay determines the time the target will delay before listening for another strike.
- Page 36 Level determines the difficulty of the game. Each category gives level a different meaning. Level will control the speed the targets change color (track categories) or how long a target stays lit (memory categories). Selection determines the targets available in a game. To create your own selection, visit the Build tab within the App and select the “Selection”...
- Page 37 Sequences are patterns of correct targets that are played within a game. A random sequence will have a random pattern each game. Fixed sequences 1 – 5 are default patterns that are provided and are known by the user when played within a game. 10.
-
Page 38: Open And Closed Platforms
Open and Closed Platforms Open the SMARTfit App. Type “Admin” under username and “smart” under password. Select the “Super User Manager” menu item. - Page 39 Select the “Administrator Settings” menu item. The SMARTfit App will start with the open platform activated. The expiration date will expire 6 months after the App has been downloaded. Change the expiration date to provide more time with the open...
- Page 40 To turn off the open system platform, switch the open system bar to the left. Once complete, the setting will instantly save. Select the back- arrow button until you are at the home screen. Your system is now ready for play!
-
Page 41: Play A Free Activity
Play a Free Activity Free activities are pre-designed game categories played while performing a specific action with custom game settings and equipment. 1. Select the “Play” tab at the bottom of the screen 2. Select the “Free Activities” tab at the top of the screen. - Page 42 Select one of the activities based on the player’s ability level. Level 1 is an easier activity, while Level 3 is more challenging. 5. If the device is connected to the internet, a video of this activity will be activated. 6.
- Page 43 You cannot adjust the settings from this direct page. However, if you select the Copy and Edit feature, then you will be given access to adjust the settings. The orange add to activity list will drag this activity into a program.
- Page 44 To begin the activity, select the blue Start Game button. The timeclock will begin after the player strikes the first target.
-
Page 45: Play A Free Program
Play a Free Program Free programs are a pre-designed custom sequence of activities used for a specific focus area. 1. Select the “Play” tab at the bottom of the screen 2. Select the “Free Programs” tab by sliding the top option bar to the right. - Page 46 This screen will provide a brief description, the game list, and the equipment list for the selected program. Select the blue Play tab near the bottom of the screen when ready to play. If WIFI is connected, a video of this activity in action will begin to play.
- Page 47 When the game is finished, the app will send a notification of completion, and the next game activity will begin. When all game activities are completed, the app will send a “Program Completed” notification.
-
Page 48: Create An Activity
Create an Activity Activities are a list of game categories, created by a Tier One User, with chosen settings and equipment to meet a focus area. Select the “Play” tab at the bottom of the screen. Select a game category from the list provided under “Categories.”... - Page 49 Customize the standard settings, then scroll down the page. Select the “Create Activity” button. Name the activity and provide a brief description of the rules and set up of the activity. Select the blue “Done” button when you are finished.
- Page 50 This option will ask for permission for all Tier Two Users to see this activity under the Tier One Users Activities tab when signed into their personal account. Tier One Users are teachers, trainers, doctors, owners, and coaches. Tier Two Users are students, clients, patients, members, or athletes.
- Page 51 This option will ask for permission for clients (Tier Two Users) to see this activity under their account. If Yes is selected, the trainer will choose which client will see this activity under their personal account. The new activity will show up under the Marked Activities tab.
- Page 52 Scroll down the game options to select the blue “Start Game” button. The game will begin when the player strikes the first target.
-
Page 53: Create A Program
Create a Program A program is a list of activities, created by a Tier One User (Trainer, Teacher, Doctor, Coach, or Owner), that play in sequence to meet a focus area. Select the first Activity you wish to build into your Program. You can either select one of the Free Activities or an Activity that you created. - Page 54 Scroll down the page, then select the orange Add to Activity List button. This question is asking you to enter the number of repetitions that this activity will repeat before the next activity appears in the program.
- Page 55 The App will update you on the current activity list that your program will import. Repeat the above steps until you are ready to build the Program. Select the “Build” tab at the bottom of the screen. Select the “Programs” button.
- Page 56 Fill in: Name, Description, and Number of program repetitions. The number of program repetitions is the number of repetitions the program will play after it has finished once. Press the blue “Next” button to continue. The app will ask you if you want to import your activity list.
- Page 57 Choose if you’d like to clear the activities in the activity list or if you’d like to keep them to import later. On this page, the user can make a change to the number of repetitions an Activity will play.
- Page 58 If you forgot an activity and you know the name of it off the top of your head, then you can select the add activity button at the top of the page. You can scroll through the entire activity library and select the one you desire.
- Page 59 If yes is selected during this first option, the program will be public for all users under the trainer account. If no is selected, the new program will stay private for the creating user only. If yes is selected during this second option, the user can choose to save this program for a specific client.
- Page 60 Access this program by selecting the play tab and scrolling across the top menu bar to the Programs tab. This Program will show up under the name of the creating user. Select the new program Scroll down and confirm that the games list is known, then select the blue play tab.
- Page 61 The first activity will begin after the player strikes the first target. Once all activities are finished, the app will send a notification of completion.
-
Page 62: Search And Export Data
Search and Export Data First, activate the client, patient, or student that you produced data on for this activity. Now select the data tab at the bottom of the screen. - Page 63 In this video, the activity is called track the color- sit to stand. These activities are alphabetically organized and contain all of the created and Free activities within the SMARTfit App.
- Page 64 Click on the view statistics tab. Here you’ll be able to select the time stamp of the attempts near the middle of the screen. For example, the 1D button indicates all attempts completed within 24 hours, while 1W indicates all attempts completed within 1 week.
- Page 65 Select the list symbol at the top right of the screen. Here are all 7 attempts with the average statistics on each attempt. You can also see the time stamp and order of which they were played. Select the bottom data set to produce an excel report for all 7 attempts.
- Page 66 Now select the excel symbol at the top right of the screen. You can zoom in here on your tablet to take a closer look at each attempt.
- Page 67 You can analyze the hit totals for each attempt, followed by the target the player stuck, the target the player should have struck, the points scored during that strike, the response time for each strike, followed by the time stamp, and game Id. Scrolling down the page will reveal the data on the remaining 6 attempts.
- Page 68 To export the excel file, select the export symbol at the top right of the screen.
-
Page 69: Eu Declaration Of Conformity
CE mark and issued the EU-type examination certificate; Controller: 99819-10-EURED This declaration of conformity is issued under the sole responsibility of the manufacturer. Signed for and on behalf of: SMARTfit, Inc Printed Name: Jim Manley Date: 5/14/18...
Need help?
Do you have a question about the Strike Pod and is the answer not in the manual?
Questions and answers