Advertisement
Available languages
Available languages
Quick Links
Advertisement

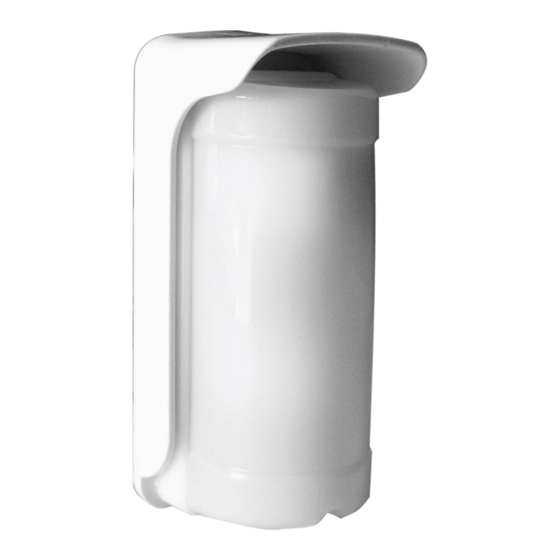
Summary of Contents for CAME PXWDTVE
- Page 1 FA0 0 4 8 9 M 4 A PXWDTVE...
- Page 2 DL4DL5 80 ° DIP-SWITCH 12 [m] +6 V 2 - FA00489M4A - ver. 1 - 03/2017...
- Page 3 – 3 - FA00489M4A - ver. 1 - 03/2017...
- Page 4 4 - FA00489M4A - ver. 1 - 03/2017...
- Page 5 5 - FA00489M4A - ver. 1 - 03/2017...
- Page 6 6 - FA00489M4A - ver. 1 - 03/2017...
- Page 7 7 - FA00489M4A - ver. 1 - 03/2017...
- Page 8 E Potenziometro per la re- B Dip-switch golazione micro-onda Spostare il DIP3 esclusivamente in assenza di rilevazione (se Tipo PXWDTVE C Jumpers F Tamper anti-strappo i LED sono abilitati, spostare il DIP quando sono tutti spenti). n° 2 batteria al Litio a...
- Page 9 ‘beep’ confermano Attraversamento dell'area di rilevazione Tipo PXWDTVE l’avvenuta inizializzazione. B3 Il sensore rileva agevolmente in tutta la portata Autonomia stimata (anni) ** Per re-inizializzare il sensore togliere l’alimentazione, preme- B4 Il sensore potrebbe rilevare a distanza inferiore della Temperatura d’esercizio (°C)
- Page 10 2- Regolare il sensore microonda muovendosi all’interno tare che, durante il giorno, i raggi solari diretti accechino il Il prodotto è conforme alle direttive di riferimento vigenti. dell’area di rilevazione: il LED DL3 (blu) si accenderà quando modulo di rilevazione IR, compromettendo il buon funziona- Dismissione e smaltimento.
- Page 11 Only switch DIP when there is no detection (if the LEDs are D Potentiometer for setting enabled, switch the DIP-switch when they are all opened). The Type PXWDTVE the infrared beam sensor confirms switching into either test or normal mode, by two 3V, CR123A,...
- Page 12 You can interrupt the initialization at any time by keeping max range. Once the sensor is fastened, to direct the heads Type PXWDTVE pressed the tamper (JP1 = OPEN) for a few seconds until the we suggest slightly loosening the joint screws.
- Page 13 ☞ The subject can walk through the areas without trigger- tion areas. A lateral variation of 1° of the head translated to This product complies with the law. a moving the beam by 30 centimeters at 18 meters. Do not ing an alarm because it is not detected by both technolo- Decommissioning and disposal.
- Page 14 Ne déplacer le DIP3 qu'à défaut de détection (si les voyants C Cavaliers F Autoprotection anti- Type PXWDTVE sont activés, déplacer le DIP quand ils sont tous éteints). Le D Potentiomètre pour le arrachement 2 piles au lithium 3 V capteur confirme le passage à...
- Page 15 : quelques bips confir- ; en cas d’erreur, c’est le voyant DL4 (rouge) qui s’allumera. Type PXWDTVE ment l'initialisation effective. Température de fonctionnement (°C) -40 à +50 Hauteur d'installation B1 et Orientation B2 Pour réinitialiser le capteur, le mettre hors tension, appuyer...
- Page 16 l'essai de marche uniquement sur la micro-onde. Le VOYANT Remarque. le couvercle du capteur atténue de 30% la lon- Montage DL2 (micro-onde) s'allumera en permanence tandis que le gueur du faisceau IR. Le capteur ne sera activé et ne fonction- À...
- Page 17 Перемещайте DIP3, только когда детекторы не работают D Потенциометр для ре- (если светодиодные индикаторы светятся, переместите DIP- гулировки инфракрасного Модель PXWDTVE переключатель только после того, как они погаснут). Датчик излучения 2 литиевые бата- Электропитание подтвердит переход в режим тестирования или режим нор- рейки, 3 В...
- Page 18 ние на датчик. Впоследствии вы можете изменять настройки, установлен для датчика: ТЕСТИРОВАНИЯ или НОРМАЛЬНОЙ Модель PXWDTVE не отключая электропитание. После этого датчик готов к ини- РАБОТЫ (DIP3). Частота микроволнового излучения (в циализации, которая займет 2 минуты. Разомкните перемычку JP1 и убедитесь в том, что контроль- ГГц)
- Page 19 ния зон обнаружения (боковое смещение головки детектора материала. на 1° соответствует смещению пучков на около 30 см при КОМПАНИЯ CAME S.P.A. СОХРАНЯЕТ ЗА СОБОЙ ПРАВО НА Зона обнаружения СВЧ-детектора M2 больше зоны обна- дальности обнаружения 18 м). Не направляйте пучки датчиков...
- Page 20 Came S.p.A. Via Martiri Della Libertà, 15 Via Cornia, 1/b - 1/c 31030 Dosson di Casier 33079 Sesto al Reghena Treviso - Italy Pordenone - Italy (+39) 0422 4940 (+39) 0434 698111 (+39) 0422 4941 (+39) 0434 698434 www.came.com...


Need help?
Do you have a question about the PXWDTVE and is the answer not in the manual?
Questions and answers