Advertisement
Quick Links
Advertisement

Related Manuals for Uniden AA 1103


Summary of Contents for Uniden AA 1103
- Page 1 VOICE RECORDER AA 1103 Instruction Manual...
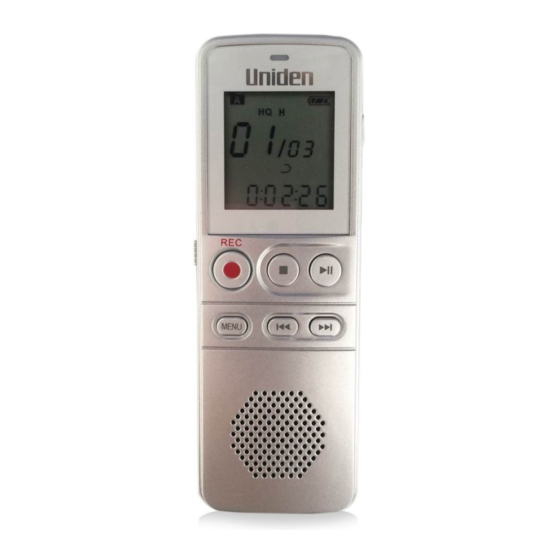
- Page 2 1.Overview: All display segments: Fig1 2.Power on: Fig2 Fig3 A.Put 2 x AAA batteries in the battery compartment, slide down and hold the power button to the “POWER” position and hold for 3 sec , the display show “ON” mode .(Fig2) B.After “ON”...
- Page 3 4.USB Connection Interface: 5. Recording setting: 1. In a recording stop mode (start-up display), press the “FOLDER” button to select any one of these 4( A/B/C/D ) folder for recording location, 2. The built-in microphone on the top of the recorder, it should be toward the sound source and press “...
- Page 4 6. Playback setting: 6.1 Select a recording folder: 1. In standby mode, press the “ FOLDER “ button to select one of these 4 folder( for the recording location. 2. In the stopped mode, press the button “ ” and that button ” ”...
- Page 5 between starting time and end time. Press “FOLDER” to cancel A-B repeat and back to normal playing. 6.4.2 T-MARK: In the playing state, press “T-MARK” to set the first index mark, press “T-MARK” again to set the second, third ,...till the tenth mark... Each recording file can be set 10 index marks at maximum.
- Page 6 Format: WAV, 32 kbit/s 4. Press the “ RED “record key to confirm the change. 5. Press the“ ”stop button to exit the set up 8.2(LED) Turn on /off the record light. The next setting menu is LED power on/off: Press to select LED on or off.
- Page 7 detected, it will continue to record once detect any voice . Press to switch ON or OFF, to enable/disable voice activation(VOR). Press “REC” key to confirm the selection. If the voice activation is in “ ON “ mode, the screen will display Press the ”...
- Page 8 Press the ” ” stop key to exit the menu, 8.8 Setting date & time: The date and time will be saved as the recording time. Press to select year/month/day/hour/minute/second Press “ + / –” to set the numbers. Press the “REC” key to confirm. Press the ”...
- Page 9 Press the “REC” key to confirm. Press the ” ” stop key to exit the menu, 8.11 (DIVIDE)Setting auto divide This function can divide very longtime recordings into some parts, if the recording for a meeting very long, the user can set time a stop point and start point for a new recording, default setting include OFF, 30mins or 60mins.
Need help?
Do you have a question about the AA 1103 and is the answer not in the manual?
Questions and answers