Table of Contents
Advertisement
Quick Links
HP LCD TVs - Setting Up Your LCD TV
Before you begin
Items needed for setup
Attaching or removing the stand
Connecting devices
Connecting an external sound system
Connecting power to the TV
TV back panel
This document pertains to these HP LCD TVs:
HP LC4776N 47-Inch LCD High-Definition Television
HP LC4276N, LC4272N, and LC4270N 42-Inch LCD High-Definition Television
HP LC3772N and LC3770N 37-Inch LCD High-Definition Television
HP LC3272N and LC3270N 32-Inch LCD High-Definition Television
This document explains how to set up your HP LCD TV.
NOTE:
It may be necessary to purchase additional video and audio cables to perform some of the steps in
this document.
Before you begin
Points to note during installation:
Select a location for the TV that has easy access to the AC power receptacle.
WARNING:
Due to the size and weight of the display and stand, it is recommended that a minimum of
two people assemble and move the TV.
Refer to
TV back panel
Refer to
Turning on the TV
for connector locations.
for TV buttons and indicators.
Advertisement
Table of Contents

Related Manuals for HP LC4776N


Summary of Contents for HP LC4776N
- Page 1 HP LC3772N and LC3770N 37-Inch LCD High-Definition Television HP LC3272N and LC3270N 32-Inch LCD High-Definition Television This document explains how to set up your HP LCD TV. NOTE: It may be necessary to purchase additional video and audio cables to perform some of the steps in this document.
-
Page 2: Items Needed For Setup
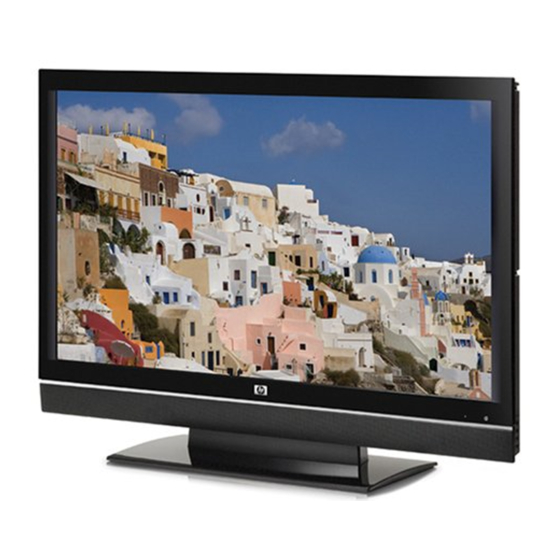
Items needed for setup The following items that came with the TV are used in this article. If you recently purchased your TV and an item is missing Contact HP (in English) for a replacement. Figure 1: Television (panel with stand detached) -
Page 3: Attaching Or Removing The Stand
Cables to connect the antenna or cable TV signal source, and other devices you want to connect to the TV A TV signal source (antenna, satellite, cable) NOTE: Optional equipment, cable or satellite TV service, and all cables are sold separately. Attaching or removing the stand Your TV comes with the stand attached. - Page 4 3. Turn the assembled stand over and insert four short screws into the bottom of the base, and tighten the screws to secure the base to the pedestal. Figure 8: Insert four short screws into the bottom of the base 4.
-
Page 5: Connecting Devices
7. Carefully lift the TV and then position the TV upright on a stable table. To remove the stand, perform the steps in reverse order. Connecting devices Use the following sections depending on the type of device you are connecting: Connecting the cable TV or an air broadcast antenna Connecting cable or satellite with a set-top box Connecting a DVD player, VCR, DVR, game console, or camcorder... -
Page 6: Connecting Cable Or Satellite With A Set-Top Box
Figure 10: Source coaxial cable to the ANT/Cable connector on the back of the TV Connect power to the Turn on the Connecting cable or satellite with a set-top box You can connect a digital TV set-top box (air or cable) and other audiovisual equipment by using the following steps. - Page 7 DVI video cable with a DVI-to-HDMI converter and audio cables connected to the HDMI 1 connector and the Audio In connectors on the TV. Figure 12: Connecting DVI-to-HDMI converter, DVI cable, and audio cables to HDMI 1 Component video and audio cables connected to Component High Definition (Component 1 or Component 2, and Audio L and R) connectors on the TV.
- Page 8 NOTE: The S-Vid connector in each of the Standard Definition Input (AV Input 1 and the AV Input 2) connector sets shares the audio connectors in the set with the Video connector in the set. Do not connect video cables to both the S-Vid and Video connectors in an input set.
-
Page 9: Connecting A Dvd Player, Vcr, Dvr, Game Console, Or Camcorder
2. Connect the cables to the set-top box. 3. Turn on the set-top box. Connect power to the Turn on the Connecting a DVD player, VCR, DVR, game console, or camcorder You can connect optional equipment, such as a DVD player, VCR, DVR, home stereo systems, and so on, to the TV. - Page 10 You can connect a game console, camcorder, and other AV equipment by using either S-Vid or Video (composite) connections. You can connect HDMI equipment by using an HDMI connector. You can connect DVI equipment by using a DVI cable with a DVI-to-HDMI converter and audio cables, and the HDMI 1 connector and Audio Input connectors.
-
Page 11: Connecting An External Sound System
2. Connect the cables to the PC. Connect power to the Turn on the 5. Connect the power to, and turn on, the PC or source equipment. Connecting an external sound system You can connect an external sound system to the TV using the Audio Output connectors for a digital audio or an analog audio signal: Use an optical audio cable and the Audio Output Digital (Optical) connector on the back of the TV to provide a digital audio signal to an optional external sound system, such as a digital receiver or... -
Page 12: Connecting Power To The Tv
Connect power to the Turn on the 4. Connect the power, and turn on the external sound system. If desired, you can turn off the TV speakers by setting the onscreen display Audio menu Speakers option to Off. Connecting power to the TV 1. -
Page 13: Tv Back Panel
to the channel list. Be sure to insert batteries into the remote control unit before use. Figure 19: TV buttons and indicators 1. POWER: Turns the TV on or off. 2. CH (channel): Selects the next higher or lower channel. 3. - Page 14 1. ANT/Cable in: Connect a coaxial cable from an off-air antenna or cable signal source. 2. Standard Definition Input, AV Input 1 and AV Input 2: Connect an S-Video cable and left and right audio cables, or, connect a composite video cable and left and right audio cables. Audio L and R connectors are shared within the AV connector set.
Need help?
Do you have a question about the LC4776N and is the answer not in the manual?
Questions and answers