Table of Contents
Advertisement
Available languages
Available languages
Quick Links
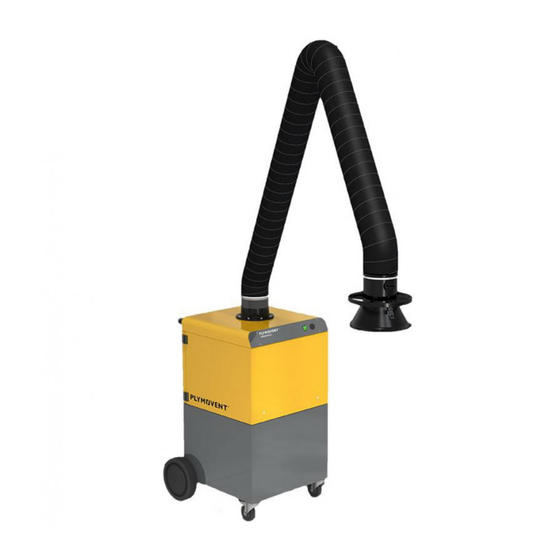
EN Mobile welding fume extractor with flexible arm
EN Stationary welding fume extractor with flexible arm
EN Stationary welding fume extractor with two flexible arms
NL Mobiele lasrookafzuiger met flexibele afzuigarm
NL Stationaire lasrookafzuiger met flexibele afzuigarm
NL Stationaire lasrookafzuiger met twee flexibele afzuigarmen
DE Mobiler Schweißrauchabsauger mit flexiblem Arm
DE Stationärer Schweißrauchabsauger mit flexiblem Arm
DE Stationärer Schweißrauchabsauger mit zwei flexiblen Armen
FR
FR Epurateur fixe des fumées de soudure avec bras flexible
FR Epurateur fixe des fumées de soudure avec deux bras flexibles
Epurateur mobile des fumées de soudure avec bras flexible
ES
ES
ES
Aspirador fijo para humos de soldadura con dos brazos flexibles
Aspirador móvil de humos de soldadura con brazo flexible
Aspirador fijo para humos de soldadura con brazo flexible
PL
PL
PL
Stacjonarny odciąg dymów spawalniczych z dwoma ramionami elastycznymi
Stacjonarny odciąg dymów spawalniczych z ramieniem elastycznym
Mobilny odciąg dymów spawalniczych z ramieniem elastycznym
MobiLEGo | MobiLEGo
EN
Installation and user manual
NL
Installatie- en gebruikershandleiding
DE
Installations- und Betriebsanleitung
FR
Manuel d'installation et d'utilisation
ES
Manual de instalación y de uso
PL
Instrukcja użytkowania i montażu
www.plymovent.com
PLuS
Advertisement
Table of Contents

Subscribe to Our Youtube Channel
Related Manuals for Plymovent Mobile GO


Summary of Contents for Plymovent Mobile GO
- Page 1 DE Stationärer Schweißrauchabsauger mit flexiblem Arm DE Mobiler Schweißrauchabsauger mit flexiblem Arm FR Epurateur fixe des fumées de soudure avec deux bras flexibles FR Epurateur fixe des fumées de soudure avec bras flexible Epurateur mobile des fumées de soudure avec bras flexible Aspirador fijo para humos de soldadura con dos brazos flexibles Aspirador fijo para humos de soldadura con brazo flexible Aspirador móvil de humos de soldadura con brazo flexible Stacjonarny odciąg dymów spawalniczych z dwoma ramionami elastycznymi Stacjonarny odciąg dymów spawalniczych z ramieniem elastycznym Mobilny odciąg dymów spawalniczych z ramieniem elastycznym MobiLEGo | MobiLEGo PLuS Installation and user manual Installatie- en gebruikershandleiding Installations- und Betriebsanleitung Manuel d’installation et d’utilisation Manual de instalación y de uso Instrukcja użytkowania i montażu www.plymovent.com...
- Page 2 EN – OrigiNal iNstructiON All rights reserved. The information given in this document has been collected for the general convenience of our clients. It has been based on general data pertaining to construction material properties and working methods known to us at the time of issue of the document and is therefore subject at any time to change or amendment and the right to change or amend is hereby expressly reserved.
-
Page 3: Table Of Contents
TabLE oF CoNTENTS ENGLiSh Page NEDERLaNDS Pag. DEuTSCh Seite Preface Voorwoord Vorwort Introduction Inleiding Einleitung Product description 2. Productbeschrijving Produktbeschreibung 3. Safety instructions 3. Veiligheidsvoorschriften 3. Sicherheitsvorschriften Installation Installatie Installation Gebruik Betrieb Maintenance Onderhoud Wartung Troubleshooting 7. Verhelpen van storingen Fehlerbehebung Spare parts 8. Reserveonderdelen 8. Ersatzteile Electrical diagram... -
Page 4: Preface
PREFaCE iNTRoDuCTioN using this manual Identification of the product This manual is intended to be used as a work of reference for The identification plate contains, among other things, the professional, well trained and authorised users to be able to following data: safely install, use, maintain and repair the product mentioned - product name on the cover of this document. - serial number - supply voltage and frequency Pictograms and symbols - power consumption The following pictograms and symbols are used in this manual: General description The MobileGo is a mobile filter unit with an integrated fan and Suggestions and recommendations to simplify an extraction arm. It features a pre filter cassette and a HEPA carrying out tasks and actions. filter cassette (both disposable). Thanks to the four transport aTTENTioN wheels (two of which are swivel casters with brake), the A remark with additional information for the user. A... -
Page 5: Product Description
Motor design Energy efficiency n.a. Mains cord Plug: Type: - 115V/1ph/50Hz - none - 115V/1ph/60Hz - none - 230V/1ph/50Hz Welding fume class according to ISO 15012-1:2013 1.3.1 Dimensions Refer to Fig. I on page 50. Working range Refer to Fig. II on page 50. ambient and process conditions Process temperature: - min. 5°C (41°F) - nom. 20°C (68°F) - max. 70°C (158°F) Fig. - Page 6 users WaRNiNG! - The use of this product is exclusively reserved to authorised, Explosion hazard! Do not use the product for trained and qualified users. Temporary personnel and explosion-hazardous applications, e.g.: personnel in training can only use the product under - aluminium laser cutting supervision and responsibility of skilled engineers. - grinding aluminium and magnesium - Stay alert and keep your attention to your work. Do not use - explosive environments or explosive substances/ the product when you are under the influence of drugs, gases alcohol or medicine. WaRNiNG! - The product is not to be used by children or persons with Do not use the product for: reduced physical, sensory or mental capabilities, or lack of - extraction of hot gases (more than 70°C/158°F experience and knowledge, unless they have been given...
-
Page 7: Installation
• Use the rubber collar to make the connection airtight. iNSTaLLaTioN • Attach the hose (A) to the swivel ring (D) with the hose clamp (C). Tools and requirements aTTENTioN! You need the following tools and requirements to install the Make sure to install the washer M20 (E) between unit: the rotating flange and the swivel ring to avoid - basic tools damage. 4.1.1 To be sourced locally - plug (except for MobileGo in 230V/1ph/50Hz) A (8x) unpacking B (8x) Make sure that the product is complete. The package contains: Filter unit - mobile filter unit - washer M6 (8) - bolt M6x25 (8) -
Page 8: Use
WaRNiNG To keep the welding fume away from the breathing zone of the welder, make sure that all fume is extracted through the hood. • Put the unit off approx. 20 seconds after you have finished welding. E (2x) D (2x) When the airflow is too low during use, the buzzer (ref. Fig. 5.1B) emits an acoustic alarm. Refer to chapter 7 to find the possible cause and the solution. aTTENTioN If you do not replace the pre filter and/or the HEPA filter cassette in time, the airflow (extraction capacity) further drops. MaiNTENaNCE Fig. 4.4 Hood mounting (metal tube arm) Periodic maintenance The product has been designed to function without problems for a long time with a minimum of maintenance. In order to guarantee this some simple, regular maintenance and cleaning activities are required which are described in this chapter. If WaRNiNG! you observe the necessary caution and carry out the Fire hazard! Do not use the product for polishing maintenance at regular intervals, any problems occurring will applications in combination with grinding, welding or be detected and corrected before they lead to a total any other application that generate sparks. breakdown. -
Page 9: Troubleshooting
Filter replacement • Dispose of the used HEPA filter cassette in accordance with state or local regulations. The buzzer emits an acoustic signal when the airflow is too • Put a new HEPA filter cassette in the unit. The side pins (A) low. exactly fit in the slits (B). • Put the pre filter cassette back in the unit. Make sure that Make sure that: the arrow on the frame points downwards - the shut-off damper is open • Close and lock the door. - the extraction arm is not fully folded When the buzzer still continues, you must replace the filter cassette(s). As the pre filter is smaller and becomes more quickly saturated than the HEPA filter, you can replace the pre filter cassette several times before you finally need to replace the HEPA filter cassette. Personal protective equipment (PPE) Wear respiratory protection and protective gloves when you replace the filter cassettes. WaRNiNG Do not replace the filter cassettes while the fan is running. -
Page 10: Spare Parts
CE DECLaRaTioN Clogged filters Replace the & defective pressure sensor & CE declaration of conformity for machinery pressure sensor the pre filter cassette We, Plymovent Manufacturing B.V., Koraalstraat 9, 1812 RK Replace the HEPA Alkmaar, Netherlands, herewith declare, on our own filter cassette as responsibility, that the products: well - MobileGo The buzzer Poor The pre filter is Replace the pre - MobileGo... - Page 11 Productaanduidingen VooRWooRD Tenzij specifiek vermeld, is de inhoud van deze handleiding van toepassing op zowel de MobileGo als de MobileGo plus Gebruik van deze handleiding Deze handleiding is bedoeld als naslagwerk waarmee iNLEiDiNG professionele, geschoolde en daartoe bevoegde gebruikers het aan de voorzijde van dit document vermelde product op veilige wijze kunnen installeren, gebruiken, onderhouden en Identificatie van het product repareren. Het identificatieplaatje bevat o.a. de volgende gegevens: Pictogrammen en symbolen - productnaam - serienummer In deze handleiding worden de volgende pictogrammen en - aansluitspanning en frequentie symbolen gebruikt: - vermogen algemene beschrijving Suggesties en adviezen om de betreffende taken of handelingen gemakkelijker te kunnen uitvoeren. De MobileGo is een mobiele filterunit met ingebouwde LET oP! ventilator en afzuigarm. De unit bevat een voorfiltercassette...
- Page 12 Beschikbare - 115V/1ph/50Hz aansluitspanningen - 230V/1ph/50Hz Bouwvorm motor Efficiencyklasse n.v.t. Voedingskabel Netstekker: Type: - 115V/1ph/50Hz - geen - 115V/1ph/60Hz - geen - 230V/1ph/50Hz Lasrookklasse volgens ISO 15012-1:2013 1.3.1 Afmetingen Zie Fig. I op pag. 50. Werkbereik Zie Fig. II op pag. 50. omgevings- en procescondities Procestemperatuur: - min.
- Page 13 Gebruik onderrichten en alle voorschriften en aanwijzingen in acht te nemen. WaaRSChuWiNG! - Wijzig nooit de volgorde van de te verrichten handelingen. Brandgevaar! Gebruik het product niet voor: - Bewaar de handleiding steeds in de nabijheid van het - polijsten in combinatie met slijpen, lassen of product. andere toepassingen die vonken veroorzaken (vezels van polijst- of slijpschijven zijn zeer brandbaar en vormen Gebruikers een hoog risico op filterbrand bij blootstelling aan vonken) - booggutsen - Gebruik van het product is uitsluitend voorbehouden aan - afzuiging en/of filtratie van ontvlambare, daartoe opgeleide en bevoegde gebruikers. Tijdelijke gloeiende of brandende deeltjes of vloeistoffen werkkrachten en personen in opleiding mogen het product - afzuiging en/of filtratie van agressieve rook en uitsluitend onder toezicht en verantwoording van vaklui gassen (bv. van zuren en alkaline) of scherpe gebruiken. voorwerpen - Blijf voortdurend opletten en houd uw aandacht bij het werk. - afzuiging en/of filtratie van deeltjes die vrijkomen Gebruik het product niet als u onder invloed bent van drugs, bij het lassen aan oppervlakten die met primer alcohol of medicijnen. zijn behandeld - Het product mag niet worden gebruikt door kinderen of - afzuiging van sigaretten, sigaren, tissues of personen met beperkte fysieke, zintuiglijke of mentale andere brandende deeltjes, voorwerpen of zuren...
- Page 14 Fig. 4.1 LET oP! • Monteer de draaiflens (C) op de filterunit met de 8 bouten Service, onderhoud en reparatie mag alleen worden M6x25 (A) + sluitringen M6 (B). uitgevoerd conform de richtlijnen TRGS 560 en TRGS 528 door daartoe bevoegd, gekwalificeerd en A (8x) A (8x) getraind personeel, dat gebruik maakt van de juiste werkmethoden. B (8x) B (8x) LET oP! Alvorens service-, onderhouds- en/of reparatiewerkzaamheden uit te voeren: - schakel de machine uit en ontkoppel deze van het Persoonlijke beschermingsmiddelen (PbM) Draag adembescherming en beschermende handschoenen bij het uitvoeren van Fig. 4.1 Draaflens service-, onderhouds- en reparatiewerkzaamheden. Fig. 4.2 WaaRSChuWiNG • In geval van een slangarm: schuif de slang over de interne De industriële stofzuiger die gebruikt wordt tijdens...
- Page 15 D (2x) E (2x) Fig. 5.1 Bedieningsorganen en controlelampen Gebruik Omdat het een mobiele unit betreft, kan deze op iedere gewenste plaats worden ingezet. Voor een optimaal resultaat moet de unit zo dicht mogelijk bij de vervuilingsbron worden geplaatst. • Positioneer de kap van de aangesloten afzuigarm op 400-800 mm afstand van de vervuilingsbron. Zie Fig. III op pag. 51 voor de juiste positie. • Controleer of de regel-/afsklep (zie Fig. 2.1A) open is. • Zet de unit aan (zie Fig. 5.1A). • Begin te lassen. • Wanneer de laspositie verandert, beweeg de kap dan naar Fig. 4.3 Montage van de kap (slangarm) de juiste positie ten opzichte van het laswerk. WaaRSChuWiNG Zorg ervoor dat alle lasrook via de kap wordt afgezogen om de lasrook buiten de ademzone van de lasser te houden. • Zet de unit ca. 20 seconden na het beëindigen van de laswerkzaamheden uit.
- Page 16 • Plaats een nieuwe voorfiltercassette in de unit. De pijl op onderdeel actie Frequentie: het frame moet naar beneden wijzen. elke X mnd • Sluit en vergrendel de deur. X =12 Filterunit Behuizing Reinig de buitenkant met een niet-agressief schoonmaakmiddel. Reinig de binnenkant met behulp van een industriële stofzuiger en verwijder het stof uit het filtercompartiment. Controleer het afdichtingsmateriaal van de deur. Indien nodig vervangen. Ventilator Controleer op aangekoekt vuil. Indien nodig reinigen. Voedings- Controleer op beschadigingen. Indien X *) kabel nodig repareren of vervangen. Afzuigarm Buizen Reinig de buitenkant met een...
- Page 17 • Trek de arm in een horizontale positie. Signalering Probleem Mogelijke oplossing • Pas de frictie aan; zie Fig. V op pag. 52 voor de oorzaak afstelpunten. De afzuigarm Er ontsnapt De instelling Pas de frictie aan; blijft niet in rook; geen van de frictie is zie Fig. V op pagina 6.3.2 Metalen arm (KUA) de gewenste goede niet correct 52 voor de positie staan afzuiging afstelpunten • Bepaal welk scharnier meer of minder frictie nodig heeft. Het lukt niet • Maak de slang op die positie los om toegang te krijgen tot de arm in de het scharnier.
- Page 18 CE VERkLaRiNG EG Verklaring van overeenstemming Wij, Plymovent Manufacturing B.V., Koraalstraat 9, 1812 RK Alkmaar, Nederland, verklaren geheel onder eigen verantwoordelijkheid dat de producten: - MobileGo - MobileGo plus waarop deze verklaring betrekking heeft, in overeenstemming zijn met de bepalingen van de volgende richtlijnen: - Machinerichtlijn 2006/42 EC - EMC 2014/30 EU - Laagspanningsrichtlijn 2014/35 E - ErP-richtlijn 2009/125 EC Handtekening: Naam: M.S.J. Ligthart Functie: Product Manager Datum van afgifte: 1 mei 2018 0000111659/150418/B MobileGo...
- Page 19 Produktbezeichnungen VoRWoRT Falls nicht anders spezifiziert, gilt der Inhalt dieser Anleitung sowohl für das Modell MobileGo als auch das Modell Über diese anleitung MobileGo plus Diese Anleitung wurde als Nachschlagewerk für professionelle, geschulte und befugte Bediener geschrieben. Sie können mit EiNLEiTuNG dieser Anleitung das vorne auf diesem Dokument aufgeführte Produkt sicher installieren, bedienen, warten und reparieren. Identifizierung des Produktes Piktogramme und Symbole Das Typenschild enthält u.a. folgende Daten: In dieser Anleitung werden folgende Piktogramme und - Produktname Symbole verwendet: - Seriennummer - Anschlussspannung und Frequenz hiNWEiS - Leistung Vorschläge und Tipps, wie sich die betreffenden Aufgaben oder Handlungen einfacher ausführen allgemeine beschreibung lassen.
- Page 20 Elektrische Daten Leistungsaufnahme 1,1 kW Verfügbare - 115V/1ph/50Hz Anschlussspannungen - 230V/1ph/50Hz Motortyp Effizienzklasse n.a. Netzkabel Netzstecker: Typ: - 115V/1ph/50Hz - keiner - 115V/1ph/60Hz - keiner - 230V/1ph/50Hz Schweißrauchklasse laut ISO 15012-1:2013 1.3.1 Abmessungen Siehe Fig. I auf Seite 50. bereich Siehe Fig. II auf Seite 50. umgebungs- und Prozessbedingungen Fig. 2.1 Hauptbestandteile und -Elemente Prozesstemperatur: - min.
- Page 21 Gebrauch - Nie von der Reihenfolge der auszuführenden Handlungen abweichen. WaRNuNG! - Die Anleitung immer in der Nähe des Produkts aufbewahren. Feuergefahr! Das Produkt nicht gebrauchen für: - Polierarbeiten in Kombination mit Schleif-, bediener Schweiß- oder anderen funkenerzeugenden - Die Bedienung des Produkts ist entsprechend geschulten und Arbeiten (von Polier- oder Schleifscheiben stammende Fasern befugten Bedienern vorbehalten. Vorübergehende sind hochentzündlich und bergen bei Exposition gegenüber Funken Arbeitskräfte und Auszubildende dürfen das Produkt ein hohes Filterbrandrisiko) ausschließlich unter Aufsicht und Verantwortung von - Lichtbogenschweißen Fachkräften bedienen. - Absaugung bzw. Filtrierung von entzündichen, - Seien Sie immer aufmerksam und bleiben Sie es bei der glühenden oder brennenden Teilchen oder Arbeit. Bedienen Sie das Produkt nie, wenn Sie unter dem Feststoffe oder Flüssigkeiten Einfluß von Drogen, Alkohol oder Medikamenten stehen. - Absaugung bzw. Filtrierung von aggressivem - Das Produkt ist nicht dafür bestimmt, durch Personen mit Rauch (wie Salzsäure) oder scharfen Teilchen eingeschränkten physischen, sensorischen oder geistigen...
- Page 22 und Servicetechniken. Verwenden Sie nie abgenutztes hiNWEiS Werkzeug und lassen Sie kein Werkzeug im oder auf dem Vor Befestigung der Schläuche überprüfen, ob sich Gerät zurück. der Absaugarm im Gleichgewicht befindet. Siehe - Bereich nach der Arbeit reinigen. Abschnitt 6.3. aChTuNG! Fig. 4.1 Service, Wartungs- und Reparaturarbeiten müssen • Drehflansch (C) auf der Filtereinheit mit acht Schrauben entsprechend den Richtlinien TRGS 560 und TRGS M6x25 (A) und Unterlegscheiben M6 (B) montieren. 528 von autorisierten, ausgebildeten und qualifizierten Fachkräften unter Anwendung ent- A (8x) sprechender Arbeitstechniken durchgeführt werden. aChTuNG! B (8x) A (8x) Bevor Sie mit Service-, Wartung und Reparaturarbeiten beginnen: - die Maschine ausschalten und vom Netz abkoppeln B (8x) Persönliche Schutzausrüstung (PSa) Während der Service-, Wartungs- und Reparaturarbeiten Atemschutz und Schutzhandschuhe tragen.
- Page 23 D (2x) E (2x) Fig. 5.1 Bedienelement und Kontrolllampe Gebrauch Weil es sich um eine mobile Anlage handelt, kann sie an jede gewünschte Stelle gestellt werden. Das beste Ergebnis wird erzielt, wenn sie möglichst nahe der Verschmutzungquelle aufgestellt wird. • Die Absaughaube auf 400-800 mm Abstand von der Verschmutzungsquelle bringen. Siehe Fig. III auf Seite 51 für die richtige Position. • Sicherstellen, dass die Absperrklappe (siehe Fig. 2.1A geöffnet ist. Fig. 4.3 Montage der Haube (Schlaucharm) • Die Einheit einschalten (siehe Fig. 5.1A). • Die Schweißarbeiten beginnen. • Bei einem Wechsel der Schweißposition die Haube auf die zur Schweißnaht bezogene korrekte Position einstellen. WaRNuNG Um den Schweißrauch fern von der Atemzone des Schweißers zu halten, muss der gesamte Schweißrauch von der Absaughaube erfasst werden. E (2x) D (2x) • Ca. 20 Sekunden nach Beendigung der Schweißarbeiten die Einheit ausschalten.
- Page 24 6.2.1 Vorfilter-Kassette Jahr einer gründlichen Gesamtinspektion zu unterziehen. Wenden Sie sich zu diesem Zweck an Ihren Händler. Um die Vorfilter-Kassette auszutauschen wie folgt vorgehen. komponent Tätigkeit Frequenz: Fig. 6.1 alle X • Die Einheit vom Netz trennen. Monate • Rückseitige Tür (B) öffnen. X =12 • Die Vorfilter-Kassette (A) entfernen Filtereinheit • Die gebrauchte Vorfilter-Kassette gemäß den örtlich gültigen Bestimmungen entsorgen. Gehäuse Das Äußere mit einem milden • Neue Vorfilter-Kassette einsetzen. Der auf dem Rahmen Reinigungsmittel reinigen. befindliche Pfeil muss nach unten zeigen. Das Innere mit einem • Tür schließen und verriegeln. Industriestaubsauger reinigen und den Staub aus dem Filterkompartiment entfernen.
- Page 25 Einstellung des absaugarms Störung Problem Mögliche Lösung ursache Verbleibt der Absaugarm ganz oder teilweise nicht in Unzu- Die Einheit Die Absperr- Absperrklappe gewünschter Position, muß die Reibung neu eingestellt reichende funktioniert klappe in der (vollständig) öffnen werden. Absaug- nicht richtig Haubes des leistung Absaugarms ist 6.3.1 Schlaucharm (EconomyArm) (teilweise) geschlossen • Feststellen, welches Gelenk mehr oder weniger Reibung benötigt. • Schlauchrohr lösen, um Zugriff auf die Scharniere zu Verstopfte Filter Anschluss der erhalten.
- Page 26 - Sicherstellen, dass der Demontagebereich ausreichend belüftet wird, z. B. über eine mobile Belüftungseinheit Nach der Demontage: - Demontagebereich reinigen 10.2 Entsorgung Anfallende Schmutzstoffe und Staub zusammen mit den gebrauchten Filter in Übereinstimmung mit den gesetzlichen Bestimmungen professionell entsorgen. EG-koNFoRMiTÄTSERkLÄRuNG EG-Konformitätserklärung für Maschinen Wir, Plymovent Manufacturing B.V., Koraalstraat 9, 1812 RK Alkmaar, die Niederlande, erklären hiermit eigenverantwortlich dass die Produkte: - MobileGo - MobileGo plus worauf sich diese Erklärung bezieht, hergestellt sind: gemäß den Bestimmungen der folgenden Richtlinien: - Richtlinie für Maschinen 2006/42 EC - EMV 2014/30 EU - LVD 2014/35 EU - ErP-Richtlinie 2009/125 EC...
-
Page 27: Avant-Propos
Indications de produit AvAnt-propos Sauf indication spéciale, le contenu de ce manuel s’applique aussi bien au MobileGo qu’au MobileGo plus Utilisation du manuel This manual is intended to be used as a work of reference for IntroDUCtIon professional, well trained and authorised users to be able to safely install, use, maintain and repair the product mentioned on the cover of this document. -
Page 28: Description De Produit
Tensions d’alimentation - 115V/1ph/50Hz disponibles - 230V/1ph/50Hz Conception de moteur Classe d’efficacité énergétique Câble d’alimentation Fiche : Type: - 115V/1ph/50Hz - aucune - 115V/1ph/60Hz - aucune - 230V/1ph/50Hz Classe de fumée de soudage selon ISO 15012-1:2013 1.3.1 Dimensions Voir Fig. I à la page 50 Working range Voir Fig. - Page 29 opérateurs Utilisation MIsE En GArDE - L’utilisation du produit est réservée exclusivement aux Risque de feu! N’utilisez pas le produit à des fins opérateurs instruits et autorisés en ce sens. Intérimaires et personnes en formation ne doivent utiliser le produit que de : sous la supervision et la responsabilité...
-
Page 30: Installation
- Utilisez toujour les équipements de protection individuelle Bras sur l’unité mobile (EPI) afin d’éviter les blessures. Ceci vaut également pour Pour installer le bras d’aspiration, procédez comme suit. les personnes pénétrant dans la zone de travail. - Assurez toujours une aération suffisante. ConsEIL - Utilisez toujours des outils, pièces, matériaux, lubrifiants et Effectuez un contrôle d’équilibrage du bras avant de... -
Page 31: Utilisation
D (2x) E (2x) Fig. 5.1 Fonctions et indicateurs Utilisation Comme il s’agit d’une unité mobile, l’unité peut être utilisée à n’importe quel endroit. Pour obtenir les meilleurs résultats de fonctionnement, disposez l’unité le plus près possible de la source de pollution. •... - Page 32 inspection générale et minutieuse. Pour cela, contactez votre fournisseur. Fig. 6.1 • Mettez l’unité hors tension. • Ouvrez la porte arrière (B). Composant opération Fréquence : • Retirez le préfiltre à cassette (A). chaque X • Mettez le préfiltre à cassette usagé au rebut conformément mois aux réglementations fédérales, gouvernementales ou X =12...
-
Page 33: Réparation Des Pannes
signali- problème Cause remède sation possible réglage du bras Capacité L’unité ne L’obturateur se Ouvrez Si le bras d’aspiration, ou une partie de celui-ci, ne reste pas d’aspiration fonctionne trouvant dans (entièrement) insuffisante la hotte du bras l’obturateur dans la position souhaitée, vous devez régler le frottement. correctement d’aspiration est 6.3.1... -
Page 34: Déclaration De Conformité
DéCLArAtIon DE ConForMIté Déclaration CE de Conformité pour les machines Nous, soussignés, Plymovent Manufacturing B.V., Koraalstraat 9, 1812 RK Alkmaar, Pays-Bas, déclarons que les machines désignées ci-après : - MobileGo... - Page 35 indicaciones de producto PREáMbuLo A no ser que se haya indicado específicamente, el contenido de este manual es aplicable al MobileGo y MobileGo plus acerca de este manual Este manual se editó en concepto de documento de referencia iNTRoDuCCiÓN para usuarios profesionales, cualificados y debidamente autorizados. Utilizando dicho manual podrá instalar, hacer funcionar, mantener y reparar de una forma segura el producto Identificación del producto que se indica en la cubierta. La placa de características contiene los siguientes datos: Pictogramas y símbolos - denominación del producto - número de serie En el presente manual figuran los siguientes pictogramas y - tensión de conexión y frecuencia símbolos:...
- Page 36 Datos eléctricos Potencia absorbida 1,1 kW (1.5 HP) Tensiones de alimentación - 115V/1ph/50Hz disponibles - 230V/1ph/50Hz Diseño del motor Eficiencia energética no procede Cable eléctrico Enchufe de red: Tipo: - 115V/1ph/50Hz - ningúno - 115V/1ph/60Hz - ningúno - 230V/1ph/50Hz Clase de humos de soldadura según ISO 15012-1:2013 1.3.1 Dimensiones Véase Fig. I en la página 50. alcance de trabajo Véase Fig. II en la página 50.
- Page 37 - El usuario no debe alterar en ningún momento el orden de las actuaciones que se tienen que realizar. ¡aDVERTENCia! - Estas instrucciones se deben guardar siempre en las ¡Peligro de incendio! No utilice el producto para: proximidades del producto. - aplicación de pulido en combinación con amolado, soldadura y cualquier otra aplicación que genere operarios chispas (las fibras de los discos de láminas pulidoras o lijadoras - El manejo del equipo que aquí se describe queda reservado son muy inflamables y crean un grave peligro de que se produzcan al personal debidamente cualificado y autorizado. Los incendios en los filtros cuando se expongan a chispas) - corte por arco aire empleados temporales, así como los aprendices u otras - la aspiración y/o la filtración de partículas, personas en formación, sólo pueden manejar el equipo bajo...
- Page 38 brazo en unidad móvil - Asegure en todo momento una buena ventilación. - Utilice en todo momento herramientas y materiales Para instalar el brazo de aspiración, proceda de la siguente homologados por el fabricante, así como repuestos, técnicas manera. de servicio, y lubricantes homologados. No utilice nunca herramientas desgastadas y preste atención a no olvidar CoNSEjo herramientas en el producto tras realizar tareas de Compruebe el equilibrio del brazo antes de fijar las mantenimiento. mangueras. Consulte el apartado 6.3. - Limpie la zona posteriormente. ¡aTENCiÓN! Fig. 4.1 Servicio, mantenimiento y las reparaciones deben • Monte la brida giratoria (C) en la unidad de filtración con ser realizadas exclusivamente según las directivas los 8 pernos M6x25 (A) + arandelas M6 (B). TRGS 560 y TRGS 528 por personas autorizadas, cualificadas y preparadas (capacitadas) que usen las A (8x) prácticas de trabajo adecuadas.
- Page 39 Panel de mandos • Monte el cuello de la campana (H) en la campana (G). Fíjelo con la pinza. La unidad contiene los siguientes controles e indicadores: • Monte el tubo manguera (A) a la campana. • Fije el tubo manguera con una abrazadera de manguera Fig. 5.1 (B). A Interruptor basculante (0-1) luminoso verde Zumbador (indicador de servicio) D (2x) E (2x) Fig. 5.1 Controles e indicadores Como se trata de una unidad móvil, puede usarse en cualquier lugar deseado. Los mejores resultados se obtienen ubicando la unidad lo más cerca posible de la fuente de contaminación. • Coloque la campana del brazo de aspiración conectado a 400-800 mm (16-32 pulg.) de la fuente de contaminación. Consulte la Fig. III de la página 51 para ver la posición correcta.
- Page 40 6.2.1 Casete de prefiltro ¡aDVERTENCia! La falta de mantenimiento de los equipos puede Para cambiar el casete de prefiltro, proceda de la siguente provocar riesgos de incendios. manera. Fig. 6.1 Los intervalos de mantenimiento que se indican a continuación dependen de las condiciones de trabajo y servicio. Por esta • Deje sin corriente la unidad. razón y de forma adicional a las tareas de mantenimiento • Abra la puerta trasera (B). • Retire el casete de prefiltro (A). regulares que se describen en este manual, se recomienda someter al equipo anualmente a una revisión completa. A • Elimine el casete de filtro usado conforme a la normativa estos efectos, diríjanse a su proveedor. nacional o local. • Ponga un nuevo casete de prefiltro en la unidad. Asegúrese de que la flecha del bastidor esté apuntando hacia abajo Componente Tarea Frecuencia: • Cierre y bloquee la puerta. cada X meses X =12...
- Page 41 Señal Problema Posible causa Solución ajuste del brazo La unidad no La válvula Abra rendimiento funciona reguladora de (completamente) la Si el brazo de aspiración, o una parte del mismo, no se de la correcta- cierre de la válvula mantiene en la posición deseada, deberá ajustar la fricción. aspiración es mente campana del insuficiente brazo de 6.3.1 Brazo de tubo manguera (EconomyArm) aspiración se ha cerrado • Determine qué bisagra necesita más o menos fricción.
- Page 42 - limpie la parte exterior Durante el desmantelamiento de la unidad: - asegúrese de que el área esté suficientemente ventilada, p. ej. mediante una unidad de ventilación móvil Después de desmantelar la unidad: - limpie el área que se desmantela 10.2 Desechar Elimine los contaminantes y el polvo, junto a los filtros usados, de una forma profesional conforme a la normativa nacional, regional o local. DECLaRaCiÓN CE Declaración CE de Conformidad Los abajo firmantes, Plymovent Manufacturing B.V., Koraalstraat 9, 1812 RK Alkmaar, Países Bajos, declaran, bajo su exclusiva responsabilidad, que los productos: - MobileGo - MobileGo plus son conforme a las disposiciones de las Directivas: - Directiva de máquinas 2006/42 EC - Compatibilidad electromagnética 2014/30 EU - Directiva de baja tensión 2014/35 EU - Directiva ErP 2009/125 EC Signatura: Nombre: M.S.J. Ligthart...
-
Page 43: Wstęp
WSTęP WPRoWaDZENiE Korzystanie z instrukcji obsługi Identyfikacja produktu Niniejsza instrukcja jest przeznaczona do stosowania jako Tabliczka znamionowa zawiera, między innymi, następujące wytyczne dla profesjonalnych, dobrze wyszkolonych i dane: uprawnionych użytkowników, aby móc bezpiecznie instalować, - nazwa urządzenia obsługiwać, konserwować i naprawiać produkt wymieniony na - numer seryjny okładce niniejszego dokumentu. - napięcie zasilania i częstotliwość - pobór energii Piktogramy i symbole Poniższe piktogramy i symbole są używane w tej instrukcji: ogólny opis MobileGo to mobilna jednostka filtracyjna ze zintegrowanym WSkaZÓWka wentylatorem i ramieniem odciągowym. Urządzenie posiada Sugestie i zalecenia, aby ułatwić wykonywanie wkład filtra wstępnego i kasetę filtra HEPA (oba jednorazowe). zadań i czynności. Dzięki czterem kołom transportowym (z których dwa są uWaGa obrotowymi kółkami z hamulcem), urządzenie MobileGo nadaje Uwaga z dodatkowymi informacjami dla się do stosowania w stosunkowo małych obiektach lub w użytkownika. Wskazówka zwraca uwagę... -
Page 44: Opis Produktu
Konstrukcja silnika Efektywności b.d. energetycznej Przewód zasilający Wtyczka: Typ: - 115V/1ph/50Hz - brak - 115V/1ph/60Hz - brak - 230V/1ph/50Hz Klasa dymów spawalniczych zgodnie z ISO 15012-1:2013 1.3.1 Wymiary Zobacz Rys. Fig. I na stronie 50. Zakres pracy Zobacz Rys. Fig. II na stronie 50. Warunki pracy urządzenia Temperatura pracy: - min. 5°C - normal. 20°C - maks. 70°C Rys. - Page 45 Użytkowanie - Zawsze należy przechowywać instrukcję wraz z urządzeniem. OSTRZEŻENIE! Użytkownicy Zagrożenie pożarowe! Nie należy używać produktu - Stosowanie tego produktu jest zarezerwowana wyłącznie dla przeszkolonych i wykwalifikowanych użytkowników. - polerowania w połączeniu ze szlifowaniem oraz Pracownicy czasowi i personel na szkoleniu mogą używać spawaniem lub innymi aplikacjami, które generują urządzenia tylko pod nadzorem i na odpowiedzialność iskry. (Włókna z polerowania lub dysków ściernych są wysoce wykwalifikowanych przełożonych. łatwopalne i stwarzają wysokie ryzyko pożarów filtra od iskry.) - Bądź czujny i zachowaj uwagę przy pracy. Nie używaj - żłobienia łukowego produktu, gdy jesteś pod wpływem narkotyków, alkoholu lub - odciągania i/lub filtrowania łatwopalnych, leków. żarzących się lub palących cieczy oraz elementów - Ten produkt nie jest przeznaczony do użytku przez dzieci lub stałych osoby o ograniczonej zdolności fizycznej, czuciowej lub - odciągania i / lub filtrowania agresywnych oparów psychicznej, lub bez doświadczenia i wiedzy, chyba że będą (na przykład kwasu solnego) lub ostrych one nadzorowane lub zostaną poinstruowane. elementów - Dzieci powinny pozostawać pod nadzorem, aby nie bawiły się - odciągania i / lub filtrowania cząsteczek pyłu, które produktem.
-
Page 46: Instalacja
- Zawsze należy oczyścić teren po zakończeniu pracy. WSkaZÓWka Wykonaj kontrolę równowagi ramienia przed uWaGa założeniem węży. Zobacz rozdział 6.3. Obsługa, konserwacja i naprawy muszą być wykonywane przez autoryzowany, wykwalifikowany i Rys. 4.1 przeszkolony personel (z uprawnieniami) przy • Zamontować kołnierz obrotowy (C) na jednostce filtrującej użyciu odpowiednich narzędzi oraz metod pracy. za pomocą 8 śrub M6x25 (A) + podkładek M6 (B). uWaGa Przed rozpoczęciem obsługi, konserwacji i / lub prac A (8x) naprawczych należy: A (8x) - całkowicie odłączyć urządzenie od sieci B (8x) elektrycznej - odłączyć zasilanie sprężonym powietrzem B (8x) Środki ochrony indywidualnej (ŚOI) Stosować ochronę dróg oddechowych oraz rękawice ochronne podczas serwisowania, konserwacji i napraw urządzenia. uWaGa Odkurzacz przemysłowy wykorzystywany podczas wykonywania serwisu i konserwacji musi posiadać... -
Page 47: Użytkowanie
D (2x) E (2x) Rys. 5.1 Kontrolki i wskaźniki Użytkowanie Ponieważ dotyczy to jednostki mobilnej, można ją użyć w dowolnym pożądanym miejscu. Dla uzyskania optymalnych rezultatów należy umieścić urządzenie jak najbliżej źródła zanieczyszczenia. • Ustawić ramię odciągowe podłączone do urządzenia w odległości 400-800 mm, od źródła zanieczyszczenia. Patrz Rys./Fig. III na stronie 51 dla prawidłowego położenia. • Upewnij się, że przepustnica (patrz Rys. 2.1A) jest otwarta. • Uruchom urządzenie (patrz Rys. 5.1A). • Rozpocznij spawanie. Rys. 4.3 Montaż ssawy (ramię z przewodem elastycznym / • Gdy zmienia się położenie spawania należy przesunąć EconomyArm) ramię odciągowe do prawidłowego położenia w stosunku do spoiny. uWaGa! Aby utrzymać dymy spawalnicze z dala od strefy oddychania spawacza, upewnij się, że wszystkie opary są usuwane za pomocą ramienia odciągowego. • Naciśnij przycisk ok. 20 sekund po zakończeniu START/STOP E (2x) D (2x) spawania w celu zatrzymania wentylatora. - Page 48 na rok podczas okresowej konserwacji. W tym celu należy Rys. 6.1 skontaktować się z dostawcą. • Odłączyć zasilanie urządzenia. • Otwórz tylne drzwi (B). • Wyjmij kasetę filtra wstępnego (A). komponenty Czynność Częstotliwość: • Utylizuj zużytą kasetę z filtrem zgodnie z lokalnymi każdego X przepisami. miesiąca • Włóż nową kasetę filtra wstępnego do urządzenia. Upewnij X =12 się, że strzałka na ramie skierowana jest w dół Jednostka filtracyjna • Zamknij i zablokuj drzwi. Obudowa Wyczyść z zewnątrz przy użyciu łagodnych detergentów Wyczyść wewnątrz przy użyciu odkurzacza przemysłowego i usunąć pył z przedziału wkładu filtracyjnego Sprawdź materiał uszczelniający drzwi. Wymień w razie potrzeby. Wentylator Sprawdź czy obce elementy nie odciągowy zalegają w obudowie lub na wirniku. Oczyść w razie potrzeby Przewód Sprawdź czy nie jest uszkodzony.
-
Page 49: Rozwiązywanie Problemów
Regulacja ramienia Objawy Problem Możliwa Rozwiązanie przyczyna Jeśli ramię odciągowe lub jego część nie pozostaje w Słaba siła Urządzenie Przepustnica w (W pełni) otwórz pożądanym położeniu, należy wyregulować przeguby. odciągu ssawie ramienia przepustnicę 6.3.1 Ramię elastyczne (EconomyArm) funkcjonuje odciągowego prawidłowo jest (częściowo) • Określ, które połączenie wymaga większego lub mniejszego zamknięta oporu. • Poluzuj przewód elastyczny, aby uzyskać dostęp do Zatkane filtry i Napraw połączenie przegubów. luźne rurek ciśnieniowych • Pociągnij ramię do pozycji poziomej. połączenie • Dostosuj opór; patrz Rys./Fig. V na stronie 52 punkty czujnika regulacji. -
Page 50: Deklaracja Ce
Podczas demontażu: - upewnij się, że obszar pracy jest wystarczająco wentylowany Po demontażu: - oczyść obszar demontażu 10.2 utylizacja Utylizacja zanieczyszczeń i pyłu wraz ze zużytym wkładem filtracyjnym powinno odbyć się w sposób profesjonalny, zgodnie z przepisami lokalnymi. DEkLaRaCja CE Deklaracja zgodności CE dla maszyn My, Plymovent Manufacturing B.V., Koraalstraat 9, 1812 RK Alkmaar, Holandia, niniejszym oświadczamy, na własną odpowiedzialność, że produkt (ów): - MobileGo - MobileGo plus którego dotyczy niniejsza deklaracja, jest / są zgodne z warunkami następujących dyrektyw: - Dyrektywa maszynowa 2006/42 EC - EMC 2004/108 EC - LVD 2006/95 EC - Dyrektywą ErP 2009/125 EC... - Page 51 Fig. I Dimensions Zakres pracy inch 28.5 28.7 1100 43.3 Dimensions Afmetingen Abmessungen Dimensions Dimensiones Dimensioni Wymiary Fig. II Working range EA-2 KUA-2 EA-3 KUA-3 Working range Werkbereik Bereich Portée Alcance de trabajo Raggio di lavoro 0000111659/150418/B MobileGo...
- Page 52 Fig. III Positioning of the extraction arm 400-800 mm 800 mm (16-32 in.) 32 in.) Positioning of the extraction arm Positionering van de afzuigarm Positionierung des Absaugarms Positionnement du bras d’aspiration Posicionamiento del brazo de aspiración Posizionamento del braccio aspirante Ustawienie ramienia odciągowego Fig. IV Reset Reset button Resetknop Rückstelltaste Bouton de réinitialisation Botón de reinicio Przycisk resetowania 0000111659/150418/B MobileGo...
- Page 53 Fig. V Adjustment Adjustment of the extraction arm | Adjustment points Ajuste del brazo de aspiración | Puntos de ajuste Afstellen van de afzuigarm | Afstelpunten Regolazione del braccio | Punti di regolazione Einstellung des Absaugarms | Einstellpunkte Réglage du bras d’aspiration | Points de réglage Regulacja ramienia odciągowego | Punkty dostosowania E (2x) D (2x) 0000111659/150418/B MobileGo...
- Page 54 Fig. VI Exploded view EconomyArm 0000101944 0000101537 0000101917 0000101918 0000101919 0000101903 0000102989 0000101395 0000101912 0000101912 (2x) 0000101908 0000102409 0000101550 0000101911 0000101937 Exploded view hose tube arm (EconomyArm) Exploded view slangarm (EconomyArm) Explosionszeichnung Schlaucharm (EconomyArm) Vue éclatée du bras tuyau (EconomyArm) Vista de despiece brazo de tubo manguera (EconomyArm) Visa esplosa del braccio a tubo (EconomyArm) Widok ramienia z przewodem elastycznym (EconomyArm) 0000111659/150418/B MobileGo...
- Page 55 EN | Spare parts NL | Reserveonderdelen DE | Ersatzteile FR | Pièces détachées Economyarm hose tube arm Slangarm Schlaucharm bras tuyau Kap met beschermgaas 0000101550 Hood with safety mesh Haube mit Gittergewebe Hotte avec toile métallique Draaischarnier, incl. manchet en 0000101903 Arm swivel ring, incl. rubber Drehgelenk, inkl. Joint tournant, manchon et onderlegring collar and washer Gummimanschette und rondelle inclus Unterlegscheibe Kraag kap, incl. handgreep, 0000101908...
- Page 56 Fig. VII Exploded view KUA 0000101944 0000101537 0000102409 0000102989 0000101907 0000101395 0000101916 0000101903 0000102199 0000102396 0000102398 0000102400 0000102384 0000102387 0000102385 0000102388 0000102386 0000102389 0000101904 0000101905 0000101913 0000101914 0000102397 0000102399 0000102401 0000101912 (2x) 0000102960 0000101906 0000101915 0000101911 0000101908 0000101550 0000114072 0000101937 0000102525 Exploded view metal tube arm (KUA) Exploded view metalen arm (KUA) Explosionszeichnung Metallrohr-Arm (KUA) Vue éclatée du bras métallique (KUA)
- Page 57 EN | Spare parts NL | Reserveonderdelen DE | Ersatzteile FR | Pièces détachées Metal tube arm Metalen arm Metallrohr-arm bras métallique 0000101550 Hood with safety mesh Kap met beschermgaas Haube mit Gittergewebe Hotte avec toile métallique 0000101903 Arm swivel ring, incl. rubber collar Draaischarnier, incl. manchet en Drehgelenk, inkl. Gummi-manschette Joint tournant, manchon et rondelle and washer onderlegring und Unterlegscheibe inclus 0000101906 Hose L=400 mm/Ø 161 mm Slang L=400 mm/Ø 161 mm Schlauch L=400 mm/Ø 161 mm...
- Page 58 Fig. VIII Exploded view MobileGo | MobileGo plus 0000117114 0000117121 0000117128 0000117125 0000117129 0000117126 0000111628 0000111637 0000111636 0000100583 0000117140 0000117135 0000117136 0000117139 0000101364 0000117141 Exploded view filter unit (MobileGo | MobileGo plus Exploded view filterunit (MobileGo | MobileGo plus Explosionszeichnung Filtereinheit (MobileGo | MobileGo plus Vue éclatée de l’unité de filtration (MobileGo | MobileGo plus Vista de despiece unidad de filtración (MobileGo | MobileGo plus Visa esplosa unità filtrante (MobileGo | MobileGo plus Widok jednostka filtracyjna (MobileGo | MobileGo plus 0000111659/150418/B MobileGo...
- Page 59 MobileGo MobileGo plus EN | Spare parts NL | Reserveonderdelen DE | Ersatzteile FR | Pièces détachées 0000100583 Fan wheel FUA-3000 (IEC) Ventilatorwiel FUA-3000 (IEC) Ventilatorrad FUA-3000 (IEC) Roue de ventilateur FUA-3000 (IEC) 0000101364 Wheel covers grey (set of 2) Wieldoppen grijs (set van 2) Radkappen grau (Satz von 2 Enjoliveurs gris (jeu de 2) St.) 0000111637 Pre filter cassette 1 m² Voorfiltercassette 1 m² Vorfilter-Kassette 1 m² Préfiltre à cassette 1 m² 0000111628 HEPA filter cassette 15 m² HEPA filtercassette 15 m² HEPA-Kassettenfilter 15 m² Cassette filtrante HEPA 15 m² 0000111636 HEPA filter cassette 26 m²...
- Page 60 0000111659/150418/B MobileGo www.plymovent.com...
Need help?
Do you have a question about the Mobile GO and is the answer not in the manual?
Questions and answers