Table of Contents
Advertisement
Advertisement
Table of Contents

Summary of Contents for CHERUBINI MISTRAL
- Page 1 A520012 MISTRAL SENSORE A VIBRAZIONE PER TENDE DA SOLE MISTRAL VIBRATION WIND SENSOR FOR AWNINGS VIBRATIONS-WINDWÄCHTER ZU MARKISEN CAPTEUR À VIBRATION POUR STORES CENTRAL DE VIENTO POR VIBRACIÓN DEL TOLDO ISTRUZIONI - INSTRUCTIONS - EINSTELLANLEITUNGEN INSTRUCTIONS - INSTRUCCIONES...
-
Page 3: Product Features
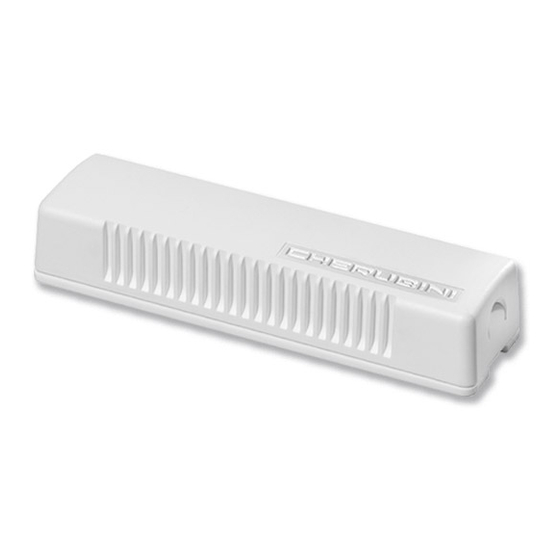
PRODUCT FEATURES The Mistral vibration wind sensor detects wind caused stresses on the structure of arm awnings, which then become vibrations of the terminal bar. The sensor indicates an alarm status, by radio, to the motor (or the radio receiver), which then closes the awning. - Page 4 COMPATIBLE REMOTE CONTROLS GIRO GIRO Wall stop DOWN down STOP GIRO Lux GIRO P-Lux DISPLAY GIRO Plus DISPLAY Activating the Change channel DISPLAY Change Sun sensor channel Wind sensor Wind sensor is “ON” is “ON” Sun sensor is “ON” Sun sensor is “ON” Change Activating/ Deactivating the Sun sensor Deactivating the Sun sensor...
-
Page 5: Key To Symbols
KEY TO SYMBOLS GIRO DOWN Press button A Skipper Press buttons A and B at the same time stop short motor rotation down in one direction long motor rotation in other direction TECHNICAL FEATURES - Battery powered: LR03 (AAA) double short - Dimensions: 140x38x26 mm rotation... - Page 6 COMMAND SEQUENCES EXAMPLE Most of the command sequences have three distinct steps, at the end of which the motor indicates if the step has been concluded positively or not, by turning in different ways. This section is provided to demonstrate the motor indications. The buttons must be pressed as shown in the sequence, without taking more than 4 seconds between one step and the next.
- Page 7 FUNCTION OPEN/CLOSE PROGRAMMING REMOTE CONTROL SKIPPER PLUS - SKIPPER LUX - SKIPPER P-LUX REMOTE CONTROL POP PLUS - POP LUX - POP P-LUX To prevent accidental changes to the programming of the motor during the daily use of the remote control, the possibility of programming is disabled automatically 8 hours after sending the last sequence (A+B or B+C).
- Page 8 FUNCTION OPEN/CLOSE PROGRAMMING REMOTE CONTROL SKIPPER - SERIES GIRO - REMOTE CONTROL POP To prevent accidental changes to the programming of the motor during the daily use of the remote control, the possibility of programming is disabled automatically 8 hours after sending the last sequence (A+B or B+C).
-
Page 9: Installation
10 metres. Make sure that there is enough space and MISTRAL does not get damaged by closing the awning! -
Page 10: Setting The Sensor
Tn: already programmed remote control • Press the buttons on the remote control in this sequence: A+B and B, and then the SET button for 2 seconds on the Mistral sensor; until the motor performs the confirmation movement (around 2 second). -
Page 11: Sensor Activation
SENSOR ACTIVATION Before assembling the shell on the base: - Rotate the selector to a middle value from 1 to 9 (e.g. 5). - Activate the sensor by pressing the SET button for at least 4 seconds until the LED flashes twice quickly. - Page 12 SENSOR TEST OPERATION When the sensor has detected its rest position it will run in test mode for the first three minutes of operation: in case of alarm the awning will close but without application of the eight-minute period when reopening is disabled, which is what occurs in normal operational mode.
-
Page 13: Deleting The Sensor
The automatic reopening function can be deactivated at any moment with the following command sequence: Tn (2 sec) DELETING THE SENSOR To delete the Mistral sensor from the motor, an already programmed remote control must be used. The deleting sequence is the following: 2 sec... -
Page 14: Maintenance
DISABLE THE SENSOR To deactivate the MISTRAL proceed as following: - Open the awning completely and wait for at least ten seconds after the terminal bar has stopped moving before beginning to unsnap the sensor. - Press both snap hooks sideways at the same time while pulling the shell downward, until it comes away from its base. - Page 15 WHAT TO DO IF..Symptom Cause Remedy Low batteries. Open the sensor shell and deactivate it: if the LED flashes, the batteries are almost drained. If the LED is OFF and it does not come back on, the batteries are dead. Change the batteries.
- Page 16 CHERUBINI S.p.A. Via Adige 55 25081 Bedizzole (BS) - Italy Tel. +39 030 6872.039 | Fax +39 030 6872.040 info@cherubini.it | www.cherubini.it CHERUBINI Iberia S.L. Avda. Unión Europea 11-H Apdo. 283 - P. I. El Castillo 03630 Sax Alicante - Spain Tel.


Need help?
Do you have a question about the MISTRAL and is the answer not in the manual?
Questions and answers