Advertisement
Quick Links
Advertisement

Subscribe to Our Youtube Channel
Related Manuals for BCP SKY5949


Summary of Contents for BCP SKY5949
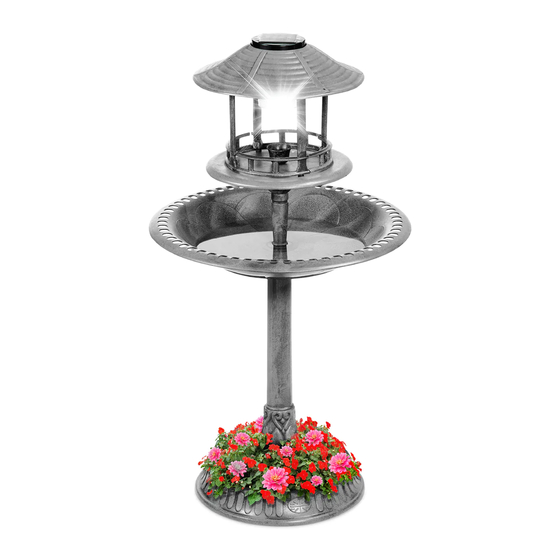
- Page 1 INSTRUCTION MANUAL Solar Power Birdbath SKY5949 + SKY5950 + SKY5951 Ver. 1...
- Page 2 As shoppers, we’re always trying to find the perfect balance between quality & value. At BCP, we believe we’ve achieved that. Our diverse catalog of everyday essentials is tailored especially to our customers & guaranteed to hit that sweet spot of high quality & low price.
-
Page 3: Tools Required
NOTICE Please retain these instructions for future reference. • Product is intended for outdoor use only. • Do not damage or scratch the solar panel. • Use in direct sunlight for best results. • Use bird bath with fresh water only. •... - Page 4 PARTS SOLAR LAMP ROOF FEEDING TROUGH 1 PC 1 PC 1 PC ROOF SUPPORT FEEDER BASE INTERIM ROD 4 PCS 1 PC 1 PC WATER BASIN PEDESTAL SHAFT PLANTER 1 PC 1 PC 1 PC PEDAL BASE COLLAR BASE 1 PC 1 PC...
-
Page 5: Product Assembly
PRODUCT ASSEMBLY Assemble from base to top. Screw the part J pedestal base collar into the part K base. Place the part I planter on top of the part J pedestal base collar. Insert the part H pedestal shaft through the opening in the planter and screw the pedestal shaft into the base collar. - Page 6 PRODUCT ASSEMBLY Insert the part 7 bolt into the part 6 steel washer Locate the part G water basin and insert the bolt through the bottom hole. Place the part 5 rubber seal over the bolt, then screw the part F interim rod onto the bolt until secure.
- Page 7 PRODUCT ASSEMBLY Use the part 4 large screw to connect the part 3 feeder bracket to the part F interim rod. Attach the part E feeder base to the feeder bracket with three part 2 screws.
- Page 8 PRODUCT ASSEMBLY Insert the part C feeding trough into the center of the feeder base. Insert four part D roof supports into the feeder base. Attach the part 1 roof bracket to the roof supports with four part 2 screws. Place the part B roof onto the roof bracket, then insert the part A solar lamp.
- Page 9 PRODUCT ASSEMBLY Choose a location and insert the part 8 ground stakes into the part K base to secure your birdbath.
- Page 10 Check out more great products: bestchoiceproducts.com...
- Page 11 Earn points while you shop. Join today! Give your friends 15% o their first order! For each successful referral you’ll receive 100 points. bestchoiceproducts.com...
-
Page 12: Help Center
HELP CENTER HELP CENTER Question about your product? We're here to help. Visit us at: Question about your product? We're here to help. Visit us at: help.bestchoiceproducts.com help.bestchoiceproducts.com CHAT CHAT Product Assembly Product Assembly Returns & Refunds Returns & Refunds PRODUCT WARRANTY INFORMATION PRODUCT WARRANTY INFORMATION All items can be returned for any reason within 60 days of the receipt and will receive a full refund as long...
Need help?
Do you have a question about the SKY5949 and is the answer not in the manual?
Questions and answers