Advertisement
Quick Links
Advertisement

Related Manuals for BCP SKY5389


Summary of Contents for BCP SKY5389
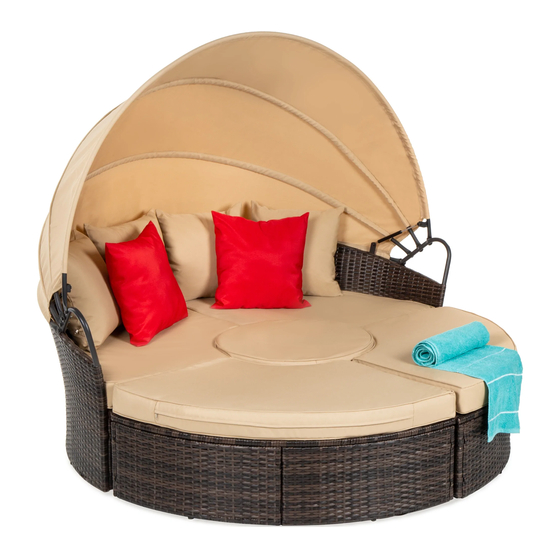
- Page 1 INSTRUCTION MANUAL 5-Piece Wicker Daybed SKY5389 + SKY5815 + SKY5816 + SKY5817 + SKY6139 Ver. 4...
-
Page 2: Tools Required
NOTICE • Please do not exceed the weight limitations of this item. • Do not stand on or use any part of this item as a step ladder. • Firmly secure all bolts, screws and knobs before use. • Reconfirm that all bolts, screws, and knobs are secure every 90 days. •... - Page 3 PARTS RIGHT SIDE LEFT SIDE BACK I 1 PC 1 PC 1 PC BACK II RIGHT SIDE PANEL LEFT SIDE PANEL 1 PC 2 PCS 2 PCS CURVED FRONT PANEL CURVED SEAT SIDE CANOPY FRAME 4 PCS 4 PCS 6 PCS FRONT CANOPY FRONT CANOPY MIDDLE CANOPY...
- Page 4 PARTS ROUND SEAT FRAME MIDDLE CANOPY MIDDLE CANOPY FRAME II FRAME III 1 PC 1 PC 1 PC MIDDLE CANOPY CANOPY ROUND SEAT SIDE FRAME IV 1 PC 1 PC 3 PCS III2 CURVED BACK PANEL RIGHT FRONT PANEL LEFT FRONT PANEL 4 PCS 1 PC 1 PC...
- Page 5 PRODUCT ASSEMBLY - DAY BED Slide a part 14 metal ring onto a part 7 plate. Attach the top of the part A1 right side to part B1 back I with the plate/ring and two part 2 screws and two part 1 washers. Attach the bottom with a part 4 bolt, two part 1 washers, and a part 6 nut.
- Page 6 PRODUCT ASSEMBLY - DAY BED Slide a part 14 metal ring onto a part 7 plate. Attach the top of the part A2 left side with the plate/ring and two part 2 screws and two part 1 washers. Attach the bottom with a part 4 bolt, two part 1 washers, and a part 6 nut. Attach the part III right front panel with two part 3 screws and two part 1 washers.
- Page 7 PRODUCT ASSEMBLY - DAY BED Attach a part D curved front panel with two part 3 screws and two part 1 washers. Attach another part D curved front panel with two part 7 plates, four part 2 screws, and four part 1 washers. Attach the part III2 left front panel with four part 3 screws and four part 1 washers.
- Page 8 PRODUCT ASSEMBLY - DAY BED Flip the assembly over. Attach the top of two part E curved seats with five part 7 plates, ten part 2 screws, and ten part 1 washers. Attach the bottom with four part 3 screws and four part 1 washers. Attach eight part 13 feet.
- Page 9 PRODUCT ASSEMBLY - CURVED SEAT Attach two part II curved back panels to a part E curved seat with two part 3 screws and two part 1 washers. Attach the back panels to one another with two part 4 bolts, four part 1 washers, and two part 6 nuts.
- Page 10 PRODUCT ASSEMBLY - CURVED SEAT Attach a part D curved front panel with five part 3 screws and five part 1 washers. Attach five part 13 feet. Repeat to build another curved seat.
- Page 11 PRODUCT ASSEMBLY - ROUND SEAT Attach three part Z round seat sides to the part I2 round seat frame with three part 2 screws, three part 1 washers, and three part 6 nuts. Attach the round seat sides to one another with six part 4 bolts, twelve part 1 washers, and six part 6 nuts.
- Page 12 PRODUCT ASSEMBLY - CANOPY Assemble the canopy frames; slide them into one another until they lock. NOTE: Do not attach the part H1 front canopy frame in this step. Slide the assembled front canopy frame into the part X canopy. Slide the part H1 front canopy frame II into the other end and attach the frame within the canopy.
- Page 13 PRODUCT ASSEMBLY - CANOPY Attach the front canopy frame to the daybed with two part 3 screws, four part 1 washers, two part 6 nuts, and two part 11 nut caps. Attach two part 12 arms with four part 5 bolts, eight part 1 washers, four part 10 spacers, four part 6 nuts, and four part 11 nut caps.
- Page 14 PRODUCT ASSEMBLY - CANOPY Slide the remaining three canopy frames into the canopy. Attach the canopy frames with six part 3 screws, twelve part 1 washers, six part 6 nuts, and six part 11 nut caps.
- Page 15 PRODUCT ASSEMBLY - CANOPY Tie the strings on the back of the canopy to the three metal rings. Secure the seats to the daybed with six part 15 clips. Insert the cushions and pillows. BEHIND UNDERNEATH...
-
Page 16: Help Center
HELP CENTER Question about your product? We're here to help. Visit us at: help.bestchoiceproducts.com CHAT Orders FAQ Chat Support Product Inquiry Product Assembly Returns & Refunds PRODUCT WARRANTY INFORMATION All items can be returned for any reason within 60 days of the receipt and will receive a full refund as long as the item is returned in its original product packaging and all accessories from its original shipment are included.
Need help?
Do you have a question about the SKY5389 and is the answer not in the manual?
Questions and answers