
Related Manuals for MediCapture MVR


Summary of Contents for MediCapture MVR
- Page 1 MVR / MVR Pro High Definition Medical Video Recorder User Guide Applies to Firmware 180810 and higher. MVR/MVRPRO-UG01-EN-200727-OB...
- Page 2 MVR / MVR Pro User Guide - English Precautions for Use Symbols in the manual Symbols on the product Warning Before attempting to set up the product, carefully read through the Indicates a potentially hazardous situation User Guide. or improper use that could result in serious personal injuries or death.
- Page 3 The MVR / MVR Pro is a Class I active medical device (Medical Devices Directive 93/42/EEC). It is important to observe your obligations as the operator of this medical device to ensure its safe operation with no risk of danger to patients, users or third parties.
- Page 4 MVR / MVR Pro User Guide - English Précautions d’utilisation Symboles utilisés dans le manuel Symboles utilisés sur le produit Mise en garde Lire les instructions avec attention avant d’installer le produit. Symbole avertissant l’utilisateur de situation potentiellement dangereuse ou d’utilisation inappropriée pouvant causer des blessures...
- Page 5 Le MVR / MVR Pro Recorder est un produit actif de classe I (Directive Medical Devices 93/42/EEC). L’exploitant doit utiliser cet équipement conformément aux recommandations du manuel utilisateur afin d’assurer un fonctionnement sans risque ni danger pour le patient, l’utilisateur ou tout autre partie.
-
Page 6: Table Of Contents
Structure of Settings: ..........24 Creating Patient Data ............14 Locking / Protecting Advanced Settings ......25 Workflow after MVR / MVR Pro was switched on: ..14 User Accounts for Security Protection ......25 Using Patient Button to End Recording Study ....14 Special Video Input Settings .......... -
Page 7: Important Safety Instructions
MVR / MVR Pro User Guide - English Important Safety Instructions 1. Read all of these instructions. 2. Keep these instructions. 3. Heed all warnings in these instructions. 4. Follow all of these instructions. 5. Do not misuse this apparatus. -
Page 8: Data Protection
Intended Use: The MVR / MVR Pro is intended to be networked to a variety of surgical imaging systems. The MVR / MVR Pro has the capability to view, archive, review, and process images collected from these surgical imaging systems so that they can be reviewed in their originally recorded state. -
Page 9: To Get Started
7. When you finish the study, it is safe to remove the USB flash drive from the MVR / MVR Pro. Insert the stick into the USB connector of a computer. Drop and drag your recordings from the stick to your computer for viewing, archiving, etc. -
Page 10: Touchscreen Monitor
MVR / MVR Pro User Guide - English Touchscreen Monitor MVR Pro only The integrated touchscreen monitor serves to operate MVR Pro and for easy access to settings. The touchscreen position can be changed by pressing the release button on the left side. -
Page 11: Monitor User Interface
USB storage or internal device Network Storage active Information page MVR / MVR Pro live view screen. This is the icon size, displayed on a Full-HD monitor. End of study On a 4K monitor, the icons will appear smaller. Please note: The position of the icons in live view can be arranged to your preferred location. -
Page 12: Remote Control
END OF STUDY: Closes the recording study for next steps. Remote control with a Remote Device (tablet) by using the MVR Remote App Android remote devices (tablets) can be used for external control of MVR / MVR Pro, either via USB connection as an external touchscreen monitor (= USB tethering) or wirelessly as a handhold portable device. -
Page 13: Connecting The Mvr / Mvr Pro
HDD, etc. before switching on the device from the back panel. 1. If you are adding the MVR / MVR Pro to imaging equipment that you are already using, begin by locating the video output of the primary video source. -
Page 14: Creating Patient Data
The workflow for patient data input depends on the settings for Patient Info. ➤ Settings ➤ System ➤ Patient Info MVR / MVR Pro starts with a defined home screen after switching-on or after a study was finished. Workflow after MVR / MVR Pro was switched on:... -
Page 15: Manual Patient Data Input
Search Recent Patient on Storage Instead of typing patient data manually, you can also list all recent patients which are located on your MVR / MVR Pro storage media (those which are enabled and connected). Tap on the “search” icon in the screen “ENTER PATIENT DATA”... -
Page 16: Recording Videos
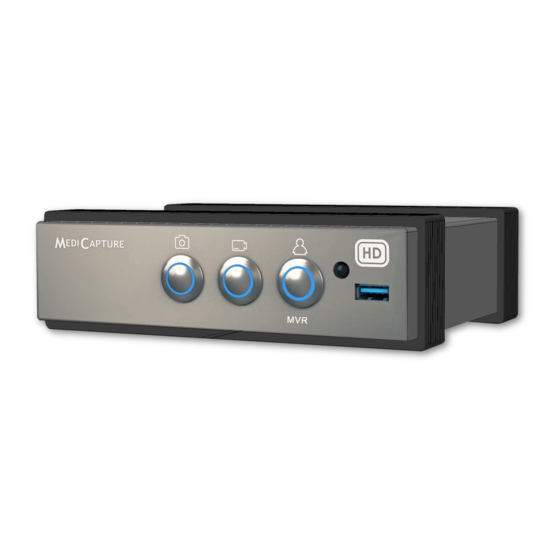
MVR / MVR Pro User Guide - English Recording Videos To start recording video, tap on the Record Video icon on the touchscreen. Tap icon again to stop recording. Front panel: Press the Record Video button on the front panel. Press the button again to stop recording. -
Page 17: Changing Input Signals In Live View = Multi Input
Recording to a USB Flash Drive Recording to the supplied MediCapture USB flash drive is the easiest way to start using your MVR / MVR Pro. When you finish recording, you can remove the flash drive and easily carry it with you. -
Page 18: Recording To A Usb Hard Drive
Transferring Images from a USB Drive to Your Computer If you record your videos to a USB flash drive or USB hard drive, unplug it from the MVR / MVR Pro at the end of your imaging studies. Insert the drive into a USB connector on your computer. -
Page 19: Recording To Network Storage
The Archive offers intuitive features to browse your recorded studies. You can enter the Archive from the Start screen. Both enabled options for Multi-Storage can be accessed in Archive. All enabled options need to be connected to MVR / MVR Pro. -
Page 20: Deleting Data
MVR / MVR Pro User Guide - English Select one storage. Internal, USB or Network Tap on study for selection To select a study, a video or a still image, simply tap on the preview icon. Tap on video for playback... -
Page 21: Reviewing Videos On Mvr / Mvr Pro
MVR / MVR Pro User Guide - English Reviewing Videos on MVR / MVR Pro A selected video starts to play automatically. To pause the video, tap on the Pause icon. You can now use the timeline slider to change position in the video or tab forward and backward frame by frame. -
Page 22: Creating And Printing Reports
Viewing Videos on Your Computer The MVR / MVR Pro records high definition video in H.264 or HEVC (=H.265) format, sometimes referred to as MPEG-4 or MP4. These widely used formats are ideally suited to medical applications because they deliver the highest quality video in a compact file size. -
Page 23: Medicapture Automatic Video Repair Function
Turning MVR /MVR Pro off or a mains power failure during active video recording will also cause corrupted video files. MVR / MVR Pro features an Automatic Video Repair Function. As soon as you plug-in a USB drive with a damaged video file, MVR / MVR Pro detects the file and fixes it for playback. -
Page 24: Settings (For Administrators)
MVR / MVR Pro User Guide - English Settings (for Administrators) You can find all MVR / MVR Pro setup features in Settings. Please note: Advanced Settings as well as optional networking should only be changed by technical personnel or IT administrators. -
Page 25: Locking / Protecting Advanced Settings
User Accounts for Security Protection ➤ Settings ➤ Advanced ➤ User Accounts For advanced device protection and data security of recorded studies, MVR / MVR Pro can be locked with User accounts. Enable user accounts and add users... - Page 26 MediCapture has no access to user account information and therefore, no “Master Password” exists. In case you do not remember your user account information, MVR / MVR Pro requires a complete setup to factory default settings, which means many of your achieved information will get lost.
-
Page 27: Special Video Input Settings
MVR / MVR Pro User Guide - English Special Video Input Settings ➤ Settings ➤ Video/Audio ➤ Video Input Picture-in-Picture Recording (PIP) When using Multi-Input you can set MVR / MVR Pro to Picture-in-Picture. Input 2 will be displayed as a window in Input 1. -
Page 28: Upgrades / Activation Keys
The key is specific to the current device and cannot be used for other devices. Please contact MediCapture for ordering information to the 4K activation key of MVR / MVR Pro. The unique device ID needs to be provided (see Information screen). -
Page 29: Appendix A: Mvr / Mvr Pro Specifications
MVR / MVR Pro User Guide - English Appendix A: MVR / MVR Pro Specifications Function Records video and still images in high definition from medical video sources to a USB storage, Internal storage or Network storage. Case Stainless Steel metal case, copper metal base... - Page 30 Fuse T1AH, 250V Kit Contents MVR / MVR Pro recorder, USB flash drive, HDMI cable, Wi-Fi / BT antenna, HDMI to DVI adapter, Split Remote Cable Adapter, Power Cable, IR Remote Control, Rubber Feet (4), User Guide (English) Compliance and...
-
Page 31: Fcc Compliance Information
® sole responsibility that the product MVR / MVR Pro complies with Part 15 Rules. Operation is subject to the following two conditions: (1) this device may not cause harmful interference, and (2) this device must accept any interference received, including interference that may cause undesired operation. -
Page 32: Industry Canada Notice
MVR / MVR Pro User Guide - English Industry Canada Notice This device complies with RSS-210 of the Industry Canada Rules. Operation is subject to the following two conditions: (1) This device may not cause harmful interference, and (2) this device must accept any interference received, including interference that may cause undesired operation. -
Page 33: Appendix B: Medicapture Limited Warranty
Note: MediCapture reserves the right to utilize reconditioned subassemblies as warranty replacements. This warranty applies only to those products sold by retailers authorized by MediCapture to sell such products and is enforceable by the original purchaser only.
Need help?
Do you have a question about the MVR and is the answer not in the manual?
Questions and answers