
Subscribe to Our Youtube Channel
Related Manuals for Rippton CatchX


Summary of Contents for Rippton CatchX
- Page 1 USER MANUAL CATCHX BAIT BOAT Please visit https://rippton.com/tutorial to watch the video tutorial of CatchX.
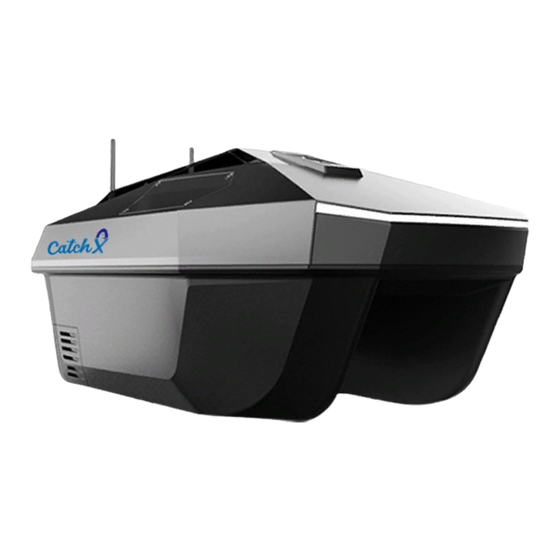
- Page 2 Dear Customer, Thank you for purchasing the CatchX bait boat. CatchX is an advanced smart fishing bait boat, which has a payload of 3kg and a range of 800 meters. With the two ergonomic handles, it is easy to carry around with. You can control the CatchX either by our app Rippton or the remoter control.
-
Page 3: Table Of Contents
What’s in the package? ................ 5 Specifications ..................6 Features ....................7 Overview ....................8 Charging ..................... 12 Remote Control .................. 17 How to Control CatchX? ..............18 APP Function ..................26 Tips ..................... 39 10. Support ....................42 11. Warranty ..................... 43 pg. 3... - Page 4 Preface Please take the time to read and understand this manual. Your CatchX Bait Boat will deliver years of trouble-free usage when used and maintained correctly. Declaration The policy is one of continuous improvement and we reserve the right to change product specifications without prior notice.
-
Page 5: What's In The Package
1. What’s in the package? Your CatchX Bait Boat contains the following items as standard: User manual x 1 and Quick Start Guide x 1 CatchX bait boat x 1 Remote control x 1 Battery x 2 Charger for boat (without taking the battery out) x 1... -
Page 6: Specifications
Size of the OLED Screen 0.96 inches Max transmission distance 800m Wi-Fi 2412 ~ 2484MHz Battery Battery type Cylindrical Li-ion Battery Pack Capacity 8000mAh * 2 Voltage 11.1V *We strongly recommend using the chargers supplied by Rippton for trouble-free charging. pg. 6... -
Page 7: Features
Android System 8.0 or above iOS 9.0 or above. Lighting System CatchX has one front white LED light belt and one rear red LED light belt. Remote Control The max transmission range is about 800m. Standby Time CatchX is able to stand by for 8 hours in water after being switched on, provided the motor remains stationary. -
Page 8: Overview
4. Overview pg. 8... - Page 9 NOTE: THE REMOTE CONTROL IS NOT WATERPROOF, PLEASE KEEP IT OUT OF CONTACT WITH WATER. The remote control will vibrate when reaching a low level of power. Unfold or fold the rack shown as the picture below. pg. 9...
- Page 10 Please notice the layout of each hopper button on the remote control and the corresponding hopper set on the boat. pg. 10...
- Page 11 Once the baits loaded in the hopper(s) have been released, you could use your hand to bring the bottom board back to the original position shown as the picture above. pg. 11...
-
Page 12: Charging
Input current 1.5A max Output voltage +12.6VDC Output Charging current Nominal power 63.0W 5.1.2. How to charge the battery of CatchX? Color of LED on battery What it stands for? charger Being charged Green Charging completed Direct charging : 5.5/2.5 DC charging port (please refer to Picture1below). - Page 13 Charging the batteries separately (please refer to Picture2 above) after taking those out of the battery compartment (please refer to Picture3 below). When charging completed, please reconnect the batteries to the compartment, and ensure all the plugs are placed in the right position (please refer to Picture4 below).
- Page 14 Picture3 Use your hand or your screwdriver to unlock the battery compartments, and then take the batteries out of them. Picture4 Reconnect the batteries to the compartment upon the charging completion, and then re-lock the compartments. Notice: Maintenance of the Batteries Due to the characteristic of the lithium battery, it should be monthly charged to avoid the loss of its functionality and battery life caused by the over-discharge.
- Page 15 100~240Vac Input Input frequency 50/60Hz Input current 1.0A max Output voltage +5VDC Output Charging current Nominal power 5.2.2. How to charge the remote control Please refer to the picture below: 5.2.3. Notice For CatchX charger: • Operating temperature:0℃~40℃ pg. 15...
- Page 16 For CatchX battery • When you set out to operate the CatchX bait boat and its remote control for the first time, please fully charge the new batteries. • It may take 2-3 hours to fully charge the remote control.
-
Page 17: Remote Control
6. Remote Control 6.1. Home Screen The “Home Screen” of the remote control is shown as below: 6.2. Task Interface The “Task Interface” is to help you set the home point of your automatic task, select and save the waypoints therein, and then carry it out. A short press on the joystick will enter “Task Interface”... -
Page 18: How To Control Catchx
7. How to Control CatchX? 7.1. Preparation Ensure both the CatchX Bait Boat and its remote control are fully charged and bring the CatchX to the side of the freshwater area where you plan to go fishing. 7.2. CatchX Turning On/Off When pressing the power button of the boat, the boat will emit a “beep”... - Page 19 4) Long press the joystick again to exit the current interface. 7.5. Unlock The user needs to place the CatchX on the ground first and turn it on. Move the joystick to the right end for 3 seconds, and the motors will start to spin.
- Page 20 been completed. Prior to carrying out any task, the user needs to set the home point. 1) Drive the boat to a point that you intend to set as the home point; 2) On “Task Interface”, please move the UI cursor to “H” and then short press the hook release button on the back of the remote control to set the home point.
- Page 21 7.10. Manual Task Mode In this mode, you are able to drive the CatchX bait boat sailing to the designated position by moving the joystick. When the boat arrives at the point, you may perform the further actions as follows: 7.10.1.
- Page 22 You could also short press the confirm button to check whether the hopper has been selected successfully. When CatchX sails to the spots where you wish to drop the berley, long press the confirm button on the remote control to implement the action.
- Page 23 Short press “Confirmation” button to quickly check the selected status of the hopper and the hook release mechanism. 7.11. Automatic Route Task (Remote Control) CatchX can also set custom route tasks through the remote control. Store the preset casting spots and set the route to quickly realize multi- point casting.
- Page 24 3) Cancel – If you want to cancel the selected hoppers, re-press the corresponding hopper button(s). 7.11.3. Task Upload and Execution 1) Upon completion of Section 7.11.1 and 7.11.2, the CatchX bait boat is nearly ready to implement an automatic casting task after the hoppers have been filled with berley.
- Page 25 “Upload success”, and then CatchX will immediately carry out the automatic route task. The two pictures below will only pop up when the system goes to semi- automatic mode. 7.11.4. Turn to Manual Task Mode When you intend to quit the Auto Task Mode or One Button for Return Mode and get back to the Manual Task Mode, please move the joystick downwards for 3 seconds at the “Task Interface”...
-
Page 26: App Function
LED light belt and the tail light belt. 8. APP Function Please search “Rippton” in the APP Store for your iOS equipment, or in Google Play or Samsung Galaxy Store for your Android equipment, or scan the QR code to download the Rippton APP for controlling the CatchX bait boat in a much easier way. - Page 27 Enter the App’s home page. Tap “Fishing” on the bottom bar. Then tap the icon on the top left-hand corner to enter the smart device connection page. Tap “Enter” to complete the connection. pg. 27...
- Page 28 APP’s controlling effect, or even make some of functions ineffective. Calibration for CatchX Bait Boat 8.3. ⚫ Before the calibration starts, please first connect CatchX with your mobile device (refer to Section 8 of this manual). pg. 28...
- Page 29 ⚫ When connected, please tap the cog icon on the top right-hand corner of the APP interface to enter “Common Settings” as below: Then tap “Ellipsis” icon on the bottom right-hand corner for calibration. Press “Calibrate” on the line of “Compass” to start the whole calibration process: pg.
- Page 30 Note: • Clockwise rotation. • For horizontal calibration, please keep CatchX’s nose facing outwards. For vertical calibration, please ensure CatchX’s nose always goes downwards from the beginning. pg. 30...
- Page 31 Then, the vertical calibration can be commenced. • Please restart CatchX Bait Boat upon completion of the calibration. • You will be suggested to do a calibration when you try to use the boat in a new location where is 3km away from the last location you went to.
- Page 32 Tap the “Mission Management” button (in below) on the red square 1 top of left side to start setting a route for your casting mission. Press the green button to confirm (in red square 2 below). Tap the “H” button (in red square 3).
- Page 33 Select the Waypoints a) Long press the point you want in the green circle until the prompt box pops up. b) Tap “Confirm”. c) Repeat the above-mentioned process if you want to add more waypoints (but no more than 4 waypoints) .
- Page 34 If you start a task without tap the selected waypoint, and selecting hoppers before the then tap “Hopper Selection” CatchX begins to sail, you to confirm which hopper or need to confirm which hopper fishing line to be released on to be released every time which waypoint.
- Page 35 Tap the “Start” on the right bottom corner. Slide to start. NOTE: The CatchX will return to the home point automatically after the mission is completed. If you intend to cancel the ongoing mission, there are two methods: 1) tap the “Return to Home Point”...
- Page 36 Release the Hook Under the “Half Automatic Mode”, when the CatchX arrives at any selected point where you want to release the hook, tap the third button on the left side. Slide to cast. 8.6. EKF pg. 36...
- Page 37 Note: When the indicator light (shown in square) turns red, it means the boat is suffering strong EKF interference, you will be recommended to use manual mode instead. 8.7. Turn On/Off the Lights by APP Tap the fourth button on the left side (in square) to turn on/off both the head and tail LED light belts.
- Page 38 8.8. Historical Spots The system will keep the record of all the historical spots that you have stored before; press the button in red square and will show your historical spots around the area as below: pg. 38...
-
Page 39: Tips
9.2. How to use the remote control to take over the control from the APP When the APP controls the CatchX bait boat to perform tasks, it will display “A” (standing for automatic mode) on the top bar of the remote control screen. - Page 40 Notes ⚫ Always turn the remote control on first before turning on the boat. To turn off, turn off the boat first and then the remote control. This will ensure that you are always in control of the boat. ⚫ The remote control should be protected from water at all times.
- Page 41 Environmentally friendly disposal Old electrical appliances must not be disposed of together with the residual waste, but have to be disposed of separately. The disposal at the communal collecting point via private persons is for free. The owner of old appliances is responsible for bringing the appliances to these collecting points or to similar collection points.
-
Page 42: Support
10.2. Video Tutorial Please visit https://rippton.com/tutorial to watch the video tutorial of CatchX. 10.3. Tell us what you think... pg. 42... -
Page 43: Warranty
11. Warranty 11.1. What the guarantee covers Notice: Rippton reserves the right to amend and/or interpret all the contents provided in this manual. We offer you a 12-month guarantee from the date of purchase. The guarantee covers any defects arising from the drive unit and the electrical and electronic parts of the boat, faulty material or workmanship. - Page 44 11.2. Warranty Form Please complete the form to register your CatchX Warranty. NAME: ADDRESS: POST CODE: TELEPHONE NUMBER: Email ADDRESS: PURCHASED DATE: ORDER NUMBER: SERIAL NUMBER: Please send the form to us via Email at support@rippton.com pg. 44...
Need help?
Do you have a question about the CatchX and is the answer not in the manual?
Questions and answers