Advertisement
Available languages
Available languages
Quick Links
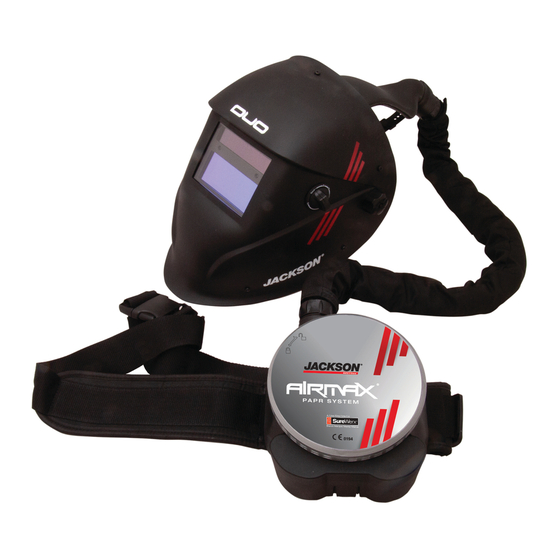
Airmax
®
User Instruction for Airmax
EN
Respiratory System
Instructions d'utilisation du système de protection
FR
respiratoire à épuration d'air motorisé Airmax
Bedienungsanleitung für das Airmax
DE
gebläsegestützte Atemschutzsystem
Manuale di istruzioni per gli utenti del sistema di
IT
respirazione assistita Airmax
Manual de instrucciones para el usuario del
ES
sistema respiratorio Airmax
Power Assisted
®
®
®
EN 12941:1998+A1:2003+A2:2008 TH3 P R SL
®
®
Advertisement

Related Manuals for Surewerx JACKSON SAFETY AIRMAX J7210


Summary of Contents for Surewerx JACKSON SAFETY AIRMAX J7210
- Page 1 Airmax ® User Instruction for Airmax Power Assisted ® Respiratory System Instructions d’utilisation du système de protection respiratoire à épuration d'air motorisé Airmax ® Bedienungsanleitung für das Airmax ® gebläsegestützte Atemschutzsystem Manuale di istruzioni per gli utenti del sistema di respirazione assistita Airmax ®...
- Page 3 IMPORTANT NOTICE Please read these instructions carefully before unpacking your JACKSON SAFETY AIRMAX PAPR. Failure to comply with the ® ® instructions in this leaflet may void your limited product warranty and adversely affect your health and safety. The selection of this respiratory for the application should be the result of the risk assessment conducted by a professional health and safety officer.
- Page 4 • Carefully review the sealing gasket and search for any visible damage. Do not use if its serviceability is suspected to be affected. Only use particle filters produced by Surewerx USA Inc properly labelled and packed. • Do not attempt to touch or modify the components of this PAPR.
- Page 5 APPLICATION GUIDELINES AIRMAX PAPR can be effectively used, but is not limited, to protect the wearer in multiple tasks in the following areas of use ® General industrial applications GRP manufacture Ship construction and maintenance Agriculture Mining Metal transformation industry Construction and demolition Metal foundries Waste disposal...
- Page 6 INITIAL ADJUSTMENT • Put the belt around the waist and faster the two ends together • If the belt is too loose, slide the male adjuster down the belt, towards the female half. If the belt is too tight, slide the male adjuster away from the female half.
- Page 7 PAPR blower unit is set to sound for 1 ® secondonce powered; if the alarm still sounds after check if the hose or filter are clogged; otherwise the battery needs re-placing or re-charging. If the problem persists, contact Surewerx USA Inc for support. Surewerx USA inc for support.
- Page 8 FILTER REPLACEMENT CRITERIA Filter should be replaced in all cases when its integrity is suspected to have been affected as a result of contamination or physical damage. Filter must also be replaced at the end of its service lifetime, which can be determined when the fully charged operational JACKSON SAFETY AIRMAX PAPR unit can’t supply airflow above 170LPM tested with the use of the Flow-Test-Unit provided with the product.
- Page 9 MAINTENANCE OF THE AIRMAX PAPR SYSTEM ® • The blower unit, filter housing and head units must all be regularly cleaned to keep them in good working order • For single users, the units can be cleaned with a cloth moistened with warm water and soap or an antimicrobial wipe. •...
- Page 10 • Operational range: 100Vac – 240Vac • Frequency: 50-60Hz at 150mA • Operating temperature range: 0°C to 40°C • Operating relative humidity: 8% to 85% • Initial charge before first use of batteries: 8 hours AIRMAX charger - J7067 Technical Specifications ®...
- Page 11 AVIS IMPORTANT Veuillez lire attentivement les instructions contenues dans le présent manuel avant de déballer votre respirateur Jackson Safety ® AIRMAX PAPR. Le non-respect des instructions fournies dans ce document peut annuler la garantie limitée du produit et nuire à votre ®...
- Page 12 • Examinez attentivement le joint d’étanchéité de l’emballage et recherchez tout signe éventuel de dommage visible. N’utilisez pas ce produit si son intégrité vous semble compromise. Utilisez exclusivement des filtres à particules fabriqués par Surewerx USA, correctement étiquetés et emballés.
- Page 13 APPLICATIONS L’usage du respirateur AIRMAX s’avère très efficace pour la protection, entre autres, de l’utilisateur dans les applications suivantes : ® Fabrication de plastiques renforcés Applications industrielles générales Construction et maintenance navales à la fibre de verre Agriculture Exploitation minière Industrie de transformation des métaux Construction et démolition Fonderies de métaux...
- Page 14 RÉGLAGE INITIAL • Fixez la sangle ventrale autour de votre taille et attachez les deux extrémités. • Si la sangle n’est pas assez serrée, faites glisser le dispositif de réglage mâle sur la ceinture, dans la direction du dispositif femelle. Si la sangle est trop serrée, faites glisser le dispositif de réglage mâle sur la ceinture, en l’éloignant du dispositif femelle.
- Page 15 1 secondes à la mise sous tension. Si passé ce délai, l’alarme ne s’éteint pas, vérifiez le tuyau ou le filtre afin de déceler toute éventuelle obstruction. En l’absence d’obstruction, il peut s’avérer nécessaire de remplacer ou de recharger la batterie. Si le problème persiste, contactez Surewerx USA pour obtenir de l’assistance.
- Page 16 CRITÈRES DE REMPLACEMENT DU FILTRE Le filtre doit être remplacé chaque fois que l’altération de son intégrité est suspectée suite à une contamination ou un à dommage physique. Il doit également être remplacé à la fin de sa durée vie utile, laquelle s’identifie lorsque le respirateur complètement chargé et allumé n’est plus en mesure de fournir un débit supérieur à...
- Page 17 ENTRETIEN DU RESPIRATEUR AIRMAX ® • Le ventilateur, le compartiment du filtre et le casque doivent être nettoyés régulièrement afin de préserver leur bon état de fonctionnement. • En cas d’utilisation par une seule personne, ces éléments peuvent être nettoyés à l’aide d’un chiffon humide imbibé d’eau tiède et de savon ou d’un essuyeur antimicrobien.
- Page 18 • Plage de fonctionnement : 100 V AC – 240 V AC • Fréquence : 50 à 60 Hz à 150 mA • Plage de température de fonctionnement : 0 à 40°C • Humidité relative en fonctionnement : 0 à 85 % •...
- Page 19 WICHTIGER HINWEIS Bitte lesen Sie diese Anleitung sorgfältig durch, bevor Sie das gebläsegestützte JACKSON SAFETY AIRMAX PAPR Atemschutzgerät ® ® auspacken. Die Nichteinhaltung der Anweisungen in dieser Bedienungsanleitung kann zum Verlust der Garantie und zu gesundheitlichen Gefahren führen. Die Auswahl dieses Atemschutzgeräts sollte auf einer vorangegangenen Risikoeinschätzung durch einen professionellen Gesundheits- und Sicherheitsbeauftragten beruhen.
- Page 20 Filter. • Prüfen Sie die Dichtung sorgfältig auf sichtbare Schäden. Benutzen Sie den Filter nicht, wenn Sie einen Schaden vermuten. Verwenden Sie ausschließlich Original-Partikelfilter von Surewerx USA. mit einwandfreier Verpackung und Kennzeichnung. • Verändern Sie keine Komponenten dieses gebläsegestützten Atemschutzgeräts.
- Page 21 EINSATZRICHTLINIEN Das gebläsegestützte AIRMAX Atemschutzgerät kann seinen Träger unter anderem bei folgenden Arbeiten wirksam schützen: ® Allgemeine Tätigkeiten Herstellung glasfaserverstärkter Schiffbau und -wartung in der Produktion Kunststoffe Landwirtschaft Bergbau Metallverarbeitende Industrie Bau- und Abrissunternehmen Metallgießereien Abfallwirtschaft Chemieunternehmen Lackierbetriebe (Wasserlacke) Allgemeine Schweißarbeiten Allgemeine Wartungsarbeiten Pharmaindustrie Heimwerken...
- Page 22 GRUNDEINSTELLUNG • Legen Sie den Hüftgurt an und schließen Sie die Schnalle. • Wenn der Gurt zu weit ist, ziehen Sie am losen Gurtende, um ihn enger zu stellen. Wenn der Gurt zu eng ist, ziehen Sie die verstellbare Schnalle weiter in Richtung des losen Gurtendes, um den Gurt weiter zu stellen. •...
- Page 23 Sekunden lang. Verstummt der Alarm danach nicht automatisch, prüfen Sie Schlauch und Filter auf Verstopfungen. Liegt hier kein Fehler vor, muss der Akku geladen oder ersetzt werden. Besteht der Fehler weiter, wenden Sie sich an Surewerx USA.
- Page 24 KRITERIEN FÜR DEN FILTERWECHSEL Im Zweifelsfall sollte der Filter ersetzt werden, besonders, wenn er kontaminiert oder mechanisch beschädigt wurde. Der Filter muss in jedem Fall ersetzt werden, wenn das voll aufgeladene Gerät den erforderlichen Mindestluftdurchsatz von 170 l/min bei angelegtem Durchflusstestgerät nicht mehr erreicht. Der Filter ist in diesem Fall vollständig verstopft und muss ausgetauscht werden. Verstummt der Alarm nach dem Filtertausch, ist das Gerät wieder einsatzbereit.
- Page 25 WARTUNG DES AIRMAX GERÄTS ® • Gebläse, Filtergehäuse und Helme müssen regelmäßig gereinigt werden, um das Gerät stets einsatzbereit zu halten. • Wird das System nur von einer Person benutzt, reicht eine Reinigung mit einem feuchten Tuch mit warmem Wasser und Seife oder einem antibakteriellen Tuch.
- Page 26 • Betriebsspannung: 100–240 V Wechselstrom • Frequenz: 50-60 Hz bei 150 mA • Betriebstemperatur: 0 bis 40 °C • Relative Luftfeuchtigkeit bei Betrieb: 8 bis 85 % • Erstladung vor erstem Gebrauch der Akkus: 8 Stunden AIRMAX Ladegerät - J7067 Technische Daten ®...
- Page 27 AVVISO IMPORTANTE Leggere attentamente le presenti istruzioni prima di disimballare il sistema PAPR AIRMAX JACKSON SAFETY . La mancata ® ® osservanza delle istruzioni fornite nel presente documento potrebbe invalidare la garanzia limitata del prodotto e compromettere la propria salute e sicurezza. La selezione di questo dispositivo di respirazione per la relativa applicazione deve risultare da una valutazione dei rischi condotta da un responsabile di salute e sicurezza.
- Page 28 P R SL confezionati nell’imballo originale; non utilizzare prodotti non sigillati o usati. • Esaminare attentamente la guarnizione sigillante per verificare la presenza di eventuali danni visibili. Non utilizzare in caso si sospetti che la manutenibilità sia compromessa. Utilizzare esclusivamente filtri antiparticelle prodotti da Surewerx USA correttamente etichettati e confezionati. •...
- Page 29 LINEE GUIDA PER L’APPLICAZIONE Il sistema PAPR AIRMAX può essere utilizzato tra l’altro per proteggere l’utente durante varie attività nelle seguenti applicazioni. ® Applicazioni industriali generali Produzione di vetroresina Costruzione e manutenzione navale Agricoltura Industria mineraria Industria di trasformazione dei metalli Costruzione e demolizione Fonderie Smaltimento dei rifiuti...
- Page 30 REGOLAZIONE INIZIALE • Mettere la cintura intorno alla vita e allacciare le estremità. • Se la cintura è troppo allentata, far scorrere il regolatore maschio sotto la cintura verso la metà femmina. Se la cintura è troppo stretta, far scorrere il regolatore maschio in direzione opposta alla metà femmina. •...
- Page 31 1 secondi all’accensione; se l’allarme continua a suonare dopo 4 secondi verificare se il tubo o il filtro siano ostruiti; altrimenti la batteria deve essere sostituita o ricaricata. Se il problema persiste rivolgersi a Surewerx USA.
- Page 32 CRITERI PER LA SOSTITUZIONE DEL FILTRO Il filtro va sostituito in tutti i casi in cui si sospetta che la sua integrità sia stata compromessa in seguito a contaminazione o danni. Occorre inoltre sostituire il filtro al termine della loro durata utile che si può determinare quando l'unità PAPR completamente carica non eroga più...
- Page 33 MANUTENZIONE DEL SISTEMA AIRMAX ® • L’unità di ventilazione, l’alloggiamento del filtro e gli elementi di protezione della testa devono essere regolarmente puliti per mantenerli perfettamente funzionanti. • Per utenti singoli, le unità possono essere pulite con un panno inumidito con acqua tiepida e sapone o con una salviettina antibatterica.
- Page 34 • Gamma di funzionamento: 100 Vca – 240 Vca • Frequenza: 50-60 Hz a 150 mA • Gamma temperatura di funzionamento: da 0°C a 40°C • Umidità relativa di funzionamento: dall’8% all’85% • Carica iniziale prima del primo utilizzo delle batterie: 8 ore Caricatore AIRMAX : J7067...
- Page 35 AVISO IMPORTANTE Antes de desempacar su JACKSON SAFETY AIRMAX PAPR, lea detenidamente estas instrucciones. El incumplimiento de las ® ® instrucciones de este folleto puede anular la garantía limitada del producto y afectar su salud y seguridad personal. La elección de este equipo de respiración para el uso previsto debe efectuarse con base en una evaluación de riesgos realizada por un profesional en salud y seguridad industrial.
- Page 36 • Revise con atención la junta de sellado y verifique que no existan daños visibles. No utilice el aparato si sospecha que puede afectar su mantenimiento. Utilice exclusivamente filtros de partículas fabricados por Surewerx USA embalados y etiquetados apropiadamente. •...
- Page 37 GUÍA DE USO A título enunciativo mas no limitativo, el PAPR AIRMAX se puede utilizar de manera efectiva para proteger al usuario en distintos tipos ® de trabajo en las siguientes áreas Uso industrial Fabricación de GRP Construcción y mantenimiento de barcos Industria metalmecánica de la Agricultura Minería...
- Page 38 AJUSTE INICIAL • Colóquese el cinturón en la cintura y abroche los extremos. • Si el cinturón le queda demasiado flojo, deslice el broche macho por el cinturón hacia el broche hembra. Si el cinturón queda demasiado apretado, deslice el broche macho en sentido opuesto al broche hembra. •...
- Page 39 1 segundos al encender la unidad; si la alarma suena por más de 4 segundos, verifique que no esté obstruida la manguera o el filtro; en caso contrario es necesario recambiar o recargar la pila. Si el problema persiste, solicite apoyo técnico a Surewerx USA.
- Page 40 CRITERIOS PARA EL RECAMBIO DEL FILTRO El filtro debe cambiarse siempre que se sospeche que ha sido afectado por la contaminación o ha sufrido daños físicos. El filtro también debe cambiarse al término de su ciclo de vida, lo cual se evidencia cuando la unidad PAPR no es capaz de suministrar un flujo de aire mayor de 170 lpm conforme a la medición de la unidad de prueba de flujo aun a carga completa y en funcionamiento normal.
- Page 41 MANTENIMIENTO DEL SISTEMA AIRMAX ® • El ventilador, el portafiltros y el casco deben limpiarse periódicamente para mantenerlos en buenas condiciones de funcionamiento. • Si se destina a un solo usuario, la unidad puede limpiarse con un paño humedecido en agua tibia y jabón o con un paño antibacteriano.
- Page 42 • Rango de funcionamiento: 100 a 240 VCA • Frecuencia: 50 a 60 Hz a 150 mA • Rango de temperatura de funcionamiento: 0 a 40°C • Humedad relativa de funcionamiento: 8 a 85% • Carga inicial antes del primer uso de la pila: 8 horas Cargador AIRMAX - J7067...
- Page 44 USA: Canada: Europe: SureWerx USA Inc., SureWerx, 49 Schooner St., Balder d.o.o. Teslova ulica 30, Elgin, IL, USA 60123 Coquitlam, BC V3K 0B3 SI-1000 Ljubljana, Slovenia surewerx.com/usa surewerx.com jacksonsafety.eu Made In/Fabriqué En/Hecho En China...
- Page 45 WH25 DUO WELDING HELMET User Instructions MASQUE DE SOUDEUR Instructions d’utilisation SCHWEISSERSCHUTZMASKEN Bedienungsanleitung MASCHERA PROTETTIVA PER SALDATURA Istruzioni per l’utente CASCO DE SOLDADURA Instrucciones para el usuario...
- Page 46 WELDING HELMET User Instructions MASQUE DE SOUDEUR Instructions d’utilisation SCHWEISSERSCHUTZMASKEN Bedienungsanleitung MASCHERA PROTETTIVA PER SALDATURA Istruzioni per l’utente CASCO DE SOLDADURA Instrucciones para el usuario FIGURE A - G SPARE PARTS EU DECLARATION OF CONFORMITY: https://www.jacksonsafety.com/europe-products-documentation...
- Page 47 For your protection and maximum efficiency, please read this informa- tion carefully before use. BEFORE WELDING • Ensure that the helmet is correctly assembled and that it completely blocks any ac- cidental light. In the front, light may enter the helmet only through the viewing area of the autodarkening welding filter.
- Page 48 WARRANTY The warranty period of the Duo ADF products is two years. Failure to follow these in- structions may invalidate the warranty. JACKSON SAFETY does not accept respon- ® sibility for any problems, which may arise from applications other than welding. HELMET AND HEADGEAR ASSEMBLY Figure 1.
- Page 49 Figure During assembly of the helmet and welding filter, or during the replacement of the protection screens, make sure that all parts are firmly in place thus prevent- ing any light from entering the helmet. Should there still be any light entering, repeat the procedure until the problem is eliminated, otherwise the helmet must not be used for welding.
- Page 50 The face seal (B) must be properly assembled within the Duo AIR helmet. The perimeter of the face seal should touch your face and extend below your chin. It’s position related to the helmet and the headgear is evident from figure No. 1. MOUNTING OF THE HOSE Figure Twist in the hose of the PAPR unit (hose comes with the Airmax...
- Page 51 of required protection for specific welding process and select the recommended shade with the shade adjustment knob. You can select the shade from shade 9 to shade13. Adjustment of sensitivity: Most welding applications can be performed with welding light sensitivity set to maximum. The maximum sensitivity level is appropriate for low welding current work, TIG, or special applications.
- Page 52 LIGHT TRANSMISSION CURVE T[%] LIGHT STATE Shade 4 Shade 9 Shade 10 DARK STATE Shade 11 0,01 Shade 12 Shade 13 0,001 0,0001 1000 1100 1200 1300 1400 Wavelength λ[nm] DESCRIPTION OF JACKSON SAFETY FILTER FEATURES ® Figure 1. Solar cells 2.
- Page 53 TECHNICAL DATA Model Viewing area 92 x 41 mm Weight 115 g Open state shade Closed state shade 9-13 Shade adjustment yes / external Sensitivity adjustment yes / internal Delay adjustment yes / internal Grinding mode Switching time at 23°C 0.3 ms Clearing time 0.1 - 0.8 s...
- Page 54 Product name of the helmet shell Product name of the autodarkening welding filter 4 - Protection shade number in open state 4 / 9-13 9-13 - Protection shade numbers in closed state Manufacturer identification code Optical classes (optical quality, light scattering, homogeneity, 1/1/1/2 angular dependence) EN 379...
- Page 55 Pour votre protection et une efficacité maximum, veuillez lire attentive- ment ces informations avant l’utilisation. AVANT LE SOUDAGE • Vérifiez que le masque est bien assemblé et qu’il bloque complètement toute lumière accidentelle. La lumière ne peut pénétrer par l’avant qu’à travers le champ de vision du filtre de soudage auto-obscurcissant.
- Page 56 jamais de solvants agressifs tels que l’acétone. Les filtres JACKSON SAFETY doivent ® toujours être protégés des deux côtés par les écrans de protection (polycarbonate ou CR39), qui doivent également être nettoyé à l’aide d’un chiffon doux. Remplacez im- médiatement les écrans de protection s’ils ont subi des dommages, quels qu’ils soient. GARANTIE La période de garantie des produits Duo ADF est de deux ans.
- Page 57 3. Insérez la visière externe dans l’ouverture du filtre (3.). 4. Abaissez le joint de lumière avec le filtre de soudage (4.). 5. Serrez les vis papillon (5.) Le schéma Au cours de l’assemblage du masque et du filtre de soudage ou lors du rem- placement des écrans de protection, vérifiez que toutes les pièces sont bien en place afin d’éviter toute entrée de lumière dans le masque.
- Page 58 12. Les plaques de protection, à la fois interne et externe, doivent être utilisées en conjonction avec le filtre auto-noircissant afin de le protéger contre des dommages permanents. Le montage du masque Duo AIR Air est semblable à celui décrit dans la partie décrivant l’assemblage du masque et du harnais.
- Page 59 que les cellules solaires et les capteurs optiques ne sont pas couverts par le masque, car cela pourrait empêcher le fonctionnement correct du filtre. Si l’une de ces conditions se présente, le filtre risque de ne pas être utilisable. DOMAINE D’APPLICATION Le filtre Duo convient à...
- Page 60 COURBE DE TRANSMISSION DE LA LUMIÈRE Transmission T[%] Obscurcissement 4 ÉTAT CLAIR Obscurcissement 9 Obscurcissement 10 ÉTAT SOMBRE Obscurcissement 11 0,01 Obscurcissement 12 Obscurcissement 13 0,001 0,0001 1000 1100 1200 1300 1400 λ[nm] Longueur d’onde DESCRIPTION POUR LES FIGURES DU FILTRE JACKSON SAFETY ®...
- Page 61 DONNÉES TECHNIQUES Modèle Champ visuel 92 x 41 mm Poids 115 g Obscurcissement ouvert Obscurcissement fermé 9-13 Ajustement de l’obscurcissement oui / externe Ajustement de sensbilité oui / interne Ajustement du délai oui / interne Mode abrasion Délai de commutation à 23°C 0.3 ms Délai d’ouverture 0.1 - 0.8 s...
- Page 62 Nom de produit de la coque de masque Nom de produit du filtre de soudage auto-obscurcissant 4 - Numéro d’obscurcissement en mode ouvert 4 / 9-13 9-13 - Numéros d’obscurcissement en mode fermé Code d’identification du producteur Classes optiques (qualité optique, diffusion de la lumière, 1/1/1/2 homogénéité, dépendance angulaire) EN 379...
- Page 63 Für eine sichere und korrekte Bedienung lesen Sie bitte zuerst die An- leitung durch. VOR BEGINN DES SCHWEISSENS • Überzeugen Sie sich, dass die Maske korrekt zusammengebaut ist und dass sie kein- erlei Licht durchlässt. An der Vorderseite darf das Licht nur durch das Sichtfeld des automatischen Schweißerfilters eindringen.
- Page 64 SAFETY Filter müssen immer von außen und innen durch eine Klarsicht-Schutzscheibe ® (Polykarbonat oder CR39) geschützt sein, die nur mit einem weichen Baumwolltuch ger- einigt werden kann. Ist die Klarsicht-Schutzscheibe in irgendeiner Art beschädigt, muss sie sofort ersetzt werden. GARANTIE Der Garantiezeitraum der Duo ADF-Produkte beträgt zwei Jahre.
- Page 65 WECHSEL DER SCHUTZSCHEIBE Abbildung 1. Retirez l‘écran de protection intérieur et remplacez-le par un nouveau (1). 2. Die Halteschrauben lösen (2.). 3. Äußeren Schutzschirm in die Filteröffnung einsetzen (3.). 4. Lichtdichtung mit Schweißfilter absenken (4.). 5. Flügelschrauben anziehen (5.). Abbildung Beim Zusammenbau der Maske und des Schweißerfilters bzw.
- Page 66 entworfen wurden, schützen den Anwender nicht vor Partikeln. Wenn ein Arbeitsplatz von beiden Arten von Verschmutzung verunreinigt ist, müssen kombinierte Filter verwendet werden. 12. Interne und externe Schutzplatten müssen zusammen mit dem Filter zur automa- tischen Verdunkelung verwendet werden, um ihn vor dauerhafter Schädigung zu schützen.
- Page 67 der äußeren und inneren Schutzscheibe entsprechend in die Schutzmaske einspannen lassen. In der Maske dürfen keine Kräfte des Spannungsmechanismus punktuell auf den Filter einwirken, da sie den Filter irreparabel beschädigen können. Achten Sie ebenfalls darauf, dass die Solarzellen und Lichtsensoren nicht von außen abgedeckt werden, da so das korrekte Funktionieren des Filters verhindert wird.
- Page 68 LICHTDURCHLÄSSIGKEITSKURVE Durchlässigkeit T[%] Schutzstufe 4 LICHTZUSTAND Schutzstufe 9 Schutzstufe 10 DUNKLE Schutzstufe 11 0,01 SCHUTZSTUFE Schutzstufe 12 Schutzstufe 13 0,001 0,0001 1000 1100 1200 1300 1400 λ[nm] Wellenlänge STÖRUNGSBESEITIGUNG Defekt oder Funk- Mögliche Empfohlene Abhilfe tionsstörungen Ursachen Der Filter verdun- Die Sensoren oder Den Filter und den Schutzschirm mit ei- kelt nicht oder...
- Page 69 TECHNISCHE DATEN Ausführung Aktive Sichtfläche 92 x 41 mm Gewicht 115 g Abdichtung in offenem Zustand Abdichtung in geschlossenem Zustand 9-13 Einstellungsmöglichkeit -Abdichtung ja / außen Einstellungsmöglichkeit -Empfindlichkeit ja / innen Einstellungsmöglichkeit -Öffnungszeit ja / innen Schleifen Umschaltungszeit bei 23°C 0.3 ms Öffnungszeit 0.1 - 0.8 s...
- Page 70 Produktbezeichnung des Helms Produktbezeichnung des automatischen Schweißerfilters 4 - Abdichtungsstufe in offenem Zustand 4 / 9-13 6-8 / 9-13 - Abdichtungsstufe in geschlossenem Zustand Hersteller-Identifikationsnummer Bewertung der optischen Klassen (optische Qualität, Lichtstreu- 1/1/1/2 ung, Homogenität, Abhängigkeit vom Winkel) EN 379 Nummer des Standards (automatischer Schweißerfilter) EN 175 Nummer des Standards (Schweißermaske)
- Page 71 Per un uso sicuro e corretto del prodotto, leggere attentamente le pre- senti informazioni prima dell’uso. PRIMA DI INIZIARE A SALDARE • Assicurarsi che la maschera sia montata correttamente e che, nella parte frontale, impedisca ogni possibile passaggio di luce, tranne attraverso il campo visivo del filtro protettivo per saldatore.
- Page 72 GARANZIA Il periodo di garanzia dei prodotti Duo ADF è di due anni. La mancata osservanza di queste istruzioni può rendere nulla la garanzia. La JACKSON SAFETY non assume ® altresì responsabilità per problemi derivanti da un uso diverso da quello previsto. MONTAGGIO DELLA MASCHERA E DEL COPRICAPO Figura 1.
- Page 73 Figura Durante il montaggio della maschera o del filtro, o durante la sostituzione delle pellicole protettive, assicurarsi che tutte le parti siano saldamente collocate in modo da impedire alla luce di penetrare nella maschera. Qualora penetri la luce, ripetere la procedura fino a correggere il problema. Se il problema persiste non utilizzare la maschera per la saldatura.
- Page 74 La guarnizione facciale deve essere montata in modo adeguato sulla maschera ad aria Duo AIR. Il perimetro del Face-Seal dovrebbe toccare il tuo viso ed estendersi sotto il mento. La sua posizione rispetto alla maschera e il copricapo è illustrata in figura 1. MONTAGGIO DEL TUBO FLESSIBILE Figura Avvitare il tubo flessibile del PAPR (il tubo è...
- Page 75 FUNZIONI Oscuramento: Il filtro elettro-ottico Duo fornito è adatto all’uso diretto. Controllare il grado di protezione richiesto per il tipo di saldatura da effettuare e selezionare il grado di oscuramento segnalato tramite la manopola di regolazione dell’oscuramento. È possibile selezionare l’oscuramento da 9 a 13. Sensibilità: La maggior parte delle operazioni di saldatura può...
- Page 76 CURVA DI TRASMISSIONE DELLA LUCE Trasmissione T[%] STATO CHIARO Oscuramento 4 Oscuramento 9 Oscuramento 10 STATO SCURO Oscuramento 11 0,01 Oscuramento 12 Oscuramento 13 0,001 0,0001 1000 1100 1200 1300 1400 λ[nm] Lunghezza d’onda DESCRIZIONE DELLE FIGURE DEI FILTRI JACKSON SAFETY Figura ®...
- Page 77 DATI TECNICI Modello Campo visivo 92 x 41 mm Peso 115 g Oscuramento modalità aperta Oscuramento modalità chiusa 9-13 Regolazione oscuramento sì / esterno Regolazione sensibilità sì / interno Regolazione intervallo di tempo sì / interno Modalità molatura sì Tempo di commutazione a 23°C 0.3 ms Tempo di apertura 0.1 - 0.8 s...
- Page 78 Nome del prodotto della maschera Nome del prodotto del filtro auto-oscurante da saldatore 4 - livello di oscuramento in modalità aperta 4 / 9-13 9-13 - livello di oscuramento in modalità chiusa Codice di identificazione del fabbricante Classi ottiche (qualità ottica, dispersione della luce, omoge- 1/1/1/2 neità, dipendenza angolare) EN 379...
- Page 79 Para su seguridad y una efectividad máxima del producto, lea primero las instrucciones. ANTES DE LA SOLDADURA • Asegúrese de que el casco esté montado correctamente y que bloquee todo tipo de luz. En la parte frontal la luz puede ingresar en el casco únicamente a través del área del visor del filtro para soldadura autooscurecible.
- Page 80 únicamente con un pañuelo o trapo suave. Si los filtros de protección están de algún modo dañados deben ser reemplazados inmediatamente. GARANTIA El período de garantía de los productos Duo ADF es de dos años. El incumplimiento de las presentes instrucciones puede dejarla sin validez. JACKSON SAFETY tampoco acepta ®...
- Page 81 4. Bajar la junta de la luz con el filtro de soldadura (4.a). Bajar el marco de soporte sobre el ADF (4.b). 5. Ajustar los tornillos moleteados (5.). Figura Durante el ensamblado del casco y del filtro de soldadura o durante el reempla- zo de las pantallas de protección asegúrese de que las partes estén firmemente fijadas en su lugar y de este modo se evite el ingreso de luz en el casco.
- Page 82 12. Deberán utilizarse las placas de protección, tanto internas como externas, conjunta- mente con el filtro de autooscurecimiento a fin de protegerla de daños permanentes. El ensamblado del casco Duo AIR es similar al descrito en la sección Y AL ENSAMBLADO DEL MECANISMO PARA LA CABEZA.
- Page 83 sistema de montaje, ya que podría causar severos daños en el casco. Asegúrese de que las células solares y los foto sensores no sean tapados por ninguna parte del casco, ya que podría impedir el correcto funcionamiento del filtro. En caso de cumplirse cualquiera de estas condiciones el filtro posiblemente no sea adecuado para ser usado.
- Page 84 CURVA DE TRANSMISIÓN DE LUZ T[%] ESTADO DE LA LUZ Sombra 4 Sombra 9 Sombra 10 ESTADO DE Sombra 11 0,01 OSCURIDAD Sombra 12 Sombra 13 0,001 0,0001 1000 1100 1200 1300 1400 λ[nm] Longitud de onda RISOLUZIONE DEI PROBLEMI Avería o mal Possibili motivi Soluzione raccomandata...
- Page 85 DATOS TÉCNICOS Modelo Área de visión 92 x 41 mm Peso 115 g Sombra en el estado abierto Sombra en el estado cerrado 9-13 Configuración de sombra sí / externo Ajuste de la sensibilidad sí / interno Configuración de temporizador sí...
- Page 86 Nombre comercial de la carcasa del cascol Nombre del producto del filtro para soldadura autooscurecible 4 - Nivel de la sombra en el estado abierto 4 / 9-13 9-13 - Nivel de la sombra en el estado cerrado Código de identificación del productor Clases ópticas (calidad óptica, dispersión de luz, homogenei- 1/1/1/2 dad, dependencia angular)
- Page 89 ORIGINAL SPARE PARTS PIÈCES DE RECHANGE ORIGINALES ORIGINAL-ERSATZTEILE RICAMBI ORIGINALI PIEZAS DE RECAMBIO ORIGINALES ® Item Code Article Codice Artikel Código Articolo Artículo J7176 Jackson Safety Duo Outer Protective Lens J7177 Jackson Safety Duo Inner Protective Lens...
- Page 90 USA: Canada: Europe: SureWerx USA Inc., SureWerx, 49 Schooner St., Balder d.o.o. Teslova ulica 30, Elgin, IL, USA 60123 Coquitlam, BC V3K 0B3 SI-1000 Ljubljana, Slovenia surewerx.com/usa surewerx.com jacksonsafety.eu Made In/Fabriqué En/Hecho En China...
Need help?
Do you have a question about the JACKSON SAFETY AIRMAX J7210 and is the answer not in the manual?
Questions and answers