
Subscribe to Our Youtube Channel
Related Manuals for elem COOL CLIMA AC120TIM-2IB

Summary of Contents for elem COOL CLIMA AC120TIM-2IB
- Page 1 AC120TIM-2IB REFROIDISSEUR D'AIR TRADUCTION DES INSTRUCTIONS D’ORIGINE LUCHTKOELER VERTALING VAN DE ORIGINELE INSTRUCTIES AIR COOLER ORIGINAL INSTRUCTIONS S01 M01 Y2015...
-
Page 2: Table Of Contents
REFROIDISSEUR D'AIR Veuillez lire ce manuel attentivement avant utilisation Table des matières 1. Les noms fonctionnels des composants 2. Fonctionnement du panneau de commande 3. Comment utiliser les touches du panneau de commande manuel 4. Installation et utilisation 5. Points à respecter 6. - Page 3 UTILISATION Pour une utilisation domestique uniquement. Les enfants ou les personnes incapables d’utiliser l’appareil de façon sûre ne doivent jamais utiliser ce rafraîchisseur. Merci de bien vouloir jeter les emballages plastiques et les garder hors de portée des enfants. AVERTISSEMENT MERCI DE BIEN VOULOIR LIRE LES CONSIGNES DE SECURITE ATTENTIVEMENT AVANT D’UTILISER L’APPAREIL.
- Page 4 16. Si le cordon d’alimentation est endommagé, il doit être remplacé par le fabricant, son Service Après-Vente ou une personne de qualification similaire afin d‘éviter un danger. 17. Cet appareil n’est pas prévu pour être utilisé par des personnes (y compris les enfants) dont les capacités physiques, sensorielles ou mentales sont réduites ou des personnes dénuées d’expérience ou de connaissance, sauf si elles ont pu bénéficier, par l’intermédiaire d’une personne responsable de leur sécurité, d’une surveillance ou d’instructions préalables...
-
Page 5: Les Noms Fonctionnels Des Composants
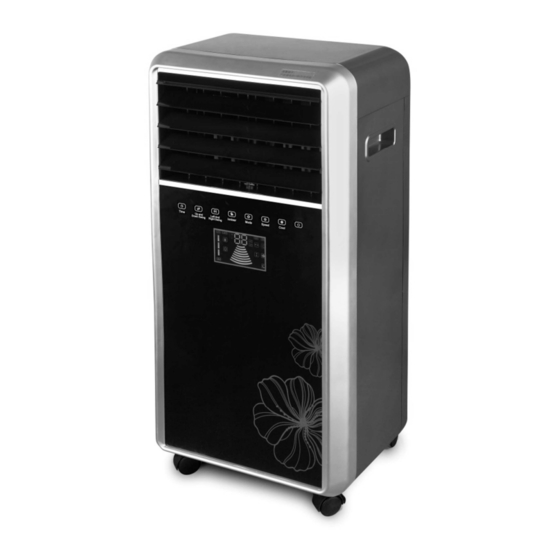
1. Les noms fonctionnels des composants 1)Panneau avant 2)Sortie d'air 3)Lame horizontale 4)Boutons-poussoirs 5)Écran d'affichage 6)Verre 7)Roue 8)Panneau latéral 9)Cordon d'alimentation 10)Poignée 11)Cadre arrière 12)Interrupteur MARCHE/ARRET 13)Cadre de tamis pour la filtration 14)Réservoir d'eau 15)Bouton de limite de niveau d'eau 16)Boîte à... -
Page 6: Fonctionnement Du Panneau De Commande
2. Fonctionnement du panneau de commande 1) TEMPS 2) Oscillation de haut en bas 3) Oscillation de gauche à droite 4) Ioniseur 5) Mode 6) Vitesse 7) Refroidisseur 3. Comment utiliser les touches du panneau de commande manuel Les boutons-poussoirs sont du type sensitif. Effleurez les boutons-poussoirs sur le panneau pour activer les fonctions correspondantes. - Page 7 3) Vitesse : dans l'état initial de mise en service, la vitesse du ventilateur est basse. Avec cette touche, l'utilisateur peut changer la vitesse du ventilateur : Basse ----Moyenne ---Haute ----Basse. Les lampes témoins correspondantes s'allument selon le réglage de la vitesse du ventilateur.
-
Page 8: Installation Et Utilisation
Règle de changement de la minuterie de soufflage : faible--moyen--faible--moyen--stop--faible--stop--moyen--faible--stop---faible--- moyen---faible--moyen--stop--faible---stop---moyen---faible---stop marche en circulation. · Lorsque « Naturel » est activé, la lampe témoin correspondante est allumée. La vitesse du ventilateur change instantanément pour le mode « Bas » en « Naturel ». La touche de vitesse du ventilateur est alors inactive. -
Page 9: Points À Respecter
5. Points à respecter 1. Utilisez une pile lithium ronde de 3V (CR2025) avec la commande à distance. 2. Lorsque la pile est épuisée, remplacez-la par une pile de même taille (3V CR2025) et veillez à la polarité correcte. 6. Nettoyage et maintenance 1) Lorsque le filtre extérieur est fortement encrassé, cela peut affecter le soufflage. - Page 10 9. GARANTIE Pour les clauses de garantie, reportez-vous aux conditions de garantie ci-jointes. 10. ENVIRONNEMENT Si, après un certain temps, vous décidez de remplacer votre machine, ne vous en débarrassez pas avec les ordures ménagères mais destinez-la à un traitement respectueux de l’environnement.
- Page 11 LUCHTKOELER Lees deze gebruiksaanwijzing aandachtig voor gebruik Inhoudsopgave 1. De functienamen van de onderdelen 2. Functiebedieningspaneel 3. Gebruik van de toetsen op het bedieningspaneel 4. Installatie en gebruik 5. Aandachtspunten 6. Reiniging en onderhoud...
- Page 12 GEBRUIK - Voor huishoudelijk gebruik alleen. - Kinderen of personen die niet in staat om het apparaat te gebruiken veilig moet nooit gebruik deze koeler. - Gelieve te gooien plastic verpakkingen en Buiten het bereik van kinderen. WAARSCHUWING LEES DE VEILIGHEID , VOORDAT U GEBRUIK. WAARSCHUWING - Gevaar voor brand, elektrische schokken, letsel lichamelijke en materiële schade: Voordat u uw koeler, volg altijd de instructies...
- Page 13 17. Dit apparaat is niet bedoeld voor gebruik door personen (inclusief kinderen ) met verminderde lichamelijke , zintuiglijke of verstandelijke vermogens of gebrek aan ervaring of kennis , tenzij ze zijn gegeven door de door een persoon die verantwoordelijk is voor hun veiligheid , toezicht of instructie over het gebruik van het apparaat .
- Page 14 1. De functienamen van de onderdelen 1)Voorkant 2)Luchtuitlaat 3)Horizontale schoep 4)Druktoetsen 5)Display 6)Glas 7)Wieltje 8)Zijpaneel 9)Stroomsnoer 10)Handgreep 11)Achterkant 12)Stroomschakelaar 13)Roostervormig kader voor filtering 14)Waterreservoir 15)Waterniveautoets 16)IJsbak 17)Afstandsbediening...
- Page 15 2. Functiebedieningspaneel TIJD 2) Omschakeling boven en onder 3) Omschakeling links en rechts 4) Ionisator 5) Modus 6) Snelheid 7) Koeling 3. Gebruik van de toetsen op het bedieningspaneel De druktoetsen zijn aanraaktoetsen. Door de druktoetsen op het paneel licht aan te raken, kunnen de overeenstemmende functies worden uitgevoerd.
- Page 16 4) Tijd: Tijdens de werking van het toestel kunnen de gebruikers de automatische uitschakeling instellen door deze toets aan te raken. Telkens als ze de toets aanraken, komt er een half uur bij. De controlelampjes (0,5H, 1H, 2H, 4H) worden toenemend getoond: 0,5H tot 7,5H.
- Page 17 De regels van de verandering van de “sleep” lucht zijn: zwak--gemiddeld--zwak--gemiddeld--stop--zwak--stop--gemiddeld--zwak--stop--- zwak--gemiddeld---zwak--gemiddeld--stop--zwak---stop---gemiddeld---zwak---stop run in circulatie. · Wanneer het luchttype in “Natural” stand is, zal het betrokken lampje gaan branden. De luchtsnelheid van de blazer verandert van "laag" in “Natural” modus. Op dat ogenblik werkt de toets voor de windsnelheid niet.
- Page 18 5. Aandachtspunten 1. Gebruik een 3V (CR2025) ronde lithiumbatterij in de afstandsbediening. 2. Is de batterij leeg, vervang ze dan door een batterij van hetzelfde type (3V CR2025) en houd rekening met de positieve en negatieve polen. 6. Reiniging en onderhoud 1) Zodra er veel stof op het filterrooster zit, kan het uitblazen van de lucht worden beïnvloed.
- Page 19 9. GARANTIE Voor de garantiebepalingen wordt verwezen naar de bijgevoegde garantievoorwaarden. 10. MILIEU Als uw machine na verloop van tijd aan vervanging toe is, geef hem dan niet met het huisvuil mee, maar zorg voor een milieuvriendelijke verwerking. Vervaardigd in China 2015...
- Page 20 AIR COOLER Please read instruction book carefully before using Table of contents 1. The function names of the parts 2. Function Control panel 3. How to use the keys in the manual control panel 4. Installation and use 5. Attention affairs 6.
- Page 21 UTILISATION - For household use only. - Children or persons unable to use the device safely should never use this cooler. - Please throw plastic packaging and Keep out of reach of children. WARNING PLEASE READ THE SAFETY CAREFULLY BEFORE USING. WARNING - Risk of fire, electric shock, injury physical and property damage: Before using your cooler, always follow the instructions safety during assembly, use...
- Page 22 In this manual and/or on the machine the following symbols are used: Read manual before use. In accordance with essential applicable safety standards of European directives Technical specifications > Model: AC120TIM-2IB > Power: 220-240V ~ 50Hz > Rated Power: 80W >...
-
Page 23: The Function Names Of The Parts
1. The function names of the parts 1)Front board 2)Wind outlet 3)Horizontal blade 4)Push-buttons 5)Display screen 6)Glass 7)Wheel 8)Sideboard 9)Power cord 10)Handle 11)Back-frame 12)Power switch 13)Net frame for filtration 14)Water tank 15)Water level limit knob 16)Ice box 17) Remote control... -
Page 24: Function Control Panel
2. Function Control Panel TIME 2) Up And Down Swing 3) Left And Right Swing 4) Ioniser 5) Mode 6) Speed 7) Cool 3. How to use the keys in the manual control panel The push-buttons belong to touch type. Touch the push-buttons on the board slightly then correspondent functions can be implemented. - Page 25 4) Time: Under power on state, through touching this key users can set automatic power off. Each time touching this key it adds up 0.5 hour. The guiding lights (0.5H、1H、2H、4H)are shown accumulatively:0.5H to 7.5H.Once the time is set well, it starts to count down. When it comes to "0",it will be powered off.
-
Page 26: Installation And Use
4. Installation and use 1) Open the gift box, throw away the foam, you could use after the machine is electrified. 2) Pouring water: If users want it to do cooling, Please pour water into the water tank. Firstly, set the water limit level knob to be horizontal position, and slowly pour water inside. - Page 27 2) Cleaning method of water tank: Switch off power and set "water tank level limit knob" to the horizontal place, take out the water tank. Wipe the scale in the water tank by using towel wet by a little detergent. Then pour a little amount of water into the water tank and spill the dirty water.
- Page 29 Ne jamais laisser un enfant ou une autre personne n’ayant pas pris connaissance des instructions d’utilisation se servir de la machine. Il est possible que les réglementations locales fixent une limite d’âge minimum de l’utilisateur. Gardez la machine non utilisée hors de la portée des enfants. Cet appareil n’est pas prévu pour être utilisé...
- Page 30 SN : 2015.01:001~350 11.12.10982 Fecha de llegada Date d’arrivée – Aankomstdatum - Arrival date – Ankunftsdatum- Data di arrivo- : 20/02/2015 Año de fabricación Année de production - Productiejaar - Production year - Fertigungsjahr - Anno di produzione- : 2015 Déclaration CE de conformité...
- Page 31 EC declaration of conformity EG-Konformitätserklärung COOL CLIMA declares that the machines: COOL CLIMA erklärt hiermit, daß der AIR COOLER AC120TIM-2IB LUFTKÜHLER AC120TIM-2IB have been designed in compliance with the entsprechend den Normen: following standards: EN 55014-1 :2006+A1 :2009/+A2 :2011 EN 55014-1 :2006+A1 :2009/+A2 :2011 EN 55014-2 :1997/+A1 :2001/+A2 :2008 EN 55014-2 :1997/+A1 :2001/+A2 :2008 EN 61000-3-2 : 2006 +A1 :2009/+A2 :2009...
- Page 32 Dichiarazione CE di conformità Declaración CE de conformidad COOL CLIMA dichiara che le macchine: COOL CLIMA declara que las máquinas: REFRIGERATORE D'ARIA AC120TIM-2IB ENFRIADOR DE AIRE AC120TIM-2IB sono state concepite in conformità con i han sido diseñadas de acuerdo con las seguenti standard: siguientes normas: EN 55014-1 :2006+A1 :2009/+A2 :2011...
- Page 33 32 / 71 / 29 . 70 . 86 Importé par : geïmporteerd door : imported by : ELEM 81, rue de gozée 6110 Montigny-le-Tilleul BELGIQUE Fabriqué en Chine - Vervaardigd in China - Made in China Hergestellt in China - Fabbricato in Cina...
Need help?
Do you have a question about the COOL CLIMA AC120TIM-2IB and is the answer not in the manual?
Questions and answers