Table of Contents
Advertisement
Available languages
Available languages
Quick Links
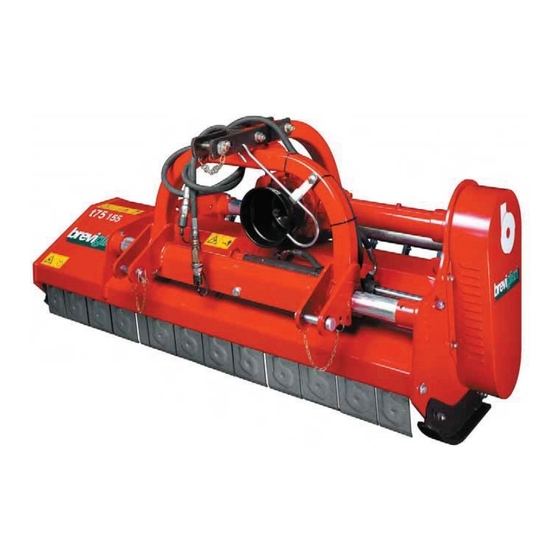
turbo t 76sr
Istruzioni per l'uso e manutenzione
Prima di iniziare ad operare, leggere attentamente le istruzioni per l'uso
Conservare il presente manuale per futura consultazione
Operating and Maintenance Manual
Read these operating instructions carefully before using the machine
Keep this manual for future reference
Manuel d'utilisation et d'entretien
Avant de commencer le travail, lisez attentivement les consignes d'utilisation
Conservez ce manuel pour référence future
Instrucciones de empleo y mantenimiento
Antes de empezar a operar con la máquina , leer atentamente las instrucciones para el empleo
Mantenga esto manual como referencia futura
Betriebs- und Wartungsanleitung
Bevor Sie mit der Arbeit beginnen, lesen Sie diese Betriebsanleitungen aufmerksam durch
Bewahren Sie dieses Handbuch zum Nachschlagen
Q
u
s e
o t
m
n a
a u
e l
è
a v
d i l
o
a d
a l l
Handbuch ist gültig ab Seriennummer - Este manual es válido a partir del número de serie ..................................................... 2012T2100001
Codice documento - Document code - Code du document - Dokument
Ref. - Signatura del documento ...................................... T2100042
m
a
i r t
o c
a l
-
T
h
s i
m
a
u n
l a
s i
a v
d i l
f
o r
m
s
r e
l a i
u n
m
e b
- r
C
e
m
a
u n
Revisione n°/in data - Review #/Date - Révision n°/Date - Überprüfung
Nr./am - Revisión No./fecha.................................... 03 / 20.02.2015
TRINCIATRICE
l e
s e
v t
l a
b a
e l
à
p
r a
r i t
d
u
u n
m
é
o r
e d
s
r é
e i
-
D
e i
e s
Advertisement
Chapters
Table of Contents

Subscribe to Our Youtube Channel
Related Manuals for breviglieri turbo t 76sr


Summary of Contents for breviglieri turbo t 76sr
- Page 1 76sr TRINCIATRICE Istruzioni per l’uso e manutenzione Prima di iniziare ad operare, leggere attentamente le istruzioni per l’uso Conservare il presente manuale per futura consultazione Operating and Maintenance Manual Read these operating instructions carefully before using the machine Keep this manual for future reference Manuel d’utilisation et d’entretien...
- Page 2 E. Nobili, 44 - 40062 Molinella (BO) - Italia - C.F.: 02441250376 - P.IVA: IT00578341208 Sede Operativa (VR): via A. Labriola, 2 - 37054 Nogara (VR) - Italia - Tel. 0442 537411 - Tel. export 0039 0442 537404 Fax 0039 0442 537444 - www.breviglieri.com - email: info@ breviglieri.com - 2 -...
-
Page 3: Table Of Contents
Sommario ITALIANO SEZIONE 1 ______________________________3 ATTACCO AL TRATTORE ............11 PRESENTAZIONE ..............3 POSIZIONE DI TRASPORTO ...........11 GARANZIA ................3 IN LAVORO ................12 1.2.1 ESCLUSIONI DELLA GARANZIA ..........4 4.4.1 REGOLAZIONE DI TAGLIO .............13 DESCRIZIONE DELLA MACCHINA ..........4 4.4.2 REGOLAZIONE DELLA TRITURAZIONE ........13 1.3.1 DESCRIZIONE ................5 4.3.3 SPOSTAMENTO LATERALE ............13 1.3.2 IMPIEGO ................5 4.4.4 CONSIGLI UTILI ..............13... -
Page 4: Esclusioni Della Garanzia
1.2.1 ESCLUSIONI DELLA GARANZIA La garanzia decade (oltre a quanto riportato nel contratto di fornitura): e l i Qualora, in seguito a riparazioni eseguite senza il consenso della Ditta Costruttrice o a causa del montaggio di pezzi di ricambio non originali, la macchina dovesse subire cambiamenti e il danno dovesse essere imputabile a tali cambiamenti. i l p c i r a l l... -
Page 5: Descrizione
DIMENSIONI CON MACCHINA CHIUSA Fig.2 Modello sr - 105 sr - 125 sr - 140 sr - 155 sr - 180 sr - 200 sr - 220 1.3.1 DESCRIZIONE Il Trincia , è costituito essenzialmente da una struttura metallica comprensivo di castello centrale con attacchi a tre punti (2 Fig. -
Page 6: Livello Sonoro
B) Versione della macchina C) Numero di matricola D) Massa (peso in Kg) E) Anno di costruzione I dati riportati nella targhetta di della macchina vanno trascritti nel retro di copertina del presente manuale e devono essere sempre citati per eventuali richieste di ricambi e/o per interventi di assistenza. La macchina viene fornita di serie con: Manuale di uso e manutenzione della macchina Dichiarazione «CE»... -
Page 7: Segnali Di Sicurezza
PERICOLO : È il segnale di pericolo al massimo livello e avverte che se le operazioni descritte non sono correttamente ese guite, causano gravi lesioni, morte o rischi a lungo termine per la salute. ATTENZIONE : Il segnale avverte che se le operazioni descritte non sono correttamente eseguite, possono causare gravi lesioni, morte o rischi a lungo termine per la salute. - Page 8 apposite catenelle. Fare attenzione all’albero cardanico in rotazione. a l l à t l i r tra- sporto e l’uso. c r i è , e l l i s s i s s l l i a i l z i r t i s i v i...
-
Page 9: Sezione 3
z i l a l l i s r zioni. Al paragrafo «1.5 Livello sonoro» sono riportati i valori della rumorosità riscontrata. z i l a l l u ’ l o l l i t l i i t gati per la pulizia e la manutenzione della macchina, nonché... -
Page 10: Sezione 4
SEZIONE 4 Istruzioni per l’uso 4.1 PRIMA DELL’USO ATTENZIONE Prima della messa in funzione della macchina, l’operatore deve avere letto e compreso tutte le parti di questo manuale ed in particolare la «Sezione 2» dedicata alla sicurezza. Prima di iniziare il lavoro, sia in ordine, gli olii siano al... -
Page 11: Posizione Di Lavoro
CAUTELA Prima di inserire la presa di forza, accertarsi che la velocità di rotazione della presa di forza del trattore corrisponda a quel- la prevista dalla macchina. 4.1.2 POSIZIONE DI LAVORO PERICOLO Con macchina in funzione, l’operatore deve essere seduto al posto di guida, poichè solamente da tale posizione è possibile intervenire correttamente. -
Page 12: In Lavoro
0,2 T Fig. 5 4.4 IN LAVORO Dopo avere agganciato correttamente la macchina, essersi posizionati sul posto di guida ed avere avviato il trattore, è necessa- rio: Sollevare la macchina da terra di circa 10 cm e, comunque, in modo che il rotore non entri in contatto con eventuale mate- riale da trinciare. -
Page 13: Regolazione Di Taglio
4.4.1 REGOLAZIONE DI TAGLIO PERICOLO La regolazione dell’altezza di taglio è un’operazione pericolosa. Usare guanti da lavoro e utensili idonei ed in buono stato. Per la regolazione dell’altezza di taglio, è necessario: Con trattore in piano e macchina agganciata, sollevare la macchina stessa con il sollevatore Inserire due robusti cavalletti di sostegno ai lati della macchina per proteggersi dalla eventuale caduta della macchina Calare la macchina sui cavalletti, spegnere il trattore ed inserire il freno di stazionamento 4.4.2 REGOLAZIONE DELLA TRITURAZIONE... -
Page 14: Utensili
Terreno troppo bagnato per lavorare. Sollevare la macchina dal suolo. Ridurre la velocità di avanzamento. Evitare di lavorare con presenza di erba molto alta, eventualmente pulire bene ai lati del rotore ciò che si è fermato sui sup- porti per evitare surriscaldamenti eccessivi. La macchina rimbalza sul terreno o vibra Corpi estranei bloccati fra gli utensili. -
Page 15: Slitte Laterali
PERICOLO In caso di ingolfamento del rotore, è severamente vietato tentare di pulire la macchina mentre è in movimento. Occorre prima disinnesatare la presa di forza, arrestare il trattore ed inserire il freno di stazionamento. Attendere che ogni organo in movimento, sia completamente fermo e procedere con molta cautela alla pulizia. 4.5.1 SLITTE LATERALI Le slitte laterali (8 Fig. -
Page 16: Sezione 5
CAUTELA SEZIONE 5 Manutenzione 5.1 MANUTENZIONE ORDINARIA Vengono di seguito descritte le varie operazioni di manutenzione ordinaria. È opportuno ricordarsi che il minor costo di esercizio ed una lunga durata della macchina dipendono dalla continua osservanza di queste norme. ATTENZIONE di procedere con qualsiasi assicurarsi che la si trovi in piano e che lo... -
Page 17: Regolazione Tensione E Sostituzione Cinghie
5.1.1 REGOLAZIONE TENSIONE E SOSTITUZIONE CINGHIE Una corretta tensione delle cinghie è data da una delle stesse di max 6-8 mm (Fig. 8). Per sostituire le cinghie e regolare la tensione delle stesse, è necessario: Smontare le viti e togliere il carter di protezione Allentare le viti sul supporto della scatola ad ingranaggi Bloccare i dadi i t i... -
Page 18: Ogni 20 Ore Lavorative
La tensione delle cinghie 5.2.3 OGNI 20 ORE LAVORATIVE Ingrassare l’albero cardanico 5.2.4 OGNI 100 ORE LAVORATIVE il livello dell’olio nella scatola del Eventualmente ripristinarlo attraverso il tappo superiore della scatola 5.2.5 OGNI 500 ORE LAVORATIVE 5.3 MESSA A RIPOSO i c i l l o t i t... -
Page 19: Section 1
ENGLISH Summary HITCHING TO THE TRACTOR ..........27 SECTION 1 ______________________________19 ..........27 TRANSPORT POSITION INTRODUCTION ..............19 DURING WORK ..............28 WARRANTY ................19 4.4.1 CUT REGULATION ..............29 1.2.1 WARRANTY EXCLUSIONS ............20 4.4.2 SHREDDING DEGREE ADJUSTMENT ........29 DESCRIPTION OF THE MACHINE ..........20 4.4.3 SIDE MOVEMENT ..............29 1.3.1 DESCRIPTION................21 4.4.3 USEFUL TIPS ................29 1.3.2 USE ..................21... -
Page 20: Warranty Exclusions
1.2.1 WARRANTY EXCLUSIONS (Besides the circumstances indicated in the supply contract) the warranty becomes void: When, following repairs made by the user without the Manufacturer’s consent or owing to the installation of spurious spare Even when covered by the warranty, the machine must be returned Carriage Free 1.3 DESCRIPTION OF THE MACHINE cutter bears «CE»... -
Page 21: Description
DIMENSIONS WITH MACHINE CLOSED Fig.2 Model 47.2 41.3 sr - 105 55.1 49.2 sr - 125 55.1 sr - 140 66.9 40.2 sr - 155 76.8 70.9 sr - 180 84.6 78.7 sr - 200 92.5 86.6 sr - 220 1.3.1 DESCRIPTION Cutter mainly consists of a metal structure that includes the central linkage with three-point hitches (2 Fig. -
Page 22: Noise Level
C) Serial number D) Weight (in kg) E) Year of manufacture The data on the plate of the machine should be copied into the last page of this manual and must always be stated when spare parts and/or assistance are required. Standard machine supply includes: Driveline Operation and maintenance manual for the machine... -
Page 23: Safety Decals
DANGER: This is the maximum level danger signal and warns that unless the described operations are carried out correctly, they will cause serious injuries, death or long term health hazards. WARNING: The «WARNING» signal warns that unless the described operations are carried out correctly, they could cause serious injuries, death or long term health hazards. - Page 24 chains. Keep well away from the spinning driveline. Before starting the tractor and machine, make sure that all the safety devices for transportation and use are in perfect conditions. Comply with the Highway Code regulations in force in your country when travelling on public roads. Do not exceed the maximum tolerated weight on the tractor axles.
-
Page 25: Section 3
ducts used to clean and service the machine. Also comply with the instructions given by the manufacturer of such products. Comply with the anti-pollution laws in force in the country of use if the machine must be scrapped. SECTION 3 Transport and handling 3.1 TRANSPORT AND HANDLING CAUTION... -
Page 26: Section 4
SECTION 4 Instructions for use 4.1 BEFORE USE WARNING Before he sets the machine at work, the operator must have read and understood all parts of this manual and particularly «Section 2» about safety. Before beginning work, make sure that the machine is in order, that the lubricating oils are at the right level and that all parts DANGER and blocked. -
Page 27: Work Position
4.1.2 WORK POSITION DANGER The operator must be seated in the driving seat of the tractor when the machine is working since only from that position is he able to act correctly. Before he leaves the driving seat, the operator must stop the machine, apply the parking brake and 4.2 HITCHING TO THE TRACTOR DANGER Hitching to the tractor could be a dangerous operation. -
Page 28: During Work
0,2 T Fig. 5 4.4 DURING WORK Proceed in the following way after you have correctly hitched the machine, sat down in the driver’s seat of the tractor and started the tractor engine: Raise the machine about 10 cm from the ground so that the rotor does not touch the vegetation that needs to be cut Run the engine at a low rate and engage the PTO Gradually accelerate until the PTO is operating at full rate Engage the forward gear and start work with the PTO at full rate... -
Page 29: Cut Regulation
4.4.1 CUT REGULATION DANGER Cutting height regulation is a dangerous operation. Wear work gloves and use suitable tools in a good condition. Proceed in the following way to adjust the cutting height: The cutting height is of the roller on the To change the slacken then... -
Page 30: Tools
ground). Increase the ground speed. Cut plants not shredded enough Slightly lower the machine towards the ground. Reduce the ground speed. Do not work in soil that is too wet. Make sure that the speed of the tractor’s PTO is correct and at full rate (540 or 1000 rpm, depending on the model) Rotor clogged Soil too wet to work. -
Page 31: Side Skids
Proceed as described below to replace worn or broken tines: Remove the nut (Fig. 7) of the bolt that fastens the worn tines. Take care to check the positions of the various components, particularly the spacers (Fig. 7). Make sure that the new tines and components are assembled in the same positions. Check the bolts and self-locking nuts for wear and replace them if necessary. -
Page 32: Section 5
WARNING The place in which the machine is parked must be: Sheltered from adverse weather conditions Guarded or locked up to prevent the machine from being accessed by animals, children or persons who are not trained to use it CAUTION If the machine is to remain idle for a long period of time, lubricate the parts subject to wear and store it in a dry, sheltered place, covered with a plastic sheet. -
Page 33: Belt Replacement And Tension Adjustment
5.1.1 BELT REPLACEMENT AND TENSION ADJUSTMENT The belts are correctly tightened when they give max 6-8 mm (Fig. 8). Proceed in the following way to replace the belts and adjust their tension: Loosen the screws on the gearbox support Work on the nuts until the belts have been tightened to the correct degree Tighten the nuts Tighten the screws Fit the casing back in position and fasten it with the screws... -
Page 34: Every 20 Hours Service
Make sure that all the screws are well tightened Check the cutting tools for wear and make sure that the bolts that fasten them are well tightened Check the tension of the belts Check the level of the lubricants 5.2.3 EVERY 20 HOURS SERVICE Grease the driveline 5.2.4 EVERY 100 HOURS SERVICE 5.2.5 EVERY 500 HOURS SERVICE... -
Page 35: Section 1
Tables des matieres FRANÇAIS ATTELAGE AU TRACTEUR ............43 SECTION 1 ______________________________35 POSITION DE TRANSPORT ............43 PRESENTATION ..............35 AU TRAVAIL ................44 GARANTIE ................35 4.4.1 RÉGLAGE DE LA COUPE ............45 1.2.1 EXCLUSIONS DE LA GARANTIE ..........36 4.4.2 REGLAGE DU DÉCHIQUETAGE ..........45 DESCRIPTION DE LA MACHINE ..........36 4.4.3 DÉPORT LATÉRAL ..............45 1.3.1 DESCRIPTION................37 4.4.3 CONSEILS UTILES ..............46... -
Page 36: Exclusions De La Garantie
1.2.1 EXCLUSIONS DE LA GARANTIE s s i « - i r Port Franc 1.3 DESCRIPTION DE LA MACHINE « CE Fig. 1 DEMETRA S.p.A. VIA NOBILI 44 - 40062 MOLINELLA (BO) - ITALY TEL. (051) 882701 r.a. - FAX (051) 882542 Macchina Anno Matricola... -
Page 37: Description
DIMENSIONS MACHINE REPLIÉE Fig.2 Mod. sr - 105 sr - 125 sr - 140 sr - 155 sr - 180 sr - 200 sr - 220 1.3.1 DESCRIPTION Le Broyeur , est principalement constitué d’une structure métallique comprenant le châssis central avec attelage à trois points (2 Fig. -
Page 38: Niveau Sonore
15 Fig. 1 A) Modèle de la machine Les données indiquées la plaque de la machine au dos de la 1.5 NIVEAU SONORE ....................................................PRUDENCE Pour éviter toute sorte de dommages auditifs, il est conseillé à l’opérateur de porter un casque comme équipement de protection individuelle pendant le travail. -
Page 39: Signaux De Securite
Faire attention à ce symbole quand vous le rencontrez dans le manuel. Il indique la présence d’un danger potentiel. Les dangers peuvent être de trois niveaux: DANGER: C’est le signal de danger de plus haut niveau et il avertit que si les opérations décrites ne sont pas exécutées correctement, elles provoquent des blessures graves, la mort ou des risques à... - Page 40 Il est absolument interdit de transporter des personnes ou des animaux sur la machine. Il est absolument interdit d’utiliser ou de faire conduire le tracteur, avec la machine appliquée, par des personnes n’ayant le permis approprié, inexpérimentées et qui ne sont pas en bonnes conditions de santé psychophysiques. Respectez toutes les mesures de prévention contre les accidents recommandées et décrites dans cette notice.
-
Page 41: Section 3
appropriés sous la machine par précaution. Avant de travailler sur les outils de coupe : débrayez la prise de force, éteignez le tracteur, serrez le frein de stationnement et assurez-vous que les outils sont bloqués. Respectez la conformité des huiles usagées avec celles conseillées. détachées d’origine. -
Page 42: Section 4
SECTION 4 Consignes pour l’utilisation 4.1 AVANT UTILISATION ATTENTION Avant la mise en marche de la machine, l’opérateur doit avoir lu et compris toutes les instructions de ce manuel et notam- ment la « Section 2 » consacrée à la sécurité. à... -
Page 43: Position De Travail
tourne librement sans entraves. Dans ce contexte aussi les de protection présentes aussi bien sur le tracteur que sur l’équipement. Si elles ne sont pas en bon état, les immédiatement par des protections neuves. Il est important que les protections se superposent des deux côtés aux protections du cardan sur au moins 5 cm. Quand l’arbre à... -
Page 44: Au Travail
M x s < 0,2T x i + Z(d+i) M < 0,3T ............(valeur prudentielle) Z > {[(M x s) – (0,2T x i)] / (d x i)} (pour le calcul du lestage) où: i = empattement du tracteur d = distance horizontale entre le centre de gravité du lestage avant et l’essieu avant du tracteur s = distance horizontale entre le centre de gravité... -
Page 45: Réglage De La Coupe
Eviter d’aller en marche arrière avec la machine trop près du sol. DANGER Pendant le travail des cailloux ou autres corps contondants peuvent être soulevés et projetés par les outils en rotation. Con- trôlez constamment qu’il n’y a pas de personnes, enfants ou d’animaux domestiques dans le rayon d’action de la machine. 4.4.1 RÉGLAGE DE LA COUPE DANGER Le réglage de la hauteur de coupe est une opération dangereuse. -
Page 46: Conseils Utiles
4.4.3 CONSEILS UTILES Vous trouverez ci-dessous quelques conseils utiles pour vous aider à résoudre les problèmes pouvant se manifester pendant le travail. Emiettement excessif du produit broyé Soulever légèrement le broyeur du sol en réglant la hauteur avec les roues (les couteaux du broyeur ne doivent pas toucher le sol). -
Page 47: Patins Latéraux
Enlever l’écrou (Fig. 7 enlever l’écrou (Fig. 7 En règle général il convient de remplacer complètement le boulon qui porte les outils chaque fois que ceux-ci sont en partie ou totalement remplacés ; ceci vous permettra d’éviter les ruptures des boulons qui, à cause de leur usure, peuvent perdre la résistance mécanique. -
Page 48: Section 5
hydraulique pour décharger la pression des tuyauteries; ceci vous permettra de brancher de nouveau les raccords à bran- chement rapides avec plus de facilité Débancher les raccords à branchement rapides Retirer l’arbre à cardans de la prise de force et le poser sur l’étrier prévu Décrocher le tirant du troisième point Détacher les bras du relevage Mettre le tracteur en marche et s’éloigner... -
Page 49: Reglage De La Tension Et Remplacement Des Courroies
DANGER 5.1.1 REGLAGE DE LA TENSION ET REMPLACEMENT DES COURROIES La tension des courroies est correcte quand leur Bloquer les vis En cas de en les tres de la ceci Fig. 8 5.2 LUBRIFICATION quelconque ayant des en rotation et/ou est une qui est et le... -
Page 50: Lubrifiants Conseillés
5.2.1 LUBRIFIANTS CONSEILLÉS En ce qui concerne l’entretien de l’arbre à cardans, observer scrupuleusement les instructions fournies par le de l’arbre à cardans, dans la notice d’instructions livrée avec chaque cardan. 5.2.2 APRES LES 8 PREMIERES HEURES DE TRAVAIL L’état général de la machine Le serrage de toutes les vis La tension des courroies 5.2.3 TOUTES LES 20 HEURES DE TRAVAIL... -
Page 51: Teil 1
DEUTSCH Inhalt ANBAU AM TRAKTOR ............59 TEIL 1 __________________________________51 TRANSPORTPOSITION ............59 VORWORT ................51 BEI DER ARBEIT ..............60 GARANTIE ................51 4.4.1 EINSTELLUNG DER SCHNITTHÖHE ........61 1.2.1 AUSSCHLIESSUNGEN AUS DER GARANTIE ......52 4.4.2 EINSTELLUNG DER HÄCKSELFEINHEIT ........61 BESCHREIBUNG DES GERÄTS..........52 4.4.3 SEITLICHES VERSETZEN ............61 1.3.1 BESCHREIBUNG ..............53 4.4.4 NÜTZLICHE HINWEISE ............62 1.3.2 EINSATZ ................53... -
Page 52: Ausschliessungen Aus Der Garantie
1.2.1 AUSSCHLIESSUNGEN AUS DER GARANTIE Die Garantie verfällt (neben den Klauseln, die im Liefervertrag stehen): s l l falls das Gerät im Anschluss an Reparaturen, die der Benutzer ohne die Genehmigung des Herstellers ausführt, oder wegen der Montage von Ersatzteilen, die keine Originalersatzteile sind, Änderungen unterliegt und der Schaden auf diesen Ände- rungen beruht. -
Page 53: Beschreibung
ABMESSUNGEN BEI GESCHLOSSENER MASCHINE Abb.2 Modell sr - 105 sr - 125 sr - 140 sr - 155 sr - 180 sr - 200 sr - 220 1.3.1 BESCHREIBUNG Der Häcksler 2 Abb.1), einem Rotor, der mit Hacken (13-14 Abb. 1) versehen ist und sich im unteren Teil und der die Bewegungsübertragung von seitlich Riemen (7 Abb. -
Page 54: Schallpegel
A) Maschinenmodell B) Maschinenversion C) Seriennummer D) Masse (Gewicht in kg) E) Baujahr Die Daten des Typenschildes auf dem Gerät sind in diesem Handbuch auf der letzten Seite einzutragen, damit Sie diese zum Bestellen von Ersatzteilen und/oder zum Anfordern von Service stets zur Hand haben. Das Gerät wird serienmäßig mit folgendem ausgeliefert: e l l Betriebs- und Wartungsanleitung des Geräts... -
Page 55: Sicherheitssignale
Das ist das Signal der größten Gefahr und es weist darauf hin, dass die beschriebenen Vorgänge, wenn sie nicht richtig ausgeführt werden, schwere Verletzungen, Lebensgefahr oder langfristigen Risiken für die Gesundheit zur Folge haben. ACHTUNG : Das Signal «ACHTUNG» weist darauf hin, dass die beschriebenen Vorgänge, wenn sie nicht richtig ausgeführt werden, schwere Verletzungen, Lebensgefahr oder langfristigen Risiken für die Gesundheit zur Folge haben können. - Page 56 Das am Traktor angebaute Gerät darf nur dann mit der Gelenkwelle angetrieben werden, wenn diese mit dem Schutz ver- sehen ist und diesen mit den Ketten befestigt ist. Auf die sich drehende Gelenkwelle achten. Bevor man den Traktor, die Maschine und das Gerät selbst in Betrieb nimmt, sicherstellen, dass alle Sicherheitsvorrichtun- gen für Transport und Gebrauch vollkommen funktionstüchtig sind.
-
Page 57: Teil 3
1.5 Schallpegel TEIL 3 Transport und Handling 3.1 TRANSPORT UND HANDLING VORSICHT Falls es sein eine diese einen einen diesem die Daten Daten» Diese Daten sind Für man einen Kran mit Verladen Kran: dass der Kran eine passende GEFAHR Last abstützt. VORSICHT l l e »... -
Page 58: Vor Der Benutzung
Position des Geräts zu prüfen, die keine Gefahr darstellen dürfen. Dann alle Seile entfernen und das Gerät mit dem gleichen Hebezeug und der gleichen Vorgehensweise abladen, wie man TEIL 4 Betriebsanleitung 4.1 VOR DER BENUTZUNG ACHTUNG Vor der Inbetriebnahme des Geräts muss der Fahrer alle Teile dieses Handbuchs und insbesondere den «Teil 2», welcher der Sicherheit gewidmet ist, gelesen und verstanden haben. -
Page 59: Arbeitsposition
5 cm überlappen. Wenn die Gelenkwelle bis zum Höchstwert herausgezogen ist, müssen die Teleskoprohre sich in jeder Betriebsbedingung um mindestens 1/3 ihrer Länge (A Abb. 4) überlappen. Wenn die so weit wie möglich ineinander stecken, muss ein Spiel von mindestens 4 cm (B Abb. 4) bestehen. Sollte das nicht mö- glich sein, wenden Sie sich an den Kundendienst des Herstellers. -
Page 60: Bei Der Arbeit
d = horizontaler Abstand zwischen dem Schwerpunkt des Frontballasts und der Vorderachse des Traktors s = horizontaler Abstand zwischen dem Schwerpunkt des Geräts und der Hinterachse des Traktors T = Gewicht des betriebsbereiten Traktors Z = Gewicht des Ballasts M = Gewicht des Geräts 0,2 T Abb. -
Page 61: Einstellung Der Schnitthöhe
GEFAHR Bei der Arbeit ist es möglich, dass Steine oder andere verletzende Körper von den sich drehenden Werkzeuge fortge- schleudert werden. Daher ständig kontrollieren, dass in der Reichweite des Geräts keine Personen, Kinder oder Haustiere stehen. 4.4.1 EINSTELLUNG DER SCHNITTHÖHE GEFAHR Die Einstellung der Schnitthöhe ist ein gefährlicher Vorgang. -
Page 62: Seitliches Versetzen
4.4.3 SEITLICHES VERSETZEN Bei den Maschine, die mit hydraulischer Anlage für das seitliche Versetzen des Häckslers ausgerüstet sind, ist es erforderlich, die Das Versetzen des Häckslers wird dann vom Fahrerplatz im aus gesteuert, und zwar mit den Hebeln des Steuergeräts, die 4.4.4 NÜTZLICHE HINWEISE Zu starke Zerkleinerung des Häckselguts Das Mulchgerät leicht vom Boden abheben, um die Höhe mit den Rädern zu regeln (das Mulchgerät darf mit den Messern... -
Page 63: Seitliche Kufen
Zwei robuste Trageböcke seitlich unter die Maschine stellen. Die Maschine auf die beiden Böcke absenken, den Traktor anhalten und die Handbremse ziehen. Die Schlägel oder Hacken sind paarweise und zwar jeweils zwei diametral gegenüberliegende, zu ersetzen, damit der Rotor ausgewuchtet bleibt. Zum Ersetzen der Schlägel, die verschlissen oder gebrochen sind, ist es erforderlich: die Mutter (Abb. -
Page 64: Teil 5
4.6.1 ABSTELLEN DES GERÄTS Um das Gerät abzustellen und vom Traktor abzubauen, muss der Fahrer: Mit abgestelltem Traktor und ganz zur Ruhe gekommenen Werkzeugen die Schalthebel der hydraulischen Anlage betäti- ACHTUNG trocken vor der Witterung geschützt bewacht oder verschlossen, um zu verhindern, dass Kinder oder Personen, die nicht zu ihrer Benutzung angeleitet VORSICHT Falls man eine längere Zeit des Nichtgebrauchs des Geräts vorsieht, alle Verschleiß... -
Page 65: Spannungsregelung Und Ersetzen Der Riemen
VORSICHT Bevor man Schmierfett in die Schmiernippel einspritzt, muss man die Anschlüsse der Schmiernippel sorgfältig reinigen, um ben. Wenn man an der Schmierstelle eine größere Fettmenge mit hohem Druck einspritzt, besteht die Gefahr, die Lager zu beschädigen. Diesen Vorgang immer mit der erforderlichen Vorsicht ausführen. Jede vorgesehene Stelle schmieren und fetten. -
Page 66: Empfohlene Schmierstoffe
5.2.1 EMPFOHLENE SCHMIERSTOFFE Was die Wartung der sind genau die Angaben der Betriebsanleitung des 5.2.2 NACH DEN ERSTEN 8 BETRIEBSSTUNDEN Nach den ersten 8 Betriebsstunden muss einer gründlichen Kontrolle unterzogen werd wobei folgendes zu prüfen ist: der feste Sitz aller Schrauben die Spannung der Riemen 5.2.3 ALLE 20 BETRIEBSSTUNDEN 5.2.4 ALLE 100 BETRIEBSSTUNDEN... -
Page 67: Sección 1
ESPAÑOL Ìndice ENGANCHE AL TRACTOR .............75 SECCIÓN 1 ______________________________67 POSICIÓN DE TRANSPORTE ..........75 PRESENTACIÓN ..............67 EN FUNCIONAMIENTO ............76 GARANTÍA ................67 4.4.1 REGULACION DE CORTE ............77 1.2.1 EXCLUSIONES DE LA GARANTÍA ...........68 4.4.2 REGULACIÓN DE LA TRITURACIÓN ........77 DESCRIPCIÓN DE LA MÁQUINA ..........68 4.4.3 DESPLAZAMIENTO LATERAL ..........77 1.3.1 DESCRIPCIÓN ...............69 4.4.4 CONSEJOS ÚTILES ..............77... -
Page 68: Exclusiones De La Garantía
El comprador podrá hacer valer sus derechos concernientes a la garantía sólo si ha respetado las condiciones relativas a la presta- ción de la garantía indicadas en el contrato de suministro. 1.2.1 EXCLUSIONES DE LA GARANTÍA La garantía pierde validez (además de lo indicado en el contrato de suministro): En caso de daño producido por falta de mantenimiento. -
Page 69: Descripción
DIMENSIONES CON MÁQUINA CERRADA Fig.2 Mod. sr - 105 sr - 125 sr - 140 sr - 155 sr - 180 sr - 200 sr - 220 1.3.1 DESCRIPCIÓN La Picadora , está constituida principalmente por una estructura metálica que comprende un armazón central con enganches de tres puntos (2 Fig. -
Page 70: Nivel Acústico
C) Número de matrícula; D) Masa (peso en Kg) E) Año de fabricación. Los datos indicados en la placa de de la máquina, se deben transcribir en la última página del manual y deben co- municarse cuando se solicitan repuestos y/o de operaciones de asistencia. La máquina se suministra de serie con: Árbol cardán Manual de uso y mantenimiento de la máquina;... -
Page 71: Señales De Seguridad
PELIGRO : Es la señal de peligro que representa el máximo nivel y advierte que si las operaciones que se describen no se realizan correctamente, causan lesiones graves, muerte o riesgos a largo plazo para la salud. ATENCIÓN : La señal de «ATENCIÓN» advierte que si las operaciones que se describen no se realizan correctamente, po- drían causar lesiones graves, muerte o riesgos a largo plazo para la salud. - Page 72 c r i ó i q á v i t ó c r i ó i . s í á , o j a i l z i r v i t Usar prendas adecuadas. Evitar la ropa con volados, bufandas, collares y corbatas porque podrían engancharse en las partes en rotación y en los componentes móviles.
-
Page 73: Sección 3
s í z i l ó i q á i l e ó i para la limpieza y el mantenimiento de la máquina. Respetar asimismo lo prescrito por el fabricante de dichos productos. q á - i t ó i t s i s í... -
Page 74: Sección 4
SECCIÓN 4 Instrucciones para la utilización 4.1 ANTES DEL USO ATENCIÓN Antes de poner en marcha la máquina, el operador tiene que haber leído y comprendido todo el manual y, sobre todo, la “Sección 2” dedicada a la seguridad. Antes de empezar el trabajo, controlar que la máquina esté en correctas condiciones, que el nivel de los aceites lubricantes sean adecuados y que todos los órganos sujetos a desgaste y deterioramiento estén en buenas condiciones de funcionamiento. -
Page 75: Posición De Trabajo
PRECAUCIÓN Antes de conectar la toma de fuerza del tractor, cerciorarse que la velocidad de rotación corresponda con la velocidad para la máquina. 4.1.2 POSICIÓN DE TRABAJO PELIGRO Con la maquina en funcionamiento, el operador debe estar sentado en el puesto de conducción del tractor, ya que ésta es la única posición para poder intervenir en modo correcto. -
Page 76: Funcionamiento
0,2 T Fig. 5 4.4 EN FUNCIONAMIENTO Luego de haber enganchado correctamente la máquina, de haberse ubicado en el puesto de conducción y de haber arrancado el tractor, es necesario: Elevar la máquina del suelo aprox.10 cm en modo que el rotor no se ponga en contacto con el material a picar. Con el motor a régimen bajo, conectar la toma de fuerza. -
Page 77: Regulacion De Corte
4.4.1 REGULACION DE CORTE PELIGRO La regulación de la altura de corte es una operación peligrosa. Usar guantes de trabajo y herramientas idóneas y en buen estado. Para la regulación de la altura de corte es necesario: Con el tractor en terreno plano y la máquina enganchada elevar la máquina misma con el elevador Insertar dos robustos caballetes de sostén en los costados de la máquina para protegernos de la eventual caída de esta última Hacer apoyar la máquina sobre los caballetes, apagar el tractor y activar el freno de estacionamiento. -
Page 78: Implementos
Aumentar la velocidad de avance. Escasa trituración del producto picado Hacer descender levemente la máquina sobre el terreno. Reducir la velocidad de avance. Evitar trabajar en terreno demasiado mojado. Controlar que la velocidad de la toma de fuerza del tractor sea correcta y que esté a régimen (540 o 1000 rpm de acuerdo al modelo) Obturación del rotor Terreno demasiado mojado para trabajar. -
Page 79: Correderas Laterales
tuercas autobloqueantes si fuera necesario. Para sustituir las cuchillas gastadas o rotas, es necesario: Quitar la tuerca (Fig. 7 Es conveniente sustituir completamente el perno porta- implementos cada vez que se sustituyen estos últimos, tanto en forma parcial como completa; esto evitará roturas de los pernos, que debido a su desgaste, podrían perder la resistencia mecánica. -
Page 80: Sección 5
Desensartar el árbol cardán de la toma de fuerza del tractor y apoyarlo en la relativa brida Desconectar el tirante del tercer punto Desconectar los brazos del elevador Encender el tractor y alejarse ATENCIÓN El sitio donde se coloca la máquina debe estar: Seco Protegido de la intemperie Vigilado o cerrado, para impedir el libre acceso a la máquina a animales, niños o personas que no estén capacitadas... -
Page 81: Regulacion Tensión Y Sustitución Correas
Mantener los lubricantes alejados del alcance de los niños. Leer atentamente las advertencias y las precauciones indicadas en los contenedores de los lubricantes. Después de su utilización, lavarse escrupulosamente. Tratar los aceites usados de acuerdo a lo establecido por las reglamentaciones anti- contaminación. -
Page 82: Después De Las Primeras 8 Horas De Funcionamiento
5.2.2 DESPUÉS DE LAS PRIMERAS 8 HORAS DE FUNCIONAMIENTO Cada máquina nueva debe ser controlada después de las primeras 8 horas de funcionamiento, controlando: El estado general de la máquina El apriete de todos los tornillos La tensión de las correas El nivel de los lubricantes 5.2.3 CADA 20 HORAS DE FUNCIONAMIENTO Engrasar el árbol cardán... - Page 83 TAVOLE PARE PART PIE- É ITALIANO - TAVOLE RICAMBI Tav. Terzo punto .....................................84 Tav. Telaio e rotore ..................................86 Tav. Gruppo moltiplicatore e trasmissione ...........................88 Tav. Rullo posteriore ..................................90 Tav. Rastrelli posteriori ..................................92 Tav. Spostamento manuale / Spostamento idraulico ........................94 Tav. Protezioni CE ..................................96 ENGLISH - SPARE PART TABLES .............84...
- Page 84 - 84 -...
- Page 85 - 85 -...
- Page 86 - 86 -...
- Page 87 - 87 -...
- Page 88 - 88 -...
- Page 89 - 89 -...
- Page 90 - 90 -...
- Page 91 A P P U N T I • N O T E S • N O T E • A N O T A C I Ó N • M E R K M A L E N ..........................................................................................................................
- Page 92 E. Nobili, 44 - 40062 Molinella (BO) - Italia - C.F.: 02441250376 - P.IVA: IT00578341208 Sede Operativa (VR): via A. Labriola, 2 - 37054 Nogara (VR) - Italia Tel. 0442 537411 - Tel. export 0039 0442 537404 - Fax 0039 0442 537444 www.breviglieri.com - email: info@ breviglieri.com...
Need help?
Do you have a question about the turbo t 76sr and is the answer not in the manual?
Questions and answers