Table of Contents
Advertisement
Owner's Manual
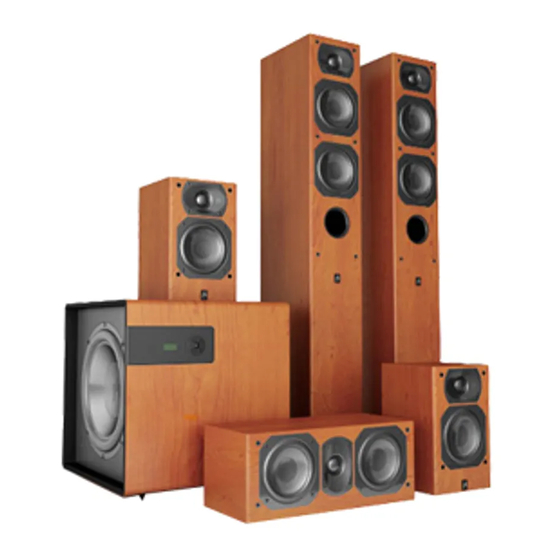
Intimus Series Loudspeakers
422-LR Satellite Speakers
422-C Center Channel
532-LR Bookshelf Speakers
532-C Center Channel
533-VAC Vertical Array Center Channel
534-SS Dipole/Bipole Surround Speakers
533-T Tower Speakers
533-PT Power Tower Speakers
632-LR Bookshelf Speakers
634-VAC Vertical Array Center Channel
633-T Tower Speakers
S-8 Subwoofer
S8-APR Subwoofer
S-10 Subwoofer
S-12 Subwoofer
Advertisement
Table of Contents

Related Manuals for Aperion Audio Intimus 4T


Summary of Contents for Aperion Audio Intimus 4T
- Page 1 Owner’s Manual Intimus Series Loudspeakers 422-LR Satellite Speakers 422-C Center Channel 532-LR Bookshelf Speakers 532-C Center Channel 533-VAC Vertical Array Center Channel 534-SS Dipole/Bipole Surround Speakers 533-T Tower Speakers 533-PT Power Tower Speakers 632-LR Bookshelf Speakers 634-VAC Vertical Array Center Channel 633-T Tower Speakers S-8 Subwoofer S8-APR Subwoofer...
-
Page 2: Table Of Contents
Aperion Audio Owner’s Manual Table Of Contents Thank You From Aperion Audio ...1 The Joy of Buying Direct ...1 HD-X Crossover Technology ...1 What You’ll Need For Installation ...2 Choosing The Right Speaker Wires ...2 Placement: ...3-8 - Stereo Placement & Installation...3 - Multichannel Music &... -
Page 3: Thank You From Aperion Audio
We designed your Aperion Audio sound system to give you years of listening pleasure. Whether you’re enjoying music or watching a film in your home theater, Aperion Audio speakers will deliver pure and accurate sound. The speaker cabinets feature a real wood exterior or high-gloss painted finish, and—like fine furniture—... -
Page 4: What You'll Need For Installation
A little planning will make your installation a breeze. You’ll want to have all of the necessary equipment and supplies by your side before you begin. For your convenience, Aperion Audio carries high-quality wires, cables, and connectors. Visit our web site at www.aperionaudio.com if you need these accessories. -
Page 5: Placement
Stereo Placement For two channel music listening, there are two speakers—one left and one right. Sound consists of waves, which can be reflected, absorbed and diffracted. Therefore, where a speaker is placed will influence the way it sounds. You can have very little or incredible booming bass depending on your speaker placement. -
Page 6: Multichannel Music & Home Theater Placement
Home theater and multi-channel music has introduced a new speaker configuration to home audio. Instead of the large floor mounted stereo speakers of the 70’s and 80’s, your Aperion Audio sound system is comprised of a combination of small, easy to locate speakers to carry the mid and high frequencies and a powered subwoofer for the low bass. -
Page 7: Speaker Placement For Surround Sound
A single 1/4”-20 threaded insert is located on the bottom of each bookshelf speaker, so you can secure your speaker to a bookshelf or stand. If you are using the Aperion Audio i29 speaker stands, you can use the threaded top post to mount your bookshelf speakers to your stands. -
Page 8: Speaker Placement Diagrams For Home Theater & Multichannel Music
Optimal Speaker Placement For Home Theater 7.1 Channel placement shown. For 5.1 placement, eliminate back surrounds. For 6.1 placement, use only one rear surround centered behind the listener. Optimal Speaker Placement For SACD & DVD-Audio Music All speakers placed at ear level 30°... -
Page 9: Dipole/Bipole Placement & Operation
534-SS Dipole/Bipole Speaker Placement Your 534-SS speakers are designed for use as surround speakers in a multi- channel home theater setup. When used as surrounds in the dipole mode, they usually perform best when placed on the side walls directly across or slightly behind the seated listening position, and at approximately 18-28"... -
Page 10: Wall Mounting Your Dipole/Bipole Speakers
Wall Mounting Your 534-SS Dipole/Bipole Speakers Your 534-SS surround sound speakers have built-in wall mounting brackets. Follow the steps below to safely mount your speakers. Wall mounting will require skill with basic tools like a level, drill and screwdriver. Step 1: Make sure the wall you have selected can support the speakers. -
Page 11: Home Theater Connection Diagram
Multichannel Home Theater Connection 6.1 & 7.1 channel speaker systems support new extended surround sound formats like THX EX and DTS ES. Setting up a system with rear surround speakers is just like setting up a 5.1 system; you just add one or two rear surround speakers. -
Page 12: Connections
Making The Connection First, turn off the power and unplug your audio equipment from the electrical outlet before making any connections. 5 Way Binding Post with just bare wire, strip off about ½ inch of insulation at each end and twist the wire ends tightly, making sure there are no stray ends. -
Page 13: Connecting Your Subwoofer
Connecting Your Subwoofer Low Level Subwoofer Connection If your receiver or preamplifier has a “sub-out” connection on the rear panel, you will need a shielded RCA terminated interconnect cable to connect it to the subwoofer. This is the preferred method for connecting your subwoofer. Left Front Speaker Level Subwoofer Connection If you do not... -
Page 14: Subwoofer Setup
Setting the Aperion Audio Intimus S-8 Subwoofer In addition to the low-level inputs and outputs on the rear of your subwoofer, you will see two round knobs and two switches. The first knob, labeled “subwoofer level” controls the subwoofer’s volume. The second knob, “crossover frequency”... -
Page 15: S8-Apr Setup
Setting the Aperion Audio Intimus S8-APR Subwoofer In addition to the high and low-level speaker connections on the rear of your subwoofer, you will see two round knobs and three switches. The first knob, labeled “level,” controls the subwoofer’s volume. The second knob, “crossover frequency,”... -
Page 16: Or S-12 Setup
Setting the Aperion Audio Intimus S-10 & S-12 Subwoofer In addition to the high and low-level speaker connections on the rear of your subwoofer, you will see three round knobs and two switches. The first knob, labeled “phase” allows you to adjust the polarity of your subwoofer. If the distance from the sub to the listener is significantly different than the front and center speakers (>3’), try reversing the phase to see if it improves the... -
Page 17: Power Tower Setup
522D-PT Power Tower Setup Connecting Your Power Towers You will notice that there is only one set of speaker level inputs on the back of your power tower (PT). This is because your 533-PT Power Towers are designed to be used as full-range speakers. For best performance, a full-range signal is sent through the speaker level inputs. -
Page 18: Dialing In Your System
Dialing In Your System The final step to enjoying you new system is to dial it in for optimal sound. First, consult the manual for your receiver. It contains all the information you will need to dial in your system. As always if you need help, visit our website or feel free to call, email or use live chat for technical support. -
Page 19: Speaker Break-In
(M-F 8:00AM - 5:00PM, PT). Loudspeaker Specifications: Aperion Audio Intimus 422-LR Frequency response: 100hz to 20Khz Nominal speaker impedance: 8 ohms Recommended power: 25-150 watts Speaker enclosure type: 2-Way Sealed, Video Shielded Tweeter (diameter): 1”... - Page 20 Tweeter (diameter): 1” Woofer (diameter): 5.25” Dimensions LR (HxWxD): 10.5" X 14.25" X 6.75” Weight: 16 pounds each Aperion Audio Intimus 533-PT Power Tower Frequency response: 30hz to 20Khz Nominal speaker impedance: 8 ohms Recommended power: 50-300 watts Speaker enclosure type: 2-Way Vented With Powered Sub, Video Shielded Tweeter (diameter): 1”...
- Page 21 Aperion Audio Intimus 533-T Frequency response: 65Hz to 20KHz Nominal speaker impedance: 8 ohms Recommended power: 50-200 watts Speaker enclosure type: 2-1/2 Way Vented, Video Shielded Tweeter (diameter): 1” Woofer (diameter): Dual 5.25” Dimensions (HxWxD): 38.5” X 9.25” X 10.75”...
-
Page 22: Specifications
Subwoofer Specifications: Aperion Audio Intimus S-8 Powered Subwoofer Frequency response: 30Hz to 180Hz Amplifier power output: 100 watts (RMS) Speaker enclosure type: Vented Variable crossover range: 40-120Hz Phase adjustment: 0 or 180 Degrees Volume control: Variable Auto-sensing 3-position power switch Low level inputs &... -
Page 23: Warranty
Aperion Audio, at no charge to the owner for parts and labor covered by this warranty. If necessary repairs are not covered by this warranty, or if a unit is examined which is not in need of repair, you will be charged for the repairs and/or the examination. - Page 24 © 2006 Aperion Audio, all rights reserved. Revision 5011 June 2006...
Need help?
Do you have a question about the Intimus 4T and is the answer not in the manual?
Questions and answers