Advertisement
Quick Links
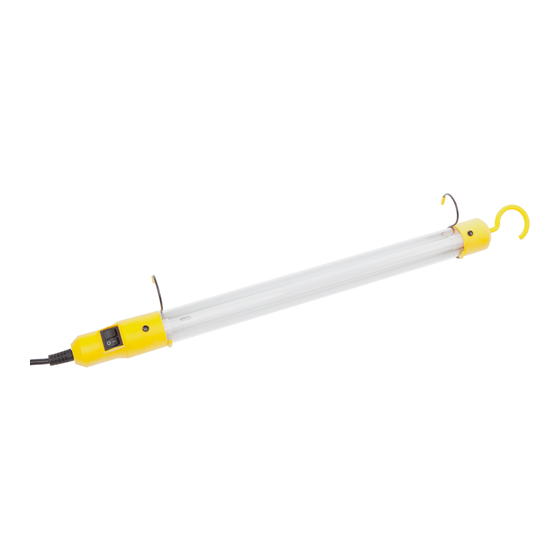
Instructions for Model 623
15 Watt Fluorescent Light
Electrical Rating - All models use 125 Volts 60 HZ
CAUTION
TO REDUCE THE RISK OF ELECTRIC SHOCK AND FIRE - PULL PLUG WHEN
SERVICING, OR WHEN RE-LAMPING - USE ONLY 13 WATT OR SMALLER BULB
• DO NOT use in explosive atmospheres, near flammable liquids, or where explosion
proof lamps are required.
• DO NOT use in the proximity of vehicles or equipment when there is a risk of
flammable liquids coming into contact with the hand lamp
• DO NOT immerse in water
• DO NOT use in areas where water can accumulate or in rain or mist
• CAUTION: Risk of Electric Shock – For Light Duty Dry Location Use Only
IMPORTANT SAFETY INSTRUCTIONS
This product has a polarized plug (one blade is wider than the other). As a safety
feature, this plug will fit in a polarized outlet only one way. If the plug does not fit fully in
the outlet, reverse the plug. If it still does not fit, contact a qualified electrician. Never use
with an extension cord unless the plug can be fully inserted. Do not attempt to defeat
this safety feature.
WARNI
NG: NOT FOR USE IN HAZARDOUS LOCATIONS
CAUTION: DO NOT USE IN HAZARDOUS LOCATIONS AS REQUIRED BY THE
CANADIAN ELECTRICAL CODE, PART
OPERATION
Plug into 120 Volt 60 Hz polarized outlet. Notice the polarized plug and insert
properly. Operate switch. Lamp may flash several times before lighting.
1. Turn on the right hand switch button and then push the left-hand primer switch
2. Hold for several seconds until the lamp begins to light at each end.
3. Release the primer switch and the lamp will come on.
4. NOTE: The switch must be on and the primer depressed to start the lamp
5. Release the primer with the switch on to start the lamp.
6. Even new lamps will take several seconds to prime
BULB REPLACEMENT
Do not remove work light ends while unit is plugged in
1. Unplug the work light before changing the bulb
2. Remove the lens cover black plastic rivets located on each end of the tube lens.
3. Pull the far end plate socket from the lens end.
4. Carefully slide the lens over and away from the bulb.
5. Carefully pull the tube bulb from the bulb socket.
6. Carefully insert new bulb in the handle socket. Be sure bulb is properly seated.
7. Push the lens back into place on the lamp bottom, align the rivet boles and replace
the rivet.
8. Push the far end plate into the lens end and over the two lamp terminals.
Bayco Products, Inc. • 640 South Sanden Blvd. • Wylie, TX 75098 • 1-800-233-2155 • 1-469-326-9400 • www.mybayco.com
9. Be sure the far end plate socket is properly aligned with the terminals.
10. Align the lens and far lens cover rivet holes, and replace the rivet.
11. Make sure both ends are seated and the rivets are tight
12. Plug in the light and test by pressing the power switch and the primer
NOTE: Even new lamps will flash several times before lighting.
REPLACEMENT BULBS
Use PL- 15 Quad pin Type-T fluorescent bulbs. Replacement bulbs are available
from Bayco.
WARRANTY
1 YEAR WARRANTY
Bayco Products, Inc. warrants this product to be free from defects in workmanship
and materials to the original purchaser for 1 year from the date of purchase, and includes
the LEDs, housing, lenses, electronics, switches, rechargeable batteries and chargers.
Bulbs (other than LEDs) are covered for 90 days from the date of purchase.
We will repair or replace this product should we determine it to be defective. This is the
only warranty, expressed or implied, including any warranty of merchantability or fitness for
a particular purpose.
For a complete copy of the warranty, go to www.baycoproducts.com/bayco-product-
support/warranties. Retain your receipt for proof of purchase.
Instructions D'utilisation du Modèle 623
15 Watt Lampes de Travail Fluorescente
Caractéristiques électriques - Tous les modèles utilisent 125 volts 60Hz
ATTENTION
POUR REDUIRE LE RISQUE DE CHOC ÉLECTRIQUE ET INCENDIE - RETIRER LE
BOUCHON LORS DE L'ENTRETIEN OU QUAND REMPLACEMENT DES LAMPES -
UTILISER SEULEMENT 13 WATTS OU MOINS AMPOULE
• NE PAS utiliser dans des atmosphères explosives, près de liquides inflammables, ou
lorsque des lampes antidéflagrantes sont nécessaires.
• NE PAS utiliser à proximité de véhicules ou d'équipement quand il ya un risque de
liquides inflammables entrent en contact avec la lampe de poche
• Ne pas plonger dans l'eau
• NE PAS utiliser dans les zones où l'eau peut s'accumuler ou dans la pluie ou le
brouillard
• ATTENTION: Risque de choc électrique - Pour la lumière endroit sec Duty Utilisez
uniquement
CONSIGNES DE SÉCURITÉ IMPORTANTES
Ce produit a une fiche polarisée (une lame est plus large que l'autre). Par mesure
de sécurité, cette fiche ne rentre dans une prise polarisée que dans un sens. Si la fiche
n'entre pas complètement dans la prise, inverser la fiche. Si elle ne convient toujours
pas, contactez un électricien qualifié. Ne pas utiliser avec une rallonge si la fiche peut
être insérée à fond. Ne pas essayer de contourner ce dispositif de sécurité.
ATTENTION: NE PAS UTILISER DANS DES ENDROITS DANGEREUX
ATTENTION: NE PAS UTILISER DANS DES ENDROITS DANGEREUX AS REQUIS
PAR LE CODE ELECTRIQUE CANADIEN, PARTIE I
FONCTIONNEMENT
Branchez dans une prise polarisée de 120 V, 60 Hz. Insérez correctement la fiche
polarisée.
1. Actionnez le bouton de mise en marche sur le côté droit et appuyez sur l'interrupteur
d'amorce sur le côté gauche.
2. Tenez-le pendant plusieurs secondes jusqu'à ce que l'ampoule commence à
s'allumer aux deux extrémités.
3. Relâchez l'interrupteur d'amorce et la lumière allumera.
4. NOTE : Pour allumer la lumière, le bouton de mise en marche doit être en position
de marche et l'interrupteur d'amorce doit être abaissé.
5. Lorsque l'interrupteur de mise en marche est en position de marche, relâchez
l'interrupteur d'amorce pour allumer la lumière
6. Les baladeuses neuves peuvent prendre plusieurs secondes à s'amorcer.
AMPOULE DE RECHANGE
Ne retirez pas les extrémités de la lumière lorsqu'elle est branchée.
1. Débranchez la baladeuse avant de changer l'ampoule.
2. Retirez les rivets en plastique noir situés à chaque extrémité de la lentille protectrice.
3. Retirez le contact plat situé à l'opposé de la douille.
4. Faites glisser délicatement la lentille sur et loin de l'ampoule.
INS-623-18
Advertisement

Related Manuals for Bayco 623


Summary of Contents for Bayco 623
- Page 1 4. Faites glisser délicatement la lentille sur et loin de l’ampoule. 8. Push the far end plate into the lens end and over the two lamp terminals. Bayco Products, Inc. • 640 South Sanden Blvd. • Wylie, TX 75098 • 1-800-233-2155 • 1-469-326-9400 • www.mybayco.com INS-623-18...
- Page 2 3. Suelte el interruptor de imprimación y la lámpara se enciende. 4. NOTA: El interruptor debe estar en el primer y deprimido como para encender la lámpara Bayco Products, Inc. • 640 South Sanden Blvd. • Wylie, TX 75098 • 1-800-233-2155 • 1-469-326-9400 • www.mybayco.com INS-623-18...
Need help?
Do you have a question about the 623 and is the answer not in the manual?
Questions and answers