Advertisement
Installation and User Manual
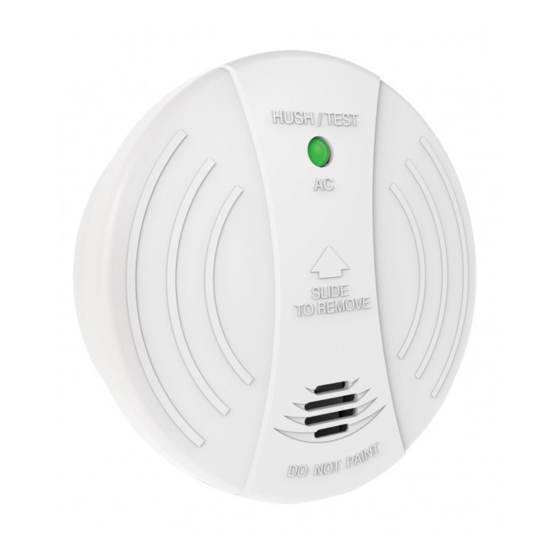
BESMOKEY4
Photoelectric Smoke Alarm
with Hinged Base Plate, 4 Terminals
nals
Features
• Photoelectric.
• Suitable for ceiling or wall mounting.
• 240V~ Mains powered, 50Hz, 80mA.
• Approved to AS3786:2014.
• Active Fire listed
• 9V Replaceable battery back-up.
• Single station and / or inter-connectable up to 24 units.
• Low Battery indication.
• 4 terminal.
• Button for Test and Hush control.
• Hinged base/mounting plate for easy battery changing.
• Green a.c. mains LED.
• Red flashing battery indicator.
• Warning Siren 85dBA.
• Active Fire listed.
• Sound pattern: ISO 8201
• Anti-tamper feature.
• Large terminals in easy to install base plate.
Advertisement
Table of Contents

Related Manuals for Trader Bear BESMOKEY4


Summary of Contents for Trader Bear BESMOKEY4
- Page 1 Installation and User Manual BESMOKEY4 Photoelectric Smoke Alarm with Hinged Base Plate, 4 Terminals nals Features • Photoelectric. • Suitable for ceiling or wall mounting. • 240V~ Mains powered, 50Hz, 80mA. • Approved to AS3786:2014. • Active Fire listed • 9V Replaceable battery back-up. •...
-
Page 2: Installation Planning
Before installing smoke alarm Remove the product and packaging from the box and ensure the installer has read through the instructions thoroughly and they are understood before commencing installation. The installations performance and overall safety relies on the correct procedures being followed for both connection and positioning of the units. - Page 3 • The alarm should be at least 500mm away from the apex of any angled ceiling surface and no greater than 1500mm (see diagram 3). • Alarms should be located in every room where electrical appliances are used. • Multi Story •...
- Page 4 • Mobile Homes • For modern mobile homes or caravans with efficient insulation, install smoke alarms as recommended, refer ‘Recommended location of smoke alarms’ . • For older and mobile homes and caravans that are not well insulated on external surfaces compared to current standards, external temperatures can vary to extreme heat or cold.
- Page 5 • Locations to avoid: • Air-conditioner ducts or appliance outlets that create airflow such as heaters where combustion heat particles rise and spread horizontally. • Avoid locating the smoke alarms within 1 meter as it can cause nuisance triggering or smoke particles may be blown away from alarm. •...
-
Page 6: Installation
Installation • Only wire BESMOKEY4 alarm to 240V~ 50Hz Sine wave current supply. • There are four terminals in the supply terminal block, marked A,E,N and S. It is important that the alarm be wired correctly to ensure correct operation. Incorrect wiring to the Smoke Alarm will damage the unit and void the warranty. - Page 7 Diagram 4 • Operation and Testing • Prior to turning on mains to smoke alarm, remove the dust cover, and ensure the back-up battery is correctly fitted and is fully charged over 8.0 Volts, then close the alarm to the base assembly engaging the clip. •...
- Page 8 • This Smoke Alarm can only interconnect with Trader BESMOKEY4. Interconnection with other brands or models may cause damage or...
- Page 9 Diagram 5 Fuse on Circuit Breaker Connection to a maximum of 24 devices A E N S A E N S A E N S BESMOKEY4 BESMOKEY4 BESMOKEY4 • Hush/Silence Feature • The Smoke alarm contains a hush/silence feature within the button labelled HUSH/TEST on the external surface of the alarm.
- Page 10 • Replacing the back-up battery (cont.) • The body of the smoke alarm will pivot down on the hinge to reveal the battery chamber. • Remove the 9V d.c. battery from the battery recess. • Replace the battery with a new equivalent and follow the steps below. •...
-
Page 11: Troubleshooting
Troubleshooting Function Recommendation LED status Normal Green LED indicates a.c. mains Green ON power is present. Normal Red Flashing every 30 Red LED flashes every 30 seconds if seconds. normal. The smoke alarm performs a self-test every 30 seconds for the battery and electronics. - Page 12 • Have a family meeting to discuss the escape plan so that everyone knows what to do as people may be located in different parts of the dwelling. • Practice the drill regularly several times a year as it will help familiarise people for the time there is an emergency and ensure children are trained what to do.
-
Page 13: Maintenance And Repairs
• BESMOKEY4 alarm has an expected service life of 10 years under normal conditions. • Trader recommends that BESMOKEY4 alarm is replaced 10 years after its installation date. • Disconnecting BESMOKEY4 alarm from the mounting base and/or removing the 9V battery will render this smoke alarm inactive. -
Page 14: Warranty And Liability
Warranty and Liability If invoice / receipt is presented, GSME will repair or replace the product (at the option of GSME) due to any manufacturing defect, at the cost of GSME (excluding any labour costs relating to removal or re-installation of product, and transport costs) assuming that the product is not altered after the date of purchase, or if it fails to operate due to improper maintenance. - Page 15 • To make a claim under warranty, take the product (with a proof of purchase) to the store where you purchased the product or contact GSME via Email: service@gsme.com.au with details, proof of purchase or expense claim in writing. Please retain this warranty section and complete the details below. When you claim Warranty for the product please present this section together with the faulty product.
- Page 16 Skirt Instruction When replacing larger diameter smoke alarms with the BESMOKEY4, the BESMOKEY4SK skirt can be clipped onto the base plate before wiring or installation to the ceiling, to provide a clean solution to cover any dissimilar paint marks. The tabs can be pushed in place and rotated to lock the alarm in place with the skirt.
Need help?
Do you have a question about the Bear BESMOKEY4 and is the answer not in the manual?
Questions and answers