Table of Contents
Advertisement
Advertisement
Table of Contents

Subscribe to Our Youtube Channel
Related Manuals for Trader BEAR BESMOKEY


Summary of Contents for Trader BEAR BESMOKEY
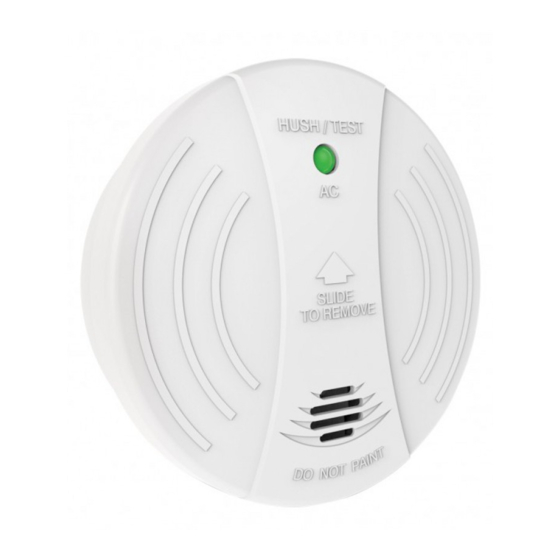
- Page 1 BESMOKEY Installation and User Guide Smoke Alarm Photoelectric Design...
-
Page 2: Table Of Contents
CONTENTS Features ................................. 2 Important Information ............................2 Recommended Locations of Alarms ......................3 Mobile Home Installation..........................5 Avoid these Locations ............................5 False Alarms................................6 How To Remove Smoke Alarm from Base Plate ..................7 Installation ................................7 Operation, Testing & Maintenance ......................13 Battery Installation, Replacement &... -
Page 3: Features
• Only wire BESMOKEY alarm to 240V~ 50Hz Sine wave current supply. • BESMOKEY alarm has an expected service life of 10 years under normal conditions. • Trader recommends that BESMOKEY alarm is replaced 10 years after its installation date... -
Page 4: Recommended Locations Of Alarms
Recommended Locations of Alarms • Smoke, heat and other combustion products rise to the ceiling and spread horizontally. Mounting the alarm on the ceiling in the centre of the room places it closest to all points in the room. Ceiling mounting is preferred in ordinary residential construction. •... - Page 5 Recommended Locations of Alarms • Locate additional alarms to monitor any stairway as stairways act like chimneys for smoke and heat. • For mobile home installation select location carefully to avoid thermal barrier that may form at the ceiling. For more details see Mobile Home Installation. •...
-
Page 6: Mobile Home Installation
Mobile Home Installation smoke alarms as recommended (refer to Recommended Locations). • In older mobile homes that are not well insulated compared to present standards, extreme heat or cold can be transferred from the outside through poorly insulated walls and the roof. This may create a thermal barrier which can prevent smoke from reaching a smoke alarm mounted on the ceiling. -
Page 7: False Alarms
Avoid these Locations • Avoid dusty areas, dust particles may cause smoke alarm to false alarm or fail to alarm. • Avoid very humid areas or near a bathroom, moisture can cause false alarm. • Avoid insect-infested areas. • Do not locate alarm within 0.9m of the following: the door to a kitchen, the door to a bathroom containing a tub or shower, a ceiling or whole house ventilating fan, or other interferences or “noise”... -
Page 8: How To Remove Smoke Alarm From Base Plate
False Alarms have caused the alarm. How To Remove Smoke Alarm from Base Plate • Look for ‘Slide to Remove’ (see below ). • Remove Tamper Locking Screw (if installed). Installation DANGER: ELECTRICAL SHOCK HAZARD. Turn o power at the main fuse box or circuit breaker by removing the fuse or switching the circuit breaker to the OFF position and securing it. - Page 9 Installation • This Smoke Alarm can only interconnect with Trader BESMOKEY. Interconnection with • Due to “noise” from electromagnetic interference, up to 24 units of smoke alarms may be interconnected. • There are three terminals in the supply terminal block, marked A, S, N. It is important that the alarm be wired correctly to ensure correct operation.
- Page 10 Installation • Terminals are marked as follows: A= ACTIVE S= SWITCHWIRE (FOR INTERCONNECTION ONLY) N= NEUTRAL Warning: Connecting the Switch wire terminal to any other supply conductor may result in damage to the alarm, failure to operate or shock hazard and void the warranty of the alarm. FUSE ON CIRCUIT BREAKER...
- Page 11 These power sources produce high peak voltages that will damage the alarm. • Trader recommend that the smoke alarms are installed on their own subcircuit to avoid false alarms and nuisance chirping that may be caused by electromagnetic interferences from other electrical equipment.
- Page 12 Installation • Switch on power and check the green light on alarm cover. It should be lit when mains power is switched on indicating that the smoke alarm is properly connected to the mounting base. • If required, secure Tamper Locking Screw (supplied) to smoke alarm. •...
- Page 13 Installation Test & Battery Backup • BESMOKEY will not function without a properly installed battery. They are equipped with a battery lockout feature which prevents the battery door from closing if a battery is not installed correctly (See Figure 5). •...
-
Page 14: Operation, Testing & Maintenance
Operation, Testing & Maintenance • The smoke alarm is operational once all wires are properly connected, a fresh battery is installed, the smoke alarm is correctly installed on the mounting base and the alarm has been tested. Red LED functioning properly. Green LED •... - Page 15 Operation, Testing & Maintenance Operation Function Recommendation LED Status Green ON. Green LED indicates the AC mains power Normal is present. Red FLASHING every Red LED flashes every 40 seconds if Normal 40 seconds. normal. The smoke alarm performs a self test every 40 seconds.
-
Page 16: Battery Installation, Replacement & Test
Battery Installation, Replacement & Test Battery Installation • The smoke alarm uses one 9V battery to automatically provide back-up power to the alarm if AC power fails. The battery will operate the alarm for approximately one to three the Red LED at approximately 40 second intervals for a minimum of 30 days. Missing approximately 40 second intervals. - Page 17 Battery Installation, Replacement & Test • Fold Red Battery Lever down into compartment with fresh replacement battery. If the Red Battery Lever is not held down in the battery compartment by the battery, the smoke alarm will not close and will not be operational. Warning: Use of inferior batteries or incorrect types may cause a malfunction of the Alarm.
-
Page 18: Repairs & Services
Repairs & Services • If the smoke alarm is defective in any way, do not tamper with the unit. Return the unit to your supplier (See warranty for instructions on in-warranty returns). There will be a service charge for repairing units out of warranty. Good Safety Habits The use of this product should not be seen as a substitute for basic safety precaution in the prevention of FIRE. - Page 19 The Limitations of Smoke Alarms • Smoke alarms must be tested regularly to ensure that the batteries and alarm circuit are in good operating condition. • Smoke alarms cannot provide an alarm if smoke does not reach the alarm. Therefore, sound sleeper.
-
Page 20: Develop & Practice A Plan Of Escape
Develop & Practice a Plan of Escape Basic Escape Plan: each room. Second storey windows may need a rope or chain ladder. • Have a family meeting and discuss your escape plan, showing everyone what to do in • Familiarize everyone with the sound of the smoke alarm and practice leaving your home when they hear it. -
Page 21: What To Do When The Alarm Sounds
What to do when the Alarm Sounds • Alert small children in the home. • Leave immediately by your plan of escape. Every second counts, so don’t waste time getting dressed or picking up valuables. smoke seeping through cracks, don’t open that door! Instead, use your alternate exit. If inside door is cool, place your shoulder against it, open it slightly and be ready to slam it shut if heat and smoke rush in. -
Page 22: Warning: Insulation Test
Warning: Insulation Test • Under no circumstances must an insulation resistance test be carried out on a circuit to • The test could cause irrepairable damage to the internal circuitry of the smoke alarm and make it inoperative. • The warranty would be void under such circumstances. Note: Weekly testing is recommended! Warranty and Liability invoice / receipt provided to you. - Page 23 Warranty and Liability • To the extent permitted by law, GSME makes no warranty, expressed or implied, written respect to the consumer replaceable battery if any. A product with non-serviceable built-in battery is covered under warranty of the product. • This warranty is provided in addition to other rights and remedies you have under law: Our goods come with guarantees that cannot be excluded under the Australian Consumer Law.
- Page 24 This smoke alarm has an expected service life of 10 years under normal conditions. We recommend that you should replace the smoke alarm after 10 years from installation date to ensure normal operation. Please use a date label as a reminder. This smoke alarm has been tested and complies to AS3786:2014 Tested and Complies to AS3786:2014 GSM Electrical (Australia) Pty Ltd...
Need help?
Do you have a question about the BEAR BESMOKEY and is the answer not in the manual?
Questions and answers