
Related Manuals for Mitsubishi Heavy Industries WRK20MA1


Summary of Contents for Mitsubishi Heavy Industries WRK20MA1
- Page 1 三菱重工 窗口式冷氣機 MITSUBISHI HEAVY INDUSTRIES Window Type Air Conditioner WRK20MA1 WRK26MA1 WRK35MA1 WRK53MA1 WRK70MA1 承蒙選購三菱重工空調器,深表感謝!爲了使空調器長久保持其良好的運 轉性能,在您開始使用空調器之前,務請仔細閱讀本說明書。閱后應將它妥善保 管好,以備必要時查閱。 本空調器使用新型環保冷媒(R410A),當需要獲得维修檢查以及保養時,請 對經銷商說明此情況。 本空調器適用於家用。...
- Page 2 SOCIABLE REMARK The following contents apply only the countries of Europe. DISPOSAL: Do not dispose this product as unsorted municipal waste. Collection of such waste separately for special treatment is necessary. It is prohibited to dispose of this appliance in domestic household waste. For disposal, there are several possibilities: A) The municipality has established collection systems, where electronic waste can be disposed of at least free of charge to the user.
- Page 3 Read This Manual Inside you will find many helpful hints on how to use and maintain your air conditioner properly. Just a little preventive care on your part can save you a great deal of time and money over the life of your air conditioner. You'll find many answers to common problems in the chart of troubleshooting tips.
-
Page 4: Table Of Contents
CONTENTS 1. SAFETY PRECAUTIONS..............2 2. UNIT PARTS IDENTIFICATION............5 3. OPERATING INSTRUCTIONS ............6 4. INSTALLATION INSTRUCTIONS............11 5. TROUBLESHOOTING ..............15 6. SPECIFICATIONS ................16... -
Page 5: Safety Precautions
SAFETY PRECAUTIONS To prevent injury to the user or other people and property damage, the following instructions must be followed. Incorrect operation due to ignoring of instructions may cause harm or damage. The seriousness is classified by the following indications. This symbol indicates the possibility of death or serious injury. - Page 6 ! CAUTION When the air filter is to be Do not clean the air Ventilate the room well when conditioner with water. used together with a stove, removed, do not touch the metal parts of the unit. etc. It may cause an injury. Water may enter the unit and An oxygen shortage may occur.
- Page 7 SAFETY PRECAUTIONS(prior to operation) Preparing for operation 1. Contact an installation specialist for installation. 2. Plug in the power plug properly. 3. Do not use a damaged or non-standard power cord. 4. Do not share the same outlet with other appliances. 5.
-
Page 8: Unit Parts Identification
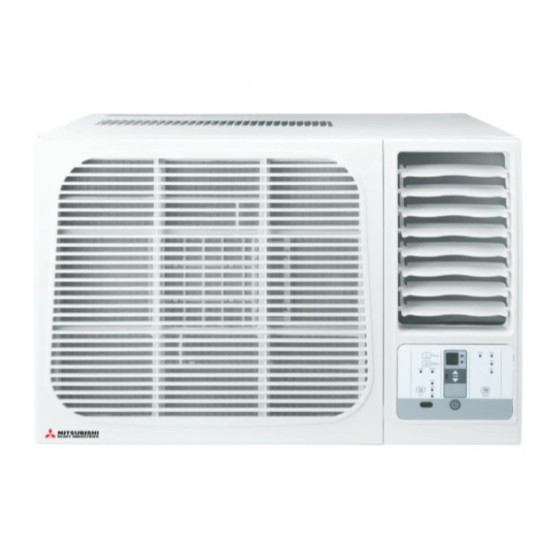
UNIT PARTS IDENTIFICATION NOTE: The front panel and cabinet may be slightly different according to the models, but the functions are the same. The following illustration is for explanation purpose only, the actual shape of the machine you purchased may be slightly different. 1. -
Page 9: Operating Instructions
OPERATING INSTRUCTIONS Controls The electronic control keypad will look like one of the following: Cooling Only Model AUTO COOL TIMER ON Timer Swing TIMER OFF SLEEP SWING TEMP HIGH Mode NOTE: Some models without MED fan speed feature and (or) swing feature. NOTE: The outline of the operation panel is based on typical model, the function is the same with your air conditioner while some difference may exist in appearance. - Page 10 OPERATING INSTRUCTIONS...
- Page 12 OPERATING INSTRUCTIONS(continued) remote display is actual temperature at its location. The remote control will send this signal to the air conditioner every 3 minutes interval until press the Follow Me button again.If the unit does not receive the Follow Me signal during any 7 minutes interval, the unit will beep to indicate the Follow Me mode has ended.
- Page 13 Air Filter The air filter behind the inlet grille should be checked and cleaned at least once every 2 weeks (or as necessary) to maintain optimal performance of the air conditioner. How to remove the air filter Hold the tabs under the front panel, then uplift it outwards, and remove the front panel.
-
Page 14: Installation Instructions
When cooling you can choose back drainage (on models with back drain hole). See the following procedures to perform back drainage: 1. Fit the seal onto the drain joint (which provided with your air conditioner accessory). 2. Remove the rubber plug from the back of the unit. (If applicable),and insert the rubber plug(which provided with your air conditioner accessory on some models) into the bottom drain hole of the unit. - Page 15 Installation of the Housing NOTE: UNIT MAY BE SUPPORTED BY A SOLID FRAME FROM BELOW OR Step 1 BY A HANGER FROM A SOLID Remove the air conditioner from it's packaging, remove fixing OVERHEAD SUPPORT. screws and slide the air conditioner out of it's housing (Refer FLASH OR SEAL AROUND EXTERNAL WALL FRAME OR ARCHITRAVE to Installation Steps).
- Page 16 Installation Steps Step 1. Remove the front panel and the air filter 1. Hold the slot under the front panel, then uplift it outwards, and remove the front panel (See Fig.1). 2. Pinch the handle under the air filter and make the air filter arched, remove it from the slot from underside to upside (See Fig.2).
- Page 17 Step 3. Installation. 1. Grasp the handle on the chassis and carefully slide the air conditioner out of the cabinet (See Fig.5). 2. Remove shipping pad from around compressor before operation and make sure the discharge points to the drain pan are aligned before the chassis is pushed into the cabinet (See Fig.6). 3.
-
Page 18: Troubleshooting
TROUBLESHOOTING Troubleshooting Tips Save time and money! Review the chart below first and you may not need to call for service. Normal Operation You may hear a pinging noise caused by water being picked up and thrown against the condenser on rainy days or when the humidity is high. This design feature helps remove moisture and improve efficiency. -
Page 19: Specifications
SPECIFICATIONS Unit dimensions: MODEL BODY DIMENSION(mm) (Btu/h) (W X H X D) 445X320X415 7000~9000 450X346X535 12000 660X428X680 18000~24000 NOTE: Value of D is for reference only. Minimum norminal cross-sectional area of conductors: Rated current of appliance Nominal cross-sectional area (mm ) >3 and ≤... - Page 20 The design and specifications are subject to change without prior notice for product improvement. Consult with the sales agency or manufacturer for details.
- Page 21 環境保護(只是試用歐盟國家) 本產品使用壽命結束時請勿與一般家庭廢棄物一併丟棄。請將該產品放置於政府指定 的回收站。此舉能為環保盡一份心力。 禁止在家用生活垃圾中處理本器具。 對於處置,下面是可選的方案: 1.該區域已建立垃圾收集系統,廢棄電子電器產品應對使用者免費處理; 2.在購買新產品時,銷售商應免費回收原舊電子電器產品; 3.製造商負責免費從使用者處回收廢棄電子電器產品, 4.如若廢棄電子電子產品中包含有價值的資源,他們可以銷售給相應金屬零售商。...
- Page 22 請閱讀該手冊 請閣下閱讀該手冊,您將獲知如何更好的使用和保養您的空調器。只要 稍加注意,就能延長您的空調器使用壽命。在疑難小百科中,您可以找 到許多常見問題的解決辦法,您也可以聯絡我們的服務中心處理。 注意 除非有安全人員的指導或者協助,並確保使用者的安全,否則該空調器 不可由8歲以下兒童,或者非健全人士使用; 切勿讓兒童把玩空調器; 如果空調器的電源線損壞,必須由製造商,或授權的維修中心,或有資 質的人士進行更換; 請遵循國家的電器法規; 切勿在浴室或者幹衣房間中使用; 帶有電加熱器的空調器距離可燃物必須大於1米位置安裝; 請聯繫授權的維修人士維修或維護您的空調器; 請聯繫授權的安裝人士安裝您的空調器; 您的說明書包含“遙控器使用說明書”和“用戶使用說明書”,如果兩 者有差異的時候,請以“用戶使用說明書”為准; 如果您的空調器在使用過程中被弄翻,請立即關閉空調器,拔下插頭, 檢查機器外觀是否破損。如果機器損壞,請聯繫您的技術人員或者維修 中心; 在暴風雨的死後,為避免空調器被雷擊,請切斷電源; 為了避免電擊危險,請不要使用任何電晶體控速裝置控制該風扇; 請不要在地毯下麵走線。不要用毯子類似的覆蓋物蓋住電線。不要在傢 俱下佈線,佈線時候遠離公共區域並避免磕碰。...
- Page 23 內容 1. 安全說明....................2 2. 部件說明....................5 3. 操作說明 ....................6 4. 安裝說明....................11 5. 故障檢修表 ....................15 6. 參數 .......................16...
- Page 24 安全警告 為避免傷及使用者和其他人士,以下說明敬請遵循。因為無視說明而進行的不正當操作可能導致您 的受傷和傷害。以下內容請嚴格遵循。 這個標識表示可能的人身傷害. 警告 這個標識表示可能的財產損失. 注意 在本書中的一下標識. 不要這樣做. 請這樣做. 警告 請不要插入或者拔出插頭來開 請不要損壞或者使用無認證 請正確的插上插頭. 關空調器. 的電源線. 否則,將有可能因為過熱導致電 將有可能因為過熱導致電擊或者起 將有可能導致電擊或者起火. 擊或者起火. 火. 為避免危險,電源線損壞的時請聯 繫您的銷售商,維修中心或者有資質 的維修人員進行更換. 請不要改變電源線的長度或者 請不要在潮濕的環境下工作, 請不要直吹. 并確保操作者操作時候手是 與其他設備共用電源線. 乾燥的。 將可能導致電擊或者起火風險. 將有可能導致電擊 這會影響閣下的健康. 請確保空調器有效接地. 請不要讓水進入空調器的電器 安裝時請使用合適規格的保 部件. 險. 不正確的接地方式可能導致電擊 將有可能導致空調器損壞或者電擊. 不正確的安裝方式將可能導致電擊...
- Page 25 ! 警告 拆除濾網后請勿觸碰空調器 請勿用水擦拭空調器. 當空調器與火爐一起使用的 金屬部件. 時候,請保證房間通風. 將可能導致受傷。 水有可能進入機器,導致機器 否則會缺氧. 絕緣保護破壞,致使電擊危險. 清潔空調器之前請確定關閉 請勿將空調直吹寵物或者植 請勿將空調用於特殊用途. 電源,拔掉插頭. 物. 否則將可能電擊受傷. 將可能傷害寵物或者植物. 以下場合請不要使用,以免影響 物品品質:精密設備,寵物,植 物等. 長期不適用的時候請切換電源, 在暴風雨或颶風天氣請關 拔下插頭后請將插頭朝上置. 拔下插頭. 閉空調器. 窗戶打開可能導致水進入室 將有可能電擊或起火. 否則有可能有起火隱患. 內而破壞家具. 請勿在空調器的進風口和 請正確的插入過濾網。敬請 請檢查絕緣支架是否完好。. 出風口放置遮擋物. 每兩周清潔濾網. 這有可能導致機器故障或損 如果支架損壞,空調器有下墜 空調器在沒有濾網下運行可能會 損壞機器。 壞. 危險.
- Page 26 Fig.a) Fig.b) Wall outlet Air-break switch POWER CORD E-Earth wire, yellow/green N-Neutral wire, blue Fig.a Fig.b A-Active wire, brown...
- Page 27 Accessories (For >18000Btu/h models only: Used to fasten the front panel) 2 or 4 ( Used to install the drain tray) 1or 2 1pec 1 pec...
- Page 28 AUTO COOL TIMER ON Timer Swing TIMER OFF SLEEP SWING TEMP TEMP HIGH Mode...
- Page 29 "POWER " "MODE" "MODE" "FAN" "FAN" "SWING" "SWING" "TIMER" ,...
- Page 30 17 -30 "SWING"...
- Page 31 Note:...
- Page 32 DRAIN OUTLET DRAIN PAN RUBBER SCREW PLUG...
- Page 33 DRAIN RUBBER JOINT SEAL PLUG AWNING AWNING FENCE FENCE About 3~4 About 3~4 Over 50cm Over 50cm 50cm 75~150cm 11 11...
- Page 34 NOTE: UNIT MAY BE SUPPORTED BY A SOLID FRAME FROM BELOW OR BY A HANGER FROM A SOLID OVERHEAD SUPPORT. FLASH OR SEAL AROUND EXTERNAL WALL FRAME OR ARCHITRAVE Step 3 DRAIN PAN STURDY TIMBER EXTERNAL SUPPORT FRAME ALL ROUND FRAME AT BALANCE UNIT POINT OF A/C...
- Page 35 (See Fig.1). (See Fig.2). Fig.3A. Fig.3B. Fig.3C. Fig.3D. Fig.4.
- Page 36 Fig.5). Fig.6). (See Fig.7). Fig.8). ( Fig.3A,3B,3C,3D). Fig.2). "click " Fig9).
- Page 38 (mm) (Btu/h) (W X H X D) 445X320X415 7000~9000 12000 450X346X535 660X428X680 18000~24000 (mm ) 3 and 0.75 6 and 10 and 16 and (AWG: Amps...
Need help?
Do you have a question about the WRK20MA1 and is the answer not in the manual?
Questions and answers