EVS LSM-VIA User Manual
Hide thumbs
Also See for LSM-VIA:
- User manual (276 pages) ,
- Installation and configuration manual (48 pages) ,
- Installation and configuration manual (56 pages)
Table of Contents
Advertisement
Advertisement
Table of Contents

Related Manuals for EVS LSM-VIA


Summary of Contents for EVS LSM-VIA
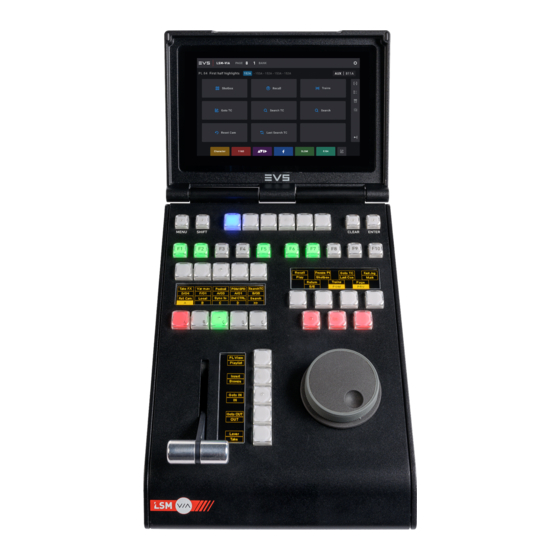
- Page 1 USER MANUAL Version 1.1 - January 2021...
- Page 3 This manual and the information contained herein are the sole property of EVS Broadcast Equipment SA and/or its affiliates (EVS) and are provided “as is” without any expressed or implied warranties, including, but not limited to, the implied warranties of merchantability and fitness for a particular purpose.
- Page 4 EVS Broadcast Equipment SA Issue 1.1.C - January 2021 User Manuals on EVS Website The latest version of the user manual, if any, and other user manuals on EVS products can be found at the EVS download center, on the following webpage: https://www.evs.com/en/download-area.
-
Page 5: Table Of Contents
WHAT'S NEW 1. INTRODUCTION 1.1. Product Overview 1.2. Starting LSM-VIA 2. TOURING THE USER INTERFACE 2.1. LSM-VIA Remote Panel Console 2.2. LSM-VIA Remote Panel Touchscreen 2.3. LSM-VIA Viewer 3. DEFINING CHANNEL CONTROL 3.1. Selecting the Channel Control Mode 3.2. Selecting the Controlled Channel 3.3. - Page 6 6.2. Clip Specific Functions and Interfaces 6.2.1. Overview 6.2.2. Overview of the Clip Screen on the Remote Panel Touchscreen 6.2.3. Overview of the Clip Grid on LSM-VIA Viewer 6.2.4. Clip Mode Commands on the Remote Panel Console 6.3. Managing Clips 6.3.1. Navigating in Pages and Banks 6.3.2.
- Page 7 8.1.1. The Recall Screen 8.1.2. Connecting to a Network Server 8.1.3. Recalling Clips or Playlists by LSM ID from the Remote Panel 8.1.4. Recalling Media by LSM ID from the LSM-VIA Viewer 8.2. Accessing Network Record Trains 8.2.1. The Trains Screen 8.2.2. Setting Filters to Record Trains 8.2.3.
-
Page 9: What's New
The changes linked to new and updated features in version 1.1 are listed below. User Interface A Help button is available from the Application bar of the LSM-VIA Viewer. It gives access to the User Manual. The About window and the Extract Logs option are now available from this button as well. - Page 10 EVS Broadcast Equipment SA Issue 1.1.C - January 2021 Maintenance The Extract Logs procedure from the Viewer has changed. • See section "Extracting Logs" on page 216. VIII What's New...
-
Page 11: Introduction
The LSM-VIA Viewer is mainly used for content management. It gives access to the list of clips and the list of playlists from the whole network, as well as to a visual representation of the active playlist. - Page 12 EVS Broadcast Equipment SA Issue 1.1.C - January 2021 The user can access any EVS video server (XT3, XT4K) on the same XNet network as the XT-VIA server connected to LSM-VIA. The operator relies on the Multiviewer of the XT-VIA server to view the requested IN and/or OUT channels.
-
Page 13: Starting Lsm-Via
VIA Remote Panel. 5. Tap on the Remote Panel touchscreen. 6. (Optional) In the LSM-VIA Viewer, you can select the Remote Panel in the Sync field so that the page and bank navigation is synchronized between LSM-VIA Viewer and LSM-VIA Remote Panel. - Page 14 How to Close LSM-VIA This closes LSM-VIA on the LSM-VIA workstation and on the LSM-VIA Remote Panel. 1. Switch off the Remote Panel using the power switch at the back of the Remote Panel, above the power supply.
-
Page 15: Touring The User Interface
Touring the User Interface 2.1. LSM-VIA Remote Panel Console The LSM-VIA Remote Panel console features the areas highlighted on the screenshot below. This section does not detail all key functions since they vary depending on the activated mode. The specific key functions will be detailed further in this manual. - Page 16 EVS Broadcast Equipment SA Issue 1.1.C - January 2021 Part Name Left Operational Block (keys (a) + key display (b)) See section "Commands on Left Operational Block" on page 26. Right Operational Block (keys (a) + key display (b)) See section "Commands on Right Operational Block" on page 28.
- Page 17 USER MANUAL LSM-VIA 1.1 Operational Blocks and Operational Block Display (4 / 5 / 6) The operational blocks (4 / 5 / 6) are groups of operational keys (4a, 5a, 6a) associated with a display (4b, 5b, 6b) which shows the operations available based on the current Remote Panel mode.
- Page 18 When using the Fast Jog mode, the browsing speed of the jog dial is multiplied by a factor defined in the LSM-VIA configuration tool. • browse inside ◦ the current playlist: see section "Browsing a Playlist" on page 181.
-
Page 19: Lsm-Via Remote Panel Touchscreen
USER MANUAL LSM-VIA 1.1 2.2. LSM-VIA Remote Panel Touchscreen The touchscreen aims at providing a visual representation of the current state on the Remote Panel. Its layout and the information displayed depends on the mode in which the Remote Panel •... - Page 20 PGM some actions will be applied to. e. About Icon The About icon gives access to the About LSM-VIA window which lists the email addresses and phone numbers of the various EVS support services, and allows you to extract logs.
- Page 21 USER MANUAL LSM-VIA 1.1 The Playlist Summary features the following information about the active playlist, from left to right: • Playlist LSM ID • Playlist name (if defined) • Number of playlist elements • Duration of the playlist • Auxiliary audio clip LSM ID and duration (if an AUX clip has been set)
-
Page 22: Lsm-Via Viewer
Issue 1.1.C - January 2021 2.3. LSM-VIA Viewer At startup, the LSM-VIA Viewer screen shows the Clip grid (3) and features the areas highlighted on the screenshot below. The Playlist pane (4) can be displayed on the right of the screen. Application Bar (1) This area is always displayed. - Page 23 The Help button gives access to a menu with the following options: • About: displays a window with the LSM-VIA version number, support phone numbers. • Extract Logs: extracts the logs to a dedicated folder. See section "Extracting Logs" on page 216.
- Page 24 Issue 1.1.C - January 2021 The Clip Grid The Clip grid and its various areas are meant to display information specific to clips. See section "Overview of the Clip Grid on LSM-VIA Viewer" on page 58 for more information. The Playlist Grid The Playlist grid and its various areas are meant to display information specific to playlists.
- Page 25 USER MANUAL LSM-VIA 1.1 The Playlist Pane (4) The Playlist pane can be opened on the right-side of the screen. It displays the active playlist. See section "Overview of the Playlist Pane on the Viewer" on page 112 for more information.
-
Page 26: Defining Channel Control
(PGM 1, 2, or 3). NOTE When you open LSM-VIA and connect the Remote Panel, the default channel control mode is applied. This default mode is configured in the LSM-VIA Configuration tool. See Installation and Configuration manual for more information. - Page 27 USER MANUAL LSM-VIA 1.1 How to Change the Channel Control Mode 1. From the Clip or Playlist screen, press The main menu is displayed on the touchscreen: The currently active control mode is displayed on a blue background. 2. On the Remote Panel console or toucscreen, press or tap: ◦...
-
Page 28: Selecting The Controlled Channel
EVS Broadcast Equipment SA Issue 1.1.C - January 2021 3.2. Selecting the Controlled Channel Introduction When you have selected a channel control mode, all channels are controlled by default. However, you can control one or more channels in either PGM+PRV or Multi-PGM mode depending on your needs. - Page 29 USER MANUAL LSM-VIA 1.1 Channel Control in PGM+PRV Mode How to Control PGM and PRV • When you enter the PGM+PRV control mode, both PGM and PRV channels are controlled by default. • When you are in PGM-only control, press the PGM key to take control on both PGM and PRV: •...
- Page 30 EVS Broadcast Equipment SA Issue 1.1.C - January 2021 Channel Control in PGM-Only Mode How to Control PGM-Only Mode • To control only the PGM, press the PGM key on the right operational block: Display on Remote Panel with PGM Control •...
- Page 31 USER MANUAL LSM-VIA 1.1 Display on Remote Panel with PRV Control • The OSD displays LEVER CTRL on the PGM monitor and FULL CTRL on the PRV monitor. • On the right operational block, PRV is displayed on a yellow background and the corresponding PRV key blinks red.
-
Page 32: Multi-Operator Mode
• According to the Number of Operators and the Operator Selection parameters, set from the Infrastructure settings of the LSM-VIA configuration tool, the player channels will be split between the operators. ◦ The number of available players on the server is divided by the number of operators. - Page 33 USER MANUAL LSM-VIA 1.1 Examples: ◦ 4 operators in a 8IN/4OUT configuration: PGM1 is for Operator 1, PGM2 for Operator 2,... ◦ 4 operators in a 6IN/6OUT configuration: PGM1 and PGM2 are for Operator 1, PGM3 and PGM4 are for Operator 2, PGM5 is for Operator 3 and PGM6 is for Operator 4.
-
Page 34: Commands On The Remote Panel
Changing the current channel control mode • Adding a log point in the logs • Restarting the LSM-VIA application How to Access the Main Menu To access the main menu from the Remote Panel console, press 4. Commands on the Remote Panel... - Page 35 USER MANUAL LSM-VIA 1.1 Possible Actions Command Action Console Key Touchscreen Button Remote 1 Associates a single remote panel to the EVS video server. Restart Quits the LSM-VIA application and opens the Network Configuration screen from which you can start the application.
-
Page 36: Commands On Left Operational Block
EVS Broadcast Equipment SA Issue 1.1.C - January 2021 4.2. Commands on Left Operational Block Overview Multi-PGM PGM+PRV The functions displayed vary according to the media type loaded. See sections "Clip Mode Commands on the Remote Panel Console" on page 60 and "Playlist Mode Commands on the Remote Panel Console"... - Page 37 USER MANUAL LSM-VIA 1.1 Sync to The Sync to function allows you to synchronize the timecode and speed of the controlled PGM with another one. Press this button and then select the PGM to be used as a reference. This function is not available with network trains.
-
Page 38: Commands On Right Operational Block
See section "Accessing Network Servers" on page 185. Shotbox The Shotbox function opens the so-called Shotbox page on the LSM-VIA touch screen. The Shotbox provides a quick access to frequently-used media (clips and playlists). See section "Using the Shotbox for Quick Actions" on page 202. - Page 39 The Fast Jog function allows you to browse the loaded media (record train, clip or playlist) at a speed from 2x to 20x faster than normal. The speed is defined in the LSM-VIA configuration tool, with the Fast Jog parameter.
- Page 40 Page The Page function, available with the key combination SHIFT + Page key + a function key (F1 to F0), allows you to access a page on the EVS server. See section "Navigating in Pages and Banks" on page 62.
-
Page 41: Commands On Bottom Operational Block
USER MANUAL LSM-VIA 1.1 4.4. Commands on Bottom Operational Block Overview Multi-PGM PGM+PRV Functions Common to all the Channels Modes Playlist The Playlist function is not active if the current playlist is empty. If the current playlist is not empty, pressing Playlist loads the active playlist as follows: •... - Page 42 EVS Broadcast Equipment SA Issue 1.1.C - January 2021 See section "Searching for Clips" on page 71. Goto IN When you are in a record train, the Goto IN function allows you to go back to the IN point, if any has been defined.
-
Page 43: Commands From The Assignable Shortcut Keys
In Conditional mode, when a playlist is loaded on a single PGM, this allows to select another PGM to control. NOTE The duration of the take effect is defined by the parameter Effect Duration for Take stored in the LSM-VIA configuration. 4.5. Commands from the Assignable Shortcut Keys... - Page 44 See the Prerequisites section hereafter. NOTE When the operator starts LSM-VIA from scratch or restarts it, the Shortcut buttons will all be empty. Prerequisites for the Use of Dyvi Macros The Dyvi macros can be mapped to Shortcut buttons if the following conditions are met.
- Page 45 USER MANUAL LSM-VIA 1.1 The Function screen is displayed on the touchscreen: 2. Select the button to map the function to. A blue line is then displayed above the currently selected shortcut button. 3. Select a function by tapping it on the touchscreen.
- Page 46 EVS Broadcast Equipment SA Issue 1.1.C - January 2021 The functions are mapped to the buttons in the Live screen and Clip screen and have the selected color(s). The functions are also mapped to the Shortcut keys on the Remote Panel console.
-
Page 47: Working With Record Trains
USER MANUAL LSM-VIA 1.1 Working with Record Trains 5.1. Overview When a train is loaded on the smallest controlled PGM, the Live screen is displayed on the Remote Panel touchscreen. It gives a quick access to some train functions and to general operation parameters. - Page 48 The Fast Jog mode allows you to browse the loaded media (record train, clip or playlist) at a speed from 2x to 20x faster than normal. The speed is defined in the LSM-VIA configuration tool, with the Fast Jog parameter.
- Page 49 USER MANUAL LSM-VIA 1.1 • Conditional: the playlist is loaded on a single PGM when the selected Channel Control mode is Multi PGM controlling a single PGM. Otherwise, it is loaded in PGM+PRV. See section "Loading a Playlist" on page 176.
-
Page 50: Changing The Camera Assignment To A
EVS Broadcast Equipment SA Issue 1.1.C - January 2021 Search TC Configuration The Search TC Configuration function allows you to configure the Search by TC operation. From the Search TC screen, you will be able to set if you want to search for all the clips, trains, or clips and trains. - Page 51 USER MANUAL LSM-VIA 1.1 How to Change the Camera Assignment in PGM+PRV How to Change the Camera Assigned to the PGM In PGM+PRV, change the camera assigned to the PGM as follows: • For CAM A to D, press the camera key to assign to the PGM •...
- Page 52 EVS Broadcast Equipment SA Issue 1.1.C - January 2021 How to Change the Camera Assignment in Multi-PGM 1. On the left operational block, select the PGM to which you want to assign another camera. 2. Press The left operational block now displays the CAMs.
- Page 53 USER MANUAL LSM-VIA 1.1 How to Reset the Default Camera Assignment Whatever the control mode, you can reset the default camera assigned to one or more controlled play channels as follows: 1. Take control on the channel(s) for which you want to reset the camera assignment: ◦...
-
Page 54: Playing And Browsing A Record Train
By default, the playout does not freeze on the mark points when clips or record trains are being played. This can be changed from the LSM-VIA configuration tool. 5. Working with Record Trains... - Page 55 USER MANUAL LSM-VIA 1.1 Possible Actions on Record Trains In order to ... Proceed as follows browse back in the record train browse forward in the record train (before the live point) You can use the jog in association with the Fast Jog option to multiply the browsing speed up to 20x.
- Page 56 EVS Broadcast Equipment SA Issue 1.1.C - January 2021 In order to ... Proceed as follows NOTE When supermotion material is loaded on the primary channel, the lever range has a larger, flat step at 50% in SLSM 2x, 33% in SLSM 3x, ...
-
Page 57: Synchronizing Record Trains
USER MANUAL LSM-VIA 1.1 The Goto TC action is automatically launched as soon as you have entered the 8 digits of a timecode. NOTE • To clear the field: • To navigate within the TC value: 3. Validate your action by pressing or tapping The media is loaded at the selected TC. -
Page 58: Adding Markers On A Record Train
EVS Broadcast Equipment SA Issue 1.1.C - January 2021 How to Synchronize PRV with PGM in PGM+PRV Mode In PGM+PRV mode, when you do not control both PGM and PRV, they will get desynchronized. You can resynchronize the timecode and speed of the PRV with those of the PGM using the Sync PRV function. -
Page 59: Searching For Trains
USER MANUAL LSM-VIA 1.1 In order to ... Press ... add a mark IN at the current TC add a mark OUT at the current TC go to the mark IN defined (if any) go to one frame before the mark OUT defined (if any) Color Codes of IN and OUT buttons The following color codes is used for the IN and OUT buttons on the Remote Panel:... - Page 60 PGM. The system memorizes the trains that were loaded on the controlled PGM at the time of the Mark action. A message is displayed on the top right of the touchscreen and the LSM-VIA Viewer screen. How to Add Mark Points on Trains in Playback Mode 1.
- Page 61 PGM. The system memorizes the trains that were loaded on the controlled PGM at the time of the Mark action. With the current version, in Playback mode, mark points are only set on local trains. A message is displayed on the top right of the touchscreen and the LSM-VIA Viewer screen. NOTE If different types of media are loaded on controlled PGMs (Clips &...
- Page 62 The Mark key button lights up in red. 3. Delete the mark point: The mark point is deleted on all the record trains. A message is displayed on the top right of the touchscreen and the LSM-VIA Viewer screen. How to Delete all the Mark Points 1.
- Page 63 USER MANUAL LSM-VIA 1.1 2. Make sure you are not on a mark point. The Mark key button must be lit up in green. 3. Delete the mark points: A message appears on the touchscreen: 4. Confirm the action: All the mark points are deleted on all the trains.
-
Page 64: Working With Clips
On each page, the first 9 banks are used for clips. The last bank (10) is used for playlists. When the EVS server operates in 6-channel mode, this makes it possible to store 900 clips with up to 6 camera angles per clip, which results in 5,400 clips on an EVS video server. -
Page 65: Clip Specific Functions And Interfaces
USER MANUAL LSM-VIA 1.1 The number of the EVS video server within the network structure is also added to define the precise location of the clip. For example if clip 129C is stored on the machine allocated with the network number 2, the clip will be identified as 129C/02. - Page 66 The Fast Jog mode allows you to browse the loaded media (record train, clip or playlist) at a speed from 2x to 20x faster than normal. The speed is defined in the LSM-VIA configuration tool, with the Fast Jog parameter.
- Page 67 USER MANUAL LSM-VIA 1.1 • Always: the playlist is always loaded in PGM+PRV, would the selected Channel Control mode be PGM+PRV or Multi PGM. • Conditional: the playlist is loaded on a single PGM when the selected Channel Control mode is Multi PGM controlling a single PGM. Otherwise, it is loaded in PGM+PRV.
-
Page 68: Overview Of The Clip Grid On Lsm-Via Viewer
6.2.3. Overview of the Clip Grid on LSM- VIA Viewer The Clip Grid on the LSM-VIA Viewer is displayed when a clip bank is selected. It contains the areas highlighted on the screenshot below: Application Bar (1) See section "LSM-VIA Viewer" on page 12. - Page 69 The Clip grid shows the clips from 2 banks from one page at a time, in a 4-camera view. Shortcuts are available to navigate between the pages and banks. See section "How to Navigate in Pages and Banks from the LSM-VIA Viewer" on page 63. Color Code...
-
Page 70: Clip Mode Commands On The Remote Panel Console
To display playlists, simply select the playlist bank. The page number relates to the clips displayed in the Clip grid. See section "How to Navigate in Pages and Banks from the LSM-VIA Viewer" on page 63. 6.2.4. Clip Mode Commands on the Remote Panel Console When a clip is loaded, some specific functions are available from the console. -
Page 71: Managing Clips
Managing Clips The current chapter mainly describes how a clip can be created, deleted, copied, archived from the Remote or from LSM-VIA Viewer. It also explains how you can search for clips or add mark points on clips. 6. Working with Clips... -
Page 72: Navigating In Pages And Banks
Navigating in Pages and Banks How to Synchronize the Navigation To make sure the page and bank selection is automatically synchronized between the Remote Panel and the LSM-VIA Viewer, you need to select the Remote Panel you want to use in the Viewer application: •... - Page 73 USER MANUAL LSM-VIA 1.1 To... Press ... go to the requested page + where the Function key corresponds to the page number. go to the requested bank where the Function key corresponds to the bank number (F1-9 for clip banks, F10 for playlist banks).
- Page 74 To display the playlists, you do not need to select a page. Simply select the PL bank. 1. Click the BANK button. 2. Click the PL bank. How to Navigate Using Shortcuts Shortcuts are available to navigate in pages and banks from LSM-VIA Viewer. To... Press / click... Go to previous page Go to next page Go to page nr (e.g.
-
Page 75: Creating Clips
Creating Clips Principles for Clip Creation Clip-Related Settings The following settings applied to clip creation in LSM-VIA. Clip Default Duration If you create a clip based only on a IN or OUT point, it is created with the default clip duration defined in the configuration tool, with the Default Clip Duration setting. - Page 76 EVS Broadcast Equipment SA Issue 1.1.C - January 2021 Preferred Camera Angles The clips are created with the following preferred cameras depending on the cameras loaded on the play channels when the clip is created: Channel Controlled 1st Preferred 2nd Preferred CAM (=)
-
Page 77: Selecting Clips
6.3.3. Selecting Clips Introduction A single clip, or clip angle, can be selected from the LSM-VIA Viewer screen. See section "Navigating in Pages and Banks" on page 62 to know how to navigate to other pages and banks. 6. Working with Clips... - Page 78 Issue 1.1.C - January 2021 A multiselection is possible as well. The number of selected CAM angles is displayed at the bottom of the LSM-VIA Viewer screen, would you use the CAM mode or the Clip mode: When a clip angle is selected, colored handles are added on each side of the clip position, whether the clip is loaded or not.
-
Page 79: Deleting Clips
USER MANUAL LSM-VIA 1.1 How to Select Clips (Clip Mode) To select in Clip mode a single clip • click one of the clip angles in the Clip grid (all its angles) • press the arrow keys on your keyboard. all the angles... - Page 80 EVS Broadcast Equipment SA Issue 1.1.C - January 2021 • Growing clip angles. How to Delete a Clip from the Remote Panel When you delete a clip, you delete all clip angles on a clip position. 1. Select the requested page and bank the clip is stored on.
-
Page 81: Searching For Clips
USER MANUAL LSM-VIA 1.1 ◦ press the arrow keys on your keyboard. 2. Delete the clip(s) in one of the following ways: 6.3.5. Searching for Clips Searching for Clips or Trains by Timecode Context of Use When a train or a clip is loaded on the smallest controlled PGM, the Search TC function is available and allows you to search for media containing a specific timecode on the whole network. - Page 82 EVS Broadcast Equipment SA Issue 1.1.C - January 2021 The timecode displayed is the current one from the smallest controlled PGM. 2. Select the resource type you want to search by tapping How to Search for Clips and/or Trains on any Timecode from the Search TC Screen...
- Page 83 USER MANUAL LSM-VIA 1.1 NOTE • To clear the field: • To navigate within the TC value: 2. Validate your action by pressing or tapping If several results match the searched TC, the result with the lowest LSM ID from the local server is loaded in pause at the searched TC, on the smallest controlled PGM.
-
Page 84: Copying And Moving Clips
Clips can be moved from the local server to the local server or a remote server from the Remote Panel or from the Viewer. With the current version of LSM-VIA, remote clips cannot be moved to the local or a remote server. - Page 85 USER MANUAL LSM-VIA 1.1 • Copying clips locally on a server does not duplicate the video and audio material on the drives: it simply creates a separate reference to the same material. This means that the available storage capacity will not decrease when making copies of clips on a server.
- Page 86 EVS Broadcast Equipment SA Issue 1.1.C - January 2021 4. Tap ◦ Clip to copy all the clip angles: ◦ Cam to copy the controlled CAM angles of the clip: The screen shows the involved CAM: 5. Tap ◦ Short to copy the clip without its guardbands: ◦...
- Page 87 USER MANUAL LSM-VIA 1.1 With the current version of LSM-VIA, only local clips can be moved. See section "Loading Clips" on page 92 for other ways to load a clip. 2. Select an empty clip position: press a non colored Function key...
- Page 88 • If only the secondary CAM (=) is selected, it becomes the principal pref cam (*), and the next smallest cam becomes the secondary pref cam. How to Copy or Move a Clip from the LSM-VIA Viewer 1. Select ◦ the Clip view to copy or move all the angles of a clip: ◦...
-
Page 89: Managing Mark Points On Clips
By default, the playout does not freeze on the mark points when clips or record trains are being played. This can be changed from the LSM-VIA configuration tool. Mark Point Display When at least one mark point has been set on the controlled media, the key button on the Remote lights up. - Page 90 A mark point is set on all the controlled clip angles, at the current timecode of the clip loaded on the smallest controlled PGM. A message is displayed on the top right of the touchscreen and the LSM-VIA Viewer screen. NOTE If different types of media are loaded on controlled PGMs (Clips &...
- Page 91 USER MANUAL LSM-VIA 1.1 2. Browse from one mark point to the next one or the previous one with the jog The Browse function can be disabled when other actions are performed on the Remote, for example: • press Browse again •...
- Page 92 EVS Broadcast Equipment SA Issue 1.1.C - January 2021 A message is displayed on the top right of the touchscreen and the LSM-VIA Viewer screen. How to Delete all the Mark Points 1. Load the required clip on the smallest controlled PGM.
-
Page 93: Editing Clips
Introduction Keywords and rating can be assigned to a loaded clip. With the current version of LSM-VIA, this is done from the Metadata window which can be displayed on the Remote Panel touchscreen thanks to the Metadata function of the console. - Page 94 This area displays the metadata, keywords an rating, associated with the loaded clip. How to Add Keyword(s) to a Clip When you add keywords in the current version of LSM-VIA, you add them to the clip angle loaded on the first controlled PGM (PGM or PGM1), not on all clip angles.
- Page 95 USER MANUAL LSM-VIA 1.1 ii. Press to confirm: . The Metadata box is highlighted in blue. The selected keyword(s) added to the clip angle are displayed on a blue background in the Keyword grid. The added keywords are displayed on the Clip Metadata pane on the right.
- Page 96 How to Add a Rating to a Clip When you define a rating in the current version of LSM-VIA, you define it on the clip angle loaded on the first controlled PGM (PGM or PGM1), not to all clip angles.
-
Page 97: Naming A Clip
1. Make sure the focus is on the Clip grid, not on the Playlist pane. See section "How to Select the Focused Pane" on page 15. 2. Type a name for the clip. It is entered in the Name field of the LSM-VIA Viewer: 6. Working with Clips... -
Page 98: Editing The Clip Duration
EVS Broadcast Equipment SA Issue 1.1.C - January 2021 3. Select Clip or CAM view: 4. Select the clip you want to name. See section "Selecting Clips" on page 67. 5. Associate the name with the selected clip angle (CAM view) or with the selected clip (Clip view) by pressing... -
Page 99: Restriping A Clip
00:10, talking at 00:20, and so on. Limitation With the current version of LSM-VIA, it is not possible to restripe a remote clip. How to Restripe a Clip from the LSM-VIA Viewer 1. Make sure the focus is on the Clip grid. - Page 100 EVS Broadcast Equipment SA Issue 1.1.C - January 2021 ◦ The user-defined timecode and/or date: Type in the new timecode for the Short IN point and/or the date of the clip in the corresponding fields. 5. (optional) To change the Primary TC, click the requested radio button: If the User TC is selected, it is displayed in yellow on the OSD.
-
Page 101: Changing The Pref Cam Of A Clip
Changing the Pref Cam of a Clip Principles In the Clip grid of the LSM-VIA Viewer, the primary preferred camera is represented with a *. The secondary preferred camera is represented with a =. Another clip angle can be set as primary pref cam or secondary pref cam. -
Page 102: Loading Clips
In Clip mode, the preferred clip angle is loaded on the smallest PGM controlled by the first connected Remote Panel, the secondary clip angle is loaded on the next PGM,... In case no Remote Panel is connected to LSM-VIA, the preferred clip angle is loaded on the smallest PGM of the server. - Page 103 2. Load the clip by pressing In CAM mode, the clip is loaded on the smallest PGM controlled by the first connected Remote Panel. In case no Remote Panel is connected to LSM-VIA, the clip is loaded on the smallest PGM of the server. Loading Behavior •...
- Page 104 EVS Broadcast Equipment SA Issue 1.1.C - January 2021 Changing the Loaded Clip Angle When a clip is loaded, you can change the loaded clip angle in different ways. How to Change the Loaded Clip Angle Using Recall Clip Toggle Mode This mode allows you to successively call the various camera angles of the clip with its Function key.
- Page 105 USER MANUAL LSM-VIA 1.1 How to Change the Loaded Clip Angle Using the CAM Keys in PGM+PRV Mode PGM+PRV or PGM only When you control both PGM and PRV or only the PGM, you can change the clip angle loaded on the PGM as follows: •...
- Page 106 4. Press TAKE: Recalling a Clip with its LSM ID See sections "Recalling Clips or Playlists by LSM ID from the Remote Panel" on page 190 and "Recalling Media by LSM ID from the LSM-VIA Viewer" on page 192. 6. Working with Clips...
-
Page 107: Browsing And Playing Clips
By default, the playout does not freeze on the mark points when clips or record trains are being played. This can be changed from the LSM-VIA configuration tool. Playing a Clip When a clip is loaded, you can play it back in one of the following ways. - Page 108 PGMs controlled by the Remote Panel, regardless of the Viewer pane which has the focus on. In case no Remote Panel is connected to LSM-VIA, the Play/Pause command applies to the media loaded on the smallest PGM of the server.
- Page 109 USER MANUAL LSM-VIA 1.1 2. Enter the requested timecode in one of the following ways: ◦ press the function keys on the Remote Panel, ◦ use the numeric pad on the touchscreen. The Goto TC action is automatically launched as soon as you have entered the 8 digits of a timecode.
-
Page 110: Transferring And Archiving Clips
The Export function is available from the Clip Screen. It can also be mapped to one of the assignable shortcut button/key of the Remote Panel. Prerequisite Xsquare has been configured from the Infrastructure Settings and it can be joined. Limitation With the current LSM-VIA version, the archiving can only be requested in CAM mode. 6. Working with Clips... - Page 111 USER MANUAL LSM-VIA 1.1 Exporting a Clip How to Export a Local or Remote Clip from the Remote Panel Console The clip angle loaded on the smallest controlled PGM can be exported as follows: 1. Load the clip angle to be exported on the smallest controlled PGM.
-
Page 112: Archiving A Clip
XFile3 is available on the setup and an appropriate AutoArchive rule has been defined. Limitation With the current LSM-VIA version, the archiving can only be requested in CAM mode. Flagging a Clip for Archive How to Flag a Clip for Archive from the Remote Panel Console The clip loaded on the smallest controlled PGM can be flagged for archiving as follows: 1. - Page 113 USER MANUAL LSM-VIA 1.1 Archive Status The archive status can be seen on the Clip grid of the LSM-VIA Viewer and on the Remote Panel console. Status Remote Panel Console LSM-VIA Viewer Not flagged Archive Key Display: normal no icon in the corner of the clip:...
-
Page 114: Working With Playlists
On each page, the first 9 banks are used for clips. The last bank (10) is used for playlists. When the EVS server operates in 6-channel mode, this makes it possible to store 900 clips with up to 6 camera angles per clip, which results in 5,400 clips on an EVS video server. -
Page 115: Playlist Specific Functions And Interfaces
It displays the content of the active playlist. See section "Overview of the Playlist Screen on the Remote Panel Touchscreen" on page 108. On the LSM-VIA Viewer, the Playlist pane can be opened on the right-side of the screen. It displays the active playlist. See section "Overview of the Playlist Pane on the Viewer" on page 112. - Page 116 On the touchscreen, the browsed playlist element is on a blue background and the playlist displays as follows: On the LSM-VIA Viewer, if the active Playlist of the first connected Remote is loaded on any channel of the local server, •...
- Page 117 • the current playlist element is on a red background • the next playlist element is on a green background. On the LSM-VIA Viewer, the playlist displays as follows: • the current playlist element is on a red background • the next playlist element is on a green background.
-
Page 118: Overview Of The Playlist Screen On The Remote Panel Touchscreen
Playlist Elements Application Bar (1) This area is displayed in Live mode, Clip mode, Playlist mode. See section "LSM-VIA Remote Panel Touchscreen" on page 9. Playlist Summary (2) The Playlist Summary features the following information about the active playlist, from left to right: •... - Page 119 USER MANUAL LSM-VIA 1.1 Playlist Elements (3) A playlist element features the following information from left to right: • Position in the playlist • Clip LSM ID • Clip name (if defined) • TC IN of the clip If the User TC has been selected for the clip used, it is written in yellow.
-
Page 120: Overview Of The Playlist Grid On The Viewer
Application Bar (1) See section "LSM-VIA Viewer" on page 12. Toolbar (2) See section "LSM-VIA Viewer" on page 12 for the description of the Server field and the Sync field Hide Empty Playlists This command is only displayed with the Playlist grid. - Page 121 USER MANUAL LSM-VIA 1.1 Playlist Grid (3) The Playlist grid shows all the 90 playlists slots of the selected server. It can be filtered to only show the actual playlists. Playlist Summary The Playlist Summary features the following information about each playlist, from left to right: •...
-
Page 122: Overview Of The Playlist Pane On The Viewer
To display playlists, simply select the playlist bank. The page number relates to the clips displayed in the Clip grid. See section "How to Navigate in Pages and Banks from the LSM-VIA Viewer" on page 63. 7.2.5. Overview of the Playlist Pane on the Viewer... - Page 123 USER MANUAL LSM-VIA 1.1 Playlist Summary (1) The Playlist Summary features the following information about the active playlist, from left to right: • Playlist LSM ID In case of remote playlist, the remote server ID is also displayed: • Playlist name (if defined) •...
- Page 124 EVS Broadcast Equipment SA Issue 1.1.C - January 2021 1. Add Clip Button This button is used to add a clip selected in the Clip grid into the playlist, or to move a playlist element selected in the playlist. It is not available with remote playlists.
- Page 125 This button is used to mute the audio tracks from the LSM-VIA Viewer. ◦ : audio is not muted. ◦ : the audio tracks of the element have been muted from the LSM-VIA Viewer or from the Remote Panel. 6. Clip LSM ID 7. Clip name (if defined) 8.
- Page 126 EVS Broadcast Equipment SA Issue 1.1.C - January 2021 Color Meaning Playlist element loaded on PRV and not selected. Playlist element loaded on PRV and selected. Auxiliary Audio Clip Area (3) This area provides information related to the auxiliary audio clip of the playlist (if an AUX clip has been set).
-
Page 127: Playlist Mode Commands On The Remote Panel Console
USER MANUAL LSM-VIA 1.1 To... Press / click... Goto first playlist element Goto last playlist element Display the previous elements Display the next elements 7.2.6. Playlist Mode Commands on the Remote Panel Console Playlist Playout Mode When a playlist is loaded in Playout mode, some specific functions are available from the console: 7. - Page 128 EVS Broadcast Equipment SA Issue 1.1.C - January 2021 For general functions, see sections "Commands on Left Operational Block" on page 26, "Commands on Right Operational Block" on page 28, "Commands on Bottom Operational Block" on page 31. Film FX The Film FX function is used to create a film style effect during the playout by replacing one field every two fields.
- Page 129 USER MANUAL LSM-VIA 1.1 Playlist Edit Mode When a playlist is loaded in Edit mode, some specific functions are available from the console: For general functions, see sections "Commands on Left Operational Block" on page 26, "Commands on Right Operational Block" on page 28, "Commands on Bottom Operational Block"...
- Page 130 EVS Broadcast Equipment SA Issue 1.1.C - January 2021 Add Cut The Add Cut function allows you to split a playlist element into two elements at a selected point. See section "Adding Cuts in Playlist Elements" on page 148. Edit Audio The Edit Audio function is available with the key combination SHIFT + Edit Audio.
-
Page 131: Managing Playlists
Managing Playlists The current chapter mainly describes how a playlist can be created, deleted, copied from the Remote or from LSM-VIA Viewer. Behavior with a Remote Playlist A remote playlist cannot be edited. So, the following actions cannot be performed on a remote playlist. -
Page 132: Selecting The Active Playlist
At LSM-VIA startup, the active playlist is automatically playlist 11. Display of the Active Playlist • The function key of the active playlist on the LSM-VIA Remote Panel is red. • The active playlist LSM ID is displayed on the touchscreen •... - Page 133 USER MANUAL LSM-VIA 1.1 2. Select a playlist position: This can be: ◦ an existing playlist: press a colored Function key. The selected playlist is now your active playlist. The procedure is finished. ◦ an empty playlist position: press a non colored Function key.
-
Page 134: Adding Clips To A Playlist
• Insert in Playlist: By default, when a clip is inserted into a playlist from the Remote Panel, it is inserted before the active element in the playlist. This can be changed from the LSM-VIA configuration tool. • Default Playlist Speed:... - Page 135 By default, when an SLSM clip is inserted into a playlist, its speed is set at the value defined in the Default Playlist Speed parameter. The default SLSM playlist element speed can be customized from the LSM-VIA configuration tool. •...
- Page 136 How to Insert a Clip in the Loaded Playlist By default, playlist elements are inserted before the active element in the playlist. This setting can be changed from the LSM-VIA configuration tool. 1. Load a playlist. See section "Loading a Playlist" on page 176.
- Page 137 USER MANUAL LSM-VIA 1.1 ◦ from the left operational block. The inserted clip becomes the active element in the playlist. NOTE In Clip mode, you can also insert the loaded clip in the active playlist before or after the active element by using the Insert function.
- Page 138 EVS Broadcast Equipment SA Issue 1.1.C - January 2021 Adding Clips to the Active Playlist from the Viewer How to Add Clips to the Active Playlist from the Viewer 1. Select ◦ the Clip view to add all the angles of a clip: ◦...
-
Page 139: Selecting Playlists
Selecting Playlists Introduction A single playlist can be selected from the Playlist grid of the LSM-VIA Viewer screen. See section "Navigating in Pages and Banks" on page 62 to know how to navigate to and from the playlist grid (playlist bank view). -
Page 140: Naming A Playlist
1. Make sure the focus is on the Playlist grid, not on the Playlist pane. See section "How to Select the Focused Pane" on page 15. 2. Type a name for the playlist. It is entered in the Name field of the LSM-VIA Viewer. 3. Select the playlist you want to name. ◦... -
Page 141: Selecting Playlist Elements
7.3.5. Selecting Playlist Elements Introduction A single playlist element can be selected from the Playlist pane of the LSM-VIA Viewer screen. It is then highlighted as described in section "Overview of the Playlist Pane on the Viewer" on page 112. A multiselection is possible as well. Then, the number of selected playlist elements is displayed at the bottom of the Playlist pane. -
Page 142: Copying Playlists
7.3.6. Copying Playlists Principles • You can copy a local or remote playlist from the LSM-VIA Viewer or from the Remote Panel to the local EVS server. • Playlist metadata are kept when a playlist is copied. •... - Page 143 USER MANUAL LSM-VIA 1.1 2. Select an empty playlist position: press a non colored Function key The following screen is displayed on the touchscreen: 3. Tap Copy PL to copy the playlist to the selected position: The following screen is displayed on the touchscreen:...
- Page 144 Issue 1.1.C - January 2021 In case the playlist to copy is a remote playlist, it appears as follows: With the current LSM-VIA version, it is not possible to copy a local playlist to a remote server. 4. Validate your action: press or tap The selected playlist is copied to the selected position and it becomes the active playlist.
-
Page 145: Deleting Playlists
USER MANUAL LSM-VIA 1.1 4. Paste the playlist by pressing The selected playlist is copied to the selected position but it does not become the active playlist. 7.3.7. Deleting Playlists Principles A playlist can be deleted from the Remote Panel or from the Viewer. -
Page 146: Making Remote Clips Local In A Playlist
EVS Broadcast Equipment SA Issue 1.1.C - January 2021 ◦ press the arrow keys on your keyboard. The playlist line is highlighted. local: 2. Delete the playlist in one of the following ways: ◦ ◦ A message appears on the Viewer: 3. - Page 147 USER MANUAL LSM-VIA 1.1 Prerequisite • The Make Local Auto Multicam parameter must have been set to Yes on the XT-VIA Server side. Making Remote Clips Manually Local Principles A Make Local function is available from the Remote Panel console when a local playlist is loaded in Playlist Edit mode and contains remote clips.
-
Page 148: Editing Playlists
Issue 1.1.C - January 2021 7.4. Editing Playlists A playlist can be created from the Remote or from LSM-VIA Viewer. Then, various editing actions are possible from one interface or the other, or from both. Behavior with a Remote Playlist A remote playlist cannot be edited. So, the following actions cannot be performed on a remote playlist. - Page 149 USER MANUAL LSM-VIA 1.1 2. Click in the Playlist pane where you want to move the clip(s). Clip(s) are moved within the playlist. 7. Working with Playlists...
-
Page 150: Sorting Playlist Elements By Tc In
7.4.2. Sorting Playlist Elements by TC IN Introduction From the Playlist pane of the LSM-VIA Viewer, it is possible to sort the playlist elements by TC IN. The sorting is done on the TC displayed in the TC IN column. WARNING This operation will change the order of the playlist elements, and reset the transitions to the default values. -
Page 151: Adding A Playlist Into Another Playlist
A playlist can be added to the active playlist without any impact on the playout. These actions can be done from the LSM-VIA Viewer. How to Insert a Playlist into Another Playlist To insert a playlist into another playlist, 1. - Page 152 EVS Broadcast Equipment SA Issue 1.1.C - January 2021 3. Click in the playlist pane where you want to insert the playlist. The playlist is inserted into the active playlist. 7. Working with Playlists...
- Page 153 USER MANUAL LSM-VIA 1.1 How to Append a Playlist at the End of Another Playlist 1. From the Playlist grid, select the playlist to append to another playlist. 2. Copy the playlist: press 3. In the Playlist grid, select the destination playlist.
-
Page 154: Changing The Camera Angle Of A Playlist Element
EVS Broadcast Equipment SA Issue 1.1.C - January 2021 7.4.4. Changing the Camera Angle of a Playlist Element Context of Use From the Remote Panel, you can replace a playlist element with another camera angle if the material is still available in a local or remote record train. - Page 155 USER MANUAL LSM-VIA 1.1 They are sorted by server network ID (local server first). The controlled PGM and the LSMID of the element loaded on the PGM are displayed on top of the screen. 4. Browse through the result list in one of the following ways: ◦...
-
Page 156: Clearing In/Out Points Of Playlist Elements
EVS Broadcast Equipment SA Issue 1.1.C - January 2021 5. To browse through a result, a. Press Browse to deactivate the mode. b. Browse through the train with the jog. 6. Validate your action by pressing or tapping A clip is automatically created with the TC IN and TC OUT of the clip used in the playlist and it replaces the element in the playlist. -
Page 157: Trimming Playlist Elements
USER MANUAL LSM-VIA 1.1 7.4.6. Trimming Playlist Elements Introduction Every playlist element can be trimmed independently of all other angles of the clip. This will only affect the selected playlist element. How to Trim a Playlist Element 1. Load the playlist by pressing See also section "Loading a Playlist"... -
Page 158: Adding Cuts In Playlist Elements
EVS Broadcast Equipment SA Issue 1.1.C - January 2021 7.4.7. Adding Cuts in Playlist Elements Description The Add Cut command is used to cut a playlist element in two elements. Actually, it duplicates the playlist element and adjusts the SHORT IN and SHORT OUT points of these new duplicated elements: •... -
Page 159: Editing Playlist Element Speed
Unknown, meaning that the speed of the previous element in the playlist will be used as a reference for the current element. The default playlist element speed can be customized from the LSM-VIA configuration tool. Afterwards, the playlist element speed can be individually edited from the Remote Panel or the Viewer as described hereafter. - Page 160 EVS Broadcast Equipment SA Issue 1.1.C - January 2021 How to Edit the Playlist Element Speed from the Remote Panel To edit the speed of one or several playlist elements, 1. Load the playlist by pressing See also section "Loading a Playlist" on page 176.
-
Page 161: Deleting Playlist Elements
USER MANUAL LSM-VIA 1.1 How to Edit the Playlist Element Speed from the Viewer To edit the speed of a playlist element, 1. Click in the Speed field of the element: 2. Enter a value for playlist element speed, e.g. - Page 162 EVS Broadcast Equipment SA Issue 1.1.C - January 2021 2. Delete the last playlist element by pressing 3. Repeat step 2 to remove other playlist elements at the end of the playlist. If the playlist is loaded in PGM+PRV, the deleted element is loaded on the PRV channel.
-
Page 163: Transition And Audio Operations
However, you can change the type of transition effect, or its duration, as explained in section "Adding Transition Effects in a Playlist" on page 156. With the current version of LSM-VIA, the type of the audio transitions is tied to the type of the video transitions. - Page 164 EVS Broadcast Equipment SA Issue 1.1.C - January 2021 NOTE With the Conditional mode, transition effects are played only if the Mix-on-one channel parameter is set. Overview of the Transition Effects Illustrations The following drawings show that the transition effects are applied to the material included in the playlist element, not on the guardbands.
- Page 165 The wipe effect is shown as a vertical line moving across the video. The direction of the Wipe effect (left to right, right to left) is defined in the LSM-VIA configuration. By default, it is Vert. L>R. Fade from color (<) A Fade Out effect from a defined color is applied to the first frame of the playlist element (on which the effect is defined).
- Page 166 LSM-VIA configuration tool. • Video Transition Effect - Wipe Type When a Wipe video transition effect is selected, its direction is, by default, from Left to Right. This can be changed from the LSM-VIA configuration tool. 7. Working with Playlists...
- Page 167 USER MANUAL LSM-VIA 1.1 How to Edit a Transition Effect from the Remote Panel To edit simultaneously the video and the audio transition effect, proceed as follows: 1. Load the playlist by pressing See also section "Loading a Playlist" on page 176.
- Page 168 EVS Broadcast Equipment SA Issue 1.1.C - January 2021 How to Edit a Transition Effect Duration from the Remote Panel To edit simultaneously the video and the audio transition effect durations, proceed as follows: 1. Load the playlist by pressing See also section "Loading a Playlist" on page 176.
- Page 169 USER MANUAL LSM-VIA 1.1 How to Edit the Transition Effect of a Playlist Element from the Viewer To edit simultaneously the video and the audio transition effect, proceed as follows: 1. Click the arrow next to the effect type for the element you want to edit: 2.
-
Page 170: Edit Audio And Edit Video Modes
EVS Broadcast Equipment SA Issue 1.1.C - January 2021 The audio transition effect duration is updated as well. NOTE In case the video and the audio transition effect durations were not the same, the same offset is applied between the two after editing the video transition duration. - Page 171 USER MANUAL LSM-VIA 1.1 Edit Audio Mode When the Edit Audio mode is activated, some specific functions are available from the console: A. Fx Dur The A. Fx Dur function is displayed in place of the Fx Dur function when the Edit Audio mode is activated.
- Page 172 The transition effect of the audio track remains linked to the video transition effect even if an audio split is defined. In the current version of LSM-VIA, video and audio transitions are Center Cut. Prerequisite • The Advanced Audio Editing setting must have been selected from the configuration tool to allow users to define an audio split.
- Page 173 USER MANUAL LSM-VIA 1.1 2. Browse to the playlist element: The Playlist Edit mode is enabled. See also section "Browsing a Playlist" on page 181. 3. Enter the Edit Audio mode by pressing The Edit Audio key display is highlighted and the Audio Effect Duration function (A. Fx Dur) becomes available.
- Page 174 EVS Broadcast Equipment SA Issue 1.1.C - January 2021 How to Edit a Video Transition Effect Duration from the Remote Panel To edit the video transition effect duration of a playlist element without impacting the audio transition effect duration, 1. Load the playlist by pressing See also section "Loading a Playlist"...
- Page 175 USER MANUAL LSM-VIA 1.1 7. Exit the Video Transition Effect Duration mode by pressing You can also edit the video effect duration of all the playlist elements at once by pressing before entering the Video Transition Effect Duration mode ( ).
- Page 176 EVS Broadcast Equipment SA Issue 1.1.C - January 2021 You can also edit the audio effect duration of several playlist elements at once. 1. Select the elements. See section "Selecting Playlist Elements" on page 131. 2. Follow the above procedure from the bottom of the Playlist pane:...
- Page 177 USER MANUAL LSM-VIA 1.1 You can also edit the video effect duration of several playlist elements at once. 1. Select the elements. See section "Selecting Playlist Elements" on page 131. 2. Follow the above procedure from the bottom of the Playlist pane:...
- Page 178 EVS Broadcast Equipment SA Issue 1.1.C - January 2021 2. The Edit Audio mode must be activated to make the Swap function available. How to Access the Audio Swap Screen To access the Audio Swap screen, • press + from the console...
- Page 179 USER MANUAL LSM-VIA 1.1 Controlled Channel (2) • Smallest controlled PGM. • LSM ID of the playlist element loaded on the smallest controlled PGM. Audio Swap Matrix (3) Input audio tracks (3a) and output audio tracks (3b) from the current playlist element. The number of tracks displayed represent the actual number of tracks of the playlist element (2, 4, 8 or 16).
- Page 180 EVS Broadcast Equipment SA Issue 1.1.C - January 2021 Swapping or Muting Audio Tracks from the Remote Panel How to Enter the Audio Swap Mode 1. Load the playlist by pressing See also section "Loading a Playlist" on page 176. 2. Browse to the playlist element: The Playlist Edit mode is enabled.
- Page 181 USER MANUAL LSM-VIA 1.1 How to Set an Audio Swap 1. Enter the Audio Swap mode as described in section "How to Enter the Audio Swap Mode" on page 170. 2. To swap audio tracks, tap the bullet at the intersection of the IN and OUT tracks.
- Page 182 The audio mute is shown on the Remote Panel touchscreen The audio mute is indicated on the OSD. How to Mute the Audio Tracks from the LSM-VIA Viewer • Click the Mute button for the playlist element you want to mute.
-
Page 183: Adding An Auxiliary Audio Clip To A Playlist
By default, when an AUX clip is added to a playlist, it is played out from the the audio outputs assigned to the PRV channel. This can be changed from the LSM-VIA configuration tool. Other values are: ◦ PRV outputs and outputs 7/8 or outputs 15/16 ◦... - Page 184 EVS Broadcast Equipment SA Issue 1.1.C - January 2021 Display of Auxiliary Clip On the Remote Panel touchscreen, the AUX clip LSM ID is displayed to the right of the Playlist Summary line. Remote Panel Touchscreen Clip mode / Live The AUX clip LSM ID is displayed on the...
- Page 185 USER MANUAL LSM-VIA 1.1 Adding an Auxiliary Clip from the Remote Panel How to Add an Auxiliary Clip from the Remote Panel 1. Make sure you set the requested playlist as the active playlist. See section "Adding Clips to a Playlist" on page 124.
-
Page 186: Loading, Browsing And Playing Playlists
EVS Broadcast Equipment SA Issue 1.1.C - January 2021 See section "Adding Clips to a Playlist" on page 124. 2. Select a clip. See section "Selecting Clips" on page 67. 3. Set the clip as the AUX clip for the active playlist. - Page 187 USER MANUAL LSM-VIA 1.1 By default, the Always mode is active. The default setting can be changed from the LSM- VIA configuration tool. The table below summarizes the playlist loading behavior. Channel Control Mode Always Conditional PGM+PRV PGM+PRV PGM+PRV Multi PGM, with control of a single PGM...
- Page 188 EVS Broadcast Equipment SA Issue 1.1.C - January 2021 How to Load a Playlist in Playout Mode on the Active Element To load a playlist in Playout mode, on the TC IN of the element where it was in Edit mode, 1. Select the playlist by selecting its page, bank (PL/10) and position.
- Page 189 Loading Behavior The loading behavior follows the control mode and the controlled players of the first connected Remote, regardless of whether the LSM-VIA Viewer is synchronized to the Remote or not. If there is no Remote connected to the Viewer, the playlist will be loaded in PGM+PRV.
- Page 190 The playlist is loaded on the selected element. Recalling a Playlist with its LSM ID See sections "Recalling Clips or Playlists by LSM ID from the Remote Panel" on page 190 and "Recalling Media by LSM ID from the LSM-VIA Viewer" on page 192. 7. Working with Playlists...
-
Page 191: Browsing A Playlist
USER MANUAL LSM-VIA 1.1 7.6.2. Browsing a Playlist How to Browse in a Playlist When the playlist is loaded, you can browse it as follows: • Browse through the playlist items with the jog. If the playlist was in Playout mode, the Playlist Edit mode is enabled. - Page 192 EVS Broadcast Equipment SA Issue 1.1.C - January 2021 If the playlist was in Playout mode, it is paused. The Browse mode is enabled: 2. Browse through the playlist with the jog to jump from the TC IN of a playlist element to the TC IN of the next playlist element.
-
Page 193: Playing A Playlist
Playlist key again. • To come back to live, press the E/E key. How to Play a Playlist from the LSM-VIA Viewer To play a playlist, 1. Load the playlist. See section "Loading a Playlist from the Viewer" on page 179. - Page 194 PGMs controlled by the Remote Panel, regardless of the Viewer pane which has the focus on. In case no Remote Panel is connected to LSM-VIA, the Play/Pause command applies to the media loaded on the smallest PGM of the server.
-
Page 195: Operations On Network
8.1. Accessing Network Servers The list of online servers of the XNet, which means the local server and the remote ones, is available from the Recall screen of the Remote Panel, and from the LSM-VIA Viewer. 8.1.1. The Recall Screen Purpose The list of servers available on the network is displayed in the Recall screen of the Remote Panel touchscreen. - Page 196 EVS Broadcast Equipment SA Issue 1.1.C - January 2021 List of Servers (2) This area displays all the online servers on the XNet with their Net ID and name. Up to 8 server buttons are displayed by page. The local server is selected by default. It is shown as a gray box when it is not selected.
-
Page 197: Connecting To A Network Server
USER MANUAL LSM-VIA 1.1 8.1.2. Connecting to a Network Server How to Connect to a Server from the Remote Panel 1. Select the Recall function. + The Recall screen opens on the touchscreen. By default, the local server is selected (blue highlighted). - Page 198 To close the Servers screen without selecting a server, do one of the following actions: • press X in the top right corner • press • press to go back to the local server. LSM-VIA is connected to the selected server. 8. Operations on Network...
- Page 199 Display on the LSM-VIA Viewer On the LSM-VIA Viewer, the active page and bank are displayed at the bottom of the screen. The first time you connect to that server, Page 1 Bank 1 is displayed.
-
Page 200: Recalling Clips Or Playlists By Lsm Id From The Remote Panel
EVS Broadcast Equipment SA Issue 1.1.C - January 2021 How to Connect Back to Local Server You can quickly connect to the local server when you are connected to a remote server. • From the console, press • From LSM-VIA Viewer, press + ... - Page 201 USER MANUAL LSM-VIA 1.1 3. Select the clip or playlist LSM ID in one of the following ways: ◦ press the function keys on the Remote Panel, (clip) (playlist) ◦ use the numeric pad on the touchscreen. NOTE To clear the LSM ID field: press on the console or tap on the touchscreen.
-
Page 202: Recalling Media By Lsm Id From The Lsm-Via Viewer
8.1.4. Recalling Media by LSM ID from the LSM-VIA Viewer Introduction You can easily load a local or remote train, clip or playlist from the LSM-VIA Viewer by simply typing its LSM ID. Writing Rules for a Train LSM ID •... -
Page 203: Accessing Network Record Trains
USER MANUAL LSM-VIA 1.1 • to load a remote playlist: type the LSM ID and the network number of a remote server, e.g. 14/03 or 14/3. How to Recall a Train, Clip or Playlist from the LSM- VIA Viewer 1. Make sure the focus is on the Clip grid, not on the Playlist pane. - Page 204 EVS Broadcast Equipment SA Issue 1.1.C - January 2021 When the Filter mode is enabled, the Trains screen only displays the record trains which have been assigned to the filter. See section "Setting Filters to Record Trains" on page 196. NOTE If filters had been defined on remote record trains before the corresponding server went disconnected, filter boxes are still displayed but not available.
- Page 205 USER MANUAL LSM-VIA 1.1 Navigating through the Trains Screen You can navigate through the pages of the Trains screen in one of the following ways: • Tap the page number from the ribbon to display the corresponding page. In case more than 9 pages exist, tap >> to be able to access more pages.
-
Page 206: Setting Filters To Record Trains
EVS Broadcast Equipment SA Issue 1.1.C - January 2021 Sort by Rec Name The record train name (second line) is written in bold in each record train box. 8.2.2. Setting Filters to Record Trains About Filters Frequently-used trains can be mapped to selected boxes on the Trains screen to allow users a quick access to them. - Page 207 USER MANUAL LSM-VIA 1.1 3. Tap an empty box, where you want to map a record train. The Trains - Camera Selection screen is displayed: 4. Tap the box of the required record train. The train is mapped to the selected box in the Define Filter screen.
- Page 208 EVS Broadcast Equipment SA Issue 1.1.C - January 2021 NOTE if you repeat the step 3 to map another record train, the sort option and the page previoulsy selected on the Camera Selection screen are automatically displayed. 5. (optional) To assign a color to the record train box: a.
-
Page 209: Loading A Record Train From The Trains Screen
USER MANUAL LSM-VIA 1.1 6. Tap the Close button: Possible Actions on the Filters Button Description Tap Update to change the record train mapped to the selected box. Tap Color to be able to select a color for the selected box. - Page 210 EVS Broadcast Equipment SA Issue 1.1.C - January 2021 2. (optional) Activate the Filter mode by tapping the Filter toggle button to only display your selection of record trains: The Trains screen only displays the record trains defined in the filter.
-
Page 211: Loading Back The Local Record Train (Back To Local)
USER MANUAL LSM-VIA 1.1 NOTE If filters had been defined on remote record trains before the corresponding server went disconnected, filter boxes are still displayed but not available. The box of the loaded record train is highlighted (blue by default). If a colored filter had been associated with the record train, the box is colored accordingly and highlighted. -
Page 212: Using The Shotbox For Quick Actions
EVS Broadcast Equipment SA Issue 1.1.C - January 2021 Camera Assignment The default camera assignment to PGMs is restored as follows: • In PGM+PRV, CAM A is assigned to PGM and CAM B is assigned to PRV. • In Multi PGM, CAM A is assigned to PGM1, CAM B to PGM 2, and so on. -
Page 213: The Shotbox Screen
USER MANUAL LSM-VIA 1.1 8.3.2. The Shotbox Screen Overview of the Shotbox Screen The Shotbox differs slightly in use mode or edit mode, but it contains the same areas highlighted on the screenshot below. Title bar (1) Page title and button to leave the page. - Page 214 EVS Broadcast Equipment SA Issue 1.1.C - January 2021 Media Grid (4) Boxes corresponding to clips or playlists you can access rapidly. Information can include: media name, clip CAM angle, remote server ID, LSM ID. NOTE At startup, media that had been mapped to the Shotbox and that have been deleted afterwards are not shown anymore on the Shotbox.
-
Page 215: Adding Media To The Shotbox
USER MANUAL LSM-VIA 1.1 How to Lock the Shotbox If the Shotbox is not locked, which is the case by default, it will close when you: • perform a command that requires the touchscreen to be updated. • press E/E to go back to the train head. - Page 216 EVS Broadcast Equipment SA Issue 1.1.C - January 2021 3. Tap the tab of the page where you want to store the quick link to your media. Page 1 is open by default. 4. Tap the box where you want to store the quick link to your media.
- Page 217 By default, the local server is selected (blue highlighted). Go to step 5. 5. Tap the EVS server where the requested media is stored. The local server is displayed on a gray box. 6. Enter the media LSM ID in one of the following ways: ◦...
- Page 218 EVS Broadcast Equipment SA Issue 1.1.C - January 2021 NOTE To clear the LSM ID field: 7. Validate your action by pressing or tapping 8. (Optional) Define options for the selected media. See section "Possible Actions in Edit Mode" on page 208.
-
Page 219: Loading Media From The Shotbox
USER MANUAL LSM-VIA 1.1 Button Description Tap Update to change the media mapped to the box. Tap Color to be able to select a color for the box. Tap Clear to remove the media mapped to the box. Tap the Play button if you want the media to be directly played out when the user taps the box in the Shotbox. - Page 220 EVS Broadcast Equipment SA Issue 1.1.C - January 2021 3. Tap the box corresponding to the media you want to load. NOTE If a remote media had been mapped before the corresponding server went disconnected, the box is still displayed but is not available.
-
Page 221: Pushing Clips To Network Servers
USER MANUAL LSM-VIA 1.1 8.4. Pushing Clips to Network Servers Introduction The Push function allows operators to easily send a copy of a clip to other machines, called push machines, on the network, via the GbE network or XNet. This can be executed from the Remote Panel. - Page 222 EVS Broadcast Equipment SA Issue 1.1.C - January 2021 3. Select up to 5 target servers where you want to send the clip by taping their box. 4. Tap ◦ Clip to push all the clip angles: ◦ Cam to push the controlled CAM angles of the clip: 5.
- Page 223 USER MANUAL LSM-VIA 1.1 2. Set up to 5 favorite target servers by taping the star. The star of the server(s) set to favorite(s) is highlighted in blue (or white if the server box is selected): The Favorites tab ( ) appears as first tab in the Push screen as soon as one star has been selected.
- Page 224 EVS Broadcast Equipment SA Issue 1.1.C - January 2021 How to Push Clips to Favorites 1. Load a clip on the smallest controlled PGM. See section "Loading Clips" on page 92 for other ways to load a clip. 2. From the Clip screen on the Remote Panel touchscreen, tap The clip is pushed to the selected server(s) with the settings (Clip/CAM - Short/Long) used for the last Push action.
-
Page 225: Maintenance
USER MANUAL LSM-VIA 1.1 Maintenance 9.1. Viewing and Managing Notifications Notification Types LSM-VIA can issue notifications of four different categories to which colors are associated: • information (blue) • success (green) • warning (orange) • error (red) Temporary Notification Messages Each time a notification is issued, it appears as a colored rectangle at the top right of the LSM-VIA Viewer and of the Remote Panel touchscreen. -
Page 226: Extracting Logs
Support team spot more easily when and where you have faced the issue. Afterwards, you will have to extract the logs first for the LSM-VIA system, then, for the whole environment. So, you will get a single archive package named with the date and time that you will send to the Support team. - Page 227 So, you will extract the logs from the Remote Panel or from the Viewer after you have logged in. In this case, the full logs (from the LSM-VIA Remote Panel and from the LSM- VIA workstation) are extracted whatever the device from which you extract the logs.
- Page 228 Issue 1.1.C - January 2021 How to Get all the Logs from the Entire System The Getlogs tool will not only retrieve the logs extracted in the previous step for LSM-VIA but also all the other logs. 1. From the XClient-VIA desktop, press the Windows key and then select Files.
- Page 229 Plug a USB key onto the XClient and copy the archive package to it. ◦ Transfer the archive package with Filezilla (sftp connection). Alternative Procedure in Case of Problems In some cases, you may not be able to collect all the LSM-VIA logs: • The LSM-VIA application cannot be started. •...
- Page 232 Belgium www.evs.com/contact EVS Broadcast Equipment is continuously adapting and improving its products in accordance with the ever changing requirements of the Broadcast Industry. The data contained herein is therefore subject to change without prior notice. Companies and product names are To learn more about EVS go to www.evs.com...
Need help?
Do you have a question about the LSM-VIA and is the answer not in the manual?
Questions and answers
How do you label your record trains instead of the generic rec 1. On the lsm legacy’s you did through menu but I don’t see that ability in via menu
To label record trains on the EVS LSM-VIA, you define filters for the record trains. This allows you to map frequently-used trains to specific boxes on the Trains screen and assign a custom label. Here’s how to do it:
1. Open the Trains screen by pressing the + button.
2. Tap the Define Filter button at the bottom right. The "Trains-Define Filter" screen appears.
3. Tap an empty box where you want to map a record train.
4. Select the required record train from the "Trains-Camera Selection" screen. The train is mapped to the selected box.
5. (Optional) Assign a color to the record train box:
- Tap the Color button.
- Choose a color from the palette or reset to default (gray) by selecting the white square.
This process allows you to label and organize record trains for quick access.
This answer is automatically generated
How do I label what cam is in what channel