ZCS 3000SP Quick Installation Manual
Hide thumbs
Also See for 3000SP:
- User manual (58 pages) ,
- User manual (209 pages) ,
- Quick installation manual (59 pages)
Table of Contents
Advertisement
Quick Links
Advertisement
Table of Contents

Related Manuals for ZCS 3000SP


Summary of Contents for ZCS 3000SP
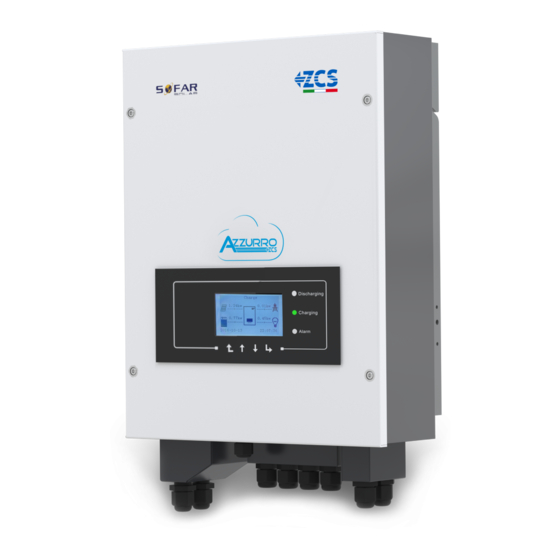
- Page 1 QUICK INSTALLATION GUIDE - 3000SP STORAGE SYSTEM...
- Page 2 1. INSTALLATION AND DISTANCES Always wear protective General notice - Always consult the clothing and/or personal Important Safety manual protective equipment Instructions Maximum height from ground permitted: 180 cm 1. INSTALLATION Distances for installing multiple inverters Maximum inclination Correct installation in permitted: 15°...
- Page 3 For instructions on this installation mode, refer to all pages of this guide, except pages 10 to 15 (inclusive). Note: If the 3000SP storage system is to be installed under different conditions from those shown in the diagrams above, contact Technical Support to check whether it is feasible.
-
Page 4: Lights And Buttons
3. LIGHTS AND BUTTONS Charge Operating status Green charging light Green charging light Red alarm light Menu/back System status Discharge Steady PV production Discharging control Intermittent Down 10. Grid power Charge Steady Enter/Forward 11. Home consumption Charging control Intermittent Discharge status 12. - Page 5 6. OPERATING STATES IN AUTOMATIC MODE Charge When the power produced from the photovoltaic system is greater than the energy required by the loads, the 3000SP system will charge the battery with the excess energy. Charge Charge When the battery is fully charged, or when the...
-
Page 6: Battery Connection
8.1 SINGLE PYLONTECH BATTERY Note: Maximum DoD Programmable 80% Communication cable pinout between Pylontech battery & 3000SP system, left to right PIN 1: White orange PIN 2: orange 3000SP PIN 3: white blue 1 …... - Page 7 8.3 SINGLE WECO BATTERY Note: Maximum DoD programmable 90% Communication cable pinout between Weco Note: The communication cables are located inside the battery and 3000SP system, from left to right kit in the WeCo battery box PIN 1: White orange 3000SP...
- Page 8 Note: Turn off the batteries each time the position of the DIP switches is changed. In case of multiple batteries connected in parallel or when adding new batteries to a system with batteries already installed and working, make sure that the difference between the voltages of all the batteries is less than 1 Volt. Each battery must be measured individually, therefore make sure the batteries are not connected to each other.
- Page 9 Connecting 2 batteries SLAVE MASTER Connecting 3 batteries MASTER SLAVE 1 SLAVE 2 Connecting 4 batteries MASTER SLAVE 1 SLAVE 2 SLAVE 3 Connecting 5 batteries MASTER SLAVE 1 SLAVE 2 SLAVE 3 SLAVE 4...
-
Page 10: Current Sensor Connection
Position the CTa sensor on the phase where the storage system is installed, at the output of the import/export meter so that all the power flows entering and leaving the meter can be read. PV Inverter CTpv 3000SP Meter Panels Utilities Batteries... - Page 11 INSTALLATION OF SINGLE-PHASE SYSTEM PV Inverter CTpv 3000SP Meter Panels NO!!!! Utilities Do not read the Batteries consumption but the exchanges with the grid!!! Current sensor PV Inverter CTpv Meter 3000SP Panels Utilities Batteries Current sensor The sensor must include all phase cables...
- Page 12 2) Remove the cover (B), loosen the cable gland (C), and then remove the stopper (G). 3) Pass the AC cable through the cable gland (C), and connect the phase, neutral and ground cables to the GRID terminal block. 11.1 INITIAL SET UP PROCEDURE OF THE 3000SP STORAGE SYSTEM 3000SP storage system GRID...
- Page 13 AC voltage. The inverter will turn on. 11.2 INITIAL SET UP PROCEDURE OF 3000SP SYSTEM - FREEZING OF CURRENT SENSORS The procedure for freezing the current sensors is available from firmware version 2.00 of the Service Code onwards;...
- Page 14 INSTALLATION OF THREE-PHASE SYSTEM 12. CURRENT SENSOR CONNECTION For the extension cable, it is recommended to use a category five 8-pole mains cable, or a 2x0.5 mm² cable. In the first case, four conductors will be connected to one pole of the sensor and the other four will be connected to the other pole. To prevent the conductor wires from breaking, it is recommended to use a cable with flexible and non-rigid conductors.
- Page 15 INSTALLATION OF THREE-PHASE SYSTEM Photovoltaic panels Photovoltaic inverter CTpv current sensor Meter CTc current sensor CTb current sensor CTa current sensor L1 Line loads L3 Line loads Batteries L2 Line loads Photovoltaic panels Photovoltaic inverter CTpv current sensor CTc current sensor CTb current sensor Meter CTa current sensor...
- Page 16 14.1 INITIAL SET UP PROCEDURE OF THE 3000SP SYSTEM 3000SP System GRID Make sure that the AC circuit breaker of the 3000SP system is open and that no AC voltage is present at the ends of the 3000SP. Make sure the PV system is not producing power on...
- Page 17 AC voltage. The inverter will turn on. 14.2 INITIAL SET UP PROCEDURE OF 3000SP SYSTEM - FREEZING OF CURRENT SENSORS The procedure for freezing the current sensors is available from firmware version 2.00 of the Service Code onwards;...
- Page 18 FREEZE appears at the bottom and then confirm with the fourth button If the required conditions cannot be checked, please contact technical support for assistance 14.3 INITIAL SET-UP PROCEDURE OF THE 3000SP - CTpv SETTINGS AND PHOTOVOLTAIC START UP 1.Settings “Password 0001” 14.CTpv Scale Factor...
-
Page 19: Checking For Correct Operation
To carry out the check, it is necessary to: 1) Switch off the photovoltaic system. 2) Lower the switch of the circuit breaker, the 3000SP system will remain on but will go into error due to no AC power supply (or in EPS mode, if previously enabled). - Page 20 7) Once the countdown is over, the batteries will start to Discharg deliver power according to the availability towards the utility, trying to reset the consumption from the grid. Check that the value of the consumption remains constant as the power supplied by the battery increases during discharge.
- Page 21 16. CHECKING THE SET PARAMETERS To check whether the parameters set are correct, enter “System Info” on the display menu and check the data, especially those highlighted. Serial number of the machine Software version installed Hardware version Communication address (enter a value of “01” for monitoring with Wi-Fi) Country code indicating the current legislation Firmware version installed Information on EPS mode and start-up time...
- Page 22 17. INITIAL SETTINGS - BATTERY PARAMETERS 1.PYLON (PYLONTECH) 4.3 Initial settings - Battery 1.Settings “Password 0001” 1.Battery parameters 4.GENERAL LITHIUM (WECO) 1. Battery type Depth of discharge 2. Depth of Discharge 3. Save * * After setting the parameters, EPS depth of discharge confirm by moving the cursor to “Save and press 18.
-
Page 23: Accessories Required
20.1 EPS MODE The EPS (Emergency Power Supply) function allows the machine to supply energy to the utility in the event of a power failure. If the event of no mains power, the storage inverter interrupts its normal operation; if EPS mode is active and correctly wired and configured, part of the loads (indicated as critical or priority loads) connected to the inverter via the LOAD output will be powered by the inverter, drawing energy only from the batteries. -
Page 24: Operating Mode
Install the double switch contactor. To prevent the current from being fed into the grid, a 2NC + 2NA double-switch contactor) must be purchased and installed correctly. The contactor must be installed as shown in the diagram below, ensuring that during normal operation of the storage inverter the contacts on the grid side are normally closed, while those on the priority load side are normally open. - Page 25 In the event of a power blackout, the alternating voltage supplied by the grid will be lost; this condition will activate the internal switches of the storage inverter which, once the set activation time has expired, will supply an alternating voltage of 230V with a frequency of 50 Hz on the LOAD output. By energising the coils of the double switch contactor, this voltage will cause the normally open switches to close, and the normally closed switches to open (to prevent current being fed back into the grid, into the photovoltaic inverter and into the GRID terminal block of the storage system which would attempt to reconnect to the grid by deactivating the EPS function), thus...
-
Page 26: Data Sheet
22. DATASHEET...
Need help?
Do you have a question about the 3000SP and is the answer not in the manual?
Questions and answers