
Related Manuals for Xebex Fitness AR-3GL


Summary of Contents for Xebex Fitness AR-3GL
-
Page 2: Assembly Preparation
ASSEMBLY PREPARATION To ensure ease of product assembly, please take time to verify the size and quantities of all required assembly hard- ware. Use the itemized parts listing and hardware chart for reference. The product assembly process has been documented in easy to follow steps. Please read all assembly instructions carefully. - Page 3 J4-Cap Head Socket Screw J1-Cap Head Socket Screw J2-Washer M6x50mm M8x16mm M8x2T J6-Ball Head Screw M4x10mm J3-Phillip Head Socket Screw J7-Cap Head Socket Screw M6x10mm M8x12mm J5-Tapping Screw M4x12mm...
- Page 4 NOTE: Before assembly please lay out ALL pieces accordingly to ensure you are not missing any items. PLEASE BE CAUTIOUS as some components may be sharp and can cause harm if not handled correctly. Always use safety measurements when assembling any piece of equipment or machinery.
- Page 5 Step 1 For best results place Forward Base(A) (Damper Fan) upside down on a soft secure surface. Once this is done, the pre-screwed holes for Front Stabilizer Assembly(C) will be visible. To bolt in Front Stabilizer Assembly(C) into Forward Base(A), place directly on top of pre-screwed holes. Secure with 4(J1) Bolt(s) and (J2) Washer(s).
- Page 6 Step 2 2-1 Please LIGHTLY pull wires so that they do not recede into the stem of Base Leg(A). DO NOT CUT WIRES; wires will connect to console tube when installing console. CAUTION:PLEASE HANDLE WITH CARE, AS ELECTRICAL WIRES ARE DELICATE. IF WIRES ARE HANDLED TOO AGGRESSIVELY, THEY WILL DISLOCATE.
- Page 7 Step 3 “To finsish securing Console(H1) onto Forward Base(A) please attach” Place Holder(L). Place Holder(L) will break up into 2 components (L1) and (L2). These components will rejoin together once attached onto Forward Base(A). Once rejoined please secure with 2 screws(J6) and 1 screw(J5).
- Page 8 Step 4 To install Rear Leg(D), face Base Railing(B) face down so that the receiving device for the seat cushion is on the floor. Place Rear Base Leg(D) above the pre-screwed holes of the Base Rail(B). “Once placed, secure with” 4(J3) Bolt(s).
- Page 9 Step 5 Align Forward Base(A) with Base Railing(B) until the pre-screwed holes are aligned with one another. Secure Forward Base(A) to Base Railing(B) with 6 Bolts(J1) and 6 Washers(J2). NOTE: Please be sure to tighten and secure ALL BOLTS AND WASHERS IN THEIR PLACE TO ENSURE A SOLID AND SECURE foundation to the rower.
- Page 10 Step 6 To install Pedal Support Frame(F) onto Forward Base(A) with 4(J1) bolts. Place foot pedals (E1) and (E2) on Pedal Support Frame(F) with 4(E8) bolts. Each Pedal will require 2 (E8) bolts to secure. NOTE: There are 12 holes on Pedal Support Frame(F). User can adjust the distance between pedals by installing the pedals into different holes.
- Page 11 Step 7 To install Seating place Seat Cushion(G1) above the pre-screwed holes of Seat Support Frame(G2). Secure with 4 (J1) bolts and 4 (J2) washers. Place Seat Support Frame(G2) with Seat Cushion(G1) onto the seat bracket on Base Railing(B). Secure with 4 (J7) bolts and 4 (J2) washers.
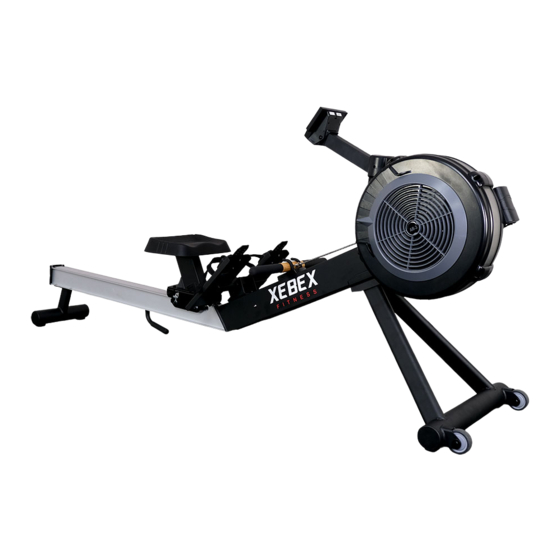
- Page 12 The Damper Lever controls how much air flows into the flywheel housing. Higher damper setting allows more resistance. Lower damper setting allows less resistance. Damper Lever Foot Height Adjuster Push down to adjust the position of the heel support.
- Page 14 NAME SPECIFICATION Q`TY NO NAME SPECIFICATION Q`TY M5×10mm (M4 hole) Main Frame Assembly Phillip Head Socket Screw Flywheel Fan Assembly M5×12mm Tapping Screw Ø 50×Ø 39 ×60.5mm A2-1 Handle Hook A2-2 1/4" Chain Tube A2-3 One-Way Bearing Chain Hook Ø 18×Ø 9(M6)×15mm A2-4 Iron Washer Even Head Socket Screw...
-
Page 15: Specifications
NAME SPECIFICATION Q'TY NO. NAME SPECIFICATIONS Q'TY Nylon Acorn Nut Pedal Support Frame Seat Lower Acorn Nut Seat Support Frame Washer Ø 8×Ø 16×2T Console Tube (12×8×2mm) Spacer Console Bracket Seat Carriage Wheel Bearing 608ZZ(TPX) Console Back Cover M8×75mm Seat Carriage Roller Cap Head Socket Screw Seat Carriage Axial Nylon Acorn Nut...
Need help?
Do you have a question about the AR-3GL and is the answer not in the manual?
Questions and answers