Eelectron HORIZONE IN00B02WEB Configuration Manual
Hide thumbs
Also See for HORIZONE IN00B02WEB:
- Installation manual (108 pages) ,
- Quick start manual (2 pages) ,
- Commissioning instructions (113 pages)

Subscribe to Our Youtube Channel
Related Manuals for Eelectron HORIZONE IN00B02WEB


Summary of Contents for Eelectron HORIZONE IN00B02WEB
- Page 1 HORIZONE SERVER IN00B02WEB KNX CONFIGURATION MANUAL Product: IN00B02WEB Description: Horizone Server - KNX Configuration Manual Date: 10/04/2020 Version: Eelectron Spa IN00B02WEBFI00060140_KNX_MANUAL.DOCX 1/42...
- Page 2 Consequently, Eelectron assumes no responsibility therein. © 2020 Eelectron SpA. All rights reserved. Microsoft, Windows, Windows 2000, Windows XP, Windows 2003, Windows Vista, and Internet Explorer are either registered trademarks or trademarks of Microsoft Corporation in the USA and other countries.
-
Page 3: Table Of Contents
Application of ETS rules Selective import KNX OBJECTS Creating objects manually Searching for objects Detail tab Group addresses Rooms and scenarios Connections Programmable events Schedules KNX SCENARIOS Introduction Configuring a KNX scenario PHYSICAL DEVICES Introduction Device List Eelectron Spa IN00B02WEBFI00060140_KNX_MANUAL.DOCX 3/42... - Page 4 Polling enquiry Detail tab SETTINGS Introduction REMOTE CONTROL OF ETS Introduction Local network usage Remote use REVISIONS Eelectron Spa IN00B02WEBFI00060140_KNX_MANUAL.DOCX 4/42...
-
Page 5: Introduction
IEC 61558-2-6 or equivalent. The CE declaration of conformity of the device can be requested from Eelectron SpA, at the contacts on the website www.eelectron.com In accordance with Directive 2002/96/EC, electronic devices must be disposed of in dedicated facilities and not in the collection of municipal solid waste. -
Page 6: Overview
In order to manage a KNX system with HORIZONE SERVER, you must have: ● A HORIZONE SERVER (upgraded to version 1.0 or higher) ● A physical connection to the KNX twisted-wire bus cable or, alternatively, the ability to communicate via TCP/IP with an IP router Eelectron Spa IN00B02WEBFI00060140_KNX_MANUAL.DOCX 6/42... -
Page 7: Installation
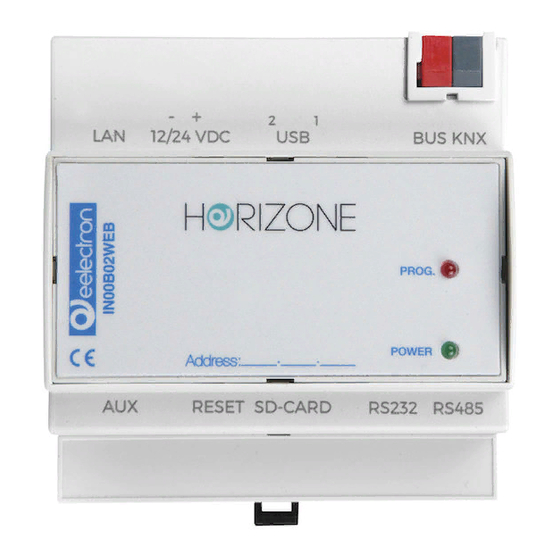
For direct connection, use the standard red-black terminal provided to connect to the bus, taking care to respect the correct polarity. For communication via KNXNET/IP, HORIZONE SERVER and IP router must be on the same network, and multicast/broadcast traffic must be enabled. Eelectron Spa IN00B02WEBFI00060140_KNX_MANUAL.DOCX 7/42... -
Page 8: Import From Ets
This type of file can be generated manually (for example, by using Microsoft Excel) or automatically by ETS software. In the latter case, it is necessary to: Select the branch of group addresses that you want to export ● Select “EXPORT GROUP ADDRESSES” from the context menu ● Eelectron Spa IN00B02WEBFI00060140_KNX_MANUAL.DOCX 8/42... - Page 9 Specify the following options: ● Data organized into 2 columns (label + address) ◦ Tab separation between columns ◦ Eelectron Spa IN00B02WEBFI00060140_KNX_MANUAL.DOCX 9/42...
-
Page 10: Ets Rules
To edit ETS rules, go to the TECHNOLOGIES section → KNX → ETS RULES: the following page is displayed, containing the list of all the default rules for importing from ETS. Eelectron Spa IN00B02WEBFI00060140_KNX_MANUAL.DOCX 10/42... - Page 11 KEYWORDS specified in the rule name, that has the data length specified as the TYPE, it adopts the ENCODING specified in the rule for writing/reading information about the KNX bus and automatically assigns the FUNCTION and ICON chosen for the graphical representation of the corresponding object. Eelectron Spa IN00B02WEBFI00060140_KNX_MANUAL.DOCX 11/42...
-
Page 12: Importing The Project
Allows you to determine which communication channel HORIZONE SERVER should use to communicate with the new imported KNX addresses. Only the KNX port built into the web server is available as an option, except for special configurations. Eelectron Spa IN00B02WEBFI00060140_KNX_MANUAL.DOCX 12/42... -
Page 13: Finding Status Feedback
The second method allows you to define a set of custom rules with which to search for associations between group addresses and create the resulting relationships between KNX objects within the supervision. Press the "CONFIGURE" button to define import rules: the following page is displayed... Eelectron Spa IN00B02WEBFI00060140_KNX_MANUAL.DOCX 13/42... - Page 14 (as in the case of command keywords) whether they should be at the beginning, end, or anywhere in the ETS name. The search automatically ignores a series of "special" characters: space ● ● ● ● ● ● ● Eelectron Spa IN00B02WEBFI00060140_KNX_MANUAL.DOCX 14/42...
- Page 15 “ADVANCED" mode) CLEAR PRE-EXISTING STATUS This option allows you to completely remove any previously created status – command relationships and replace them RELATIONSHIPS entirely with those identified in the new import. Otherwise, previous relationships are maintained. Eelectron Spa IN00B02WEBFI00060140_KNX_MANUAL.DOCX 15/42...
-
Page 16: Importing
The two columns on the right show the KNX objects interpreted as status feedback (label and group address), while the two columns on the left show the relative command objects, to which the statuses have been associated. Eelectron Spa IN00B02WEBFI00060140_KNX_MANUAL.DOCX 16/42... -
Page 17: Application Of Ets Rules
● Specify a reference FUNCTION, which is the category in which the new object will be inserted ● Select the most appropriate ICON by pressing the corresponding preview button and selecting the most appropriate one in the pop-up window that is displayed Eelectron Spa IN00B02WEBFI00060140_KNX_MANUAL.DOCX 17/42... -
Page 18: Selective Import
HORIZONE SERVER based on the version/ license To enable this mode, select the CHOOSE WHICH ADDRESSES TO IMPORT option before starting the procedure; a list of the group addresses in the project is shown, divided by intermediate group: Eelectron Spa IN00B02WEBFI00060140_KNX_MANUAL.DOCX 18/42... - Page 19 Include all addresses automatically by clicking on the link at the bottom of the message ● Manually include some of them by locating them in the list of addresses in the project ● Enable ADVANCED access level and disable “CREATE AUTO-RELATIONS” ● Eelectron Spa IN00B02WEBFI00060140_KNX_MANUAL.DOCX 19/42...
-
Page 20: Knx Objects
Choosing the function also filters the list of available renderings RENDERING Select a graphic to use to represent the objects you want to create within supervision. The list of renderings depends on the encoding type chosen Eelectron Spa IN00B02WEBFI00060140_KNX_MANUAL.DOCX 20/42... -
Page 21: Searching For Objects
Searching for objects KNX objects created by the import procedure or manually are available in the TECHNOLOGIES → KNX → ETS PROJECT section grouped according to the hierarchical structure of the corresponding group addresses in ETS: Eelectron Spa IN00B02WEBFI00060140_KNX_MANUAL.DOCX 21/42... -
Page 22: Detail Tab
Allows you to select the rendering via a pop-up window to be used for the graphic representation of the object in the supervision pages (FRONTEND). The choice of renderings depends on the type of KNX object and FUNCTION chosen (specify “none” as a function to display all possible icons/renderings). Eelectron Spa IN00B02WEBFI00060140_KNX_MANUAL.DOCX 22/42... - Page 23 Normally, this is set automatically by the ETS import; disable it to make the object view-only even if could be controlled. NOTE: to activate the command on objects which are initially read-only, change the type of communication with the corresponding KNX address Eelectron Spa IN00B02WEBFI00060140_KNX_MANUAL.DOCX 23/42...
- Page 24 ENABLE PIN CONTROL Specifies whether the KNX object command should be protected with a numeric PIN NEW PIN If the previous entry is enabled, it allows you to specify the security PIN (to be repeated twice) REPEAT NEW PIN Eelectron Spa IN00B02WEBFI00060140_KNX_MANUAL.DOCX 24/42...
-
Page 25: Group Addresses
“SORT” button, if necessary and then, dragging them into the correct order. Eelectron Spa IN00B02WEBFI00060140_KNX_MANUAL.DOCX 25/42... -
Page 26: Rooms And Scenarios
This field allows you to determine which value to set if the target object of the event VALUE envisages it, choosing it from those available for the object in question. You can also choose to automatically set the value of the object that causes the event to run, or to deny it. Eelectron Spa IN00B02WEBFI00060140_KNX_MANUAL.DOCX 26/42... -
Page 27: Programmable Events
This section contains the summary of programmable events to which the current object belongs. Refer to the INSTALLATION MANUAL for further information. Schedules This section allows you to create one or more schedules for the current object. Refer to the INSTALLATION MANUAL for further information. Eelectron Spa IN00B02WEBFI00060140_KNX_MANUAL.DOCX 27/42... -
Page 28: Knx Scenarios
Set the value to be sent on the KNX bus by pressing the scenario button in the “KNX ● SCENARIO VALUE” field that is only available by choosing the “SCENARIOS” function After the configuration has been completed, the KNX scenario object looks like this: Eelectron Spa IN00B02WEBFI00060140_KNX_MANUAL.DOCX 28/42... - Page 29 By pressing the “LEARN” button, on the other hand, the current status of the devices that are part of the scenario is stored, which also happens if you press and hold down the KNX buttons. Eelectron Spa IN00B02WEBFI00060140_KNX_MANUAL.DOCX 29/42...
-
Page 30: Physical Devices
Physical device status queries are performed completely automatically, rotating on all devices to ensure minimal impact on bus traffic. Depending on the outcome of the query, the devices can be in one of the following states: Eelectron Spa IN00B02WEBFI00060140_KNX_MANUAL.DOCX 30/42... -
Page 31: Detail Tab
When created via import ETS, each device is accompanied by an on-screen “system” notification that automatically displays a message if the device in question can no longer be reached by polling. These notifications can be modified or deleted as desired. Eelectron Spa IN00B02WEBFI00060140_KNX_MANUAL.DOCX 31/42... -
Page 32: Settings
It is also possible to determine whether HORIZONE SERVER should communicate with the KNX system directly, through the integrated communication port, or via an IP KNXNet/IP router; choose the desired method using the appropriate drop-down menu. Eelectron Spa IN00B02WEBFI00060140_KNX_MANUAL.DOCX 32/42... -
Page 33: Remote Control Of Ets
If HORIZONE is not detected ● automatically due to network problems, manually enter its IP address and specify “3671” as the port, taking care not to select NAT mode When finished, confirm the changes ● with the “OK” button Eelectron Spa IN00B02WEBFI00060140_KNX_MANUAL.DOCX 33/42... - Page 34 Press the “NEW” button to open the “NEW CONNECTION” window; specify a name for the ● connection, select “KNXNet/IP” and manually enter the IP address of the webserver, specifying 3671 as the port (not NAT mode) Eelectron Spa IN00B02WEBFI00060140_KNX_MANUAL.DOCX 34/42...
- Page 35 In ETS remote mode, only the “ON-LINE CONTROL” function can be used to perform a diagnostic of the system; the “PROJECT CONTROL” function requires a direct connection to the bus. This constraint applies to both ETS3 and ETS4. Eelectron Spa IN00B02WEBFI00060140_KNX_MANUAL.DOCX 35/42...
-
Page 36: Remote Use
VPN connection to the network on which HORIZONE is located, whose public IP address or, alternatively, the DYNDNS domain name must be known. If you are using Windows XP on your PC, do the following: Eelectron Spa IN00B02WEBFI00060140_KNX_MANUAL.DOCX 36/42... - Page 37 IP addresses provided in HORIZONE; at this point, you can switch to the ETS configuration as described above in the case of use on the local network. If you are using Windows VISTA or SEVEN, do the following: Eelectron Spa IN00B02WEBFI00060140_KNX_MANUAL.DOCX 37/42...
- Page 38 Log in to the dashboard, then ● select “Network and Sharing Center” Select “configure connection or ● network” in the side menu Select “Connecting to a company ● network” Eelectron Spa IN00B02WEBFI00060140_KNX_MANUAL.DOCX 38/42...
- Page 39 (specifying the public IP address of the router if you connect remotely), and specify a name for the connection (e.g.: “HORIZONE”) Specify the login credentials ● indicated in the HORIZONE configuration tab and leave the “domain” box blank Eelectron Spa IN00B02WEBFI00060140_KNX_MANUAL.DOCX 39/42...
- Page 40 If ETS5 or higher is used, normal HORIZONE communication with the bus must be temporarily suspended. To do this, use the START and STOP buttons on the remote control page: Eelectron Spa IN00B02WEBFI00060140_KNX_MANUAL.DOCX 40/42...
- Page 41 If the web page is reloaded during ETS5 remote control, the following warning is displayed: In this case, to restore normal functionality of the server, press the link and wait until the page reloads. Eelectron Spa IN00B02WEBFI00060140_KNX_MANUAL.DOCX 41/42...
-
Page 42: Revisions
First draft 06/06/2017 IN00B02WEBFI00040102 Addition of screenshots, minor fixes 15/12/2017 IN00B02WEBFI00040103 Content and screenshot adaptation to software version 1.0.2, layout restyling 10/04/2020 IN00B02WEBFI00060140 Adaptation to software version 1.4 Copyright 2020 Eelectron SpA All rights reserved http://www.eelectron.com Eelectron Spa IN00B02WEBFI00060140_KNX_MANUAL.DOCX 42/42...
Need help?
Do you have a question about the HORIZONE IN00B02WEB and is the answer not in the manual?
Questions and answers