
Related Manuals for OLI Sport


Summary of Contents for OLI Sport
- Page 1 INSTALLATION USE AND MAINTENANCE MANUAL Revision - 00 of 10/06/2019 Original instructions: Italian...
- Page 2 INDEX GENERAL INFORMATION 4.2. SPARE PARTS AVAILABLE 1.1. PURPOSE OF THE MANUAL 1.2. STORAGE OF THE MANUAL 1.3. MANUFACTURER 1.4. DESCRIPTION 1.5. CERTIFICATION 1.6. WARRANTY 1.7. TECHNICAL ASSISTANCE 1.8. TRANSPORT, PACKAGING AND STORAGE 1.9. IDENTIFICATION OF THE DRIVE UNIT 1.10. TECHNICAL DATA 1.11.
- Page 3 0B_OLI_00_IT_EN...
- Page 4 OLI S.p.a. Via Canalazzo, 35 41036 Medolla (MO) - Italia Tel. +39 0535 410 611 Fax +39 0535 410 650 oli@legalmail.it www.oli-ebike.com...
-
Page 5: General Information
GENERAL INFORMATION 1.1. PURPOSE OF THE MANUAL This manual is an integral part of the SPORT unit and was written by the manufacturer in its original language (Italian) to provide all the information needed for an adequate and safe use of the drive unit and the HMI unit throughout their life cycle (from transport, delivery, installation, use and maintenance to disposal). - Page 6 For any need concerning the use, maintenance or request for spare parts, please specify the identification data of the unit shown on the manufacturer's plate. 1.4. DESCRIPTION The SPORT unit consists of the following components: Drive unit Display control...
- Page 7 1.5. CERTIFICATION The SPORT unit was built in compliance with the relevant EU Directives applicable at the time of its introduction to the market, as specified in the declaration of conformity, therefore it meets the safety requirements required by the machinery directive 2006/42/EC.
-
Page 8: Warranty
SPORT 1.6. WARRANTY The SPORT unit is covered by a warranty on the materials for a period of 36 months from the date shown on the transport document. The buyer loses the right to the warranty in the event of of incorrect installation or use or when they have made changes or repairs to the supply without the authorisation of the manufacturer. -
Page 9: Technical Data
1.9. IDENTIFICATION OF THE DRIVE UNIT The identification of the drive unit takes place via the manufacturer's plate. The plate includes the following information. Model Internal code OLI eds Serial number The identification plate must never be removed. IMPORTANT: 1.10. TECHNICAL DATA... -
Page 10: Size And Dimensions
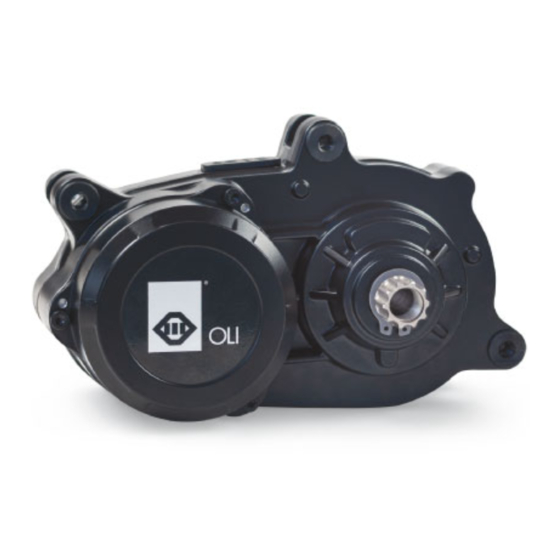
GENERAL INFORMATION 1 SPORT 1.11. SIZE AND DIMENSIONS Drive unit Display 01_OLI_00_IT_EN... - Page 11 1 GENERAL INFORMATION SPORT Control panel; Speed Sensor Speed sensor magnet 01_OLI_00_IT_EN...
-
Page 12: Declaration Of Conformity
The unit complies with the laws in force. Furthermore, since these are products with a strong technical and regulatory evolution, OLI eBike System reserves the right to update its products as quickly as possible due to new technological knowledge and the applicable official standards (UNI, EN, ISO) that may become available from time to time. -
Page 13: Installation
2 INSTALLATION. SPORT INSTALLATION. 2.1. SYMBOLS AND TERMINOLOGY Below are the symbols used in the manual and what they mean. Pictogram Description exagonal male key HilliPs screwdriver crewdriver for slotted screws lotted screws exagonal oPen key ing nut key igHtening torque to aPPly... - Page 14 INSTALLATION. 2 SPORT 2.2. INSTALLATION OF THE HMI UNIT 2.2.1. Display Insert the display support rings on the handlebar. Position the display on the supports carefully at the angle (15° - 35° in relation to the horizontal plane) and tighten the...
-
Page 15: Control Panel
2 INSTALLATION. SPORT 2.2.2. Control panel; Position the keypad paying attention to the angle (15° - 35° in relation to the horizontal plane) so as to allow the user to operate it comfortably during motion. Tighten the fixing screws 1.5 - 3 Nm... -
Page 16: Speed Sensor Installation
INSTALLATION. 2 SPORT 2.2.3. Speed sensor installation speed sensor magnet wheel radius bicycle frame magnet-speed sensor distance Fix the speed sensor to the frame using an M5x12 screw 1.5 - 3 Nm Secure the magnet The distance of the magnet from the sensor must be 25 1.5 - 2 Nm... -
Page 17: Connection Diagram
2 INSTALLATION. SPORT 2.3. IDENTIFICATION OF THE DRIVE UNIT 2.3.1. Connection diagram drive unit display cable battery cable battery cable speed sensor cable lights cable 2.3.2. Assembly of the drive unit Position the drive unit in correspondence with the interface... - Page 18 INSTALLATION. 2 SPORT Connect the following cables: - display - speed sensor - lighting system (if provied for by the installation). During assembly, check that no cables are blocked between the motor and the WARNING: interface. Insert the cables to be connected to the battery the hole in the interface of the frame.
- Page 19 2 INSTALLATION. SPORT Lift the drive unit until it reaches its final position. Insert the M8x25 screws on the right side without tightening them. To optimize the assembly, it is necessary to first insert the screws on the right IMPORTANT: side of the drive unit.
- Page 20 INSTALLATION. 2 SPORT Tighten the screws on the right side. 10 Nm Tighten the screws on the left side. 10 Nm 02_OLI_00_IT_EN...
- Page 21 2 INSTALLATION. SPORT 2.3.3. Chain guide assembly (optional) Position the chain guide so that the fixing slots are in correspondence with the threaded holes present in the drive unit. If necessary, optimize the angle of the chain guide relation to the assembly position of the drive unit using the...
- Page 22 INSTALLATION. 2 SPORT 2.3.4. Spider and crank installation Engage the crank arm (left side) on the shaft tighten. Refer to the manufacturer's specifications. Crown installation The crown can be installed on the inner or outer side of the spider, according to the rear carriage stop.
- Page 23 2 INSTALLATION. SPORT Lubricate the coupling of the spider Eand then engage the spider (right side). Lubricate the thread and then tighten the fixing ring KM30 25 Nm Engage the crank arm (right side) on the shaft tighten. Refer to the manufacturer's specifications.
-
Page 24: Residual Risks
INSTALLATION. 2 SPORT 2.3.5. Engine mount assembly (optional) Position the paramotor so that the fixing holes are in correspondence with the threaded holes in the frame of the bicycle. Tighten the four fixing screws 3-5 Nm 2.4. RESIDUAL RISKS Despite all the measures taken, the unit installation operations present... -
Page 25: Safety Standards
3 USE AND MAINTENANCE MANUAL SPORT USE AND MAINTENANCE MANUAL 3.1. SAFETY STANDARDS In order to minimise the causes that can create hazardous situations for users and others, we encourage you to adopt good rules of behaviour. Particularly when using the bicycle, it is good practice to respect the following points: ›... - Page 26 USE AND MAINTENANCE MANUAL 3 SPORT 3.3. TURNING ON AND OFF To turn on the system, press the MODE key briefly. To turn off the system, press and hold the MODE key. If the e-bike is not used for 5 minutes, the system will automatically turn off.
-
Page 27: "City" Mode
3 USE AND MAINTENANCE MANUAL SPORT 3.6.1. “CITY” Mode Lights status indicator: The activation of the backlighting of the display and of the e-bike lights (depending on the equipment) includes three different modes: Automatic turn on: It is turned on automatically if the ›... - Page 28 USE AND MAINTENANCE MANUAL 3 SPORT Dynamic indicator: The dynamic indicator is a field that can display different types of information. A short press of the MODE key allows you to change the data displayed. The information available is as follows: Lap distance: Indicates the distance travelled since the ›...
-
Page 29: "Race" Mode
3 USE AND MAINTENANCE MANUAL SPORT 3.6.2. “RACE” Mode This mode is intended for experienced users and for sports use of the e-bike. IMPORTANT: Support level: Indicates the selected assistance level. For more information on assistance levels, refer to the “Setting the assistance level”... - Page 30 USE AND MAINTENANCE MANUAL 3 SPORT 3.6.3. “SUMMARY” Mode: In the Summary display mode, the main lap statistics calculated from the last reset are listed. The total distance travelled by the e-bike (data that cannot be reset) is also displayed.
-
Page 31: Trip Reset
3 USE AND MAINTENANCE MANUAL SPORT 3.8. MENU From any display screen, it is possible to access the menu by simultaneously pressing the UP and DOWN keys simultaneously. › To scroll through the menu items, briefly press the UP and DOWN keys. -
Page 32: Time Setting
USE AND MAINTENANCE MANUAL 3 SPORT Time setting Select the item “clock set”. menu TriP reset Set clock Advanced System infos Battery infos Back Use the UP and DOWN keys to increase or decrease the SET CLOCK hours value. Press the MODE key to confirm the set value and switch to minutes. -
Page 33: Firmware Version
3 USE AND MAINTENANCE MANUAL SPORT System info Select the item “system info”. menu TriP reset Set clock Advanced System infos Battery infos Back The display shows the firmware version of the HMI and drive SYSTEM INFOS unit. Firmware version HMI: 1.00.000... - Page 34 USE AND MAINTENANCE MANUAL 3 SPORT Battery info Depending on the equipment, some information may not be available. WARNING: Select the item “battery info”. menu TriP reset Set clock Advanced System infos Battery infos Back The battery status information is displayed in the display.
-
Page 35: Clear Errors
3 USE AND MAINTENANCE MANUAL SPORT 3.8.2. Advanced settings Cancellation of errors Select the item “Delete errors”. AVANCED MENU This operation allows you to reset all the stored error codes. Clear errors LCD contrast Language Diagnosis Back If, after this operation, the error code is still displayed you must go to a service WARNING: centre. - Page 36 USE AND MAINTENANCE MANUAL 3 SPORT LCD contrast Select the item “LCD Contrast”. AVANCED MENU This operation allows you to set the LCD display contrast for maximum display quality. Clear errors LCD contrast Language Diagnosis Back The upper part of the display shows a character pattern that...
-
Page 37: Error Messages
3 USE AND MAINTENANCE MANUAL SPORT Language Select the item “Language”. AVANCED MENU This operation allows you to select the menu language. Clear errors LCD contrast Language Diagnosis Back To scroll through the list of available languages use the UP LANGUAGE and DOWN keys. - Page 38 USE AND MAINTENANCE MANUAL 3 SPORT The following table lists the possible faults and the 4-character codes displayed in the error messages. Error code Description 0001 Communication problem with the battery. It is possible that the battery status data is displayed incorrectly.
-
Page 39: Troubleshooting
3 USE AND MAINTENANCE MANUAL SPORT Error code Description 0810 Signal of the current sensor not compliant. 0811 The drive has detected an overcurrent. 1101 Communication problem between HMI and drive. Check that the wiring is correctly connected and intact. -
Page 40: Demolition And Disposal
USE AND MAINTENANCE MANUAL 3 SPORT 3.11. CLEANING Cleaning operations do not require dedicated products or tools. None of the components, including the drive unit, should be immersed in water or cleaned with a high pressure jet. To clean the motor and the HMI unit, only use a cloth dampened with water. -
Page 41: How To Order Spare Parts
SPARE PARTS 4.1. HOW TO ORDER SPARE PARTS OLI eBike Systems thanks to its logistical structure is able to minimize the delivery time of the spare parts. The manufacturer also guarantees quality and high performance for spare parts. Spare parts are subjected to numerous tests to ensure the same standards as the components initially installed on the product and have been developed and approved specifically for the drive unit and the HMI unit. - Page 42 SPORT Code and Description Spare part identification EBHMI0003 Display EBHMI000F Support for display EBKRV000X Hardware for Move Plus 04_OLI_00_IT_EN...
- Page 43 4 spare parts SPORT Code and Description Spare part identification EKRV000Y Hardware for SPORT EBCG0001 Chain guide EBCE02001 Display extension cable 04_OLI_00_IT_EN...
- Page 44 SPORT Code and Description Spare part identification EBKRV0004 Spider EBSN0002 Ring EBCB0001 Support for chain guard EBMG0001 Sport Paramotor 04_OLI_00_IT_EN...
Need help?
Do you have a question about the Sport and is the answer not in the manual?
Questions and answers
How I buy snap ring for OLI Sport