Table of Contents
Advertisement
Quick Links
Advertisement
Table of Contents

Related Manuals for Datalogic SLIM


Summary of Contents for Datalogic SLIM
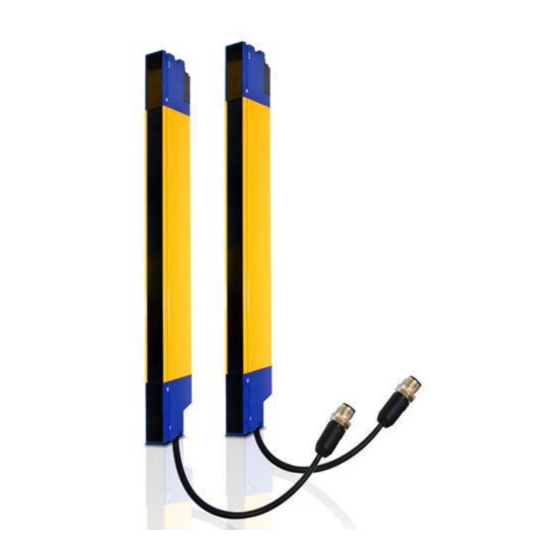
- Page 1 SLIM INSTRUCTION MANUAL Safety Light Curtains...
- Page 2 Electronic versions of this document may be downloaded from the Datalogic website (www.datalogic.com). If you visit our website and would like to make comments or suggestions about this or other Datalogic pub- lications, please let us know via the "Contact" page.
-
Page 3: Table Of Contents
CONTENTS PREFACE ........................V About this Manual ......................v Manual Conventions ..........................v Technical Support ......................v Support Through the Website ......................v Reseller Technical Support ........................ vi COMPLIANCE ......................VII CE Compliance ........................ ix GENERAL INFORMATION .................... 1 General description ......................1 Package contents ...................... - Page 4 (ST-K2-SL-L) “L” type brackets kit .................52 (ST-K2-SL-C-OR) “C” type orientable brackets kit ............52 (SE-S) Columns and floor stands ..................53 (SG-DM) Deviating mirrors .....................54 (TP) Test piece .......................56 Connection cables ......................56 Cascade cables .......................57 (SE-SR2) Safety relay ....................58 (CSME-03VU24-Y14) EDM relay box ................58 GLOSSARY....................... 59 SLIM...
-
Page 5: Preface
WARNING TECHNICAL SUPPORT Support Through the Website Datalogic provides several services as well as technical support through its website. Log on to ( www.datalogic.com For quick access, from the home page click on the search icon , and type in the name of the product you’re looking for. -
Page 6: Reseller Technical Support
PREFACE Reseller Technical Support An excellent source for technical assistance and information is an authorized Datalogic reseller. A reseller is acquainted with specific types of businesses, application software, and computer systems and can provide individualized assistance. VI SLIM... -
Page 7: Compliance
COMPLIANCE INSTRUCTION MANUAL VII... - Page 8 COMPLIANCE VIII SLIM...
-
Page 9: Ce Compliance
Since April 20 , 2016 the main European directives applicable to Datalogic products require inclusion of an adequate analysis and assess- ment of the risk(s). This evaluation was carried out in relation to the applicable points of the standards listed in the Declaration of Conformity. - Page 10 COMPLIANCE X SLIM...
-
Page 11: General Information
CHAPTER 1 GENERAL INFORMATION GENERAL DESCRIPTION The safety light curtains are optoelectronic multi-beam devices that are used to protect working areas that, in presence of machines, robots, and automatic systems in general, can become dangerous for operators that can get in touch, even accidentally, with mov- ing parts. -
Page 12: Package Contents
As the required knowledge may not be completely included in this manual, we suggest the customer to contact Datalogic Technical Service for any necessary information rela- tive to the functioning of the light curtains and the safety rules that regulate the correct installation (see "... -
Page 13: How To Choose The Device
HOW TO CHOOSE THE DEVICE HOW TO CHOOSE THE DEVICE There are at least three different main characteristics that should be considered when choosing a safety light curtain, after having evaluated the risk assessment. Detection capability The detection capability (or resolution) of the device is the minimum diameter that an opaque object must have in order to obscure at least one of the beams that constitute the detection zone and to actuate the sensing device. -
Page 14: Height Of The Detection Zone
The controlled height is the height protected by the safety light curtain. Figure 2 - Detection zone The SLIM controlled height extends up to the whole height of the product (zero dead- zone). The available dimensions are listed in the following table:... - Page 15 HOW TO CHOOSE THE DEVICE Referring to the figure above the protected height is reported in the table here below. CONTROLLED HEIGHT MODEL Hp (mm) SLX-XX-0150-E SLX-XX-0210-E SLX-XX-0270-E SLX-XX-0300-E SLX-XX-0330-E SLX-XX-0360-E SLX-XX-0390-E SLX-XX-0420-E SLX-XX-0450-E SLX-XX-0480-E SLX-XX-0510-E SLX-XX-0540-E SLX-XX-0570-E SLX-XX-0600-E SLX-XX-0630-E SLX-XX-0660-E SLX-XX-0690-E SLX-XX-0720-E...
-
Page 16: Minimum Installation Distance
C=850 mm for devices with resolution > 40 mm • R = Resolution of the system K value is: 2000 mm/s if the calculated value of S is ≤ 500 mm 1600 mm/s if the calculated value of S is > 500 mm NOTE 6 SLIM... - Page 17 HOW TO CHOOSE THE DEVICE When devices with > 40 mm resolution are used, the height of the top beam has to be ≥ 900 mm (H2) from machine supporting base while the height of the bottom beam has to be ≤ 300 mm (H1). If the safety light curtain must be mounted in a horizontal position (Figure 5) the dis- tance between the dangerous area and the most distant optical beam must be equal to the value calculated using the following formula:...
-
Page 18: Typical Applications
The small dimensions of the profile of SLIM (15 mm x 32 mm) makes it also possible to hide the light curtain inside the structure of machine itself. - Page 19 Three units can be cascaded and used as a single light curtain, reaching the total length of 3600 mm. The small dimensions of the profile of SLIM (15 mm x 32 mm) makes it also possible to hide the light curtain inside the structure of machine itself.
-
Page 20: Safety Information
The Restart button must be located outside the dangerous zone because the oper- ator must check the dangerous zone during all Restart operations. Please carefully read the instructions for the correct functioning before powering the light curtain on. NOTE 10 SLIM... -
Page 21: Installation
The presence of intense electromagnetic disturbances could affect device’s cor- rect operation. • This condition shall be carefully assessed with the advice of DATALOGIC Technical Service. • The operating distance of the device can be reduced in presence of smog, fog or airborne dust. -
Page 22: General Information On Device Positioning
Figure 1 - Wrong light curtain positioning Figure 2 - Correct light curtain positioning If the operator is able to enter in the dangerous area, an additional mechanical protection must be mounted to prevent the access. CAUTION 12 SLIM... -
Page 23: Minimum Distance From Reflecting Surfaces
GENERAL INFORMATION ON DEVICE POSITIONING Under standard operating conditions, machine starting must not be possible while operators are inside the dangerous area. Where it is not possible to install safety light curtain very near to the dangerous zone, a second light curtain must be mounted in a horizontal position in order to prevent any lateral access, as shown in Figure 4. - Page 24 Dsr (m) = 0.5 x operating distance (m) x tg 5° for operating distance ≥ 3 m For ESPE Type 4: Dsr (m) = 0.13 for operating distance < 3 m Dsr (m) = 0.5 x operating distance (m) x tg 2° for operating distance ≥ 3 m 14 SLIM...
-
Page 25: Distance Between Homologous Devices
GENERAL INFORMATION ON DEVICE POSITIONING Distance between homologous devices The following graphic shows the distance from the interfering devices (Ddo) according to the operating distance (Ddo) of the couple ( TXA – RXA ). If different safety devices have to be installed in adjacent areas, the emitter of one device must not interfere dangerously with the receiver of the other device. - Page 26 INSTALLATION The figure provides two examples: Figure 9 - Recommended positioning for homologous devices 16 SLIM...
-
Page 27: Minimum Distance For Cascaded System
GENERAL INFORMATION ON DEVICE POSITIONING Minimum distance for cascaded system Figure 10 - Minimum distance for cascaded system In a cascade system with a protective field width of up to 3m a minimum distance Ddo of 263mm must be maintained between Master and Slave 2 unit in order to avoid inter- ference. -
Page 28: Use Of Deviating Mirrors
Even very small displacements of the mirror is enough to lose alignment. • The use of DATALOGIC laser pointer accessory is recommended under these condi- tions. • The minimum safety distance (S) must be respected for each single section of the beams. -
Page 29: Controls After First Installation
GENERAL INFORMATION ON DEVICE POSITIONING Controls after first installation The control operations to carry-out after the first installation and before machine start- up are listed hereinafter. The controls must be carried-out by qualified personnel, either directly or under the strict supervision of the person in charge of machinery Safety. Check that: •... -
Page 30: Mechanical Mounting
Position the product between the two brackets engaging the end parts in the brackets themselves. (2) • Tighten the screws to a maximum torque of 1.2 Nm. • For ESPE length longer than 600 mm, a double-sided tape strip in the middle is suggested in case of vibrations (3). 20 SLIM... - Page 31 FIXING WITH “O” TYPE BRACKETS Figure 2 - Fixing with “O” type brackets MODEL L (mm) SLx-xx-0150-E 162.20 SLx-xx-0210-E 222.10 SLx-xx-0270-E 282.00 SLx-xx-0300-E 312.00 SLx-xx-0330-E 341.90 SLx-xx-0360-E 371.90 SLx-xx-0390-E 401.70 SLx-xx-0420-E 431.70 SLx-xx-0450-E 461.70 SLx-xx-0480-E 491.60 SLx-xx-0510-E 521.60 SLx-xx-0540-E 551.50 SLx-xx-0570-E 581.50 SLx-xx-0600-E...
-
Page 32: Fixing With "C" Type Brackets
For lengths up to 600 mm, 2 “C” type brackets are sufficient, for greater lengths it is recommended to use 3 “C” type brackets, the third one as an additional support in the middle. Figure 4 - Fixing with “C” type brackets 22 SLIM... -
Page 33: Fixing With "L" Type Brackets
FIXING WITH “L” TYPE BRACKETS FIXING WITH “L” TYPE BRACKETS Figure 5 - “L” type brackets • Mount the “L” type bracket at the desired height. Tighten the M4 screws to a torque of 1.2 Nm. (1) • Mount the side plate of “L” type bracket so that the product end face sticks out of the side plate upper coupling face by a maximum of 1 mm. -
Page 34: Fixing With "L" Type Brackets And "C" Type Brackets
Slide the product until mechanical stop on the “L” type bracket (5). • Tighten the M3 screw of the “C” type bracket to a torque of 1.2 Nm. (6) Figure 7 - Mixed fixing with “L” type and “C” type brackets 24 SLIM... -
Page 35: Cascade Resolution With Different Brackets
CASCADE RESOLUTION WITH DIFFERENT BRACKETS CASCADE RESOLUTION WITH DIFFERENT BRACKETS Fixing with “O” type brackets Cascade resolution at junction drops to 40 mm. Figure 8 - Fixing with “O” type brackets Fixing with “C” type brackets Cascade resolution at junction remains 14 mm. Figure 9 - Fixing with “C”... -
Page 36: Cascade 90° Resolution
MECHANICAL MOUNTING CASCADE 90° RESOLUTION When cascading two SLIM light curtains at 90° like in Figure 11, the resolution at junc- tion drops to 18mm if “C" type brackets are used or any bracket combination that allows the top of one light curtain to touch the side of the other. -
Page 37: Electrical Connections
CHAPTER 4 ELECTRICAL CONNECTIONS PIN-OUT AND CONFIGURATION PIN CONNECTION All electrical connections to the emitting and receiving units are made through a male M12 connector, carried by a pig-tail cable located on the lower part of the two units. For both the receiver and the emitter M12 5-pole connector is used. Receiver (RX) Figure 1 - Receiver FUNCTION... - Page 38 ELECTRICAL CONNECTIONS Emitter (TX) Figure 2 - Emitter FUNCTION CONNECTION TO STATUS Normally closed contact to 24 Vcc MANUAL RESTART RESTART RESTART SELECTION AUTOMATIC RESTART FLOATING ALIGN MODE 28 SLIM...
-
Page 39: Notes On Connections
NOTES ON CONNECTIONS NOTES ON CONNECTIONS For the correct operation of the safety light curtains, the following precautions regard- ing the electrical connections have to be respected: • Do not place connection cables in contact with or near high-voltage cables and/or cable undergoing high current variations (e.g. - Page 40 Connect both OSSDs to the device to control. • Failure to connect an OSSD to the activating device jeopardizes the system safety degree that the light curtain has to control. Figure 4 - OSSDs connection Figure 5 - OSSDs test timing pattern 30 SLIM...
-
Page 41: Cascade Connection
Master unit takes care of collecting safety optic scan results from Slave units and the synchronization between them to avoid mutual interference. Each SLIM unit can either be used as Master or Slave, only depending on cable connec- tion. Figure 6 - Cascade composition... -
Page 42: Alignment Procedure
In alignment mode user interface inform the user about quality and level of alignment. To activate Alignment Mode, leave Restart input floating on TX unit at power on (see " Pin-out and configuration pin connection" on page 27 ). NOTE 32 SLIM... - Page 43 OSSD STATUS LED CONFIGURATION RESULT IN INDICATION NORMAL OPERATION NOT ALIGNED SYNC NOT ENGAGED SYNC ENGAGED ONE OR MORE BEAMS INTERCEPTED MIN. SIGNAL LEVEL ALL BEAMS FREE MED. SIGNAL LEVEL ALL OPTICS FREE MAX. SIGNAL LEVEL ALL OPTICS FREE The light curtain alignment can be effected only after having completed the mechanical installation and the electrical connections as described above.
- Page 44 To check alignment level for periodical maintenance ESPE must be restarted in Alignment Mode. For cascaded system start the alignment procedure always from Master NOTE unit, then proceed with Slaves. OSSDs are not enabled on alignment mode. NOTE 34 SLIM...
-
Page 45: Commissioning And Configuration
CHAPTER 6 COMMISSIONING AND CONFIGURATION RESTART MODE SELECTION AND RESTART FUNCTION The interruption of a beam due to an opaque object causes the opening of OSSD out- puts and the stop of the safety light curtain, SAFE condition. ESPE standard operation can be reset (OSSD safety contact closing = NORMAL OP. condi- tion) in two different ways: •... - Page 46 WARNING beyond the sensitive area. In this case, the manual restart or, for example, the manual restart of the SE-SR2 relay is necessary. Time chart (Manual Restart) Figure 3 - Manual Restart timing 36 SLIM...
-
Page 47: Edm Function
EDM FUNCTION EDM FUNCTION Figure 4 - EDM connection The light curtain has a function for monitoring actuation of external devices (EDM). This function can be enabled or deactivated. EDM enabled Connect EDM FBK/SELECTION input at normally closed contacts to 24 VDC of the devices to be monitored. - Page 48 TC ≤350 msec: time after OSSD OFF-ON switch when EDM test is performed. T0 ≤100 msec: time after OSSD ON-OFF switch when EDM test is performed. EDM disabled Connect EDM FBK/SELECTION input to OSSD1 to disable the EDM function. 38 SLIM...
-
Page 49: User Interface And Diagnostics
Failure on Restart function, check RESTART SELECTION F13: Failure on connection (see "Restart mode restart selection and Restart func- tion" on page 35 If failure persists after recommended checks and ESPE power cycle, please contact DATALOGIC. INSTRUCTION MANUAL 39... - Page 50 27) and any OSSDs cause of electrical interference, then power cycle the ESPE Check for proper connection (see Power supply "Electrical Connections" on page failure If failure persists after recommended checks and ESPE power cycle, please contact DATALOGIC. 40 SLIM...
-
Page 51: Periodical Checks
CHAPTER 8 PERIODICAL CHECKS The following is a list of recommended check and maintenance operations that should be periodically carried-out by qualified personnel (see " Controls after first installation" on page 19 Check that: • The ESPE remains in Safe State (Red OSSD LED ON) during beam interruption along the entire detection zone, using the appropriate “Test Piece”... -
Page 52: General Information And Useful Data
The warranty period for this product is 36 months. See the General Terms and Conditions of Sales at www.datalogic.com for further details. DATALOGIC will not be liable for any damages to persons and things caused by the non- observance of the correct installation modes and device use. -
Page 53: Device Maintenance
PRODUCT DISPOSAL Under current Italian and European laws, DATALOGIC is not obliged to take care of prod- uct disposal at the end of its life. DATALOGIC recommends disposing of the product in compliance with local laws or con- tact authorized waste collection centers. -
Page 54: Technical Data
SAFETY CATEGORY Type 4 (rif. EN 61496-1: 2013) SIL 3 (rif. EN 61508) SIL CL 3 (rif. EN 62061:2005/A1: 2013) PL e, Cat. 4 (rif. EN ISO 13849-1: 2015) PFHd [1/h] = 2.64E -09 MTTFd [years] = 444 44 SLIM... - Page 55 ELECTRICAL DATA Power supply (Vdd) 24 VDC ± 20% Consumption (TX) 1.6 W max (55 mA at28.8 VDC) Consumption (RX) 4.2 W max (145 mA at 28.8 VDC – no load on OSSD) OSSD outputs 2 PNP OSSD short-circuit 0.6 A type protection OSSD output current 0.3 A max / each output...
- Page 56 10G (16 ms) 1,000 shocks per axis (EN 60068-2-29) Housing material Painted aluminum (yellow RAL 1003) Front glass material PMMA Cap material Painted Zamak (Blue RAL 5002) Weight W [g] = L [mm] x 5 + 50 (single unit TX or RX) 46 SLIM...
-
Page 57: Available Models And Response Times
APPENDIX B AVAILABLE MODELS AND RESPONSE TIMES AVAILABLE MODELS 14mm RESOLUTION 24mm RESOLUTION 34mm RESOLUTION CONTROLLED RESPONSE RESPONSE RESPONSE HEIGHT BEAMS NO. BEAMS NO. BEAMS NO. TIME TIME TIME 1020 1050 1080 1110 1140 1170 1200 INSTRUCTION MANUAL 47... -
Page 58: Cascade Response Times
For cascade systems, independently of unit length, response times are the following: • 2-Unit Cascade: 18 ms • 3-Unit Cascade: 20 ms Make sure that installation conditions indicated in " Minimum distance for cascaded system" on page 17 are met for 3-unit cascade systems. NOTE 48 SLIM... -
Page 59: Overall Dimensions
APPENDIX C OVERALL DIMENSIONS Figure 1 - Overall dimensions (mm) MODEL LT = (L-63) SLx-xx-0150-E SLx-xx-0210-E SLx-xx-0270-E SLx-xx-0300-E SLx-xx-1170-E 1170 1107 SLx-xx-1200-E 1200 1137 SLx- = Type 2 or Type 4 -xx- = Resolution 14, 24, and 34 mm INSTRUCTION MANUAL 49... -
Page 60: Included Accessories
APPENDIX D INCLUDED ACCESSORIES “C” TYPE BRACKETS KIT Figure 1 - “C” type brackets kit “O” TYPE BRACKETS KIT Figure 2 - “O” type brackets kit 50 SLIM... -
Page 61: Accessories
APPENDIX E ACCESSORIES (ST-K2-SL-C) “C” TYPE BRACKETS KIT MODEL DESCRIPTION CODE ST-K2-SL-C “C” type brackets (2 pcs kit) 95ASE2510 Figure 1 - “C” type brackets kit (ST-K4-SL-O) “O” TYPE BRACKETS KIT MODEL DESCRIPTION CODE ST-K4-SL-O “O” type brackets (2 pcs kit) 95ASE2520 Figure 2 - “O”... -
Page 62: (St-K2-Sl-L) "L" Type Brackets Kit
“L” type brackets (2 pcs kit) 95ASE2540 Figure 3 - “L” type brackets kit (ST-K2-SL-C-OR) “C” TYPE ORIENTABLE BRACKETS KIT MODEL DESCRIPTION CODE ST-K2-SL-C-OR “C” type orientable brackets (2 pcs kit) 95ASE2530 Figure 4 - “C” type orientable brackets kit 52 SLIM... -
Page 63: (Se-S) Columns And Floor Stands
(SE-S) COLUMNS AND FLOOR STANDS (SE-S) COLUMNS AND FLOOR STANDS MODEL DESCRIPTION CODE (mm) (mm) SE-S 800 Column and floor stand H = 800 mm 30x30 95ACC1730 SE-S 1000 Column and floor stand H = 1000 mm 1000 30x30 95ACC1740 SE-S 1200 Column and floor stand H = 1200 mm 1200... -
Page 64: (Sg-Dm) Deviating Mirrors
The image includes the mirror SG-DM and a mounting kit ST-DM. MODEL DESCRIPTION CODE SG-DM 150 Deviating mirror version 150 mm 95ASEE1670 Figure 7 - SG-DM 150 (mm) The image includes the mirror SG-DM and a mounting kit ST-DM. 54 SLIM... - Page 65 (SG-DM) DEVIATING MIRRORS Mounting kit for SG-DM with SE-S column and floor stands MODEL DESCRIPTION CODE ST-DM SG-DM mounting kit (2 pcs kit) 95ASEE1940 Figure 8 - Mounting kit For each SG-DM mirror order 1 mounting kit ST-DM. INSTRUCTION MANUAL 55...
-
Page 66: (Tp) Test Piece
5-pole M12 cable (axial) 5 m UL2464 95ASE1180 CS-A1-03-U-10 5-pole M12 cable (axial) 10 m UL2464 95ASE1190 CS-A1-03-U-15 5-pole M12 cable (axial) 15 m UL2464 95ASE1200 CS-A1-03-U-25 5-pole M12 cable (axial) 25 m UL2464 95ASE1210 CS-A1-03-U-50 5-pole M12 cable (axial) 50 m UL2464 95A252700 56 SLIM... -
Page 67: Cascade Cables
CASCADE CABLES CASCADE CABLES L ± 10 MODEL DESCRIPTION CODE (mm) CS-H1-03-B-001 Cascade cable 0.1 m 95A25950 CS-H1-03-B-005 Cascade cable 0.5 m 95ASE2550 CS-H1-03-B-01 Cascade cable 1 m 95ASE2560 Figure 9 - Cascade cables INSTRUCTION MANUAL 57... -
Page 68: (Se-Sr2) Safety Relay
The drawing shows the connection between the safety light curtain and the Type 4 safety relay of the SE-SR2 series operating in the automatic Restart mode. Figure 10 - Safety relay (CSME-03VU24-Y14) EDM RELAY BOX MODEL DESCRIPTION CODE CSME-03VU24-Y14 EDM relay 95ASE1270 Figure 11 - EMD relay 58 SLIM... -
Page 69: Glossary
GLOSSARY AOPD (Active optoelectronic protective device) Its detection function is achieved thanks to the use of optoelectronic receivers and emitters detecting the optical beams interruptions inside the device caused by an opaque object present inside the specified detecting area. An active optoelectronic protective device (AOPD) can operate both in emitter-receiver mode and in retro-reflective light curtains. - Page 70 Qualified operator A person who holds a professional training certificate or having a wide knowledge and experience and who is acknowledged as qualified to install and/or use the product and to carry out periodical test procedures. 60 SLIM...
- Page 71 Probability of occurrence of an injury and severity of the injury itself. Safe State Operating state of ESPE when at least one beam is intercepted, OSSD LED lit RED in SLIM light curtain. OSSD1 and OSSD2 are both switched OFF.
- Page 72 © 2015-2020 Datalogic S.p.A. and /or its affiliates • All rights reserved • Without limiting the rights under copyright, no part of this documentation may be repro- duced, stored in or introduced into a retrieval system, or transmitted in any form or by any means, or for any purpose, without the express written permission of Data- logic S.p.A.
Need help?
Do you have a question about the SLIM and is the answer not in the manual?
Questions and answers