Table of Contents
Advertisement
Quick Links
Advertisement
Table of Contents

Related Manuals for Andor Technology Zyla sCMOS 4.2 PLUS


Summary of Contents for Andor Technology Zyla sCMOS 4.2 PLUS
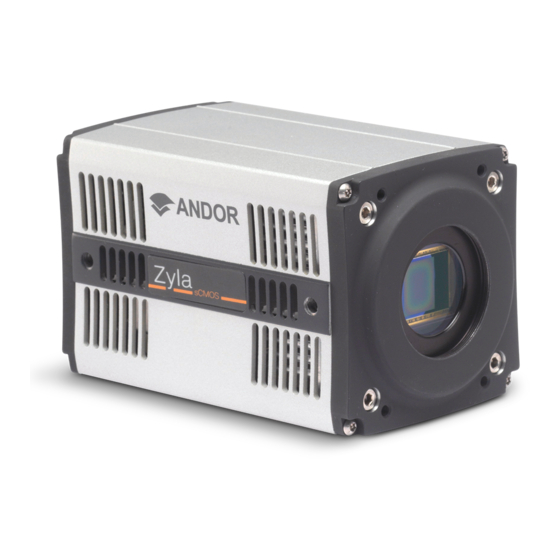
- Page 1 8.2 x 8.2 mm / 512 x 512 sensor Lowest Noise Imaging EMCCD Zyla sCMOS Version 2.0 rev 18 Feb 2021 Hardware Guide Covers Zyla 4.2 PLUS and 5.5 models with Camera Link or USB 3 connections and air or water cooling andor.com © Andor Technology 2021...
-
Page 2: Table Of Contents
SECTION 1: INTRODUCTION ......................8 Help and Technical Support .........................9 Disclaimer................................10 Trademarks and Patent Information ....................10 Components ................................. 11 1.4.1 Accessories ....................................11 Power And Signal Connections ........................12 1.5.1 Power Supply Unit (PSU) ..............................12 1.5.2 Connectors ....................................13 1.5.3 Multi I/O Timing Cable Pin Outs .......................... - Page 3 2.6.2.4 Rolling Shutter Internal Triggering (Overlap Mode) ................33 2.6.2.5 Rolling Shutter External / Software Triggering (Non Overlap Mode)........35 2.6.2.6 Rolling Shutter External Exposure Triggering (Non-Overlap Mode) ........36 2.6.2.7 Rolling Shutter External Exposure Triggering (Overlap Mode)..........37 2.6.2.8 Rolling Shutter External Start Triggering ....................38 2.6.2.9 Rolling Shutter Global Clear Internal (Non-Overlap Mode)- Zyla 4.2 only.....39 2.6.2.10 Rolling Shutter Global Clear External/Software Triggering (Non-Overlap Mode)
- Page 4 SECTION 3: INSTALLATION ......................56 Safety Considerations ............................56 Camera Mounting ..............................56 Coolant Hose Connection and Disconnection (Water Cooled Models) ......57 3.3.1 Coolant Recommendations ............................. 57 3.3.2 Connecting the Coolant Hoses ............................. 58 3.3.3 Disconnecting the Coolant Hoses..........................58 Recommended Computer Requirements ...................58 Installing Software (Solis or SDK3) ......................59 Installing the Camera Framegrabber Card ..................
- Page 5 SECTION 6: TROUBLESHOOTING ....................69 Camera buzzer does not sound on start-up ..................69 Camera is not recognized by PC ........................69 Buzzer sounds continuously ..........................69 Fan not operating as expected ........................69 Camera does not cool to the required temperature ...............69 Fire, Aux_Out and Arm outputs not functioning correctly .............70 External Trigger input not functioning correctly .................70 Condensation Appearing On Exterior Of Camera (Water Cooled Model) ......70 6.9...
- Page 6 SAFETY AND WARNING INFORMATION PLEASE READ THIS INFORMATION FIRST BEFORE USING YOUR ZYLA sCMOS CAMERA. To ensure correct and safe operation of this product, please read this guide before use and keep it in a safe place for future reference If equipment is used in a manner not specified by Andor, the protection provided by the equipment may be impaired Before using the system, please follow and adhere to all warnings, safety, manual handling and operating instructions located either on the product or in this Hardware Manual...
- Page 7 Revision History Version Released Description 17 Jul 2012 Initial Release 29 Oct 2012 General minor updates throughout. General enhancements to presentation (all Sections) Text revised to improve clarity of information (all Sections. Zyla Components revised to show standard supplied components more clearly (Section 1.5) 15 Oct 2013 Additional accessories revised to match current options available (Section 1.5.1) Additional information added for use for lens mount adaptors (Section 4.2)
-
Page 8: Section 1: Introduction
SECTION 1: INTRODUCTION Thank you for choosing the Zyla Scientific CMOS (sCMOS) camera. You are now in possession of a revolutionary new sCMOS camera, a breakthrough technology based on the next-generation CMOS image sensor (CIS) design and fabrication techniques. The camera offers two image sensors of 5.5 Megapixels (Zyla 5.5) and 4.2 Megapixels (Zyla 4.2). It is available in both air cooled, and water cooled forms and with Camera Link and USB 3.0 connection options. -
Page 9: Help And Technical Support
Help and Technical Support If you have any questions regarding the use of this equipment, please contact the representative* from whom your system was purchased, or: Europe Andor Technology Ltd. Andor Technology 7 Millennium Way 300 Baker Avenue Springvale Business Park... -
Page 10: Disclaimer
OUT OF OR IN CONNECTION WITH THE USE OF THE INFORMATION PROVIDED HEREIN. COPYRIGHT AND PROTECTIVE NOTICES: The copyright in this document and the associated drawings are the property of Andor Technology and all rights are reserved. This document and the associated drawings are issued on condition that they are not copied, reprinted or reproduced, nor their contents disclosed. -
Page 11: Components
1.4 Components The standard components supplied with the Zyla are shown in Table 1: Table 1: Standard Components supplied with the Zyla Description Quantity Zyla 5.5 or Zyla 4.2 sCMOS Camera with Integral Lens Mount Adaptor (C, CS or F-mount: as selected at time of ordering) Description Quantity Description... -
Page 12: Power And Signal Connections
1.5 Power And Signal Connections 1.5.1 Power Supply Unit (PSU) The Zyla camera is powered by a external 12 V DC Power Supply Unit (PSU). The Zyla camera is connected via a 4 pin power connector - refer to Section 1.6.5. The external power supply has an IEC male socket that requires a certified mains lead with an IEC female plug for connection to the mains electrical supply. -
Page 13: Connectors
1.5.2 Connectors 1. I/O 15-Way D Type Connector 2. 12V DC Power Connector 3. CL1 connector 4. CL2 connector (Not Made in UK present on 3-tap version) 5. On/Off Switch 6. USB 3.0 Connector Figure 3: Zyla Back Plate Connections (Left) Cameralink versions (Right) USB 3.0 version 1.5.3 Multi I/O Timing Cable Pin Outs Table 2: Multi I/O Timing Cable Pinouts 15-way D type connector Reserved AUX_OUT_1... -
Page 14: Impedance Information
1.5.4 Impedance Information Ext Trigger & Spare Inputs Zyla Camera > 2.4V Logic level 1 1K Ohms Input triggers on posiitve edge < 0.8V Logic level 0 5K6 Ohms Arm, Fire, Fire n and AUX_OUT Outputs Zyla Camera > 2.0V 15 Ohms >... -
Page 15: Cooling Hose Connectors (Water Cooled Models Only)
1.6 Cooling Hose Connectors (Water Cooled Models only) There are two connectors to allow connection of Water Cooled Zyla models to a water cooler or re-circulator. Hose inserts are provided to enable connection to coolant hoses. Coolant pipes for connection to water cooler or re-circulator Figure 6: Zyla Cooling Hose Connectors Please refer to Section 3.3 for details of connector and hose type compatibility and for connection and... -
Page 16: Section 2: Features And Functionality
SECTION 2: FEATURES AND FUNCTIONALITY 2.1 sCMOS Structure and Operation sCMOS technology has been developed specifically to overcome many of the limitations that have marred other scientific detector technologies, resulting in an imaging detector that provides exceptional performance for many applications. APS with column A/D Horizontal Scan Circuit Figure 7: sCMOS Sensor Architecture As illustrated above, the CMOS sensor is an “Active Pixel Sensor” (APS) whereby each pixel has its own integral amplifier and the sequence of operation is as follows: Light hits sensor and generates charge 2. The photo-generated charge is converted to an analog voltage inside each pixel amplifier... -
Page 17: Rolling And Global Shutter
2.2 Rolling and Global Shutter The sCMOS sensor used by the Zyla 5.5 offers a choice of both Rolling and Global shutter, providing superior application flexibility. Rolling and Global shutter modes describe two distinct sequences through which the image may be read off a sCMOS sensor. In rolling shutter, charge is transferred from each row in sequence during readout, whereas in global shutter mode each pixel in the sensor effectively ends the exposure simultaneously. However, lowest noise and fastest frame rates are achieved from rolling shutter mode. Traditionally, most CMOS sensors offer either one or the other, but very rarely does the user have the choice of both from the same sensor. For the Zyla 5.5, it is possible to select between either readout mode from the same sensor, so the most appropriate mode can be selected for the specific application. The Zyla 4.2 offers Rolling Shutter only. -
Page 18: Rolling Shutter
2.2.1 Rolling Shutter In Rolling Shutter mode, adjacent rows of the array are exposed at slightly different times as the readout ‘waves’ sweep through each half of the sensor. Therefore, each row will start and end its exposure slightly offset in time from its neighbour. In the case of the Zyla 5.5, at the maximum readout rate of 560 MHz (as each half of the sensor is at 280 MHz), this offset between adjacent row exposures is ~10 μs. The rolling shutter readout mechanism is illustrated in Figure 8 below. From the point of view of readout, the sensor is split in half horizontally. Rows are read out from the centre outwards, row after row. At the start of an exposure, the wave sweeps through each half of the sensor, switching each row in turn from a ‘keep clean state’, in which all charge is drained from the pixels, to an ‘exposing state’, in which light induced charge is collected in each pixel. -
Page 19: Global Shutter (Zyla 5.5 Only)
2.2.2 Global Shutter (Zyla 5.5 only) Global shutter mode, which can also be thought of as a ‘snapshot’ exposure mode, means that all pixels of the array are exposed simultaneously. In most respects, global shutter can be thought of as behaving like an Interline CCD sensor. -
Page 20: Selecting Rolling Or Global Shutter
2.2.3 Selecting Rolling or Global Shutter The selection of Rolling Shutter or Global Shutter modes for the Zyla 5.5 depends on your specific experimental conditions. A summary of the key parameters for each mode is shown in Table 3. Table 3: A Comparison of Rolling and Global Shutter Modes Parameter Rolling Shutter Mode Global Shutter Mode (Zyla 5.5 only) Frame Rate Maximum available Maximum frame rate is halved... -
Page 21: Rolling And Global Shutter Mechanisms
2.2.4 Rolling and Global Shutter Mechanisms In Rolling Shutter mode, charge transfer happens on a per row basis whilst in global shutter charge transfer happens for the whole sensor or globally. To read out a pixel in Rolling Shutter mode, the following occurs within the analog circuitry: The read out node is reset The node level (reference level) is measured... -
Page 22: Understanding Read Noise In Scmos
2.3 Understanding Read Noise in sCMOS sCMOS technology boasts an ultra-low read noise floor that significantly exceeds that of even the best CCDs, and at several orders of magnitude faster pixel readout speeds. For those more accustomed to dealing with CCDs, it is useful to gain an understanding of the nature of read noise distribution in CMOS imaging sensors. CCD architecture is such that the charge from each pixel is transferred through a common readout structure, at least in single output port CCDs, where charge is converted to voltage and amplified prior to digitization in the Analog to Digital Converter (ADC) of the camera. -
Page 23: Spurious Noise Filter
2.3.1 Spurious Noise Filter The Spurious Noise filter corrects for pixels that would otherwise appear as spurious ‘salt and pepper’ noise spikes in the image. The appearance of such noisy pixels is analogous to the situation of Clock Induced Charge (CIC) noise spikes in EMCCD cameras, in that the overall noise of the sensor has been reduced to such a low level, that the remaining small percentage of spurious, high noise pixels can become an aesthetic issue. -
Page 24: Dual Amplifier Dynamic Range
2.4 Dual Amplifier Dynamic Range The Dual Amplifier architecture of the sCMOS sensor in Zyla eliminates the need to choose between low noise or high capacity, in that signal can be sampled simultaneously by both high gain and low gain amplifiers. As such, the lowest noise of the sensor can be harnessed alongside the maximum well depth, affording the widest possible dynamic range. Traditionally, scientific sensors including CCD, EMCCD, ICCD and CMOS, demand that the user must select ‘upfront’ between high or low amplifier gain (i.e. sensitivity) settings, depending on whether they want to optimise for low noise or maximum well depth. Since the true dynamic range of a sensor is determined by the ratio of well depth divided by the noise floor detection limit, then choosing either high or low gain settings will restrict dynamic range by limiting the effective well depth or noise floor, respectively. For example, consider a large pixel CCD, with 16-bit Analog to Digital Converter (ADC), offering a full well depth of 150,000 e- and lowest read noise floor of 3 e-. The gain sensitivity required to give lowest noise is 1 e-/ ADU (or ‘count’) and the gain sensitivity required to harness the full well depth is 2.3 e-/ADU, but with a higher read noise of 5 e-. - Page 25 The method of combining signals from two 11-bit ADCs can be divided into four basic steps. 1. At the end of the analog chain the “Signal” voltage is applied to two independent amplifiers: the high gain amplifier and the low gain amplifier. This results in two separate digital data streams from the sensor The camera selects which data stream to use on a pixel per pixel, frame by frame basis using a threshold method 3. The data is then compensated for DC offset and gain. Again, this is done on a pixel by pixel basis using the compensation data associated with the data stream.
-
Page 26: Sensor Readout Optimization
2.5 Sensor Readout Optimization To allow the camera to be optimized for the widest range of applications it is important to have flexibility in the readout options available, some of these include the following: • Gain Channel Control • Pixel Readout Rate • ROI sub image settings • Triggering / Synchronization options (see Section 2.6) The effect of different shutter modes, readout speed and different ROIs on frame rates is shown in Table 6. Table 6: Maximum sustainable frame rates for all electronic shutter modes, readout speeds and gain channel combinations for various (vertically centred) ROIs Region Shutter... -
Page 27: Pixel Readout Rate
2.5.2 Pixel Readout Rate The Pixel Readout Rate defines the rate at which pixels are read from the sensor. The faster the readout rate the higher the frame rate that can be achieved. The ability to change the pixel readout rate is important to achieve the maximum flexibility of camera operation. Slower readout typically allows lower read noise but at the expense of slower frame rates. The following readout rates are available on the Zyla (Table 7 below shows the typical read noise at each readout rate): •... -
Page 28: Trigger Modes
2.6 Trigger Modes The Zyla camera has the following triggering modes: • Internal Trigger - the camera determines the exact time when an exposure happens based on the acquisition settings entered by the user. This is the most basic trigger mode and requires no external intervention. -
Page 29: Example System Usage Of Acquisition Events
2.6.1 Example System Usage of Acquisition Events Software Acquisition Events are only accessible via SDK- these are not available in Solis, iQ or other software but may be used internally. Refer to the SDK3 manual for further information on configuration of Software Acquisition Events. Compare the two diagrams below: The first diagram (Figure 14) shows the situation prior to the introduction of the software events. In this case the user had to wait until the image frame was completely transferred to the PC before they received any notification that the exposure had completed. This results in a cycle time of approximately 79 ms or a frame rate of 12.6 fps, for this example. -
Page 30: Rolling Shutter Triggering Modes
2.6.2 Rolling Shutter Triggering Modes In Rolling Shutter, charge transfer happens on a per row basis: The node is reset, A ‘reference’ measurement taken, and then the charge transferred, The ‘signal’ is measured, The reference and signal measurements are then subtracted in the analog domain. Each following row is processed until the whole sensor is read out. -
Page 31: Timing Parameters And Ext Triggering For Zyla 5.5
2.6.2.1 Timing Parameters and Ext Triggering for Zyla 5.5 The timing tables accompanying each of the triggering diagrams that follow indicate the exposure and cycle times achievable in each triggering mode for the Zyla 5.5. These are based on Frame and Row Periods as shown below. -
Page 32: Rolling Shutter Internal Triggering (Non-Overlap Mode)
2.6.2.3 Rolling Shutter Internal Triggering (Non-Overlap Mode) Internal Trigger Mode allows the user to configure an exposure time and cycle time. For Internal Triggering Non-overlap mode, the exact acquisition sequence depends on the exposure time and cycle time set as shown in Figure 16. The following diagrams show the behaviour of TTL outputs ‘Fire’, Fire n’, ‘Fire ALL’ and ‘Fire ANY’. Fire ALL indicates the time period within a frame during which all rows are exposing simultaneously. -
Page 33: Rolling Shutter Internal Triggering (Overlap Mode)
2.6.2.4 Rolling Shutter Internal Triggering (Overlap Mode) Internal Triggering in Overlap Mode allows the user to perform an exposure and acquire images from the sensor simultaneously. This is achieved by starting a new exposure for a new frame while the current frame’s exposure is being read out from the sensor. - Page 34 Long Exposures When the required exposure time is greater than the time it takes to read out a frame (Long Exposures), the cycle time is defined by the exposure time. Initially, the entire sensor is held in a global clear state to ensure that there is no charge build-up on the sensor. Global Clear goes LOW and the first frame read out is initiated. This frame is discarded as it does not contain the correct exposure period. Reading out this first frame effectively begins the first exposure. When the exposure period has completed, a signal frame read out phase begins.
-
Page 35: Rolling Shutter External / Software Triggering (Non Overlap Mode)
2.6.2.5 Rolling Shutter External / Software Triggering (Non Overlap Mode) In this section, both External and Software Trigger are described in the same diagram as the acquisition sequence is the same. The trigger event can either be from the EXT Trigger input or sent via software. While waiting on the trigger event, the sensor is put into a “pre-scan read out cycle”... -
Page 36: Rolling Shutter External Exposure Triggering (Non-Overlap Mode)
2.6.2.6 Rolling Shutter External Exposure Triggering (Non-Overlap Mode) While waiting on the trigger event, the sensor held in a global clear state and is put into a “pre-scan read out cycle”. On detection of the trigger event, Global Clear goes LOW and a frame read out is initiated. This frame is discarded as it does not contain the correct exposure period. Reading out a frame effectively begins a new exposure. -
Page 37: Rolling Shutter External Exposure Triggering (Overlap Mode)
2.6.2.7 Rolling Shutter External Exposure Triggering (Overlap Mode) In overlap mode, every positive edge of an external trigger will trigger a frame read out and start a new exposure for the next frame. The period of external trigger pulse defines exposure and cycle time for each frame read out. While waiting on the positive edge of the external trigger, the sensor is held in a global clear state and put into a “pre-scan read out cycle”. -
Page 38: Rolling Shutter External Start Triggering
2.6.2.8 Rolling Shutter External Start Triggering In this mode the camera will wait for a single external trigger event. Once this external trigger event is detected, the camera will progress as if the camera was in internal trigger mode (see Section 2.6.2.3 and 2.6.2.4). The ARM signal indicates to the user when the camera is ready to detect an External Start Trigger. -
Page 39: Rolling Shutter Global Clear Internal (Non-Overlap Mode)- Zyla 4.2 Only
2.6.2.9 Rolling Shutter Global Clear Internal (Non-Overlap Mode)- Zyla 4.2 only Rolling Shutter Global Clear is an extended Rolling Shutter Mode. If enabled, the sensor rows are held in a global clear state to ensure there is no charge build-up on the sensor. When the camera is taken out of the Global Clear state, the exposure period begins for all rows in the sensor. -
Page 40: Rolling Shutter Global Clear External/Software Triggering (Non-Overlap Mode)
2.6.2.10 Rolling Shutter Global Clear External/Software Triggering (Non- Overlap Mode) - Zyla 4.2 Only In this section, both External and Software Trigger are described in the same diagram as the acquisition sequence is the same. The trigger event can either be from the EXT Trigger input or sent via software. While waiting on the trigger event, the sensor is held in a Global Clear State which ensures that charge build up on the sensor is kept to a minimum while waiting for the trigger event. -
Page 41: Rolling Shutter Global Clear External Exposure Triggering (Non-Overlap Mode)
2.6.2.11 Rolling Shutter Global Clear External Exposure Triggering (Non- Overlap Mode) - Zyla 4.2 Only While waiting on the trigger event, the sensor is held in a Global Clear State which ensures that charge build up on the sensor is kept to a minimum while waiting for the trigger event. The ARM signal is asserted to indicate it is ready to detect an incoming trigger input. -
Page 42: Rolling Shutter Triggering Constraints
2.6.2.12 Rolling Shutter Triggering Constraints The table below shows a summary of constraints when operating in Rolling Shutter mode: Table 21: Rolling Shutter Mode Triggering Constraints Fast trigger exposure Rolling Shutter Triggering Modes Exposure Range trigger pulse switching Jitter width supported Internal User settable exposure time. -
Page 43: Global Shutter Triggering Modes (Zyla 5.5 Only)
2.6.3 Global Shutter Triggering Modes (Zyla 5.5 only) Global Shutter triggering modes are available for Zyla 5.5 only. Global Shutter can also be thought of as a ‘snapshot’ exposure mode, meaning that all pixels of the array are exposed simultaneously. Before the exposure begins, all pixels in the array are cleared of charge using the Global Clear. -
Page 44: Global Shutter Internal Triggering (Non-Overlap Mode)
2.6.3.1 Global Shutter Internal Triggering (Non-Overlap Mode) In Internal non-overlap modes, a new exposure can not start until the previous exposure has been read out. The exact acquisition sequence depends on the exposure time. The two scenarios are shown in Figure 26 and Figure 27. - Page 45 If the exposure time is greater than a frame read out time, the exposure starts first by pulsing the Global Clear. The reference frame is read out during the exposure such that the end of the reference read out is coincident with the end of the exposure. The Charge Transfer pulse then goes HIGH to transfer charge from all pixels in the sensor.
-
Page 46: Global Shutter Internal Triggering (Overlap Mode)
2.6.3.2 Global Shutter Internal Triggering (Overlap Mode) In Internal Triggering in Overlap Mode, the read out of an exposure overlaps with the next exposure. This allows the user to maximise the Cycle Time for a given exposure time. The absolute maximum frame rate achievable is the time taken to read out both the Reference and Signal Frame from the sensor. -
Page 47: Global Shutter External/Software Triggering
2.6.3.3 Global Shutter External/Software Triggering In this section, both External and Software Trigger are described in the same diagram as the acquisition sequence is the same. The trigger event can either from the EXT input or sent via software. While waiting on the trigger event, the sensor is put into a “pre-scan read out cycle”. - Page 48 Table 26: Global Shutter External/Software Triggering Timing Parameters (Non Overlap Mode) Parameter Minimum Maximum Exposure 1 Frame + 4 Rows 30 s Cycle Time (1/Frame Rate) Exposure + 1 Frame + 1 InterFrame + 5 Rows Acquisition Start Delay 1 Row 2 Rows EXT Trig Pulse Width 2 Sensor Speed Clock Cycles...
-
Page 49: Global Shutter External Exposure Triggering (Non-Overlap Mode)
2.6.3.4 Global Shutter External Exposure Triggering (Non-Overlap Mode) While waiting on the trigger event, the sensor is put into a “pre-scan read out cycle”. On detection of the trigger event, the Global Clear is pulsed to clear the charge from the sensor. The exposure period then starts and lasts for the width of the External Trigger. -
Page 50: Global Shutter External Exposure Triggering (Overlap Mode)
2.6.3.5 Global Shutter External Exposure Triggering (Overlap Mode) In overlap mode, every positive edge of an External trigger will trigger a signal frame read out and start a new exposure. The period of External trigger pulse defines both the exposure time and cycle time. Note that when an acquisition starts, the first positive edge of the trigger will initiate the first exposure but also output a frame that has an incorrect exposure which is therefore discarded. The next positive edge of the trigger will end the first exposure and start a new frame read out. From the figure below, it is can be seen that the minimum exposure time is approximately two frame read out periods. The first read out period is used to read out the “Signal”... -
Page 51: Global Shutter External Start Triggering
2.6.3.6 Global Shutter External Start Triggering In this mode the camera will wait for a single external trigger event. Once this external trigger event is detected, the camera will progress as if the camera was in internal trigger mode. The ARM signal indicates to the user when the camera is ready to detect an External Start Trigger. -
Page 52: Global Shutter Triggering Constraints
2.6.3.7 Global Shutter Triggering Constraints The table below shows a summary of constraints when operating the Zyla 5.5 model in Global Shutter mode: Table 32: Global Shutter Mode Triggering Constraints Fast trigger exposure Global Shutter Triggering Modes Exposure Range trigger pulse switching Jitter... -
Page 53: Acquisition Modes
2.7 ACQUISITION MODES The following acquisition modes can be supported: • Single Scan • Kinetic Series • Accumulate • Run Till Abort NOTES: The term ‘User Frame’, in this section refers to a single frame in Rolling Shutter mode and a reference/ image frame pair in Global Shutter mode. -
Page 54: Live Mode
2.7.4.1 Live Mode Live Mode refers to a version of Run Till Abort in which each user frame will be the latest frame output by the sensor and will have the minimum amount of latency through the camera as possible. Live mode requires the use of SW Trigger. In order to ensure that frames are buffered in the on-camera memory for the shortest possible time, the next SW trigger must not be sent until the user frame has been transmitted from the camera. -
Page 55: Flexiscan
Furthermore, LightScan PLUS offers the user multiple new scanning directions for the rolling shutter mechanism in which both sides of the sensor can be used simultaneously, synchronized to two scanning lasers, thus providing the option to utilize the full ‘Dual Port Readout’ capability of the sensor and provide 100 fps full resolution frame rate. These new scanning options for sCMOS are also ideal for dual-wavelength applications where two light sources are scanning across the image sensor with different wavelengths. The multi-laser readout configurations are illustrated below in Figure 35. Figure 35: Multiple ‘dual laser’ scanning options available. The standard rolling shutter scan mode (Centre outwards in both directionssimultaneously) is illustrated on the left along with the three additional scanning options. -
Page 56: Section 3: Installation
SECTION 3: INSTALLATION 3.1 Safety Considerations • Prior to commencing installation, please refer to the Specifications in Appendix A to ensure all requirements have been met • As part of the safety features of the product the Zyla must be powered from an SELV (safety extra low voltage) source. In the case of the specified power supply (SW3605) this unit provides an SELV output and is designed to have a protective earth connected via the earth pin on the mains plug of the unit. It is important to ensure that this is connected to the buildings protective earth system •... -
Page 57: Coolant Hose Connection And Disconnection (Water Cooled Models)
3.3 Coolant Hose Connection and Disconnection (Water Cooled Models) CAUTION: • Before attempting to insert or remove the coolant hose connections, ensure that all coolant has been drained from the hoses and integral coolant channel within the camera head. • Care must be taken to avoid permanent damage to the camera system resulting from either leakage of coolant during connection/removal of hoses or spillage of any residual coolant contained within the camera head once the hoses have been removed. -
Page 58: Connecting The Coolant Hoses
3.3.2 Connecting the Coolant Hoses 1. Press the hose connector into the connection on the camera head, ensure it clicks into place and repeat for the second hose. 2. Confirm the hoses are connected securely by applying pressure on the top front of the camera body and pulling backwards on the hoses. 3. The coolant hoses are now connected. 3.3.3 Disconnecting the Coolant Hoses 1. -
Page 59: Installing Software (Solis Or Sdk3)
3.5 Installing Software (Solis or SDK3) NOTE: You must have administrator access on your PC to perform this installation. The same instructions cover the installation procedure for Andor’s Solis software or Andor’s SDK, which is used in conjunction with third party software. If you are planning to run your camera through a third party interface you will require the Andor Drivers, called SDK3. -
Page 60: Installing The Camera Framegrabber Card
3.6 Installing the Camera Framegrabber Card Ensure your PC is powered off. Ensure anti-static precautions using anti-static strap provided. Keep all screws safe. Unplug all cables from the rear of the computer. Remove the PC enclosure so as to gain access to the expansion slots. Locate a PCIe x16, x8 or x4 slot. -
Page 61: Checking & Setting Bios Options (For Pcs Not Supplied By Andor)
3.7 Checking & Setting BIOS options (for PCs not supplied by Andor) Enter the BIOS menu when starting PC. For Dell workstations, press F12 at start-up and select System Setup in the One Time Boot Menu. For Dell workstations 3 options in the Performance menu of the BIOS need to be checked/set: •... -
Page 62: Section 4: Operation
SECTION 4: OPERATION 4.1 Connecting your Camera and Switching it on Ensure that the Camera on / off switch is in the OFF position AND your PC is switched OFF. For water cooled models, ensure the cooling water supply is connected prior to powering the camera (refer to Section 3.3). -
Page 63: Using The Lens Mount Adaptors
4.2 Using the Lens Mount Adaptors The Zyla has a T-mount thread as standard. There are 3 standard lens mount adaptors available that can be specified at the time of ordering, enabling the Zyla to suit standard mounting options. These are as follows: • C-mount • CS-mount • F-mount The Zyla is supplied with the selected lens mount adaptor locked into a nominal position of 1 mm from the top surface of the Zyla faceplate (see Figure 37). -
Page 64: Cs-Mount Adaptor
4.2.2 CS-mount Adaptor The CS-mount adaptor can be adjusted as follows: Loosen the 2 locking screws located in the front face of the adaptor if required using supplied 1.5 mm Allen key. CS-mount locking screw locations Figure 41: CS-mount adaptor Manually screw the CS-mount into position until the desired focus is achieved. -
Page 65: Cooling
4.3 Cooling 4.3.1 Integral Thermal Protection Care should be taken to ensure that the camera does not overheat, as this can cause system failure. Overheating may occur if either of the following situations arises: Air-cooled Models • The air vents on the sides of the head are accidentally blocked •... -
Page 66: Emergency Mains Disconnection
4.4 Emergency Mains Disconnection In case of emergency, the disconnecting point of the equipment is the mains power cord connected to the external power supply, or the mains socket switch. WARNING: SWITCH OFF THE POWER AT THE MAINS SOCKET AND REMOVE THE MAINS LEAD FROM THE EXTERNAL POWER SUPPLY. -
Page 67: Section 5: Maintenance
SECTION 5: MAINTENANCE THERE ARE NO USER-SERVICEABLE PARTS INSIDE THE CAMERA. DAMAGE CAUSED BY UNAUTHORISED MAINTENANCE OR PROCEDURES WILL INVALIDATE THE WARRANTY. 5.1 Regular Checks • The state of the product should be checked regularly, especially the integrity of the External Power Supply and the mains cable. -
Page 68: Cooling Hoses And Connections
contact Andor Product Support to arrange a pre-emptive Zyla chamber service. There is some anticipated variability as to when moisture ingress can be expected to present as an issue to camera performance following saturation of the desiccant, based on variability in environmental humidity and air flow around the camera. For example, while a camera may be operated in a dry air-conditioned laboratory environment throughout the working day, the laboratory air conditioning may be turned off overnight, during which the camera chamber can become exposed to high heat and humidity. -
Page 69: Section 6: Troubleshooting
SECTION 6: TROUBLESHOOTING This section provides useful information and solutions for some troubleshooting scenarios. If you have an issue that you are unable to rectify using this section, please contact Andor Technical Support for further advice. 6.1 Camera buzzer does not sound on start-up 1. The camera buzzer should be audible momentarily when the camera is switched on. 2. If this does not occur, ensure that power is connected to the camera and the On/Off switch is set to On 6.2 Camera is not recognized by PC Ensure the camera is switched on... -
Page 70: Fire, Aux_Out And Arm Outputs Not Functioning Correctly
6.6 Fire, Aux_Out and Arm outputs not functioning correctly These are 5 V TTL outputs which should not be used to drive low impedance loads. Please refer to Section 1.7.2 and 1.7.3 for suggested terminations. 6.7 External Trigger input not functioning correctly This is a 5 V TTL input which should be driven from a 5V TTL compatible source. -
Page 71: Condensation Effect Noticeable In Images
6.9 Condensation Effect Noticeable in Images For back-filled designs, one expects a very low-level of moisture ingress into the sensor chamber over time, pervading through the O-ring seals. Furthermore, in cameras that thermoelectrically cool the sensor to reduce darkcurrent, this moisture would then condense onto the cooled sensor, affecting image quality. To mitigate this, all such cameras utilise desiccant material in the sensor enclosure to absorb any moisture that has entered. However, eventually the desiccant may become saturated, indicating the need for the camera’s sensor chamber to be serviced, whereupon the chamber will be re-backfilled and the desiccant replaced. -
Page 72: Appendix A: Specifications
APPENDIX A: SPECIFICATIONS •1 Model Specific Specifications Model Zyla 5.5 Zyla 4.2 PLUS Sensor type Front Illuminated Scientific CMOS Front Illuminated Scientific CMOS Active pixels (W x H) 2560 x 2160 (5.5 Megapixel) 2048 x 2048 (4.2 Megapixel) 16.6 x 14.0 mm 13.3 x 13.3 mm Sensor size 21.8 mm diagonal 18.8 mm diagonal Slow Read... - Page 73 Mechanical Specifications Zyla 4.2 PLUS and Zyla 5.5 models Weight (Camera Only*) 1 kg (2 lb 3 oz) Weight (External Power Supply) 0.33 kg (0 lb 11.6 oz) * The camera weight is the head only with no cables or pipes attached and without water or coolant. Environmental Specifications Zyla 5.5 Zyla 4.2 PLUS Location to be used Indoor Altitude...
- Page 74 External Power Supply Requirements Zyla 4.2 PLUS and Zyla 5.5 Low Voltage Supply Input 12 V +/- 5% Low Voltage Supply Current Low Voltage Supply Cable Connector Tyco Electronics Part # 3-1437719-3 Pins 1 & 2: 0 V Low Voltage Supply Connector Pin Connections Pins 3 &...
-
Page 75: Appendix B: Mechanical Drawings
APPENDIX B: MECHANICAL DRAWINGS Zyla Mechanical Drawings Air Cooled Models Zyla 5.5 3-tap version Zyla 5.5 and Zyla 4.2 10-tap Zyla 5.5 and 4.2 USB 3 Below: Zyla Mechanical Drawings for water cooled versions of Zyla 5.5 and Zyla 4.2. version 2.0 rev 18 Feb 2021... - Page 76 version 2.0 rev 18 Feb 2021...
-
Page 77: Appendix C: Dew Point Graph
APPENDIX C: DEW POINT GRAPH To avoid issues with condensation, the coolant temperature must be set above the dewpoint- the temperature at which condensation (dew) will form. In the relatively dry conditions of an air conditioned lab, or a cool dry climate, use of a coolant temperature of 10 C should not cause any problems. -
Page 78: Appendix D: Other Information
APPENDIX D: OTHER INFORMATION D.1 Terms and Conditions of Sale and Warranty Information The terms and conditions of sale, including warranty conditions, will have been made available during the ordering process. The current version for the US is available here, for all other regions (except Japan) please click here.
Need help?
Do you have a question about the Zyla sCMOS 4.2 PLUS and is the answer not in the manual?
Questions and answers