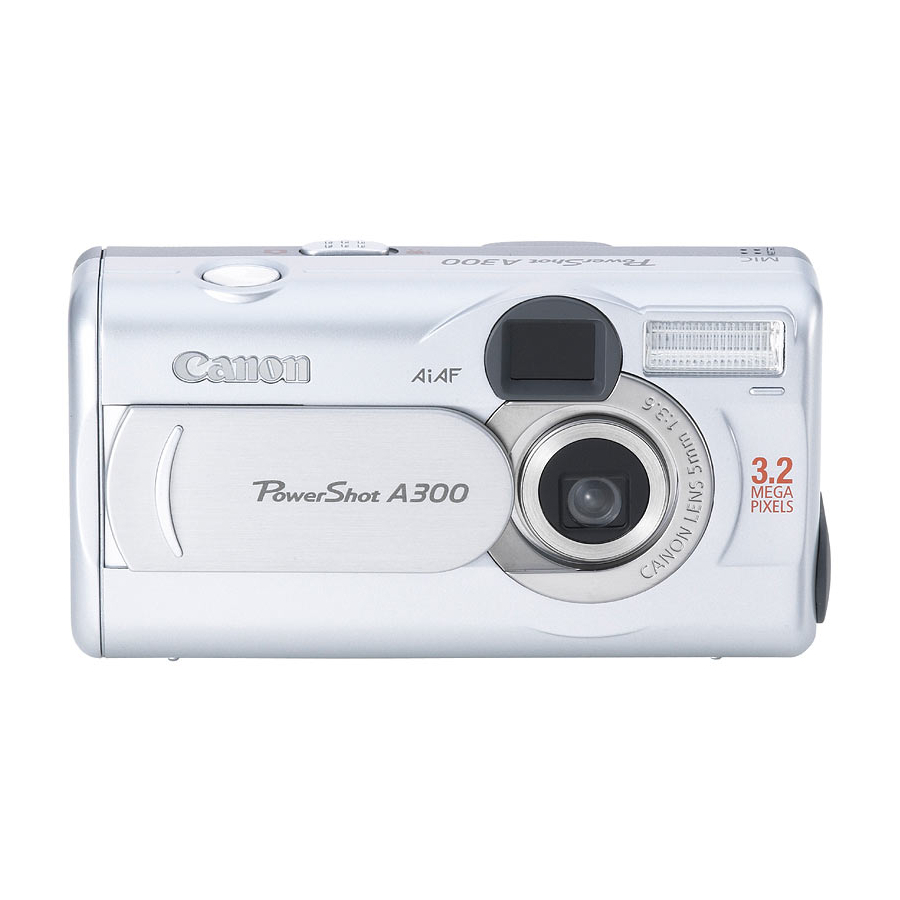
Canon PowerShot A300 Service Manual
Hide thumbs
Also See for PowerShot A300:
- User manual (144 pages) ,
- Service manual (130 pages) ,
- Software starter manual (138 pages)
Table of Contents
Advertisement
Quick Links
Advertisement
Chapters
Table of Contents

Related Manuals for Canon PowerShot A300


Summary of Contents for Canon PowerShot A300
- Page 2 Canon will release service information as the need arises. In the event of major changes in the contents of this manual over a long or short period, Canon may issue new editions of this manual. The following paragraph does not apply to any countries where such provisions are inconsistent with local law.
- Page 3 SAFETY PRECAUTIONS The following precautions should be observed when servicing. Since many parts in the unit have special safety-related characteristics, always use genuine CANON replacement parts. Especially critical parts in the power circuit block should not be replaced with other makes.
-
Page 4: Table Of Contents
CHAPTER 2. TECHNICAL DESCRIPTION CONTENTS 1. Functions of each unit 1.1 MAIN PCB ASS’Y --------------------------------------------------------------------------------------------------------- 2-1 1.2 FLASH UNIT ---------------------------------------------------------------------------------------------------------------- 2-1 2. Outline of Circuits 2.1 Power Supply Control ------------------------------------------------------------------------------------------------------ 2-2 2.1.1 Power Supply Block Diagram ----------------------------------------------------------------------------------- 2-2 2.1.2 Power Control Sequence ------------------------------------------------------------------------------------------ 2-2 2.2 Signal Processing ------------------------------------------------------------------------------------------------------------ 2-3 2.2.1 System Control ----------------------------------------------------------------------------------------------------- 2-3... -
Page 5: Functions Of Each Unit
CHAPTER 2. TECHNICAL DESCRIPTION 1. Functions of each unit 1.1 MAIN PCB ASS’Y 1) Driving the CCD Sensor. 2) Conversion of the image signal from the analog signal to the digital signal. 3) Controlling the power supply and the system by CPU. (Refer to Sections 2.1 and 2.2.) 4) Image processing, and reading and writing the image signal to and from the CF card using DSP. -
Page 6: Outline Of Circuits
CHAPTER 2. TECHNICAL DESCRIPTION 2. Outline of Circuits 2.1 Power Supply Control The power supply is controlled by the CPU mounted on the main PCB ass’y. 2.1.1 Power Supply Block Diagram MAIN PCB ASS'Y E1, E2, E21, E3 BATTERY DC/DC VCC1AL for DSP CONVERTER... -
Page 7: Signal Processing
CHAPTER 2. TECHNICAL DESCRIPTION 2.2 Signal Processing MAIN PCB ASS'Y SDRAM CF card HD, VD Drive Pulse Driver CDS, A/D Sensor Motor LENS UNIT Driver AF Support LED FLASH MEMORY FINDER LED Electric FLASH AUDIO/SP SPEAKER Fig. 3 Signal System Block Diagram 2.2.1 System Control The CPU on the main PCB ass’y controls the LENS UNIT (motor, shutter), operation switch receiver, USB communication and flowing circuits. -
Page 8: Picture Processing
CHAPTER 2. TECHNICAL DESCRIPTION 2.2.2 Picture Processing 1) The drive pulse of the CCD sensor is created by both clock from DSP and TG that is operated by sync. signal. The picture signal by the drive pulse is output from CCD sensor. The output signal of the CCD picture is converted to the signal processing and the digital data by the CDS and A/D converter, and is sent to the DSP. -
Page 9: Troubleshooting
CHAPTER 2. TECHNICAL DESCRIPTION 3. Troubleshooting 3.1 When an Error Code is Displayed [Remedy] • Check for any abnormalities in the mounting of probable faulty parts or connector connections referring to the table below. • Try replacing probable faulty parts referring to the below. [NOTE] •... - Page 10 CHAPTER 2. TECHNICAL DESCRIPTION Error Code Name Occurrence Conditions Cause and Probable Faulty Part CF WRITE Free area could not be secured in the CF CARD TIME OVER buffer for the photograph image within the specified time in the continuous MAIN PCB ASS’Y shooting mode.
-
Page 11: When A Problem Occurs
CHAPTER 2. TECHNICAL DESCRIPTION 3.2 When a Problem Occurs [Remedy] • Check for any abnormalities in the mounting of probable faulty parts or connector connections referring to the table below. • Try replacing probable faulty parts referring to the table below. [NOTE] •... - Page 12 CHAPTER 3. REPAIR INSTRUCTION CONTENTS 1. Before Starting the Repair Work ------------------------------------------------------------------------------------------------ 3-1 1.1 Precaution on Flash High Tension Circuit ------------------------------------------------------------------------------- 3-1 1.2 List of Tools ----------------------------------------------------------------------------------------------------------------- 3-1 1.3 List of Supplies -------------------------------------------------------------------------------------------------------------- 3-1 1.4 Flexible Connectors --------------------------------------------------------------------------------------------------------- 3-2 2. Disassembly/Assembly ----------------------------------------------------------------------------------------------------------- 3-3 2.1 Procedure --------------------------------------------------------------------------------------------------------------------- 3-3 2.2 REAR COVER UNIT, STRAP PLATE, LCD WINDOW ------------------------------------------------------------ 3-4 2.3 BACK LIGHT UNIT, LCD PANEL ------------------------------------------------------------------------------------- 3-5...
-
Page 13: Before Starting The Repair Work
CHAPTER 3. REPAIR INSTRUCTION 1. Before Starting the Repair Work Be sure to read the following precaution before starting the repair work. 1.1 Precaution on Flash High Tension Circuit • When the FRONT COVER UNIT is removed, be sure to discharge the main capacitor. (Discharging resistor : 1 kΩ,, approx. -
Page 14: Flexible Connectors
CHAPTER 3. REPAIR INSTRUCTION 1.4 Flexible Connectors This product uses the two types of the flexible connectors. Type A UNLOCK LOCK The contact-piece should face upwards. UNLOCK LOCK Type B The contact-piece should face front. Unconnected state connected state Fig. 3-2 Flexible connectors Holes of the flexible card. -
Page 15: Disassembly/Assembly
2. Disassembly/Assembly 2.1 Procedure Disassembling procedure of PowerShot A300 is shown by the following flowchart. Reverse the disassembling procedure to reassemble them. * The pages to refer are shown in parenthesis ( ). Some parts can be disassembled not following the procedure shown below. (See interactive.) Note : At the respective steps, *1 indicates that the “DIA BOND 1663G that has adhered to the parts should be... - Page 16 CHAPTER 3. REPAIR INSTRUCTION (1)-4 SIDE COVER SIDE COVER BATTERY COVER (1)-3 (1)-4 REAR COVER UNIT NOTE2 (Assembling) Setting position during assembling (1)-3 NOTE1 (Assembling) Switch position check (1)-1 LITHIUM BATTERY (1)-3 (1)-1 (1)-4 (1)-2 (1)-2 LENS COVER MO FPC LCD FPC CAUTION REAR COVER...
-
Page 17: Back Light Unit, Lcd Panel
CHAPTER 3. REPAIR INSTRUCTION REAR COVER UNIT NOTE2 (Assembling) Setting the position during assembling NOTE1 (Assembling) (1)-1 Soldering (1)-2 (1)-4 LCD PANEL (1)-3 (1)-4 LIGHT SHADING SHEET CAUTION (1)-3 BACK LIGHT UNIT (1)-4 NOTE3 (Assembling) (1)-2 (1)-4 Claw (1)-4 (1)-4 XA4-9170-407 Claw 4.0mm... -
Page 18: Battery Cover
CHAPTER 3. REPAIR INSTRUCTION (1)-1 BATTERY COVER (1)-2 (1)-1 BATTERY CONTACT PLATE NOTE (Assembling) (1)-1 Claws Dowels (1)-2 Tweezers Fig. 3-6 BATTERY COVER 2.4 BATTERY COVER (1) BATTERY COVER 1. Remove the BATTERY COVER in the direction of the arrow. 2. -
Page 19: Front Cover Unit, Cf Cover, Battery Cover Spring
CHAPTER 3. REPAIR INSTRUCTION (2)-1 CF COVER (2)-1 CAUTION (1)-3 SHUTTER BUTTON ELECT. CAPASITOR (2)-2 BATTERY COVER SPRING (1)-3 FRONT COVER UNIT (1)-3 (1)-3 USB CONNECTOR Never touch the terminals of the capacitor MAIN SHILD 2 CASE How to discharge the capacitor (1)-2 terminal BARRIER FPC... -
Page 20: Microphone, Microphone Bush
CHAPTER 3. REPAIR INSTRUCTION (1)-3 MICROPHONE BUSH (1)-2 (1)-3 MICROPHONE (1)-2 Black (1)-1 Soldering (1)-2 NOTE (Assembling) MICROPHONE, MICROPHONE BUSH Black Fig. 3-8 MICROPHONE, MICROPHONE BUSH 2.6 MICROPHONE, MICROPHONE BUSH (1) MICROPHONE, MICROPHONE BUSH 1. Remove soldering and remove the two lead wires (black) and (red) coming from MICROPHONE. NOTE (Assembling) Be careful of the direction of the two lead wires (black) and (red). -
Page 21: Main Pcb Ass'y-(1)
CHAPTER 3. REPAIR INSTRUCTION OPT FPC CCD FPC NOTE2 (Assembling) MAIN PCB ASS’Y, Setting the position MAIN SHIELD 1 CASE, during assembling MAIN SHIELD 2 CASE, MAIN SHIELD 3 CASE (1)-5 (1)-6 (1)-4 (1)-6 (1)-3 (1)-2 Soldering CAUTION Black (1)-1 Soldering Black NOTE2 (Assembling) Setting the position... -
Page 22: Main Pcb Ass'y-(2)
CHAPTER 3. REPAIR INSTRUCTION MAIN PCB ASS’Y, MAIN SHIELD 1 CASE, MAIN SHIELD 3 CASE, (1)-2 MAIN SHIELD 2 CASE (1)-1 Soldering (1)-2 Position where insulation tape is to be attached. Insulation tape Insulation tape NOTE (Assembling) MAIN SHIELD 2 CASE Fig. -
Page 23: Main Pcb Ass'y-(3)
CHAPTER 3. REPAIR INSTRUCTION (1)-2 (1)-1 Soldering (1)-2 MAIN SHIELD 3 CASE (1)-4 MAIN PCB ASS’Y (1)-2 (1)-4 (1)-4 MAIN SHIELD 1 CASE (1)-1 Soldering (1)-4 (1)-3 Soldering NOTE (Assembling) (1)-4 Insulation tape Fig. 3-11 MAIN PCB ASS’Y-(3) 2.9 MAIN PCB ASS’Y-(3) (1) MAIN SHIELD 3 CASE, MAIN SHIELD 1 CASE, MAIN PCB ASS’Y 1. -
Page 24: Flash Unit
CHAPTER 3. REPAIR INSTRUCTION NOTE2 (Assembling) NOTE3 (Assembling) When viewed from the bottom of Dowels for setting the position the MAIN FRAME. FLASH UNIT Motor block (1)-4 (1)-5 GND PLATE (1)-3 NOTE1 (Assembling) Molded portion Soldering position (1)-5 FLASH UNIT (1)-4 (1)-1 (Gray) -
Page 25: M-S Fpc
CHAPTER 3. REPAIR INSTRUCTION FLASH UNIT M-S FPC NOTE (Assembling) Fig. 3-13 M-S FPC 2.11 M-S FPC (1) M-S FPC 1. Remove the M-S FPC. NOTE (Assembling) Fold the M-S FPC into the three equal lengths as shown. 3-13... -
Page 26: Rls Pcb Ass
CHAPTER 3. REPAIR INSTRUCTION (1)-2 (1)-3 RLS PCB ASS’Y NOTE (Assembling) (1)-1 Dowel for setting the position Dowel for setting the position NOTE (Assembling) Claw (1)-1 OPT FPC XA4-9140-257 2.5mm METAL M1.4 (SELF TAP) Fig. 3-14 RLS PCB ASS’Y 2.12 RLS PCB ASS’Y (1) RLS PCB ASS’Y 1. -
Page 27: Battery (-) Contact, Battery (+) Contact
CHAPTER 3. REPAIR INSTRUCTION MAIN FRAME (1)-1 (2)-1 (1)-1 BATTERY (-) CONTACT (1)-1 (2)-1 (2)-3 NOTE1 (Assembling) (1)-2 Soldering (2)-2 (1)-2 BATTERY (+) LEAD (2)-2 Soldering BATTERY (-) LEAD (Red) (Black) NOTE2 (Assembling) (2)-1 (2)-3 BATTERY (+) CONTACT BATTERY CONTACT (+) GUARD NOTE3 (Assembling) DIA BOND 1663G How to route the wire. -
Page 28: Elect. Capacitor
CHAPTER 3. REPAIR INSTRUCTION (1)-1 NOTE1 (Assembling) Double-sided adhesive tape (1)-1 ELECT. CAPACITOR (1)-2 Soldering Orange Gray MAIN FRAME NOTE2 (Assembling) DIA BOND 1663G How to route the wire. ELECT. CAPACITOR Orange DIA BOND 1663G Gray Fig. 3-16 ELECT. CAPACITOR 2.14 ELECT. -
Page 29: Optical Unit-(1)
CHAPTER 3. REPAIR INSTRUCTION NOTE1 (Assembling) Setting the position during assembling (1)-2 MAIN FRAME (1)-2 OPTICAL UNIT, (1)-1 IR FILTER, CCD RUBBER, CCD UNIT XA4-9170-407 4.0mm METAL M1.7 (SELF TAP) Fig. 3-17 OPTICAL UNIT-(1) 2.15 OPTICAL UNIT-(1) (1) OPTICAL UNIT-(1) 1. -
Page 30: Optical Unit-(2)
CHAPTER 3. REPAIR INSTRUCTION NOTE1 (Assembling) Setting the position during assembling (1)-4 NOTE2 (Assembling) IR FILTER (1)-3 CCD RUBBER (1)-2 CCD UNIT OPTICAL UNIT (1)-1 XA4-9140-307 3.0mm METAL M1.4 (SELF TAP) Fig. 3-18 OPTICAL UNIT-(2) 2.16 OPTICAL UNIT-(2) (1) CCD UNIT, CCD RUBBER, IR FILTER 1. -
Page 31: Battery Lock Plate, Battery Locker
CHAPTER 3. REPAIR INSTRUCTION MAIN FRAME Groove NOTE (Assembling) (1)-3 (1)-1 BATTERY LOCKER (1)-2 BATTERY LOCK PLATE XA4-9170-407 4.0mm METAL M1.7 (SELF TAP) Fig. 3-19 BATTERY LOCK PLATE, BATTERY LOCKER 2.17 BATTERY LOCK PLATE, BATTERY LOCKER (1) BATTERY LOCK PLATE, BATTERY LOCKER 1. -
Page 32: Lithium (+) Contact, Lithium (-) Contact
CHAPTER 3. REPAIR INSTRUCTION MAIN FRAME (1)-2 (1)-1 (2)-2 (1)-2 (2)-1 LITHIUM (+) CONTACT (2)-2 LITHIUM (-) CONTACT XA4-9170-407 4.0mm METAL M1.7 (SELF TAP) Fig. 3-20 LITHIUM (+) CONTACT, LITHIUM (-) CONTACT 2.18 LITHIUM (+) CONTACT, LITHIUM (-) CONTACT (1) LITHIUM (+) CONTACT 1. -
Page 33: Screw List
CHAPTER 3. REPAIR INSTRUCTION 2.19 Screw List CD3-0443-000 XA4-9170-607 XA4-9170-407 4.0mm 4.0mm 6.0mm SILVER METAL METAL M1.7 M1.7 M1.7 (SELF TAP) (SELF TAP) (SELF TAP) XA4-9140-257 XA4-9140-307 3.0mm 2.5mm METAL METAL M1.4 M1.4 (SELF TAP) (SELF TAP) 3-21... -
Page 34: Adjustments
3. Adjustments 3.1 Replacement Parts and Adjustment Items PowerShot A300 requires electrical adjustments when certain parts are replaced. The table below indicates the adjustments required for the respective part replacements. For all other parts not listed below, no electrical adjustments are necessary after replacement. -
Page 35: Adjustment Tools
CHAPTER 3. REPAIR INSTRUCTION 3.2 Adjustment Tools The following tools are required for electrical adjustment. DESCRIPTION PARTS NO. REMARKS PC/AT-Compatible Machine — Local purchase (Windows2000 or 98 pre-installed Model, USB port) SERVICE MANUAL (CD-ROM) CY8-4385-031 ADJUSTMENT SOFTWARE — Download Enclosed in Compact Power Adapter CA-PS800 —... -
Page 36: Before Starting Electrical Adjustments
CHAPTER 3. REPAIR INSTRUCTION 3.3 Before Starting Electrical Adjustments 3.3.1 TWAIN Driver Installation Install the USB Driver for Adjustment in the CD-ROM to PC. (“This Adjustment Software” is impossible when the RS-232C TWAIN driver is used.) 3.3.2 Factory Mode Driver Installation After downloading and extracting Factory Mode Driver, double-click Setup.exe (\Factory Mode Driver\Win 2000_98\Setup.exe) to install it. - Page 37 CHAPTER 3. REPAIR INSTRUCTION Choose Destination Location Select folder where Setup will install files. Click the “??[N]>” button. InstallShield Wizard Complete Click the “??” button. Click the “OK” button. Installing TWAIN (Factory Mode) Driver is completed. NOTE : If you cannot install Factory Mode Driver in above procedure, install it in the following procedure. 1.
-
Page 38: Adjustment Software Installation
CHAPTER 3. REPAIR INSTRUCTION 3.3.3 Adjustment Software Installation 1. After downloading and extracting Adjustment Software, double-click Setup.exe to install it. (Adjustment Softwares are different according to the model of camera that you are going to adjust.) 2. When the dialog box below appears, click the “OK” button. 3. -
Page 39: Preparation
CHAPTER 3. REPAIR INSTRUCTION 3.3.4 Preparation Before starting up the Adjustment Software, follow the preparatory steps below: 1. Obtain all the tools necessary for the adjustment. 2. Connect the Camera to the Power Source with the Compact Power Adapter CA-PS800 and AC Cable. 3. -
Page 40: Starting Up The Adjustment Software
CHAPTER 3. REPAIR INSTRUCTION 3.3.5 Starting up the Adjustment Software After completing the preparatory steps, click Start and move the cursor to Program; then select Canon Digital Camera and click PowerShot A300 Adjustment. 3.3.6 Menu Window When the Adjustment Software starts up, the Menu Window below will appear. -
Page 41: Calibration
CHAPTER 3. REPAIR INSTRUCTION 3.4 Calibration 3.4.1 Calibration I Tools Used • Personal Computer • Brightness Box (light source A) • FL-W Filter • ADJUSTMENT SOFTWARE • Color Viewer (5600° K) • ND-2 Filter • Compact Power Adapter CA-PS800 • Color Bar Chart •... - Page 42 CHAPTER 3. REPAIR INSTRUCTION 1. Place the camera so that lens is set against the Brightness C-12 Filter light source surface of the Brightness Box via the C-12 Filter. 2. Set the Brightness Box to EV12. CAMERA 3. Click the “Check” button. BODY 4.
- Page 43 CHAPTER 3. REPAIR INSTRUCTION When the message on the right appears go to 9. W-10 1. Remove the ND-2 Filter. Filter 2. Attach the two W-10 Filters between the Lens Color Viewer and the Color Viewer. CAMERA BODY Place the camera so that the lens is set against the center part of the Color Viewer.
- Page 44 CHAPTER 3. REPAIR INSTRUCTION When the message on the right appears go to 13. 1. Attach the Color Bar Chart to the Color Viewer. Color Bar Chart Color Viewer 2. Place the camera so that the Viewing image of the color bar chart is the full of LCD with the ND-4 Filter attached.
- Page 45 CHAPTER 3. REPAIR INSTRUCTION When the message on the right appears, click the “FINISH” button. (This ends the “Calibration”.) 3-33...
-
Page 46: Adjustment Procedure
CHAPTER 3. REPAIR INSTRUCTION 3.5 Adjustment Procedure 3.5.1 CCD Adjustment I Tools Used • Personal Computer • INTERFACE CABLE IFC-300PCU • ADJUSTMENT SOFTWARE • Brightness Box (light source A) • Compact Power Adapter CA-PS800 • C-12 Filter • AC Cable Click the “CCD”... - Page 47 CHAPTER 3. REPAIR INSTRUCTION When the message on the right appears, Set the Brightness Box to EV15 while setting the C-12 Filter between the lens. Click the “ADJUST” button. When the message on the right appears, click the “FINISH” button. (This ends the “CCD”...
-
Page 48: Optical Unit Adjustment
CHAPTER 3. REPAIR INSTRUCTION 3.5.2 Optical Unit Adjustment I Tools Used • Personal Computer • INTERFACE CABLE IFC-300PCU • ADJUSTMENT SOFTWARE • AutoFocus Chart • Compact Power Adapter CA-PS800 • Zoom Chart • AC Cable • Tripod Click the “Optical Unit” button. When the message on the right appears, go to 3. - Page 49 CHAPTER 3. REPAIR INSTRUCTION When the message on the right appears, click the “FINISH” button. (This ends the “Optical Unit” Adjustment.) 3-37...
-
Page 50: Imaging Process Adjustment
CHAPTER 3. REPAIR INSTRUCTION 3.5.3 Imaging Process Adjustment I Tools Used • Personal Computer • W-10 Filter (2 pcs.) • ADJUSTMENT SOFTWARE • C-12 Filter • Compact Power Adapter CA-PS800 • FL-W Filter • AC Cable • ND-2 Filter • INTERFACE CABLE IFC-300PCU •... - Page 51 CHAPTER 3. REPAIR INSTRUCTION When the message on the right appears, go to 5. W-10 1. Remove the ND-2 Filter. Filter 2. Attach the two W-10 Filters between the Lens Color Viewer and the Color Viewer. CAMERA BODY Place the camera so that the lens is set against the center part of the Color Viewer.
- Page 52 CHAPTER 3. REPAIR INSTRUCTION When the message on the right appears, click the “FINISH” button. (This ends the “Imaging Process” Adjustment.) 3-40...
-
Page 53: Color Adjustment
CHAPTER 3. REPAIR INSTRUCTION 3.5.4 Color Adjustment I Tools Used • Personal Computer • INTERFACE CABLE IFC-300PCU • ADJUSTMENT SOFTWARE • Color Viewer (5600° K) • Compact Power Adapter CA-PS800 • Color Bar Chart • AC Cable • ND-4 Filter Click the “Color”... - Page 54 CHAPTER 3. REPAIR INSTRUCTION 1. Shift a frame on the displayed screen with a mouse to choose a color of color bar. 2. Click the “Sampling” button. Check “Yellow and Red”, and click the “OK” button. If these data are within specifications, go to 7. * Specification Ave_Cr = Reference Camera ±...
-
Page 55: Pixel Dot Adjustment
CHAPTER 3. REPAIR INSTRUCTION 3.5.5 Pixel Dot Adjustment I Tools Used • Personal Computer • INTERFACE CABLE IFC-300PCU • ADJUSTMENT SOFTWARE • Brightness Box (Light source A) • Compact Power Adapter CA-PS800 • C-12 Filter • Light-Shielding Cloth (500 × 500 or larger) •... - Page 56 CHAPTER 3. REPAIR INSTRUCTION 1. When the message on the right appears, cover the camera with the Light-Shielding Cloth so that the no light reasons the CCD. 2. Click the “ADJUST” button. When the message on the right appears, click the “FINISH”...
-
Page 57: Flash Adjustment
CHAPTER 3. REPAIR INSTRUCTION 3.5.6 Flash Adjustment I Tools Used • Personal Computer • INTERFACE CABLE IFC-300PCU • ADJUSTMENT SOFTWARE • 18% Gray Chart • Compact Power Adapter CA-PS800 • Tripod • AC Cable Click the “Flash” button. When the message on the right appears, go to 3. 1. - Page 58 CHAPTER 3. REPAIR INSTRUCTION When the message on the right appears, click the “FINISH” button. (This ends the “Flash” Adjustment.) 3-46...
-
Page 59: Checking Of Sound Recording/Output
CHAPTER 3. REPAIR INSTRUCTION 3.5.7 Checking of sound recording/output It is not required to adjust the recording/output (volume, etc.) of sound. Check the camera if the sound is recorded/play-backed properly. 3-47... - Page 60 CHAPTER 4. PARTS CATALOG CONTENTS PowerShot A300 Casing Parts ----------------------------------------------------------------------------------------------------------------------- Pg1 Internal Parts-1 ------------------------------------------------------------------------------------------------------------------- Pg2 Internal Parts-2 ------------------------------------------------------------------------------------------------------------------- Pg3 Accessories-1 ------------------------------------------------------------------------------------------------------------------------- Pg4 Accessories-2 ------------------------------------------------------------------------------------------------------------------------- Pg5 Service Tools-1 ----------------------------------------------------------------------------------------------------------------------- Pg6 Service Tools-2 ----------------------------------------------------------------------------------------------------------------------- Pg7 Category of CLASS A: Frequency of use: High...
- Page 61 PowerShot A300 Casing Parts...
- Page 62 PowerShot A300 P A R T S L I S T SYMBOL PARTS NO. CLASS QTY D E S C R I P T I O N R E M A R K S CY1-6281-000 FRONT COVER UNIT CD3-0406-000 COVER, CONNECTOR...
- Page 63 PowerShot A300 Internal Parts-1 BLACK BLACK...
- Page 64 PowerShot A300 P A R T S L I S T SYMBOL PARTS NO. CLASS QTY D E S C R I P T I O N R E M A R K S CD3-0449-000 PLATE, GND CK2-2002-000 FPC, M-S...
- Page 65 PowerShot A300 Internal Parts-2 ORANGE GRAY...
- Page 66 PowerShot A300 P A R T S L I S T SYMBOL PARTS NO. CLASS QTY D E S C R I P T I O N R E M A R K S CY1-6284-000 CCD UNIT CD1-4906-000 RUBBER, CCD...
- Page 67 PowerShot A300 A c c e s s o r i e s -1 Wrist Strap WS-200 USB Interface Cable CF Card FC-16M IFC-300PCU Alkaline Batteries (X2) Canon Digital Camera AC Cable Solution Disk CF CASE N.Sl : N.S Stand for No Stock (Product available)
- Page 68 PowerShot A300 P A R T S L I S T SYMBOL PARTS NO. CLASS QTY D E S C R I P T I O N R E M A R K S C84-1060-000 WRIST STRAP WS-200 C84-1174-000 CD-ROM, SOLUTION DISK VER.12.0 (J/E)
- Page 69 PowerShot A300 A c c e s s o r i e s -2 Camera User Guide Software Starter Guide System Map Quick Start Guide...
- Page 70 PowerShot A300 P A R T S L I S T SYMBOL PARTS NO. CLASS QTY D E S C R I P T I O N R E M A R K S CDI-E078-000 I.BOOK (ENGLISH) FOR USA, CANADA,...
- Page 71 PowerShot A300 S e r v i c e T o o l s -1 C-12 Filter ND-2 Filter SERVICE MANUAL CD-ROM Color Viewer (5600° K) ND-4 Filter W-10 Filter Standard Color Bar Chart FL-W Filter ND-8 Filter 18% Gray Chart...
- Page 72 PowerShot A300 P A R T S L I S T SYMBOL PARTS NO. CLASS QTY D E S C R I P T I O N R E M A R K S CY8-4385-031 CD-ROM, SERVICE MANUAL (J/E) DY9-2039-100...
- Page 73 PowerShot A300 S e r v i c e T o o l s -2 DIA BOND NO.1663G BLACK Adhesive Tape SONY T4000 Adhesive Tape 3M NO.56 Copper Foil Tape (3M 1181)
- Page 74 PowerShot A300 P A R T S L I S T SYMBOL PARTS NO. CLASS QTY D E S C R I P T I O N R E M A R K S CY9-8129-000 BOND, DIA BOND NO.1663G BLACK 6mm ×...
- Page 75 CHAPTER 5. DIAGRAMS CONTENTS 1. INTERCONNECTION DIAGRAM 3. P.C.B. DIAGRAMS 2. BLOCK DIAGRAMS 3-1. MAIN PCB ASS’Y 2-1. OVERALL 3-2. FLASH UNIT 2-2. MAIN PCB ASS’Y (1/4) 3-3. OPR PCB ASS’Y 2-3. MAIN PCB ASS’Y (2/4) 3-4. RLS PCB ASS’Y 2-4.
-
Page 76: Interconnection Diagram
CN1501 FU101 REAR COVER UNIT FLASH UNIT OPR PCB ASS'Y BL FPC ASS'Y BATTERY BARRIER CLOSE SW M-S FPC LCD PANEL BARRIER OPEN SW DETECT SWITCH SPEAKER BACK LIGHT UNIT CN201 01 April, 2003 C CANON INC., 2003 (Direct solder) - Page 77 VBATT EFCHG STSP /CE2 VCHGLVL Not Connected LED_SELF /IORD VDC(VDD3) /IOWR VDD(VCCIA-3) IREQ Not Connected Not Connected RESET /WAIT /INPACK Not Connected /REG POCB Not Connected Not Connected Not Connected DSAVE PSAVE C_GND 01 April, 2003 C CANON INC., 2003...
-
Page 78: Block Diagrams
UNIT (2/3) AUDIO/SP CN1502 Control SPEAKER for System for Motor for CCD for LCD Control FLASH UNIT FLASH HV/OSC/XE_Drive AF Support DC/DC CONVERTER SELF SW REG CONTROL Red Eye BATTERY BOX UNIT DC_IN 01 April, 2003 C CANON INC., 2003... - Page 79 TGCS P2 5 MIC PWRS AOUT PBAMPI UV_GND P2 2 SP PWRS BUZZERC BEEP IN VAUDIOEVR EVR CTL VCC1A 3 VCC1 VCC SP MIC IN DATA COMMUNICATION ANALOG IMAGE SIGNAL ANALOG AUDIO SIGNAL 01 April, 2003 C CANON INC., 2003...
- Page 80 CN1902 EX63 STSPC STSP IC1905 AND GATE VCC1A 3 EFCHG ST PCB UNIT BUZZERC IC1901(1/2) VCC1 VCHGLVL COMPARATOR LED SELF NJM12903R AIN1 EX60 IC1003 BH2220FVM VCC1 Q1902 DATA COMMUNICATION LED DRIVE XP03311 VAUDIOEVR 01 April, 2003 C CANON INC., 2003...
- Page 81 P0 1 VBATT_R BARRIER OPEN XP03312 /REG P0 0 BROP EX49 P0 4 BR_CLS BARRIER CLOSE EX48 BR OPEN BARRIER OPEN SCAN INTP2 BR FPC EX30 /CD1 EX31 FRONT COVER UNIT /CD2 DATA COMMUNICATION 01 April, 2003 C CANON INC., 2003...
- Page 82 6 5 8 -INE3 Q2008 Q2006 D2002 SWITCH SWITH UMF5N MCH3406 OUT2 Q2001 SWITCH L2012 SSM6N16FE -INE2 VDD3 Q2002 E21LAT EX37 SWITCH XP6213 DTC1 E2LAT DTC2 EX36 DTC3 DTC4 E3LAT EX38 VREF E1PLAT EX35 01 April, 2003 C CANON INC., 2003...
-
Page 83: Abbreviation In Block Diagrams
2.6 Abbreviation in Block Diagrams Abbreviation Nominal name Description Analog-to-Digital (A/D) Converter Automatic Exposure control Automatic Focussing control Logic AND circuit R-Y/B-Y Color difference signals of TV system Band-Pass Filter BUFFER Buffer circuit Chrominance signal Color component signal of TV system Charge-Coupled Device CCD imager Correlated Double Sampling system... -
Page 84: Diagrams
3. P.C.B. DIAGRAMS 3.1 MAIN PCB ASS’Y MAIN PCB ASS’Y (SOLDERING SIDE) MAIN PCB ASS’Y (COMPONENT SIDE) 01 April, 2003 C CANON INC., 2003... -
Page 85: Flash Unit
3.2 FLASH UNIT FLASH PCB ASS’Y (SOLDERING SIDE) FLASH PCB ASS’Y (COMPONENT SIDE) 01 April, 2003 C CANON INC., 2003... -
Page 86: Opr Pcb Ass'y
3.3 OPR PCB ASS’Y 01 April, 2003 C CANON INC., 2003... -
Page 87: Rls Pcb Ass'y
3.4 RLS PCB ASS’Y 01 April, 2003 C CANON INC., 2003... -
Page 88: Bl Fpc Ass'y
3.5 BL FPC ASS’Y 01 April, 2003 C CANON INC., 2003... - Page 89 How to print out the Auto Focus Chart < Procedures > 1. Click “ Print” of the Menu Bar. 2. Remove clicking from “Shrink oversized pages to paper size” and “Expand small pages to paper size”, and then print on A4 or legal. (A3 can be used.)
- Page 90 PowerShot A300 Auto Focus Chart...
- Page 91 PowerShot A300 Auto Focus Chart...
- Page 92 AF Chart Dimensions Dimensions 83mm...
Need help?
Do you have a question about the PowerShot A300 and is the answer not in the manual?
Questions and answers