Table of Contents

Related Manuals for Tattile ANPR MOBILE Series

Summary of Contents for Tattile ANPR MOBILE Series
- Page 1 ANPR MOBILE Series Automatic Number Plate Recognition Original Instructions for Installation Document number: RMM_00029 Rev.09 Tattile srl - Via Gaetano Donizetti, 1 - 25030 Mairano (BS) Italy - Tel. +39 030 97000 - Fax. +39 030 97001 - info@tattile.com...
- Page 2 Table of Contents Contact: Tattile S.r.l. Via Donizetti 1 25030 Mairano– Brescia, Italy Ph. +39 030 97 000 Fax +39 030 97 001 http://www.tattile.com http://www.tattile.com infotraffic@tattile.com This publication is copyright protected Copyright © 2020 Tattile S.r.l. Mairano (Brescia), Italy This document or any part of it must not be reproduced in any form, nor information therein contained disclosed to third parties, nor methods, procedures or tests described, performed without the authorization of Tattile S.r.l.. All trademarks and logos referenced herein belong to their legitimate owners; third‐party brands, product names, trade names, corporate names and company names may be trademarks of their respective owners or registered trademarks of other companies and have been used for purposes of explanation and to the owner's benefit, without implying a violation of copyright law. RMM_00029_09 2 / 42 ANPR Mobile...
-
Page 3: Table Of Contents
Preparation and Installation ...................... 21 4.1 Package Content .......................... 21 4.2 Building the Connector Cables .................... 21 4.2.1 Cabling the Power Supply .................... 22 4.3 Mounting the Product ......................... 23 4.3.1 Device check ........................ 23 5 Use .............................. 24 5.1 Searching the Device ........................ 24 5.2 Downloading the Freeware Software Tool Tattile Pathfinder ............ 24 5.3 Modifying the IP Address of the Device .................. 25 5.4 Connecting to the Web Interface .................... 25 5.5 What to Do When Starting the Device for the First Time ............ 26 5.6 Updating the Firmware ....................... 27 5.7 Types of use for Camera models .................... 28 5.7.1 F01710 Short distance reading ‐ parallel parking ............ 28 5.7.2 F01845 Medium distance reading ‐ curb side parking .......... 29 RMM_00029_09 3 / 42... - Page 4 Table of Contents 5.7.3 F01696 Long distance reading ‐ patrolling .............. 30 6 Troubleshooting and Support ...................... 31 6.1 Troubleshooting .......................... 31 6.2 Support ............................ 31 7 Maintenance ............................. 32 7.1 Cable Check .......................... 32 7.2 Cleaning the Protection Glass ..................... 32 7.3 Fastening System Check ...................... 32 7.4 Water and Humidity Check ...................... 32 8 Accessories ............................ 34 8.1 Mating Parts Kit ........................... 34 8.2 Magnetic Base .......................... 34 8.2.1 Important safety warnings ................... 34 8.2.2 Prior to purchasing the magnetic plate, following points need to be checked and verified ......................... 36 8.2.3 Assembly ........................ 37 8.2.4 Disassembly........................ 39 8.2.5 Additional Directions .................... 39 ...
- Page 5 Table of Figures Table of Figures Figure 1: Hazard Distance evaluation .................... 10 Figure 2: Tattile ANPR Mobile dimensions .................... 12 Figure 3: Product overview ........................ 13 Figure 4: Power supply pinout connector ..................... 14 Figure 5: Mating pinout connector ....................... 14 Figure 6: Strobe schematic section ....................... 15 Figure 7: Product label .......................... 18 Figure 8: Assembly Connector instructions ................... 22 Figure 9: ANPR Mobile Advanced main web page ................ 26 Figure 10: Frame grabber setting ...................... 27 Figure 11: Short distance parallel parking .................... 28 Figure 12: Medium range application ..................... 29 Figure 13: Long range application ...................... 30 ...
-
Page 6: About This Document
1 About this Document 1 About this Document 1.1 Scope of this Document This document shows the user how to correctly install and set up the Automatic Number Plate Reader MOBILE Series. 1.2 Who this Document is for Table 1 summarizes the groups this document is aimed at, with a brief description of the type of information the manual must supply to help them understand the product. Readership group Description Aim Installer Technician responsible for product Supply all information on: installation in the traffic Mechanical installation application. Electrical installation Product maintenance System integrator IT administrator responsible for Supply all information on: product integration, configuration ... - Page 7 1 About this Document DANGER! Type and source of danger! (indicates an hazardous situation, that if not avoided, will result in death or serious injury)! Possible consequences (optional). Preventive measure. NOTICE! Type and source of danger! (used to address practices not related to physical injury)! Possible consequences (optional). Preventive measure. Useful suggestion or additional information. Preventive measure. RMM_00029_09 7 / 42 ANPR Mobile...
-
Page 8: Precautions / Safety Instructions
2 Precautions / Safety Instructions 2 Precautions / Safety Instructions 2.1 Safety Instructions Read and understand this manual prior to use the product. Misuse of the product may result in damages. Tattile is not responsible for any damage due to negligence in reading this manual. Mount the device on a mechanically stable structure. The camera shall be reachable only by maintenance operator. Always observe the polarities of the power supplies and the power requirements specified in this manual. Turn off all electrical power before making or breaking any electrical connections. Making or breaking connections when power is on can results in damage to the device. Do not place the power supply and signal cables parallel to cables carrying high‐current switching voltages. DANGER! High levels of artificial optical radiation can cause damage to both eyes and skin. Exposure limit values have been drawn up for such hazards. Every light system is placed within a Risk Group, which defines the level of risk when the light is used normally, higher level, higher risk group number, from 1 to 3. When the light emits less than the exposure limit values it is categorized as Exempt Group. Evaluation of risk group is made at 0.2 m distance, that is the minimum hazard distance considered. The hazard distance (HD) is the point furthest from the illuminator at which the Exempt Group exposure limit is exceeded. RMM_00029_09 8 / 42... - Page 9 2 Precautions / Safety Instructions Illuminator risk group and hazard distance evaluation F01710, F01845 IR illuminator lens 36° (wavelength 860nm, ±15nm spectral bandwidth @ 50% of max intensity) Ultraviolet Retinal blue Retinal blue Cornea/lens Retinal thermal hazard light hazard light or thermal infrared hazard hazard, weak hazard visual stimulus Hazard 200 ‐ 400 nm 300 ‐ 400 nm 400 ‐ 780 nm 780 ‐ 3000 nm 780 ‐ 1400 nm (Es/Euva) (Lb) (Lr) (Eir) (Lir) Risk Exempt Group Exempt Group Exempt Group Exempt Group Exempt Group Group – ...
-
Page 10: Intended Use Of The Product
2 Precautions / Safety Instructions Figure 1: Hazard Distance evaluation 2.2 Intended Use of the Product The product is designed for automatic number plate recognition for the following applications: ‐ Police enforcement ‐ Crime prevention 2.3 Known or Foreseeable Misuse of the Product All other uses not included in the intended use of the product are considered as an improper use of the product. RMM_00029_09 10 / 42 ANPR Mobile... -
Page 11: General Characteristics
3 General Characteristics 3 General Characteristics 3.1 Features Tattile ANPR Mobile is an embedded camera produced by Tattile for automatic license plate reading. ANPR Mobile is suitable for Police enforcement, crime prevention, patrol enforcement and everywhere a portable solution is required. It is equipped with Megapixel sensor, able to read license plate in all light conditions. It combines multiple components in a compact solution, such as: sensor, infrared illuminator and processor with integrated OCR (Optical Character Recognition) to read automatically license Plate. The system does not require the installation of processing units on board of the cars, nor of physical connection between the cameras and the on board computer/ tablet. In fact, the license Plate analysis is done directly from the cameras installed on the roof, bonnet or trunk of the car and the data transmission occurs in Wi‐Fi mode. This way it is possible to speed up the installation, making ANPR Mobile easily transportable from a car to another, with a consequent costs reduction. Tattile new solution is equipped with a sophisticated software that enables to capture images in both gray scale and color, with the best automatic selection of acquisition parameters with multiple auto exposure. The ANPR Mobile devices are available in 3 version, depending on expected reading distance: ‐ Short distance: to satisfy the license plate reading in small parking lots, parallel parking and everywhere the plate to be read is at very closed distance from the camera (distance < 2,5m) ‐ Medium distance: to satisfy the license plate reading for curb side parking, diagonal parking, and everywhere it's needed to read license plates of vehicles parked at short‐medium distance from the camera (3m<distance<7m) ‐ Long distance: for reading plates at various distances while patrolling on the road (distance up to 25 meters) RMM_00029_09 11 / 42 ANPR Mobile... -
Page 12: Dimensions
3 General Characteristics 3.2 Dimensions 3.2.1 Product Dimensions Figure 2 shows the overall view of the Tattile device, dimensions in millimeters. Figure 2: Tattile ANPR Mobile dimensions RMM_00029_09 12 / 42 ANPR Mobile... -
Page 13: Physical Interface
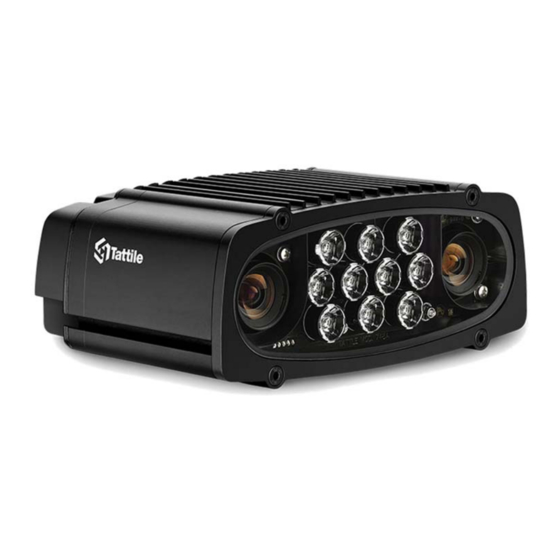
3 General Characteristics 3.3 Physical Interface 3.3.1 Product Overview Figure 3: Product overview Ref Description 1 OCR camera (ANPR image) 2 Illuminator 3 Context camera (Overview image) 4 Back cover 5 Camera housing 6 Closing flange 7 Power Supply and Ethernet connector 8 Product label 9 Safety hazard label 10 Mounting bracket Table 4: Product overview RMM_00029_09 13 / 42 ANPR Mobile... -
Page 14: Power Supply, Ethernet And Strobe Connector
3 General Characteristics 3.3.2 Power Supply, Ethernet and strobe Connector The type of the power supply connector is: M16 8 Pole Male. Mating part included in the package. Figure 4: Power supply pinout connector PIN Signal name Description 1 + 12 Vdc Power supply 2 TxP Ethernet 3 RxP Ethernet 4 Strobe Out Output Strobe 5 TxN Ethernet 6 GND Ground (power supply) ... - Page 15 3 General Characteristics Strobe Output Feature Description Type Optoisolated open collector Channels 1 Max voltage 24 Vdc + 10% Min voltage 3.3 Vdc ‐ 10% Max current 50 mA Table 6: Strobe Interface Figure 6: Strobe schematic section RMM_00029_09 15 / 42 ANPR Mobile...
-
Page 16: Technical Sheet / Specifications
3 General Characteristics 3.4 Technical Sheet / Specifications General Short Medium Long ANPR MOBILE Range Mono Mono Mono Part Number F01710 F01845 F01696 Storage microSD card up to 32 GB Strobe Output 1 LAN Fast Ethernet 10/100 Wi‐Fi 802.11 b/g/n Operating System Linux Integrated Tilt‐roll sensor Integrated Temperature and Humidity sensor Other Sensor Power supply voltage and current monitoring sensor Real time clock GPS ... - Page 17 Yes SHA2 Yes Compression JPG Configuration Web Server Installation and configuration by web server on board TCP/IP Server Configuration and monitoring through TCP/IP protocol Date and Hour Synchronization via SNTP protocol or GPS Software Update Upgrading via web Interface and SDK Data Transmission FTP Client to FTP Server mode for remote data transmission, two different FTP FTP destination address TCP/IP Tattile TCP/IP open protocol; two different FTP destination address Video Streaming H.264/MPEG4 Color video streaming H.264 or MPEG4 Operating Mode Free Run Continuous image capture and processing Table 11: Technical Sheet / Specifications RMM_00029_09 17 / 42 ANPR Mobile...
-
Page 18: Identification Of The Product
3 General Characteristics 3.5 Identification of the Product Figure 7: Product label Part Description 1 Company logo 2 Product part number 3 Product name 4 Product serial number 5 Serial number barcode (code 128) 6 Eth Mac Address number 7 Eth Mac Address number barcode (code 128) 8 Revision 9 CE mark 10 Wlan Mac Address number 11 Wlan Mac Address number barcode (code 128) 12 Rated Voltage and Current Table 7: Product label RMM_00029_09 18 / 42 ANPR Mobile... -
Page 19: Conformity - Compliance
3 General Characteristics 3.6 Conformity – Compliance Tattile declares under sole responsibility that the products described in this manual are in conformity with the essential requirements of the following EU directives and standards: Compliance Description 2014/53/EU, RED Directive ( ) The objectives and protection requirements of the Low Voltage Directive 2014/35/EU and EMC Directive 2014/30/EU are applied under Directive 2014/53/EU, Article 3.1. 2011/65/EU (Rohs Directive) and that the standards and/or technical specifications reference below have been applied: EN 60950-1:2006 +A11:2009 +A1:2010 +A12:2011 +AC:2011 Safety Art 3.1a Safety specifications ... -
Page 20: Disposal
3 General Characteristics Compliance Description Tattile herewith declares that this product is in compliance with the following US Federal Regulation: FCC 47CFR part 15 US Federal Regulations, emission limit Class B Changes or modifications not expressly approved by the party responsible for compliance could void the user's authority to operate the equipment. This device contains FCC ID: 2AULGT17950 This device complies with Part 15 of the FCC Rules. Operation is subject to the following two conditions: (1) this device may not cause harmful interference, and (2) this device must accept any interference received, including interference that may cause undesired operation. This equipment has been tested and found to comply with the limits for a Class B digital device, pursuant to part 15 of the FCC Rules. These limits are designed to provide reasonable protection against harmful interference in a residential installation. This equipment generates, uses and can radiate radio frequency energy and, if not installed and used in accordance with the instructions, may cause harmful interference to radio communications. However, there is no guarantee that interference will not occur in a particular installation. If this equipment does cause harmful interference to radio or television reception, which can be determined by turning the equipment off and on, the user is encouraged to try to correct the interference by one or more of the following measures: ‐ Reorient or relocate the receiving antenna. ‐ Increase the separation between the equipment and receiver. ... -
Page 21: Preparation And Installation
4 Preparation and Installation 4 Preparation and Installation 4.1 Package Content The following products are included in the package: ANPR MOBILE Device. Mating parts kit, cod: T17493 For more information on the purchased device model refer to the Technical Specifications. 4.2 Building the Connector Cables Good equipment operation is guaranteed only by respecting the instructions contained in this manual. Tattile declines all responsibility for anomalous equipment behavior, if the installation does not follow these instructions: ‐ Always observe the polarities of the power supplies and the power requirements specified in manual. ‐ Mount the device on a mechanically stable structure, well connected to electrical ground. ‐ Remove the power supply voltage from the device before unplugging the power connector. ‐ Turn off all electrical power before making or breaking any electrical connections. Making or breaking connections when power is on can result in damage to the device. ‐ Electromagnetic Interferences (EMI) and Electrostatic Discharges (ESD) can cause problems whit your device. ‐ Do not share the main power supply (V MAIN) with other equipment. Use a dedicated power supply. ‐ Do not place the power supply and signal cables parallel to cables carrying high‐current switching voltages. ... -
Page 22: Cabling The Power Supply
4 Preparation and Installation 4.2.1 Cabling the Power Supply This chapter shows how to correctly build the cables for the power supply connector. This procedure is useful to cable the device to the power supply, look at the following design description. Figure 8: Assembly Connector instructions Ref Description 1 Assemble sealing rings (3x) 2 Bead cable parts 3 Dismantle cable and shielding braid. 4 Push single wires through housing. 5 Mount shielding ring and pitch ring 6 Slightly fix pressing screw. 7 Solder wires to insert. 8 Mount positioning sleeve in angled position 9 Put in insert and distance sleeve 10 Mount lid. 11 Fix pressing screw (100 cNm). Table 9: Assembly Connector instructions ... -
Page 23: Mounting The Product
A PC for remote connection is available. 4.3.1 Device check Make sure the camera complies with the focus distance defined during the project configuration. For more information: Login to the web interface. Open the Device Information section. Check the values specified for the Channel n best focus parameter. 2. Cable the device and connect the device to a PC. 3. Start up the device. After about 60 seconds the operating system is ready for use. 4. Search for the device using the specific command of the Tattile Pathfinder. 5. Open the live stream of the device to check for the correct framing. 6. If needed adjust the device orientation moving the wall‐mount bracket. The device is ready for use. RMM_00029_09 23 / 42 ANPR Mobile... -
Page 24: Use
1. Turn on the device. After about 60 seconds the operating system is ready for use. 2. Use the freeware software tool Tattile Pathfinder to search for a device. The device is now available for use. For more information on the freeware software tool Tattile Pathfinder, read and follow the user manual of the product. 5.2 Downloading the Freeware Software Tool Tattile Pathfinder The freeware software tool Tattile Pathfinder enables the user to search for a device into the network and to manage the device IP address. The user is already registered to the Tattile website. 1. Open the Tattile web page, www.tattile.com 2. Click the link Downloads. 3. From he first drop‐down menu select Traffic. 4. From the second drop‐down menu select Traffic Common Area. 5. Click the button View the available files. – A list of available files is displayed. ... -
Page 25: Modifying The Ip Address Of The Device
5 Use 5.3 Modifying the IP Address of the Device This operation must be performed using the freeware software tool Tattile Pathfinder. This function allows the user to modify the IP address of the device. The function is useful, for example, when the host address of the device differs from the host of the Net interface. Tattile Pathfinder software tool is correctly installed. The device is correctly cabled to the network. 1. Turn on the device. After about 60 seconds the operating system is ready for use. 2. Use the freeware software tool Tattile Pathfinder to search for the desired device. The default IP address of the device is: 192.168.0.21 3. Modify the IP address of the device. The device is now available for use. The device IP address must be configured by the user in the same subnet mask configured on the ... -
Page 26: What To Do When Starting The Device For The First Time
5 Use 5.5 What to Do When Starting the Device for the First Time First of all, fix the system in a secure way. Remove the transparent adhesive film from the device front. Now connect electrical cables and data cables, you can see par. 3.3.2 for schematics. To connect to the system you can have 2 options: wired network and wireless network. If you have a wired network system the default IP address is 192.168.0.21, while if you have a wireless network the IP address is 192.168.150.1. The subnet mask is 255.255.255.0 for both cases. The default user name is superuser and the default password is superuser for both cases. For security reason change the default user and password after the first use. For wired network you can enter into the system by a web browser typing http://192.168.0.21:1080 For wireless network the system is configured as an Access Point. The wireless network has a visible SSID name configured without password. The SSID is composed by the name “ANPR” plus the serial number of the system (example ANPR123456). Once the user will be connected to the Wi‐Fi network provided by ANPR Mobile will be possible to connect to the web interface of the system. The ANPR Mobile has DHCP server enabled and will provide automatically the IP address to the user PC. In order to connect via web browser with the system over wireless network type the following in the user browser: http://192 .168.150.1:1080 In both cases you can see this web page: Figure 9: ... -
Page 27: Updating The Firmware
5 Use Figure 10: Frame grabber setting If a license plate is in the camera field of view, and the plate distance is in accordance with the camera specifications, the license plate is automatically read. 5.6 Updating the Firmware Before updating the firmware of your device, contact your sales representative. The camera can be fully upgraded by uploading a package file. The Package file extensions for Tattile software upgrades is “gpg”. To upgrade the software please follow the instructions below: The device is correctly cabled to the network. 1. Turn on the device. After about 60 seconds the operating system is ready for use. 2. To update the device firmware use either the web interface or the freeware software tool Tattile Pathfinder. For details refer to the corresponding user manual SUM_00003. RMM_00029_09 27 / 42 ANPR Mobile... -
Page 28: Types Of Use For Camera Models
5 Use 5.7 Types of use for Camera models Follow the instructions for your case. 5.7.1 F01710 Short distance reading - parallel parking Short distance devices are designed to read license plate everywhere the plate is very closed to the ANPR device. The typical application is the enforcement of parallel parking while driving in the lane aside the parked vehicles. Please refer to the drawing below to understand the application. Figure 11: Short distance parallel parking The possible working conditions are: Minimum reading distance: 1.5 m Maximum reading distance: 2.5 m Install the ANPR system on the top of patrol car roof. The height (H) should be between 1,2 and 1,8 meters. Point the camera at 90° respect to the travel direction, in such a way that the camera is looking straight to the parked vehicles. Drive aside a vehicle parked at the distance of 2 meters. Adjust the ANPR camera for having the license plate in the middle of the images. ... -
Page 29: F01845 Medium Distance Reading - Curb Side Parking
5 Use 5.7.2 F01845 Medium distance reading - curb side parking The typical application for medium distance devices is the enforcement of curb side parking or diagonal parking. The possible working conditions are: Minimum reading distance: 3 m Maximum reading distance: 7 m Install the ANPR system on the patrol car roof. The height (H) should be between 1,2m and 1,8m. Adjust the ANPR camera for having the license plate in the middle of the images when approximately at half range of reading interval. NOTE: The maximum suggested camera rotation must be of 30 degree respect the direction of drive. (PAN angle) Extra rotation may lead to unreadable plates or read mistakes. Please refer to the drawing below to understand the application. Figure 12: Medium range application RMM_00029_09 29 / 42 ANPR Mobile... -
Page 30: F01696 Long Distance Reading - Patrolling
5 Use 5.7.3 F01696 Long distance reading - patrolling The typical application for long distance devices is the enforcement over free roads and highways. The possible working conditions are: Minimum reading distance: 8 m Maximum reading distance: 15 m Others range of distances can be operated with proper lens selection. Install the ANPR system on the patrol car roof. The height (H) should be between 1,2m and 1,8m. Adjust the ANPR camera for having the license plate in the middle of the images when approximately at half range of reading interval. NOTE: The maximum suggested camera rotation must be of 30 degree. (PAN angle) Extra rotation may lead to unreadable plates or read mistakes. Please refer to the drawing below to understand the application. NOTE: can be detected vehicles travelling in the same direction and opposite direction as well. Figure 13: Long range application RMM_00029_09 30 / 42 ANPR Mobile... -
Page 31: Troubleshooting And Support
6 Troubleshooting and Support 6 Troubleshooting and Support 6.1 Troubleshooting The freeware software tool Tattile Pathfinder cannot find the device The device is not correctly powered Check the device is correctly cabled to the power supply Check the power supply Check the cable PIN OUT The device network is not correctly cabled Check the Ethernet wiring If necessary, cable a new connector Cannot access the web interface The device IP address does not belong to the same netmask of user's PC Modify the IP address of the device or of the PC The PC is configured for DHCP IP assignment Define a static IP address to the PC belonging to the host address of the device The web interface does not display the live stream of the device The device is not responding Restart the device If the problem persists, contact your sales representative The device does not recognize a car plate ... -
Page 32: Maintenance
7 Maintenance 7 Maintenance This chapter describes the required maintenance for the ANPR Mobile devices. If you install new electronic devices near the system, be careful the power cable of the system Will be away of any cable of the new electronic devices DANGER! IR radiation damage! The device emits invisible IR radiations. Never look directly into the infrared illuminator. NOTICE! Product malfunction! Never perform maintenance activity when the product is plugged to the power supply. Disconnect the product from the power supply. NOTICE! Improper use! Risk of damage to surfaces. Do not use abrasive or corrosive detergents on glass parts (e.g. powder products, stain removers and metallic sponges). Do not use rough or abrasive materials or sharp metal scrapers. 7.1 Cable Check Clean the wear of all cables every 12 months. In case of damages to cables, substitute cables with a new product. 7.2 Cleaning the Protection Glass ... - Page 33 7 Maintenance Check the presence of humidity or water drops inside the connectors. In case of humidity or water drops, replace the seals. Clean the connectors. If necessary, build new connector cables. RMM_00029_09 33 / 42 ANPR Mobile...
-
Page 34: Accessories
8 Accessories 8 Accessories 8.1 Mating Parts Kit Order Code Description T17493 Mating parts kit (included in the package) 8.2 Magnetic Base Order Code Description T18481 MAGNETIC BASE FOR ANPR MOBILE in the package Figure 14: Magnetic Base with safety belt (included ) Prior to purchasing the Magnetic Base, carefully read the instructions below ... - Page 35 8 Accessories Before starting off on each trip, check to see that magnet positioning is steady and stable. The grip strength of the Magnetic Base is decisively strong, meaning that even when endeavouring to tug the Magnetic Base off the rooftop at full strength, it should neither budge nor detach in the slightest. Be sure to always test the grip firmness before every use and do not use the Magnetic Base when in doubt of its condition or performance. Roof‐mounted magnetic Magnetic Bases are liable to cause serious accidents if all given instructions are not accurately observed. Individuals that have not read these instructions should not be allowed to use the Magnetic Base. The vehicle driver is held responsible for correct Magnetic Base use. The “Supplier” declares that he cannot be held responsible for any possible damage occurred during the use of the Magnetic Base and especially if the instructions provided have not been ...
-
Page 36: Prior To Purchasing The Magnetic Plate, Following Points Need To Be Checked And Verified
8 Accessories 8.2.2 Prior to purchasing the magnetic plate, following points need to be checked and verified Does your car have a steel plate rooftop? Figure 155: Metallic roof Does your car have a sliding or a pop‐up style steel sunroof? If it does, would it be possible to fit the magnetic plate’s entire surface over the sliding/pop‐up style sunroof or car roof, without it protruding over the sides? This item is not suited to cars featuring sliding glass sunroofs! Figure 166: Sliding glass sunroofs Does your car avail of an absolutely flat rooftop surface or an adequately large flat rooftop area? Does the surface of magnetic plate entirely adhere to the rooftop? ... -
Page 37: Assembly
8 Accessories In the event of protruding relief profiles, grooves or other non‐flat rooftop features, a Magnetic Base fitting trial must be conducted to ensure that the entire Magnetic Base surface perfectly grips onto the rooftop surface. Figure 188: Verify mounting roof Has the vehicles rooftop varnish finish be touched up (due to damage caused by hail, transport, etc.)? This may be possible even if your car is new! Use of repair filler materials (e.g. tin, glass fibre, filler bases) will bear a considerable influence on efficient magnet grip force! When a car is new or if a used car has just been re‐varnished, the varnish may not yet be entirely dry whereby use of the Magnetic Base might lead to said varnish alterations. For any one of these cases, actual purchase or possible future use of the magnetic Magnetic Base is not recommended. 8.2.3 Assembly Responsibility for perfect magnetic plate operation and functions is guaranteed only if the entire magnetic surface accurately adheres to the vehicle rooftop. Prior to proceeding with rack assembly, ensure that the magnetic plates and the car rooftop area are both perfectly clean and dry! If not, maximised Base grip and prevention of rooftop abrasion hazards due to fine particles (dust/sand) cannot be guaranteed. Figure 199: Clean roof and Magnetic Plate RMM_00029_09 37 / 42 ANPR Mobile... - Page 38 8 Accessories Carry out the perfect grip test: if it is not possible to slip a sheet of paper in under the magnetic plate, the plate is assembled on correctly. Figure 200: Paper sheet test For safety reasons, the magnetic device must be fixed onto the car rooftop by means of the appropriate safety belt, as shown (per EC Directive 79/488). Slip the safety belt internally to the car and position the plastic stop device so that the buckle is as close up as possible to the car door. In case of rainy weather, sling the safety belt only through the door strut to avoid water seeping in. Figure 211: Safety Cable use Warning! If the Magnetic Base is assembled onto a sliding or a pop‐up style still sunroof, be sure never to open the sunroof. Figure 222: Prohibition of opening the sunroof RMM_00029_09 38 / 42 ANPR Mobile...
-
Page 39: Disassembly
8 Accessories 8.2.4 Disassembly You will note the magnetic plate has a disassembly knob. Figure 233: Dismantling of the Magnetic Base Carefully lift the plate off by manually prising up its higher rise area. Clean as instructed in the “Maintenance Tips” section then store the Magnetic base adequate place so that it will not be damaged. 8.2.5 Additional Directions Assemble the Magnetic Base only onto car rooftops. The magnetic plate must strictly be fitted only on absolutely clean and dry, snow, ice and frost free rooftop surfaces. Beware of the fact that in the event of accidental rack damages (i.e. if the magnetics plates crash to the floor) its magnetic properties may be subject to variations (due to deformation, scratches on the magnets, etc.) thus compromising safe device use. If the magnetic plates are put into direct contact with one another or are kept or held next to magnetic material, their magnetic force is considerably reduced. The magnetic plates can be influenced or damaged by electronic devices (such as MP3 players) or magnetic storage units (such as hard disks). Figure 244: Warning magnetic damage RMM_00029_09 39 / 42 ANPR Mobile... -
Page 40: Driving Tips
8 Accessories The magnetic plate can damage magnet‐sensible elements, units or devices such as credit cards, wristwatches, electronic data books, discs, magnetic computer bands, video and audio devices. Leaving it assembled on will avoid dirt and snow deposits and the formation of ice and frost on the car roof surface. If the weather conditions were suddenly to change, the formation of frost and/or snow, twilight setting in, etc. might make reassembly of the Magnetic Base more difficult. Assembly of the Magnetic Base in difficult conditions will not ensure perfect grip force and safe carriage of the ANPR Mobile leading to accidents (as well as subsequent damages!) The Magnetic Base should not be left assembled on the rooftop for weeks on end to avoid damaging the car paint finish. Furthermore, window cleaner additives might seep in under the magnetic plates with an ensuing chemical reaction causing the magnetic plate to unglue down onto the rooftop surface. Exposure to direct sunlight and high temperatures will intensify this type of reaction. The use of Magnetic Base will not entirely exclude or avoid damaging the car paint. Tough dust particles combined with car motion vibrations will possibly form opaque spots. Said spots cannot in any way be considered as being a Magnetic Base defect and do not justify or permit claims accordingly, whatsoever. After every Magnetic Base use session, it is important to rinse the Magnetic Base off with some warm water, especially after combined use of the car windscreen wipers. Warning! The insertion or application of any form of packing or thickness layer between the magnetic plates and the car rooftop is strictly prohibited. 8.2.6 Driving Tips Always remove the Magnetic Base prior to passing through car wash rollers. Figure 255: ... -
Page 41: Maintenance Directions
8 Accessories 8.2.7 Maintenance Directions Notwithstanding the implementation of rust prevention and antirust protection measures as well as synthetic weatherproof materials, the Magnetic Base do happen to be affected by winter use. For safety and maintenance of your Magnetic Base, clean at regular intervals only by hand, using car detergent diluted in warm water. We recommend use of a car window cleaning additive: beware though that if the additives are much too aggressive, they might lead to Magnetic Base damage. Check regularly the safety screw tight, for fixing nuts to the Base 5 nm, for angle adjustment screws 3.5 nm. Figure 266: Check the screw tight When magnetic plates are removed after use, there might be a harmless film‐like formation on the rooftop surface that is eliminated either using a car detergent or with some liquid car wax or Soft‐Wax. Always keep the Magnetic Base stored away in clean and dry conditions Do not hang the plates up on walls or metal tubes. The two Magnetic Base must never be put into direct contact against one another (magnetic force reduction hazards). Do not store the Magnetic Base in the vicinity of devices sensible to magnets/affected by magnetism such as computers / CDs / disks / magnetic films / tape recorders / video recorders / electric power supply panels, etc. (to avoid and prevent ensuing damages!) The magnetic materials of the Base carriers may be subject to wear due to weather conditions or improper use. If damaged Magnetic Base can no longer be used. The Supplier recommends to periodically carry out a general check of the integrity of all parts of the Magnetic Base and its correct grip strength, at least every six months. ... -
Page 42: Revision History
9 Revision History 9 Revision History Rev. Date Description Author Approved by S. Gustinelli 00 2014‐04‐04 First Release. P. Forti I. Paderno General updated of the document. S. Gustinelli 01 2014‐10‐03 P. Forti Added reference to the code F01653 I. Paderno S. Gustinelli 02 2015‐03‐18 Added codes F01622 and F01675 P. Forti I. Paderno Added codes F01696 and F01710 and 03 2016‐09‐13 F. Conti I. Paderno “Angle of View” table Housing table (pag. 25) corrected with 04 2016‐12‐13 R. Marchioni I. Paderno ...
Need help?
Do you have a question about the ANPR MOBILE Series and is the answer not in the manual?
Questions and answers